Anchor Point Tool Options
Krita also has the ability to add, merge, delete, and convert anchor points. There are thirteen options that exist. They are a bit unorganized on the Tool Options, so we will break apart the different options by area.
When you select the Path Editing Tool, you will notice the anchor point tool options appear.
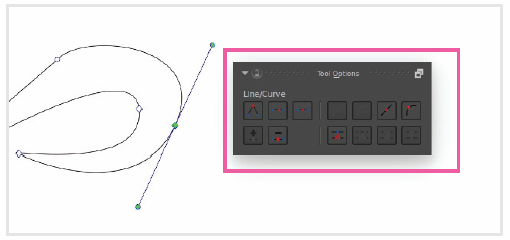
Anchor Tool Options: You need the Path Editing Tool activated for these to appear. If you are working with text, you might need to use the Convert to Path button first.
Converting Bézier Anchor Point Types
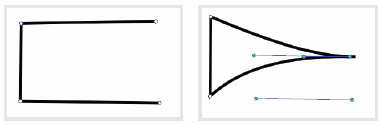
Let's take the first three options on the top left. The main thing these functions will modify is how the Bézier points will appear. There are three point types: Corner, Smooth, and Symmetric. The icons are a bit difficult to see with the dark theme, so I will be using the light icons for the screenshots.

Corner Point – The Bézier points will move independently in both direction and length.

Smooth Point – The Bézier points will move parallel to each other but will allow you to change the length.

Symmetric Point – The Bézier points will move parallel to each other. Changing the distance of one point will automatically change the distance of the other point.
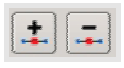
Insert and Remove Anchor Points
These icons are located below the first set of icons on the top left. You can select a point and press the Remove point button. For the Insert point icon to be enabled, you will need to select more than one anchor point. You can select multiple anchor points by holding down Ctrl. When the Insert point button is pressed, Krita will determine how many points need to be added to retain the shape. If you are adding points to a simple line, only one point will be added. If the path is a large curve, there will be multiple points added.
Convert Line Anchor Points
The right area of icons modifies how the lines are constructed. These options convert the lines to various vector formats that are common.

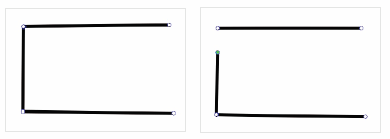
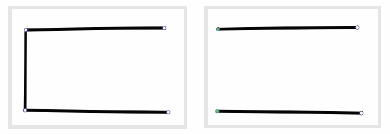
Segment to Line – Needs multiple points selected. It removes the Bézier points that are in the direction of the other anchor point. This creates a straight line in the process between the two points.

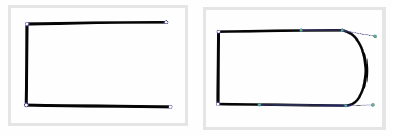
Segment to Curve – Needs multiple points selected. It adds Bézier points to the anchors if they do not exist.

Make Line Point –Takes the selected anchor points and removes the Bézier points if they exist.

Make Curve Point – Takes the selected anchor points and adds Bézier points if they do not exist.

Shortcut
You can also press the Delete key to remove an anchor point when it is selected.
Anchor Connection Tools
The last four buttons on the Tool Options deal with separating and joining anchor points. Most of them require having multiple anchor points selected.

Break at Point – Separates a single point into two unique points. The result doesn't appear to do anything. If you select the anchor point and try to move it, you will notice that there are two points now.

Break at Segment – Needs exactly two points selected. This will remove the line that attaches the two anchor points.

Join with Segment – Needs exactly two points selected. It connects the two anchor points by creating a line between them. A Bézier point is created to connect the two lines.

Merge Points – Needs exactly two points selected. When this action merges the two points, it moves the merged point to the center of the two original points. When the points are merged, the original point still exists.