Creating Vector Objects
When Krita starts, a paint layer will be added by default. For learning sake, let's see the difference between how a rectangle looks and acts on a paint layer and how the same tool acts on a vector layer. Let's use the Rectangle Tool and draw a rectangle on the canvas.
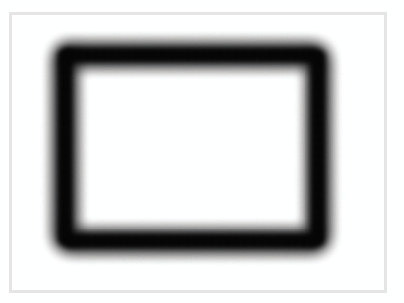
Create a rectangle on a paint layer. There is no editing ability after it is on the canvas.
The rectangle uses your current brush to fill in the outline. If we try to go to the Shape Handling Tool, we are not able to select the object to change anchor points. We are on a painting layer, so the Rectangle Tool has turned our rectangle into a bitmap–escaping the world of vector. To edit this, we will have to use the Transform Tool. One downfall with the Transform Tool on a paint layer is that the rectangle will start distorting the rectangle as it grows or shrinks.
Now let's create a vector layer and do the same thing. We can do this by going to the Layers docker and clicking the drop-down arrow by the plus sign.
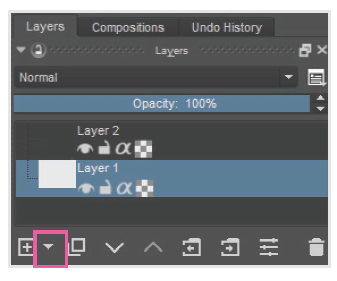
Use the drop-down to create a Vector Layer.
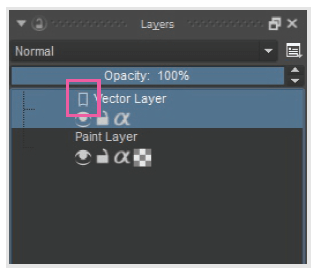
Vector layers will have a special icon by them.
Once you have created your vector layer, select the layer. With your new vector layer selected, use the Rectangle Tool again to make another rectangle.
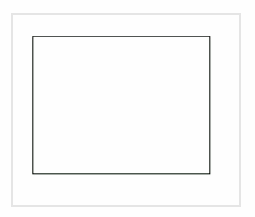
Creating a rectangle on a vector layer gives a different appearance. Notice how thin the line is. The brush stroke we had on the paint layer is not applied.
This time the rectangle doesn't look like the brush preset. You can try to switch brushes around, but you will notice the rectangle always has a solid thin line. Because the rectangle is on a vector layer, the properties, as well as the shape, are configured in the Tool Options. We can edit the rectangle by using the Shape Handling Tool.

Shape Handling Tool – Select and transform vector objects. Selecting an object will show you the transform handles in blue.
You can click the rectangle now, and it will have blue handles. If we look at the Tool Options now, they are overflowing with properties and options we can play with. We can do anything from changing the visual styles to adding effects like shadows.
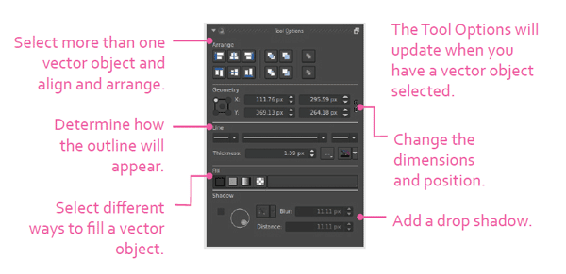
For the Arrange tool options, the different buttons will arrange the selected object based on the canvas size. If you have multiple vector objects on a layer, you can also position them in front or back of each other.
Adding Vector Objects to the Layer
Now that you understand the basic process of how a vector object is added to the canvas, you can extend that knowledge to add other vector types. Try to add a few more objects to the canvas and play around with their strokes, fills, and shape properties.
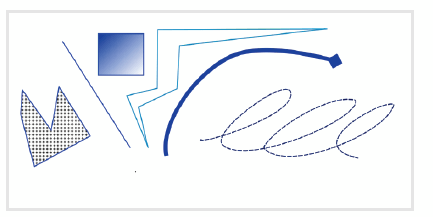
A few vector shapes are added to the canvas. All of the objects are on the same layer.
You can select multiple objects by holding down Ctrl. While you are in the middle of making a vector shape, you can right-click and undo the last point that was added.
Add Shape Docker
In addition to the vector tools in the toolbox, there are additional vector shapes in the Add Shape docker. This docker might not be visible, so you will need to open it from the main menu Settings > Dockers > Add Shape. From here you can drag predefined vector shapes onto the canvas. The last option will present a drop-down of categories like Geometrics and Arrows.
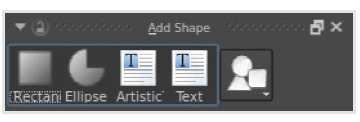
Drag existing shapes on the canvas by using the Add Shape docker.

Note
If you add shapes to the canvas through the Add Shape docker, the object will be added to a vector layer. If you are not on a vector layer, one will be created.

Note
The shapes you use from the Add Shape docker have limited editing functionality. If you want full control over your anchor points, you might want to create the shape from scratch.
Shape Properties
There are two dockers that store properties for the vector shapes: Tool Options and Shape Properties. You can access this by going to the main menu Settings > Dockers > Shape Properties. If you open up this docker and select certain objects like ellipses, you will get a few more options to tweak. For the ellipse object, you can create other types of effects like chords and pie chart pieces.

Primitive shapes have additional properties to customize their appearance.
Modifying Vector Objects
We learned earlier how to create vector layers and add different types of vector objects. Next we need to know how to edit the individual points of a shape. We cannot paint on vector layers, but we can edit the anchor points. With a vector object selected, we can do the following:
- Scale – Resize your object. Grab a corner handle and drag the object bounds.
- Rotate – Rotate the object. Place your cursor slightly outside of a corner anchor point. The cursor will change to a rotate icon.
- Skew – Skew the object. Place your cursor slightly outside of a side anchor point. The cursor will switch to a skew icon.
- Move – Move the object. Place your cursor inside of the object. Dragging your pen will move the position.
Holding down Shift will lock the aspect ratio while scaling. Holding down Ctrl will scale the object by the center. By holding down Alt, you can constrain the movement horizontally and vertically.
Modifying Anchor Points
In addition to making selections to an object, you can also modify the individual anchor points. To edit the points directly, you need to have a vector object selected with the Shape Handling Tool active. Once the vector object is selected, a new tool will appear in the toolbox.

Path Editing Tool - Edits vector object anchor points.
Selecting the Path Editing Tool will change the blue object boundaries into anchor points. In some versions of Krita, this tool may not appear. You will have to use the mouse and double-click an object to see the anchor points. With shapes like ellipses, you can only modify aspects like the start and end angle.
Hovering over an anchor point will turn the circle red. This lets you know that the anchor point will be selected if you click.
Selecting anchor points can be frustrating. If you don't select the anchor point exactly, your entire selection will disappear. It is easier to drag a selection around the area that has the anchor point(s). When you drag an area around your selection, everything inside will be selected.
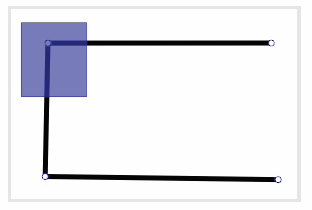
Selecting anchor points is faster if you create a selection. While in the Path Editing Tool, you can create these selection boxes by dragging your pen.
In the figure above, when I let go, the top left anchor point will be selected. This selection technique only works for selecting the anchor points, not Bézier points.

