Understanding Vector Objects
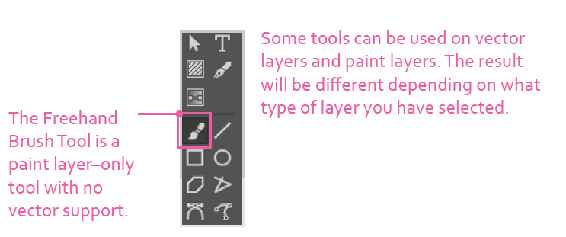
The vector tools in Krita are a bit different than most applications. Many of the tools in the toolbox can either work on a paint layer or a vector layer. I didn't have this aha moment until months after I started using the application. If you use the vector tools on a paint layer, the results will be rasterized. If you use the tools on a vector layer, the results will be a vector format. You can edit anchor points if using a vector layer. You can use transforms if using a paint layer. The tools are type-agnostic and will adapt to your selected layer.

The first group of tools in the toolbox can be used on vector layers: Shape Handling Tool, Text Tool, Calligraphy Tool, Gradient Editing Tool, Path Editing Tool (hidden normally), Rectangle Tool, Ellipse Tool, Polygon Tool, and Bézier Curve Tool.
The next question is usually which type do you use–vector layers or paint layers? Like many answers that are given, the answer is usually, “It depends.” If you are interested in the painting aspect of the program, you will find that you will rarely use the vector tools. Outside of setting up comic book frames and inserting text, the vector tools are easily missed or ignored. Tweaking anchor points and shapes can slow down your process. They do have some benefits though.
Illustrators sometimes prefer the vector format as it gives them the most control with sharp lines. On a paint layer, your painting information gets lost when you paint over existing areas. With vector layers, the lines and shapes are stored separately. Your artwork is nondestructive with vector layers and objects. This comes at a cost of higher maintenance, so be careful.

