Pen Capabilities
We just looked at the pen pressure settings. As you saw, there are a lot more. Let’s spend a little bit of time going over all of the capabilities, or sensors, that a pen might have. Each pen setting has a curve associated with it. You will notice that some of the settings have different labels. A brief illustration is included in case you aren’t sure what type of motion is involved.
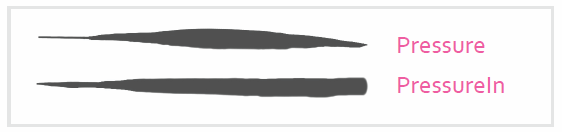
Pressure
Your pen keeps track of how hard you press the pen. Most tablets support this feature but not all. Some budget tablets are not designed for artists, so they may not mention this feature when you buy it.
PressureIn
This is similar to pressure. While pressure values can get larger and smaller with each brush stroke, pressureIn values can only get larger.
X-Tilt
X-tilt is the angle that is created between your pen and graphics tablet in the x axis. It ranges from -30° (left position) to 30° (right position).
Y-Tilt
Y-tilt is the angle that is created between your pen and graphics tablet in the y axis. It ranges from -30° to 30°. The maximum effect happens at 0°.
Tilt Direction
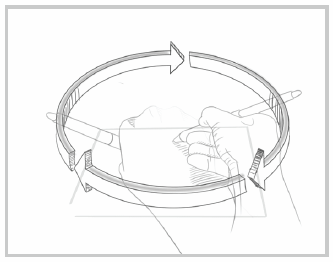
Tilt direction is the angle between your pen and your graphics tablet. Pointing your pen forward is 0°; pointing to the right is 90°. The maximum effect will happen at 359°.
Tilt Elevation
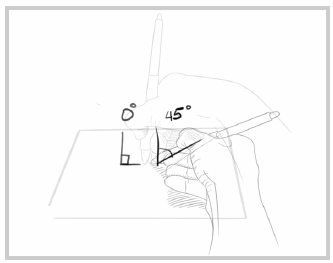
The angle that you hold your pen at determines the value. Perfectly straight up is 0°. Full effect would be at 90°, but this is pretty much impossible as your pen would be laying on its side. You will have to adjust the curve for the pen to be something more realistic. It does not matter what direction your pen is facing (north, south, east, west).
Drawing Angle (Software)
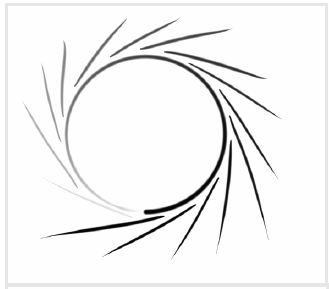
The effect changes based on the direction you are drawing. You can see that a horizontal line has no effect. No effect is produced from applying a 359° angle, while the full effect is produced from a 1° angle. It is a continuous calculation as seen by the circle drawn inside.
Fan Corners
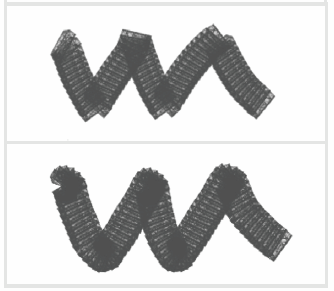
The Drawing angle sensor comes with a Fan Corners checkbox. The examples to the left show a couple of strokes with sharp turns. In the first brush stroke, Fan Corners was off. When enabled, your brush strokes fill the gaps.
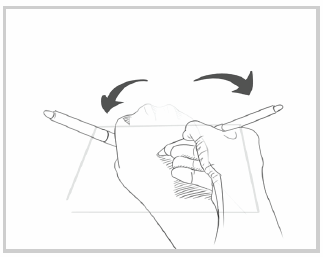
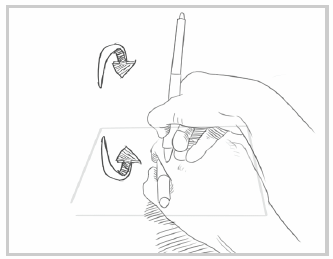
Rotation
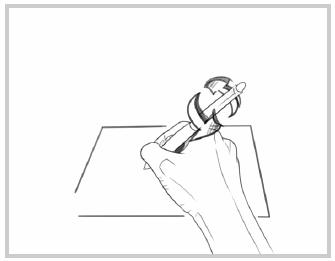
Rotation is achieved by twisting the stylus. This is not supported by many tablets. You will see this available in more specialized pens such as the Wacom 6D art stylus. The values range from 0° to 360°.
Speed (Software)
The speed at which you make your pen strokes will change the value. Faster pen strokes will give you higher values on the curve.
Distance (Software)
The value reduces the further your brush stroke goes. This simulates a pen that has an ink well. The effect will change over a given amount of pixels—specified in the Length property. The example below shows what happens when the Repeat checkbox is enabled. This causes the stroke to start over whenever the ink runs out.

Time (Software)
Think of this as a countdown to when your brush will stop applying a stroke. If you set the duration to 3 seconds, the effect will diminish as the countdown approaches 0. Once the countdown is reached, the effect will not be applied. The only exception is if you have the Repeat checkbox on. This will reset the timer after it reaches 0 and start the effect again.

The value is slowly decreasing based on time.
Fuzzy (Software)
This adds a degree of randomness to the brush stroke. For the example below, I added some fuzziness to the opacity setting. The first stroke has no fuzziness. The second example has fuzziness. You can only control this effect by the curve.

Fade (Software)
The value changes based on the rate that paint dabs come out (individual brush blots). The effect is similar to the Distance sensor. The Distance sensor changes based on the distance you move the brush stroke. Changing the spacing on the brush will make the Fade effect more apparent on the edge of the brush tip.
Perspective (Software)
Your strokes will change as they get closer to the vanishing point. It takes effect when you are working with the Assistant Tool. This does not work with the Perspective Grid Tool. This effect is independent for each perspective grid.
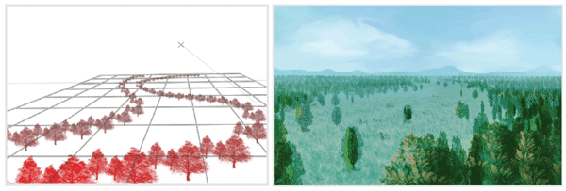
In the above example, I had a tree brush that I checked the Perspective option on the Size setting. My brush strokes automatically scaled down as the brush got closer to the vanishing point line. This takes away all of the guesswork with sizing. When working with this, you have to be careful to stay inside the grid. If your stroke goes outside of the grid, the perspective sensor will be ignored. This will cause some unexpected results.
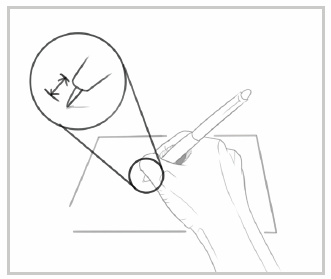
Tangential Pressure
This is used with an airbrush stylus. It is usually the finger wheel that is attached to the top of the stylus. The values range from negative one to positive one. Zero is the neutral position. This is sometimes referred to as barrel pressure. Do a search for the Wacom Intuos airbrush if you are curious.

Note
Your pen will probably not support all of the technologies that Krita can handle. The best way to test this is to enable one of the settings and make a few strokes on the scratchpad. You must have one pen setting enabled at all times. You will have to disable the Pressure setting to individually experiment with others.

