Selection Display Mode
By default, your selections are displayed as dotted lines, or marching ants, as they are often called. Another way to view your selection is the Mask display mode.
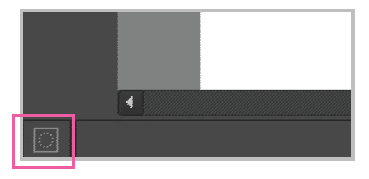
Selection Display mode: If there is no selection, the icon will be disabled. The current selection mode is Marching ants.
You can change the Display mode at the bottom left of the status bar. This button is enabled if you have a selection. When the Display mode is set to mask, the canvas will turn red and your selection will be cut out.
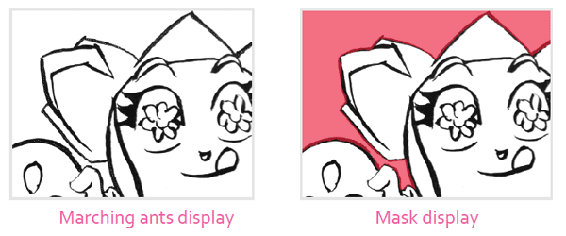
The Mask mode for a selection might seem like a somewhat useless feature at first, but it is quite helpful. When you have complex selections, it can be difficult to see everything. In the example above, you can see that the selection is over the line work. This makes the marching ants example difficult to see.
If a selected pixel is less than 50% opaque, it will not appear with the Marching ants display mode. The Marching ants mode can only show two states: selected or not selected. For this reason, the Mask display mode is superior in terms of information it provides. Mask display mode has the drawback of obscuring your artwork by covering almost everything with red. Most selections do not need a variety of opacity levels, so the marching ants will work fine for most things.
If you want to change the color, you can access this in the configuration. From the main menu, go to Settings > Configure Krita > Display. One of the options will be called Selection Overlay. Changing the slider on the right will control what opaque value will appear. If you want to make sure you can always see through the color slightly, make sure to lower the slider.
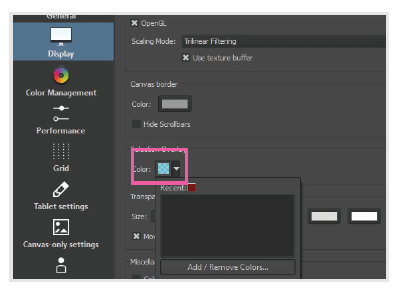
Update the Mask display color here. You can also select the opacity value that will be displayed.
Creating a Vignette Mask
Normally selections are either opaque or transparent. If your selection is filled with a color, it will create hard, jagged lines. Having a soft look will make your edges look more natural. A common framing technique for images is called a vignette. By using the Mask display type, we will see the selection better.
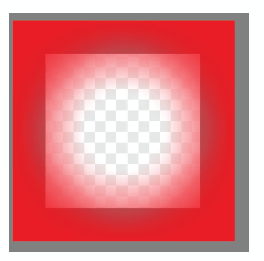
A vignette effect is used to direct a reader’s eye to the center of an image.
Making a vignette mask requires two steps:
- Use the Elliptical Selection Tool to create a circle.
- Use the feather selection option from the main menu Select > Feather Selection. Use 200 px for the radius.
If you are in Marching ants mode, you won’t be able to see what the mask looks like. Turn your display mode to Mask to see the results.

Tip

Another helpful way to know you are hiding your selection is by looking at the mask display type. If you are hiding your selection, the icon will be filled with a checkerboard pattern.
Adding and Subtracting from Your Selection
When creating complex selections, you will quickly find yourself in a situation where you need to modify the selection. These are oftentimes referred to as "Boolean operations". These actions take two selections and combine them in some way. Every selection tool comes equipped with these actions. These are the Tool Options from left to right.
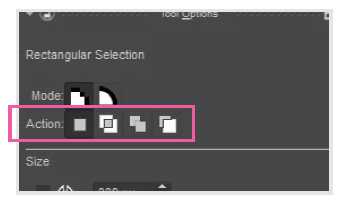
Modify your selection with the different actions.
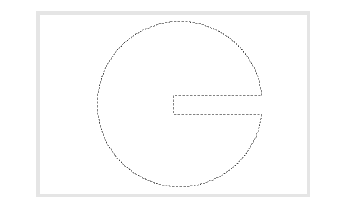
The Subtract action was used to remove part of the circle.
- Replace – Use your next selection as a new selection and remove all existing selection data.
- Intersect – Keep only the intersecting area between your new selection and existing selection. Shortcut: Hold down Shift + Alt before making a selection.
- Add – Add your next selection to the existing selection. Shortcut: Hold down Shift before making a selection.
- Subtract – Remove from the existing selection. Shortcut: Hold down Alt before making a selection.
Moving and Scaling Selections with Vector Selection Mode
By default, all of the selections you create are in Pixel mode. As you create and edit your selections, there is pixel data being modified behind the scenes. There is also a Vector mode that makes a vector selection. Vector selections can be moved and scaled without affecting the layer content. Vector and Pixel modes can be selected from the Tool Options with any selection tool. Let’s take a look at the differences of each mode.

Pixel mode (default) – Provides the ability to create selections by adding and removing using the actions (add, subtract, etc.). The disadvantage of this selection type is that it cannot be moved without moving up all of the layer contents.

Vector mode – Creates selections similar to the Pixel mode. Vector selections contain anchor points that you can edit. You can also move the selection around without picking up the existing layer content. You can only edit and move the selection, so the actions (add, subtract, etc.) are all disabled.
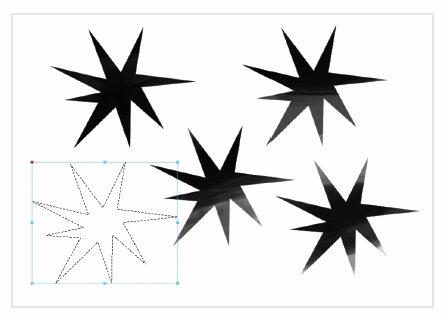
Moving a vector selection like a stamp: The blue outline that is created is a good indication that the selection is vector based.
When Vector mode is used when creating a selection, the Shape Handling Tool will appear in the toolbox. This will allow you to move and scale the selection.
As you can see in the example above, I reused the selection to serve as a stamp. After I was done moving the selection, I would switch to the Freehand Brush Tool, paint the selection, then switch to the Shape Handling Tool to move the selection. If you want to learn more about the Shape Handling Tool, take a look at the Vector Tools chapter.
An important thing to know with the Vector and Pixel modes is that you can convert a pixel selection to a vector selection. The best workflow I have found is to always start with a pixel selection. Most of the time this will be enough. If for some reason you need to move or scale the selection without affecting the layer, you can convert the selection to a layer mask by going to the main menu Select > Convert to Vector Selection. You can now use the Shape Handling Tool to move the selection around as I did previously. If you would need to continue editing the selection shape, you can use any of the selection tools as usual. As soon as you use a Pixel mode action, your selection will be turned back into a pixel selection.
You can also create a vector selection from a vector object. If you are on a vector layer and have a vector object selected, choose Select > Convert Shape to Vector Selection from the main menu. A new selection will be created that follows the outline of the vector shape.
Painting Selections with the Global Selection Mask
In addition to the normal selection tools, you can also paint a selection. This allows you to create selections with any of the painting tools. To accomplish this, we need to use the Global Selection Mask. Before we can start using it, we need to turn it on from the main menu Select > Show Global Selection Mask. A new layer will appear on top of your layer stack. If you have nothing selected, this layer will not appear. When you select your global selection mask layer, your color wheel will turn grayscale.
You can now paint on it as you would a normal painting layer. The effect is a bit delayed on your canvas when painting.
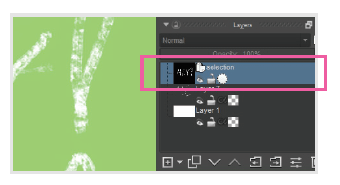
A new layer appears showing you the Global Selection Mask. The Freehand Brush Tool was used to create the selection.

