Toolbox Selection Tools
The most common selection tools are displayed in the toolbox. When you draw selections on the canvas, they will appear as a dotted shape, referred to as "marching ants". Selections will always be closed when you are working on them. This means that the selection must loop back around and end in the same place it began. Here is a summary of the selection tools.

Rectangular Selection – Creates a rectangular selection. This is useful for quick selections that don’t need a lot of precision.

Elliptical Selection – Creates an elliptical selection. Holding down Shift will force the shape to be a circle. Shortcut: J.

Polygonal Selection – Creates a series of connecting lines to determine the selection shape. There are a few ways to close the selection:
- Double-click – Adds an additional line that connects back to your first selection point.
- Enter key – Adds an additional line that connects back to your first selection point.
- Closing the Selection – When you are creating a selection, you can hover over the first point. You will see a small circle appear. That is Krita’s way of telling you to close the selection. When you click, the selection will be closed.
Many artists use the Polygonal Selection Tool for filling their line work. When going around a selection, you simply click in the places that will be close enough. Since you don’t have to worry about every motion of your hand, you can move fast and only put down points that you feel comfortable with. The final selection is behind line work, so the end results don’t need to be exact. If you currently use this tool, I would recommend checking out the Bézier Curve Selection Tool.

Outline Selection Tool – Draw an outline anywhere in the canvas to create a selection.

Contiguous Selection Tool – Only selects areas that have a similar color. If there is another disconnected area with the same color, it will not be selected. This is why the tool is called "Contiguous". It has a few options.
- Fuzziness – The color you picked will have a greater range of values for the selection. Your selection will be larger with larger values.
- Grow/shrink selection – The selection will be expanded or shrunk after the initial selection is calculated.
- Feathering radius – Softens the edges of the selection.
- Limit to current layer – Only uses the selected layer to determine the selection. This option is disabled by default.

Similar Color Selection Tool – Selects areas based off pixel information. This is useful for selecting areas that share similar color information. The areas do not have to be connected. There is one setting for this tool.
- Fuzziness – The color you picked will have a greater threshold of values for the selection. Your selection will be larger with larger values.

Bézier Curve Selection Tool – Similar to the Polygonal Selection Tool. The main difference is that your points can be curved using Bézier points. This can be achieved if you drag your pen as you are clicking a point. The length of the handle will determine how much a line will curve in a direction. Once mastered, this tool is a superior version of the Polygonal Selection Tool.

The Bézier Curve Selection Tool will give better results than the Polygonal Selection Tool.
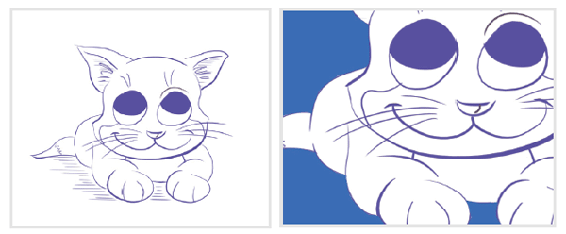
The Bézier Curve Selection Tool has more flexibility than the Polygonal Selection Tool. While this won’t save hours of time, it can make quick work with curved areas. For the previous illustration, I was blocking in the cat silhouette with the Bézier Curve Selection Tool. Blocking elements like this makes it easier to paint in the lines later. With the final mask, about 40% of the points were straight lines, while 60% were using Bézier points.
The tool options have no effect for the Bézier Curve Selection Tool. The biggest downside with working with selection tools is that you cannot edit your anchor point. You will have to convert the selection to a vector selection to edit the points.

Tip
Krita remembers the settings for your tools. After you configure a tool with the settings you like, you will not have to configure it again when Krita is relaunched.
Helpful Selection Shortcuts
Selections are a heavily used feature, so there are additional shortcuts available. When you are in the middle of creating a selection (while your pen is down), you can use the following shortcuts:
- Move the selection: Hold down Alt.
- Constrain the aspect ratio: Hold down Shift.
- Resize selection by its center: Hold down Ctrl.
While seeing the selection is helpful, it can sometimes get in the way when you are more interested in the final results. Here are a few more shortcuts that help you manage your selections:
- Show/hide the selection:Ctrl + H.
- Select the entire canvas: Ctrl + A.
- Clear selection: Ctrl + Shift + A.

