Mask Layer Types
A mask is a nondestructive tool that helps you remove unwanted areas. To understand how masks work, it is best to think of them like a selection. In a selection, every pixel is assigned a value from 0 to 255: white being transparent, black being opaque, and grayscale levels for everything in between. If you select white from a color docker, you can use Eraser mode to quickly add or remove from the mask. You can also press Delete to clear the entire selection. Here are the types of masks that you can use.
Transparency Masks
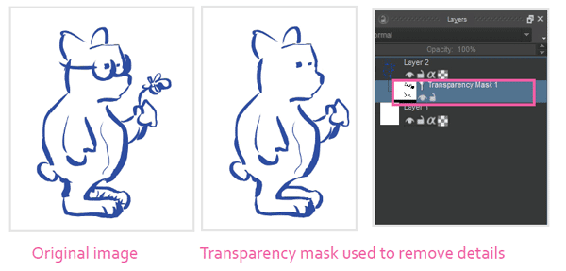
Determine which areas of a layer you want to show or hide. When you paint on a transparency mask, it appears like you are deleting the artwork.
In the following example, I added a transparency mask to a paint layer. Masks will appear as nested elements in the layer stack. The thumbnail besides the mask will tell you what the mask information is. I selected the mask and painted a few strokes. You can see the thumbnail change. Transparency masks are great for deleting areas that you might want to bring back later.

Filter Masks
Add a filter as a layer. The filter you pick can later be changed in the layer settings. The mask allows you to paint out areas that aren’t needed. The filter mask is a smarter version of a filter layer, so I always prefer to use this. There are effects in the Filter main menu called G’MIC that cannot be used for filter masks or filter layers.

Transform Masks
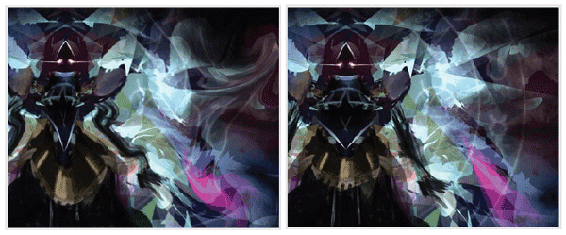
Distort and transform your layer nondestructively with a transform mask. Once you have the mask added and selected, you can use any of the transform tools. The visibility icon will toggle your effects. You have to use a transform mask when distorting file and clone layers.

Do transformations on a transformation layer mask (left). Toggle the changes off at any time (right).

Note
You can apply multiple masks to the same layer. If you want to apply a transparency mask, filter mask, and a transform mask all on the same layer, you can.
Local Selections
Take the current selection and assign it to a selected layer. When you have the layer selected, the local selection will become active. Changing to another layer will remove the local selection. You can hide the visibility of the selection by using the circle icon on the end. This is a convenient way to save a selection that is specific to a layer.

