Layer Actions
The bottom of the Layers docker has common operations that are performed. This is where you can manage your layers including adding, moving, and deleting layers. Let’s look at the operations, working from left to right.

Use these common actions to manage layers.
- Create layer – Clicking the "+" will create a new paint layer. Clicking the drop-down next to it will give you options to create other layer types.
- Duplicate – Make a copy of the selected layer. You can also Ctrl + drag a layer in the Layers docker to duplicate it.
- Move down – Moves the selected layer down in the order.
- Move up – Moves the selected layer up in the order.
- Move out of group – Requires a group layer. If the layer is in a group, this will move it out of the group.
- Move into group – Requires a group layer. If the layer is directly above or below a group layer, the layer will move inside the group layer.
- Properties – A way to change layer information. If using a filter layer, this allows you to change the filter applied.
- Delete – Removes the selected layer. You cannot delete a layer if it is marked as invisible. This includes masks and filters as well as painting layers.
Creating Layers
The add a layer option has a drop-down option next to it. If you click the plus icon, a new paint layer will be created. If you select the drop-down to the right of the plus icon, you will get options for additional layer types. Each layer type has a different icon that appears by the name.
In addition to layer types, there are also layer masks. Layer masks will look like they are nested inside your normal layer. These options will only affect the layer you currently have selected. These options are all nondestructive, meaning that you will not lose pixel information when applying them. You cannot add a layer mask to a layer mask. We will go over the different layer types in detail later.

Multiple masks have been added to a painting layer. Notice how they all appear nested.
Layer Groups
If you start using a lot of layers, you might want to group them into folders. Layer groups have many of the same properties as normal layers. If you are feeling risky, you can even nest group layers. You can also move layers in and out of groups by using the Move into and Move out of layer actions at the bottom of the Layers docker.

Tip
Layer groups have alpha locking and inherit alpha properties. Grouping multiple layers that share these settings can be helpful.
Clone Layers
Take an existing layer and create a reference of it. The following example will show how it works.
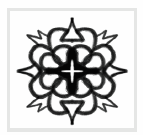
- Create a quick drawing on a layer. I used the Multibrush Tool to create the mirrored effect.

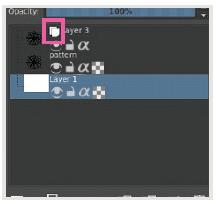
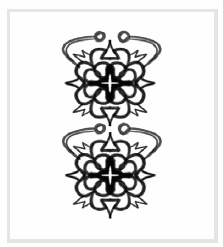
- Create a new Clone layer from the Add menu (use the drop-down menu to the right). The selected layer will be cloned. Move the layer with the Move Tool so it is not on top of the original layer. Notice the icon to the left of the layer name (highlighted in the image).

- Select the original layer and paint a few more strokes. You will see that the cloned layer will also add those strokes. This can be nice for certain designs that need to be repeated.


Note
The layer names are not descriptive when they are cloned. The name will say "Layer n", depending on how many layers have been cloned. If you do end up working with a lot of clone layers, it might be a good idea to add them to a layer group to keep them together.
Filter Layers
Add effects or make adjustments to an image. Instead of applying a filter to a layer, you can create a filter as a layer. The advantage is that you can work nondestructively. If you think the image was sharpened a little too much, you can change the settings through the layer properties.
Fill Layers
Fill the entire canvas with a color or pattern. Like filter layers, you can alter this by going into the layer properties. This can create subtle washes or glazes over your painting. Glazing is a painting technique that will shift all of your colors to a specific hue, making your painting appear more cohesive.
File Layers
Some applications refer to this type of behavior as a "smart object". You can reference an external image and modify it freely. The largest benefit to a file layer is that the image doesn’t degrade when the dimensions change. If you try to shrink a file layer down, you can then enlarge it back without any pixelation. Doing this to a normal paint layer will destroy the pixel information.
File layers are not embedded into the file. Do not delete the original image if you are using it with a file layer.

Note
Trying to do transformations like perspective or warping won't work on a file layer. If you want to transform a file layer, you will need to add a transform mask first.

