Chapter 16
Feifi the Canary—Plumiferos Takes Wing
In this chapter, you have a very special opportunity to take a glimpse inside Plumiferos, the world’s first feature film to use Blender as its primary 3D animation software. The creators have kindly allowed me access to the rig of Feifi the canary, one of the main characters of the film, and I am very pleased to present an overview of this excellent example of cartoon-style rigging.
- Introducing Feifi
- Facial Deformations with Lattices
- Rigging a Cartoon Bird
), the love interest of Plumiferos. Whereas the two protagonists of Elephants Dream are eminently unlovable, Feifi is as cute and charming as Proog and Emo are unsettling. Both for character and for style, the modeling and the rigging of Feifi are done in very different ways from that of Elephants Dream.
Designs for one of the avian protagonists of Plumiferos
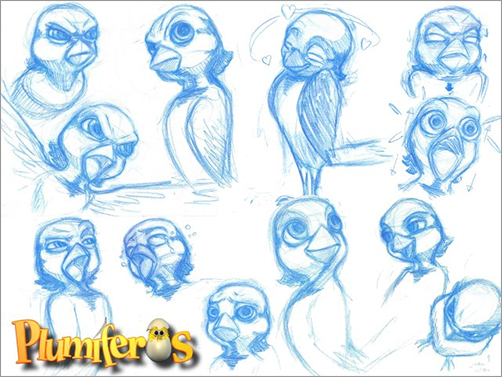
Stylistically, Elephants Dream is realistic and artificial in almost a diametrically opposed way to the way in which Plumiferos is cartoony and naturalistic. The creators of Plumiferos have created a natural-looking, convincing world to tell their story in. Lighting in Plumiferos is painstakingly naturalistic, whereas Elephants Dream is full of surreal glows and emanations. The directing style and camera work in Plumiferos is unobtrusive, whereas Elephants Dream often uses dramatic framing and camera angles to enhance the feeling of danger and unease in the film. In other important respects, however—particularly as concerns this chapter—Plumiferos is far less realistic, and far more cartoony, than Elephants Dream. This cartoon-quality completely informs the way the rig is set up, as you will see in this chapter.
The Feifi Mesh
Looking at the wireframe contours of the mesh in , the differences in style and character between Feifi and the Elephants Dream protagonists are immediately clear. Feifi is rounded and smooth, with none of the jaggedness and incongruity of the Elephants Dream characters. Feifi is a classically cute cartoon character, complete with large head and very large eyes, puffy cheeks, small chin and mouth (in this case beak), and a small, rounded body. The mesh of the body is smooth, is clean, and at first glance appears comparatively simple.
The Feifi mesh, front and side
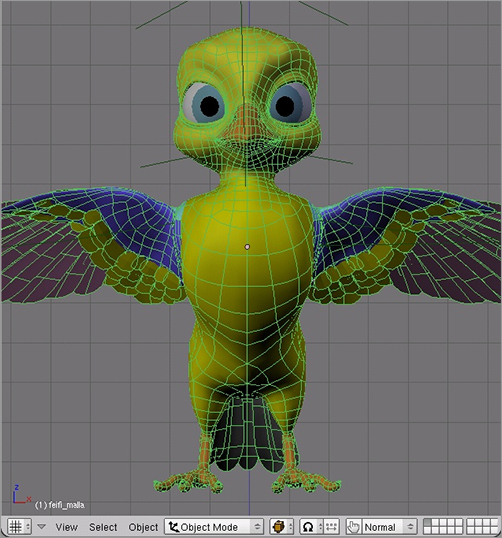
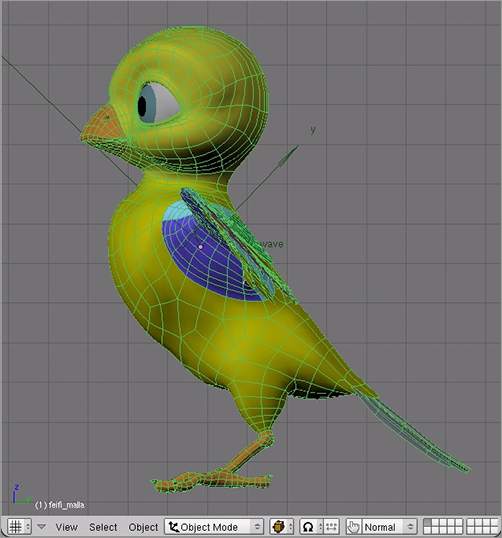
In fact, although Feifi’s head is clearly cartoony in its proportions, the body itself is actually not very exaggerated at all. The torso, legs, and feet are highly naturalistic. The most significant and complex concessions to naturalism in the mesh are probably in the wings, shown in their rest position in . Clearly, they are based on considerable study of actual bird wings, and the component feathers are painstakingly organized to yield a naturalistic structure that can be animated in a convincing way; however, in keeping with the film’s cartoon style, these wings are far more versatile and expressive than natural bird wings.
Feifi’s wings
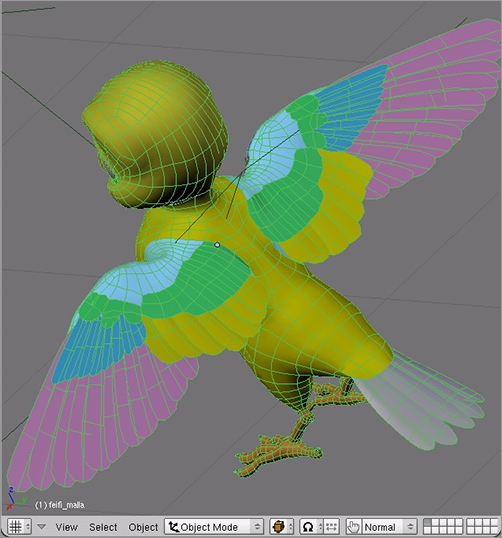
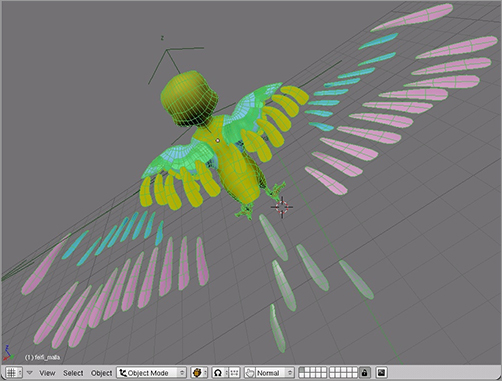
Feifi is not a single unbroken mesh. The wings and tail are built up of many mesh parts representing features that have been modeled separately and placed together, as in the exploded image of the Feifi mesh in .
These segments were modeled separately for several reasons. It is more modular to do it this way than to have all the mesh pieces attached; similar wing structures are used for many of the bird characters in Plumiferos, and it is easier to reuse wing parts if they are separate. Also, using multiple mesh parts allows for more materials to be applied to an object. Each unbroken mesh was limited to 16 different materials in the Blender 2.4x versions used in Plumiferos. As of Blender 2.5, this restriction has been lifted. This was generally not a particularly limiting restriction, because it is easy to use separate mesh segments within an object, as is done here. Lastly, separately modeling each of the large features that make up the wing yields very nice results and facilitates some interesting possibilities for wing posing—which you will look at a bit later in this chapter.
Separate feathers that make up the wings
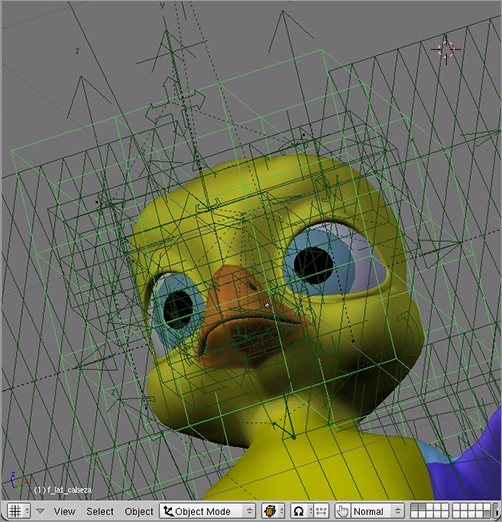
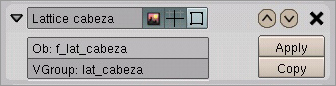
shows a view of Feifi’s head with a complex scaffolding of multiple lattices. Each lattice covers a specific portion of the mesh and influences the part of the mesh defined by the vertex group named in the VGroup field in the Lattice modifier, as shown in . They connect a hook to the parts of the lattice that will be deformed by going to Edit mode, selecting the lattice verts that the hook will influence, and then pressing Ctrl+H to create a hook. By default a new empty will be created as the hook object; in 2.5 a pop-up menu will come up asking you how you want to create the hook. This empty is then bone parented to the appropriate controller bone.
Lattices modifying Feifi’s head
The Lattice modifier applied to a vertex group
This approach results in a remarkably expressive face rig. In you can see a small sample of the kinds of deformations and facial expressions possible with this approach. The only portion of the face rig that involves weight-painted, bone-deformed mesh is the lower beak portion, which is opened by means of a bone. The only shape keys used are for opening and closing the eyelids. In these examples, once again, you can see the potential for lattices to create exaggeration and hence cartoon style.
Facial deformations with a lattice/armature combination
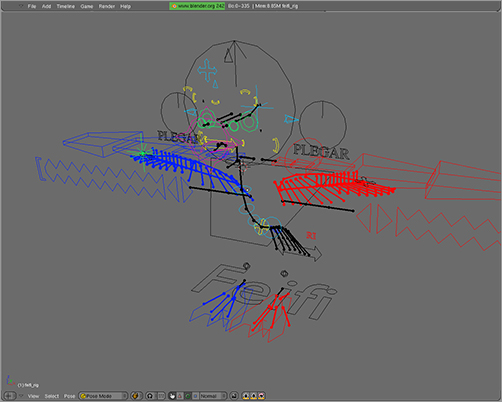
. Although it is not clear from the black-and-white image, the Blender version used by the Plumiferos team allows custom bone colors as well as shapes. This feature, which is now standard in Blender, was developed specifically for this project by the Plumiferos team.
In the Feifi rig, the left wing and foot bone setups are colored red, and the right wing and foot are blue. Since animators may work in wireframe mode or without the mesh visible, it can be difficult to tell right from left when viewing the armature from the side. It is useful to have colored bones to distinguish the sides. Bone colors are available in current Blender versions by using the Bone groups feature.
The Feifi armature
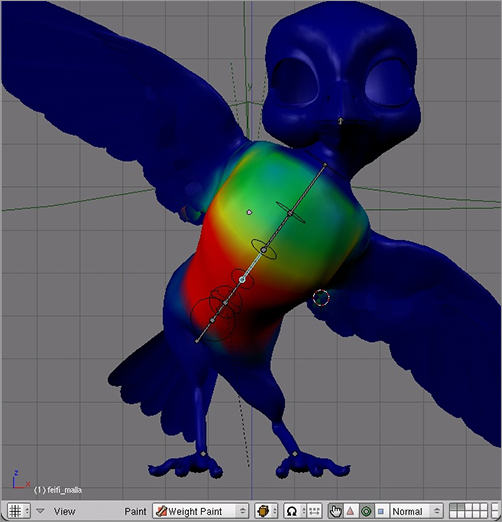
The rigging of Feifi’s torso comes closest to using the rigging style you looked at elsewhere in this book. Feifi’s spine is basically an IK chain that can be posed very flexibly by manipulating control points in the hip and neck area, as in . This area, as well as the main posing bones for the head and legs, is rigged and skinned in a straightforward way using weight painting, as shown in .
Posing Feifi’s torso
Feifi’s torso weight painting
Wings
A place where the Feifi rig is especially interesting is in the wings. Modeling and rigging wings and feathers present a number of challenges that are not easily addressed using traditional armature-mesh deformation.
The Feifi rig basically breaks wing movement into components corresponding to something like flap, curl, and fan, with each of these components controlled mostly independently from the others, as shown in .
The main components of Feifi’s wing movement: flap, curl, and fan
The angle of Feifi’s wing to his body is determined by the rotation of a circular dial-like custom bone located over his shoulder. The curl within the wing is controlled by a chain of FK bones extending horizontally from the shoulder area; this setup allows for much more flexible posing than a natural bird wing, which is appropriate to a cartoon bird character that will likely have to use his wing as a hand from time to time. Finally, the fanning of the wing feathers, a key element of expressive wing posing, is controlled by scaling the accordion-shaped custom bones positioned horizontally beneath each wing.
This kind of flexibility would be difficult to accomplish using only weight painting and armature deformation. In fact, most of Feifi’s wing posing is not accomplished with weight painting. Rather, as in the case of the facial deformations, the rigging of Feifi’s wings is solved with lattices.
Feifi’s wings are each modified by two lattices, one that controls flap and one that controls the curl of the wings. The lattices in turn are controlled by using hooks parented to the appropriate armature bones, like the facial deformation. A single wing’s curl lattice is influenced by 25 separate hook modifiers. shows a wing pose, the accompanying lattice deformations, and a full view of all layers of the armature.
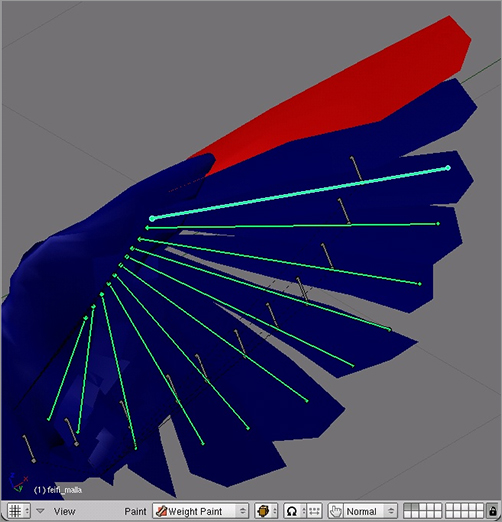
The only part of the wing’s pose that is not controlled by lattices is the fanning mechanism. To fan the feathers, traditional armature deformation is used, in that each separately modeled feather is fully assigned to its own bone, as shown in . Each feather follows the movement of its governing bone while remaining stiff.
The posed mesh, lattices, and full armature: flap, curl, and fan
A feather mesh segment fully assigned to a deform bone
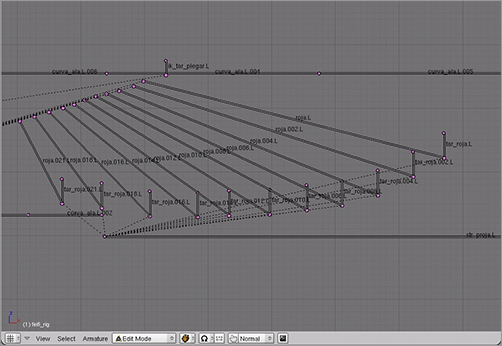
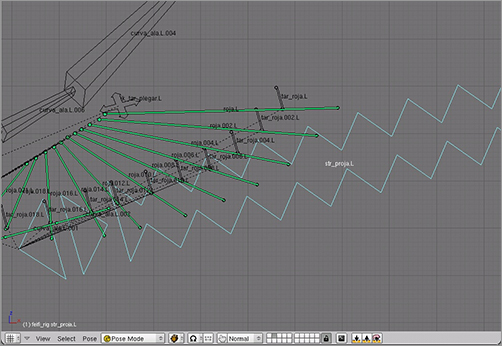
The fanning itself is controlled by a very clever example of a kind of mechanical rigging that does not often find its way into character armatures. To understand how it works, it is helpful first to look at the setup in its rest position in Edit mode, as in . Located at the tip of each deform bone is a small control bone (the bones named with the prefix tar_roja). These bones have no direct relationship via parenting to the feather deform bones; they are simply placed at their tips. The parent of the control bones is the str_proha.L bone.
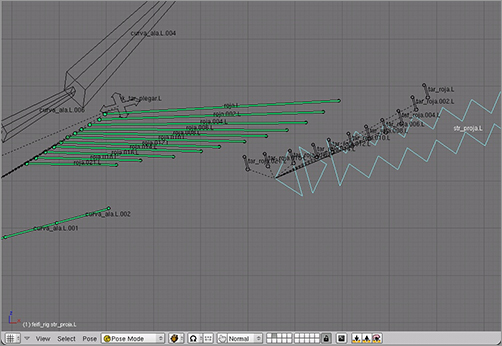
In Pose mode, each of the feather deform bones is constrained using a Lock Track constraint to point toward the location of its respective control bone. Scaling the parent of this set of bones has the effect of scaling the control bones themselves and their distances from each other, while also changing the location of the point to which they are parented. As this happens, the tracking of the feather deform bones toward the control bones results in the deform bones spreading apart from each other, as shown in .
The wing fanning mechanism in Edit mode
The feather-fanning mechanism in action
As you can see, in spite of the apparent simplicity of the Feifi character, the rig is a fairly complex construction. The result is a very expressive, poseable character that can allow an animator to create a wide range of actions and emotions quickly and easily. Although some of the techniques used in this rig certainly deserve to be described in greater depth, I hope that the approaches I’ve reviewed in this chapter will give you an idea of the possibilities available in Blender for rigging characters and perhaps point you toward some solutions of your own for your specific rigging needs.
Many of the core creative team members of the Plumiferos team have moved on to create Licuadora Studio and participated in Sintel as the “Team Argentina” off-site contributors. You can find out more about Licuadora’s Blender animation work in my book with Claudio Andaur, Blender Studio Projects: Digital-Moviemaking (Sybex, 2010).

