Adding more nodes to the SolrCloud
Let us see how we can add more nodes to SolrCloud. Create one more machine solr5. Copy the Tomcat folder to this machine and create the folder solr-cores in the /home/ubuntu folder. Alter the tomcat/bin/setenv.sh file and change the -Dhost parameter to match the machine's host. For solr5, it will be:
SOLR_OPTS="-Dsolr.solr.home=/home/ubuntu/solr-cores -Dhost=solr5 -Dport=8080 -DhostContext=solr -DzkClientTimeout=20000 -DzkHost=zoo1:2181,zoo2:2181,zoo3:2181"Also copy the solr.xml file from any Solr machine to these machines inside the solr-cores folder. Now start Tomcat and check whether it is running by opening the following URL: http://solr5:8080/solr.
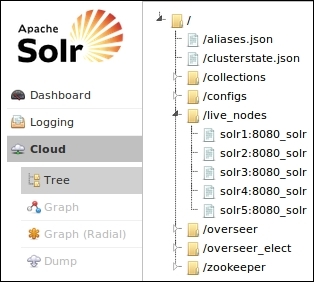
There are two ways to identify whether this node has been added to SolrCloud. We can check whether the admin interface on solr5 displays the current Cloud | Graph. Another way is to go to the admin | Cloud | Tree | live_nodes folder. This should contain the name of the live nodes. solr5 should be visible there.

Now, let us add the node as a replica for shard2 of mycollection. For this, we will have to execute the ADDREPLICA command on the collection API, as follows:
http://solr5:8080/solr/admin/collections?action=ADDREPLICA&collection=mycollection&shard=shard2&node=solr5:8080_solr
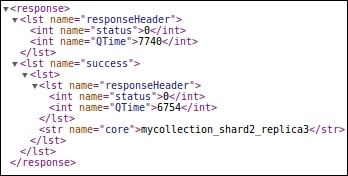
The output from command execution will specify the name of the core that has been created:

In this command, we have specified:
action=ADDREPLICA: This is the action to be performed on the collection.collection=mycollection: This is the collection on which the action is to be performed.shard=shard2: This is the shard for which the replica is to be created.node=solr5:8080_solr: This is the node on which the replica is to be created. The name of the shard is obtained from thelive_nodeslist we saw earlier.
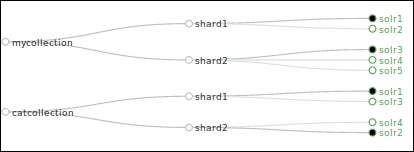
The cloud graph indicates that solr5 is added as a replica of shard2 of mycollection:


