Vector Gradients and Patterns
When you select any type of vector shape, you will notice there are a couple of tools in the toolbox that will become enabled.
Pattern Editing Tool
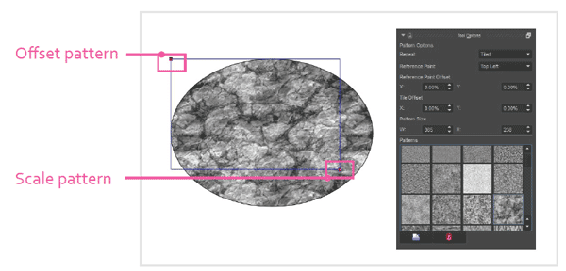
Add or edit a pattern on a vector object. When the tool is selected, a blue box will appear that allows you to offset and scale the pattern. With the on-screen controls, you rarely need to adjust the values in the Tool Options.

Pattern editing tool – Have more control over how your patterns are placed and scaled on the object.

You have a few repeat types you can use with a pattern. These repeat types are in the Tool Options.
- Original – Only one instance of the image is used.
- Tiled – The image is repeated horizontally and vertically.
- Stretched – The image is stretched to fit the bounds of the object.
If Stretched is selected, all of your other options to scale or offset will be disabled. Leaving the option set to Tiled will work in most circumstances.
There are additional options for editing the pattern in the Tool Options. These options do the same thing as manually moving the offset pattern or scaling the anchor points. It is easier to use the blue box instead of manually tweaking the numbers.
Gradient Editing Tool
Add or edit a gradient on a vector object. Like the Pattern editing tool, you need to have an object selected before this tool becomes enabled.

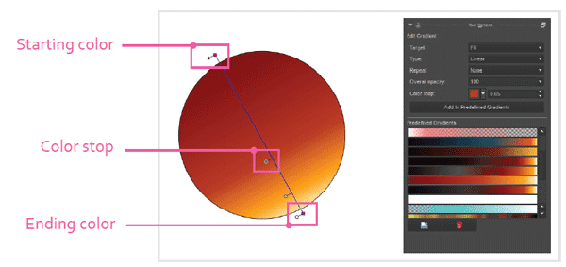
Gradient editing tool – You can move and rotate the end handles on the object to change the gradient. This provides more control than the standard fill options.
If your object has a gradient applied and this tool is selected, a line will appear along with some color swatches below them. Each color swatch along the gradient is referred to as a Color stop. When you have a Color stop selected, you will notice the Color stop option appear in the Tool Options. In the Tool Options, the number to the right of the color is the distance percentage between color stops. It is easier to drag the color stop handle visually.

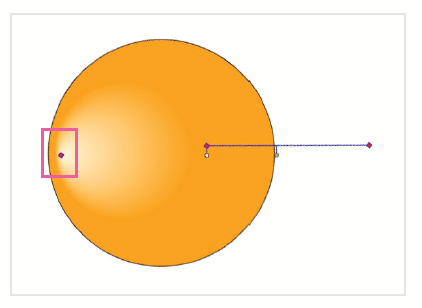
If you select a Radial gradient from the Tool Options, you will notice an extra point appears on the object, as shown below. This extra point will change the distribution of the gradient relative to the position of the starting color stop. You can see that shifting this anchor point to the left will shift the gradient's effect so the brightest part is on the left.

Using the Radial gradient will give you an additional anchor point to modify. This will influence how the gradient is distributed.

Note
When you save a gradient, the rotation and position are not saved. You will need to reposition the gradient if you apply it to a different object.

Artwork by Gkoumas George

