Spray Engine
Create a spray can or airbrush type of effect. While at first this type of brush would appear limited, you can do some interesting things with it when you push the settings.

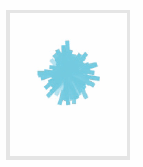
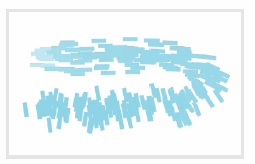
The above example demonstrates the different spray effects that can be achieved by changing the settings in the Spray engine. This includes normal spray effects on the left to a more exotic effect on the right. For the example on the right, I drew a rectangular selection to keep everything inside. The brush has an extreme aspect ratio, so that is what gives it the horizontal feel. We’ll go over the different parameters you can play around with.
Spray Area
The spray area is the radius of the spray effect. The spraying effect generates particles, so there are multiple properties that can be modified.
- Diameter – How large the spray area will be.
- Aspect ratio – How much the brush will be squashed horizontally or vertically.
- Angle – Rotates the brush tip angle.
- Scale – Similar to the diameter. The scaling will affect the distance as it is changed. It is usually best to leave this at 1.
- Spacing – How much space there will be between each brush dab.
- Particle Count – How many particles will be applied for each dab.
- Particle Density – Percentage of how many particles will be applied. This setting can really slow down your computer, so try to keep the setting low.
- Jitter Movement – How spread out the particle clusters will be. Higher values will spread out the particles more.
- Gaussian distribution – Your spray area will be focused around the center.

The Gaussian distribution stroke on the first image above has its spray effect focused on the center. The normal distribution will have an evenly distributed spray area.
Spray Shape
Each individual particle that sprays out will have its own shape. There are a few properties that you have control over. If this setting is unchecked, the Brush Tip settings will be used.
- Shape – Select the brush tip with how each dab will look. The two most common ones are ellipse and rectangle.
- Width – How wide each paint particle will be.
- Height – How tall each paint particle will be.
- Proportional – Change the width and height sliders to a percentage. This is useful when you want the size to change depending on the spray area diameter.
- Texture – If you have Image selected from the Shape drop-down, you can use an image as your brush dab.
Shape Dynamics
Randomize the size and rotation of your spray area.
- Random size – Takes the size of the spray area and randomly pick a size. If you want more control over the size, think about using the Size setting instead.
- Fixed rotation – This seems to do the same thing as the Angle option in the main area of the Spray engine.
- Randomize Rotation – The range of values the rotation can be set in.
- Follow cursor weight – With a value of 1, the brush shapes will all point toward the cursor. With a value of 0, this option will not have any effect.
- Angle weight – The brush tip will be rotated according to the direction of your drawing movement.

Follow Cursor

Angle Weight

Fixed Rotation
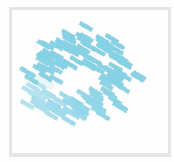
The shape dynamics deal mostly with rotation. You need a rectangular brush tip like the examples above if you want to see what the effects are doing. Most of the spray brushes use circular brush tips, so the shape dynamics will not appear to do anything.
Color Options
Randomize various components of the color. This includes changing the hue, saturation, and value. It also has additional options for randomizing opacity. These options can be used to create variety in every stroke you create.

