Chapter 16: Performance and Dealing with Noise
CPU vs. GPU
Modern graphics cards can have way more processing power than modern CPUs, so in general using the GPU should be faster. But there are a few special situations. A GPU that is twice as fast in rendering normal scenes might be even slower than a CPU when the scene has a lot of volumetric shaders or hair. GPUs are only fast for simple computations, so very complex shaders or hair strands might also profit from rendering on the CPU. The good thing about GPUs is also that you can install several of them in your system without the need for special special motherboards and processors.
32Bit vs. 64Bit
While Blender is still available in 32bit flavours, we strongly advise you use the 64bit versions wherever possible. All modern operating systems support 64bit software. Our benchmarks have shown that for GPU rendering, the 64bit versions of Blender are up to 200% faster than the 32bit versions. This is not a bug but a limitation of the technology.
The Right Tile Size
The field for the tile size in the of the is divided into x and y values. These value are actually pretty important. In general, if you are using CPU rendering, you want to make those tiles smaller, since a modern CPU has more than 1 processor and therefore is able to calculate multiple tiles at once. If you are using GPU, the amount of shader cores is key. Every core will handle one pixel in your image, therefore if you set the amount of pixels (x * y) in each tile to a multiple of the amount of shader cores on your graphics card, you can make sure there are no idle cores while the rest is still computing. You might want to do a little experimenting yourself for each scene individually, since it can depend on factors like hair, transparent background, or shader types, which tile size is suited best. As a rule of thumb a tile size of 32 by 32 for CPU and 256 by 256 for GPU rendering should result in reasonable efficiency.
For very big tiles it can happen that just one small stripe is left at the end which will result in most of the computing power of the GPU being idle. You can circumvent this by entering a fraction of the image size for the tiles, for example 1920 / 8 and 1080 / 4. The input fields will behave like a calculator. If you don’t want to do this manually, the addon by Greg Zaal will take care of that automatically.
Using the AutoTileSize Addon
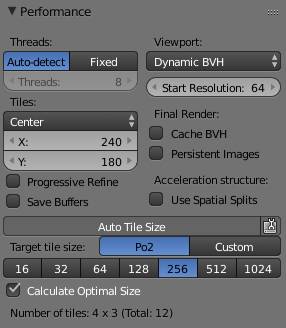
Once you have enabled it, the addon will take care of setting a very reasonable tile size for your rendering, taking into account CPU or GPU automatically. It also solves the small stripe problem as well. Which basically means you can sit back and relax.
The addon adds a new button below the performance settings allowing you to turn it off at will. Next to it is a button that opens up additional options if you are not satisfied with the values the addon sets by default.
Target tile size
Here you can set the tile size the addon will set depending on your compute device. To change this for CPU you first have to select CPU as compute device in the , same procedure for GPU. By default you have a selection of sizes that are powers of two (Po2). By selecting custom , you can set your own preferred size.
Calculate Optimal Size
This will set a tile size close to what you chose in the target size, that does not suffer from the small stripe effect. In the example setup above I did set the render size to 960 x 540. A tile size of 256 x 256 would not fit perfectly while 240 x 180 actually does (4 * 240 = 960 and 3 * 180 = 540).
Oversampling
You might also know it as anti-aliasing, but for what I am about to explain, oversampling is the more appropriate expression. Sometimes even after 2,000 samples there is still some noise in your image. If you render your image 25-50% larger than the resolution you are going for, shrinking the image back in the compositor can significantly reduce noise .
Note: Keep in mind, increasing the x and y resolution by 50% each, will increase the actual image size by 125% and thereby render time will most likely increase by more than 50%.
Noise Reduction in Post Processing
You can also reduce the noise of a rendering in the compositor. There are several ways to that. Since the compositor nodes aren’t tequichally Cycles nodes, I will cover them only very briefly. In the compositor under filter there are two powerful noise removal tools. One is called despeckle and works fairly straight forward. Feed it your image and tweak the settings.
The other one is a lot more complicated to set up. So if you want more detail and also a tutorial on a quick way to get it to work, .
Note: There are some cases where the latter method will not help you reduce noise, for example noise behind a transparent object will be ignored.
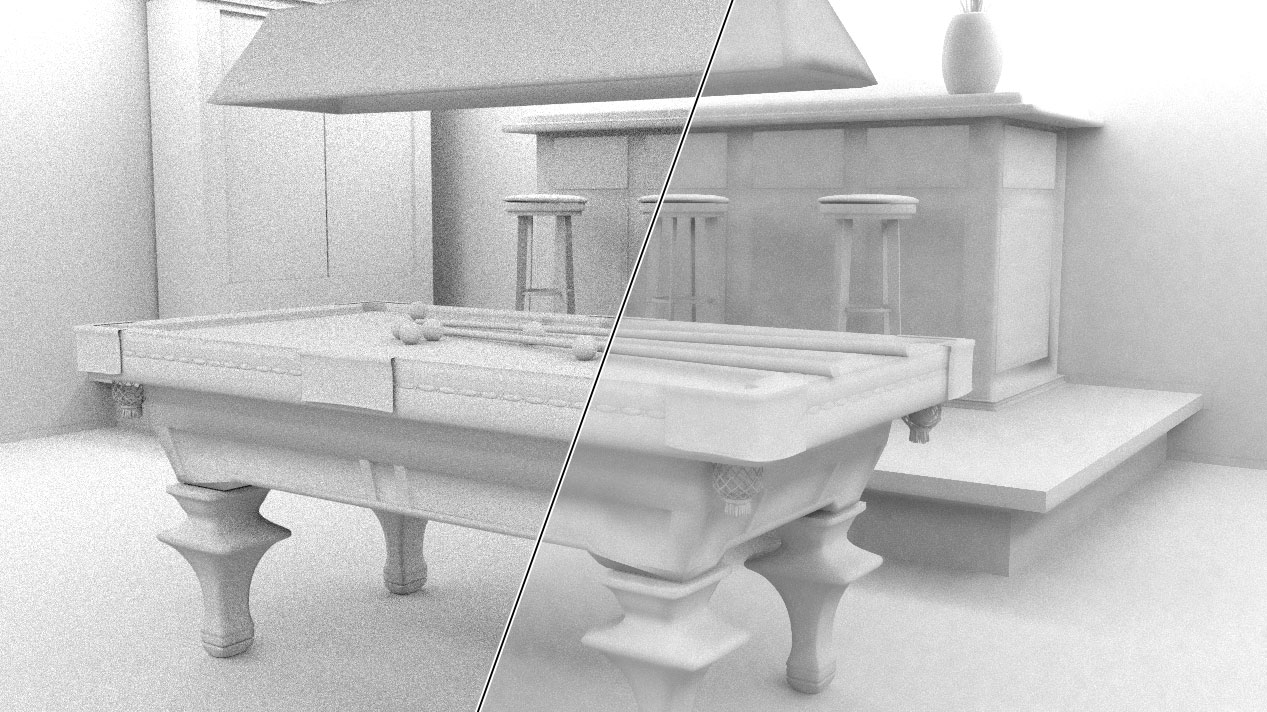
Fig. 16.1) Example of the noise reduction that is possible using the method in the tutorial linked above.
Animating the Seed Value
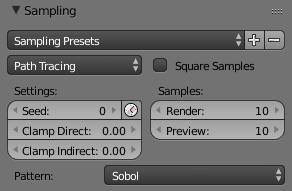
If you look at filmed footage, there is almost always some visible noise. This is called film grain. So a little noise is actually more realistic than none. However in Cycles by default, the noise is not flickering, but the grain stays in one place, which looks pretty awkward, if you use a moving camera. In the which you can find in the there is a setting called seed . If you animate it in any way, the grain will not stay in one place, but actually behave as animation noise.
To animate the seed it is easiest to click on the small icon next to the seed property that looks like a stopwatch. This will automatically animate the seed value for you and you should always turn this on when rendering animations.
Clamping
Clamping itself will not speed up rendering, however it will help reduce fireflies so you need less samples until your picture is clear. The bright overexposed pixels you get from rendering are called fireflies. Fireflies appear more frequently if caustics are enabled.

Fig. 16.2) Clamping of the samples. For each pixel, the camera shoots as many rays into the scene as you selected under samples. Due to random factors not every ray behaves the same, so the color and lightness varies from sample to sample. The mean of all the samples taken by Cycles results in the color of a pixel. The dashed line represents the clamping value. Every pass that results in a color brighter than the clamping value will get clipped. The end result is less accurate, but it eliminates the possibility of outliers overexposing single pixels.
For every pixel in the rendering there will be as many camera rays cast into the scene as you specify samples in the sampling settings. Each ray will get scattered into a slightly different direction than the last one, so it will produce a slightly different color each time and the mean value between these individual results will be used as the resulting color. If one of theses values is unusually bright, the result will be a firefly. By clamping their brightness you can chop of values that threaten to cause fireflies, none of the passes will be able to contribute a pixel brighter than the clamp value. Since there might be parts of your scene that are supposed to be pretty bright, this option it is split into direct and indirect. Indirect fireflies are the most common ones and mostly originate from reflective and refractive caustics. Thus you should first try to set the indirect clamping to get rid of noise. Direct noise often occurs when the render is using motion blur or very small light sources, with the latter also increasing indirect noise.

Fig. 16.3) Clamping examples. The scene was deliberately overexposed and rendered with 150 samples. a) no clamping, b) direct clamping, c) indirect clamping, d) both direct and indirect clamping. In b)-d) the clamp values were set to 2. In a there are several fireflies due to caustics. Clamping the direct light does not counter them, but it does darken the brightest parts of the image. Clamping the indirect light reduces the bright pixels almost completely. Clamping both direct and indirect removes fireflies (see 16.4), but also darkens the brightest parts of the image.
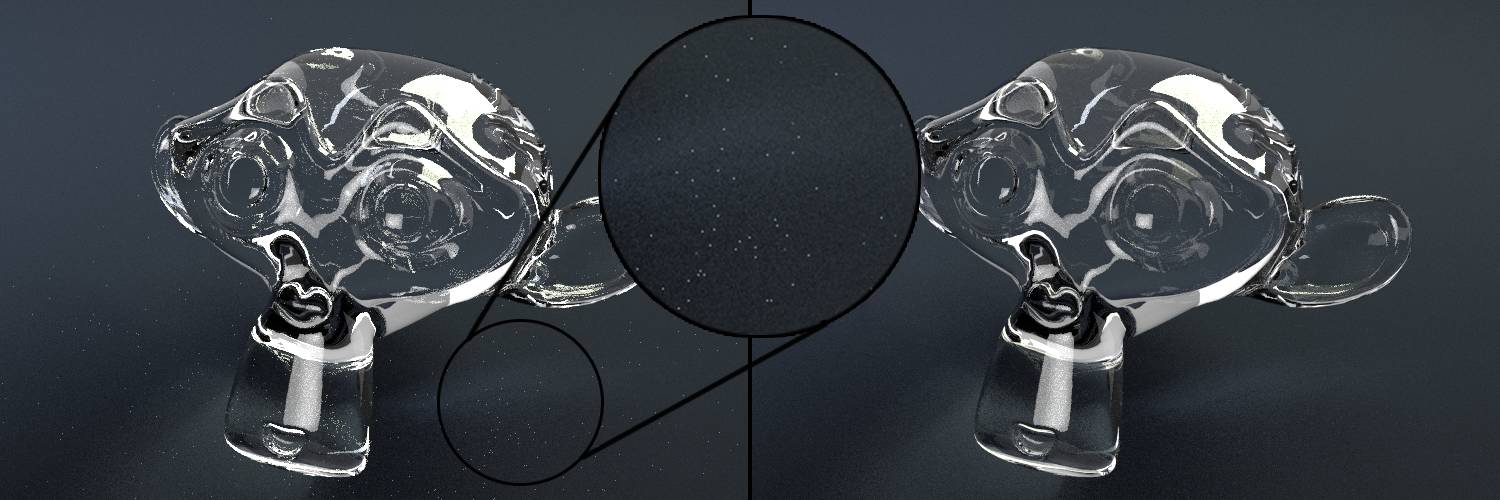
Fig. 16.4) Clamping indirect lighting. Left: no clamping, right: clamp indirect set to 2
Note: The clamping is not a factor, but a maximum value. Lower values will therefore influence your image more than high values. Setting it to 0.5 will allow no pixels to be brighter than middle gray. So if you want to prevent serious loss in contrast, you should not set this value lower than 2.
Render Border
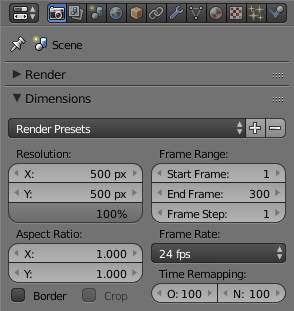
When using the live preview, it covers the entire viewport. Even when looking through the camera. In that case parts outside of the camera view might not be of interest. In the Dimensions panel in the tab of the properties editor you find a checkbox Border . When looking through the camera and having that checked, the rendered part of the viewport is restricted by the camera border. This way the scene will clear up faster.
The render border can also be set arbitrarily by the user. While looking through the camera in the 3D viewport press SHIFT + B and draw a rectangle around your object. Now the rendered part is limited to the rectangle and Border has automatically been checked as well (Fig. 16.6). This comes in very handy when you want to tweak a material and thus do not need to render most of the scene.
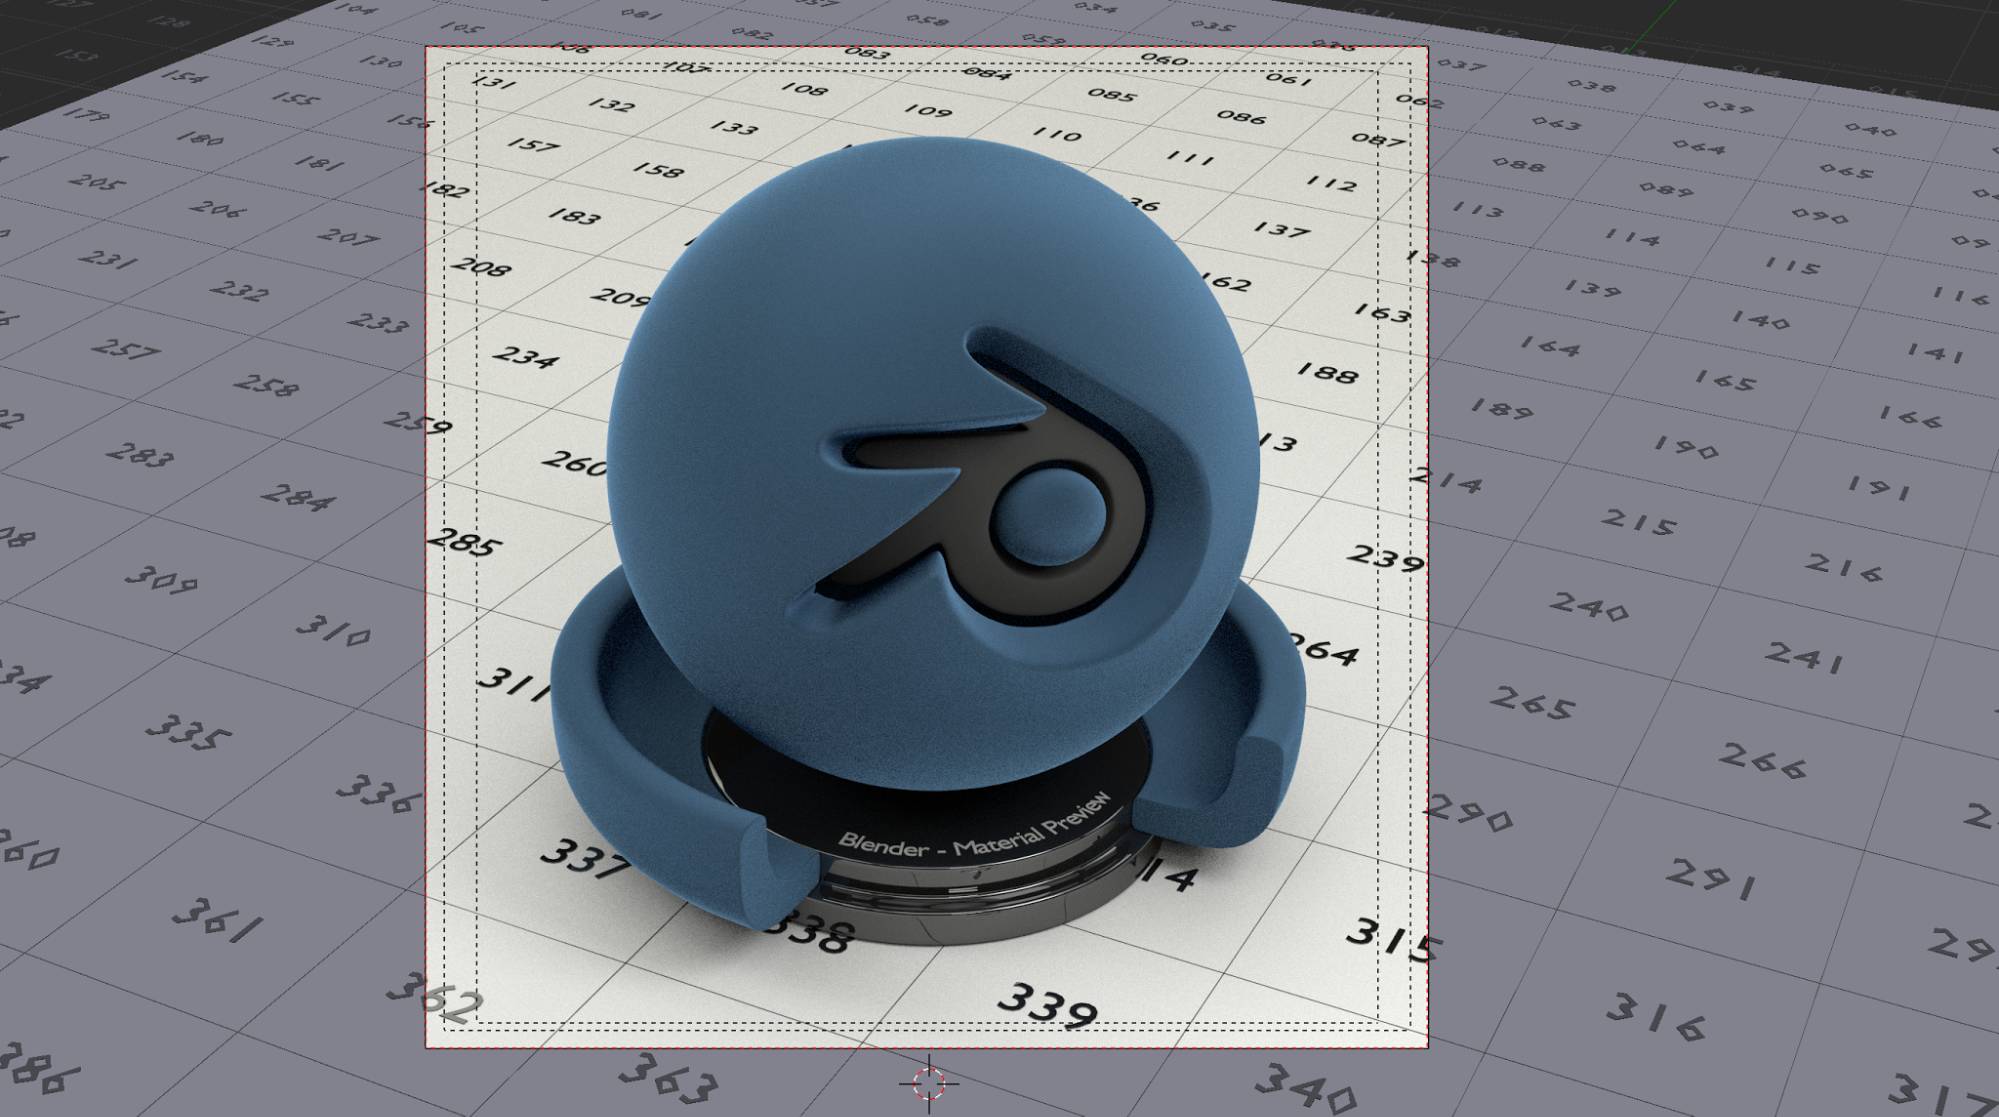
Fig. 16.5) When looking through the camera and Border being turned on, live rendering in the viewport is restricted to the area inside the camera border.
When rendering with a user-defined border, Cycles will render the scene, ignoring anything outside the border and then composite it over a blank image of the render size. If you do not want this behavior, you can check Crop in the dimensions tab of the render properties. In that case, Cycles will just render the restricted area without compositing it over a blank image.
You can manually composite it over the previous render, if you were just not happy with that one tree in the background or your character’s nose, SHIFT + B will save you the trouble of re-rendering the entire scene.
To get rid of the border, use SHIFT + B, but draw a rectangle outside of the area seen by the camera or turn off the Border checkbox.
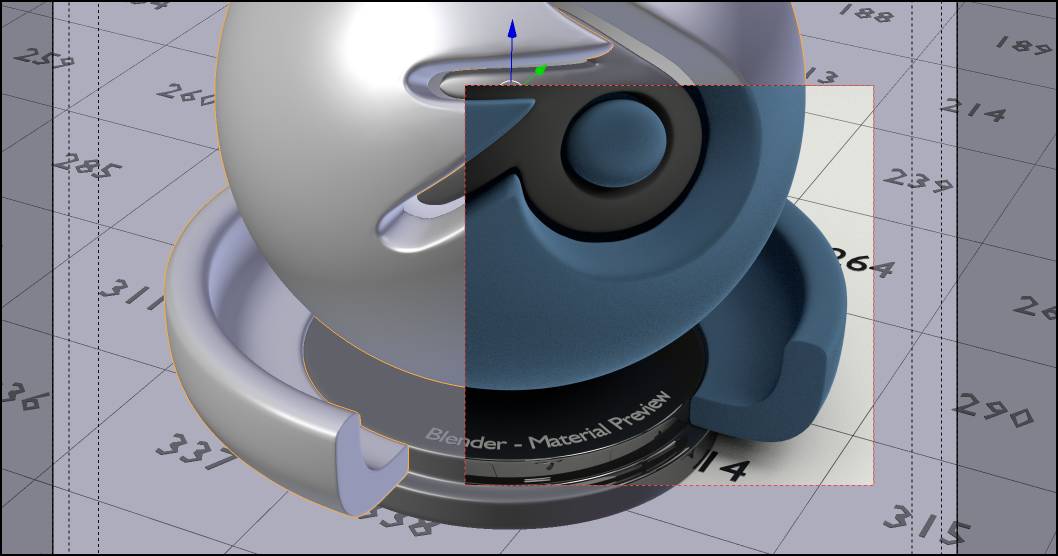
Fig. 16.6) By restricting the rendered area using SHIFT + B you can save a lot of time when tweaking shaders. You can also use the feature to selectively re-render parts of your image.
Whether you want to re-render just a small portion of your image or have an image with a lot of transparent background, restrict render can really speed up the process.
Rendering a scene with nothing in it on a transparent background - so essentially nothing - on an i7 quad core with default settings and 250 samples took 21 seconds. Using a GeForce 560Ti it still took 10 seconds. While this does not sound like a lot, if you are going for VFX for music videos, you might end up rendering thousands of frames, so every second counts.

