Chapter 15: Miscellaneous Settings
Material Settings
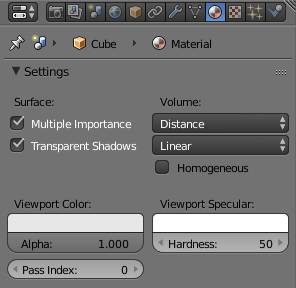
Every material has a folded up tab called settings. Generally you can leave them as they are , because their default settings should suit most of your rendering needs, however if you want full control, here is what they do:
Viewport color
Determines what color the material has in solid view in the viewport.
Alpha
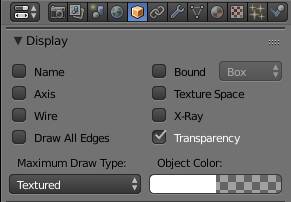
Use this to set the transparency in the viewport. In order for this to work, you need to check transparency under display in the object properties.
Viewport Specular
Defines the color of the specular highlights of the object in solid view in the viewport. It is an additive effect, so if you want to get rid of the specular, just set it to black.
Hardness
The higher you set this value, the smaller and more defined the specular reflections in the viewport will get.
Pass Index
Allows you to separate objects based on their materials for post processing in the compositor. You need to turn on material index in the render layer settings in order to get access to it.
Surface:
Transparent Shadows
This option only applies if there is a transparent shader node in your material, has nothing to do with glass, refraction or volume shaders. If you disable it, shadow rays will be also be blocked by the transparent shader, resulting in lots of noise. For more information on the reasons for that, consult the section Shadows in the .
Multiple Importance
only makes a difference if the material has an emissive component. Generally leaving this setting checked will result in less noise. For very large area objects that only emit little light, disabling this might reduce noise. Another case where this should be disabled is when there is a very large number of emissive objects in the scene.
Volume:
Distance
If there are lights outside a volume or very far away from the camera and their density is above 1.0, this option will produce the least noise.
Equiangular
If there is a light close to or inside a volume, this option can help reducing noise in areas very close to the light. It is also generally the best suited setting for volumes with density < 1.0.
Multiple Importance
The mid-ground between Distance and Equiangular. It yields good results in the usual circumstances and the best results for scenes with lights both close to and far away from the camera.
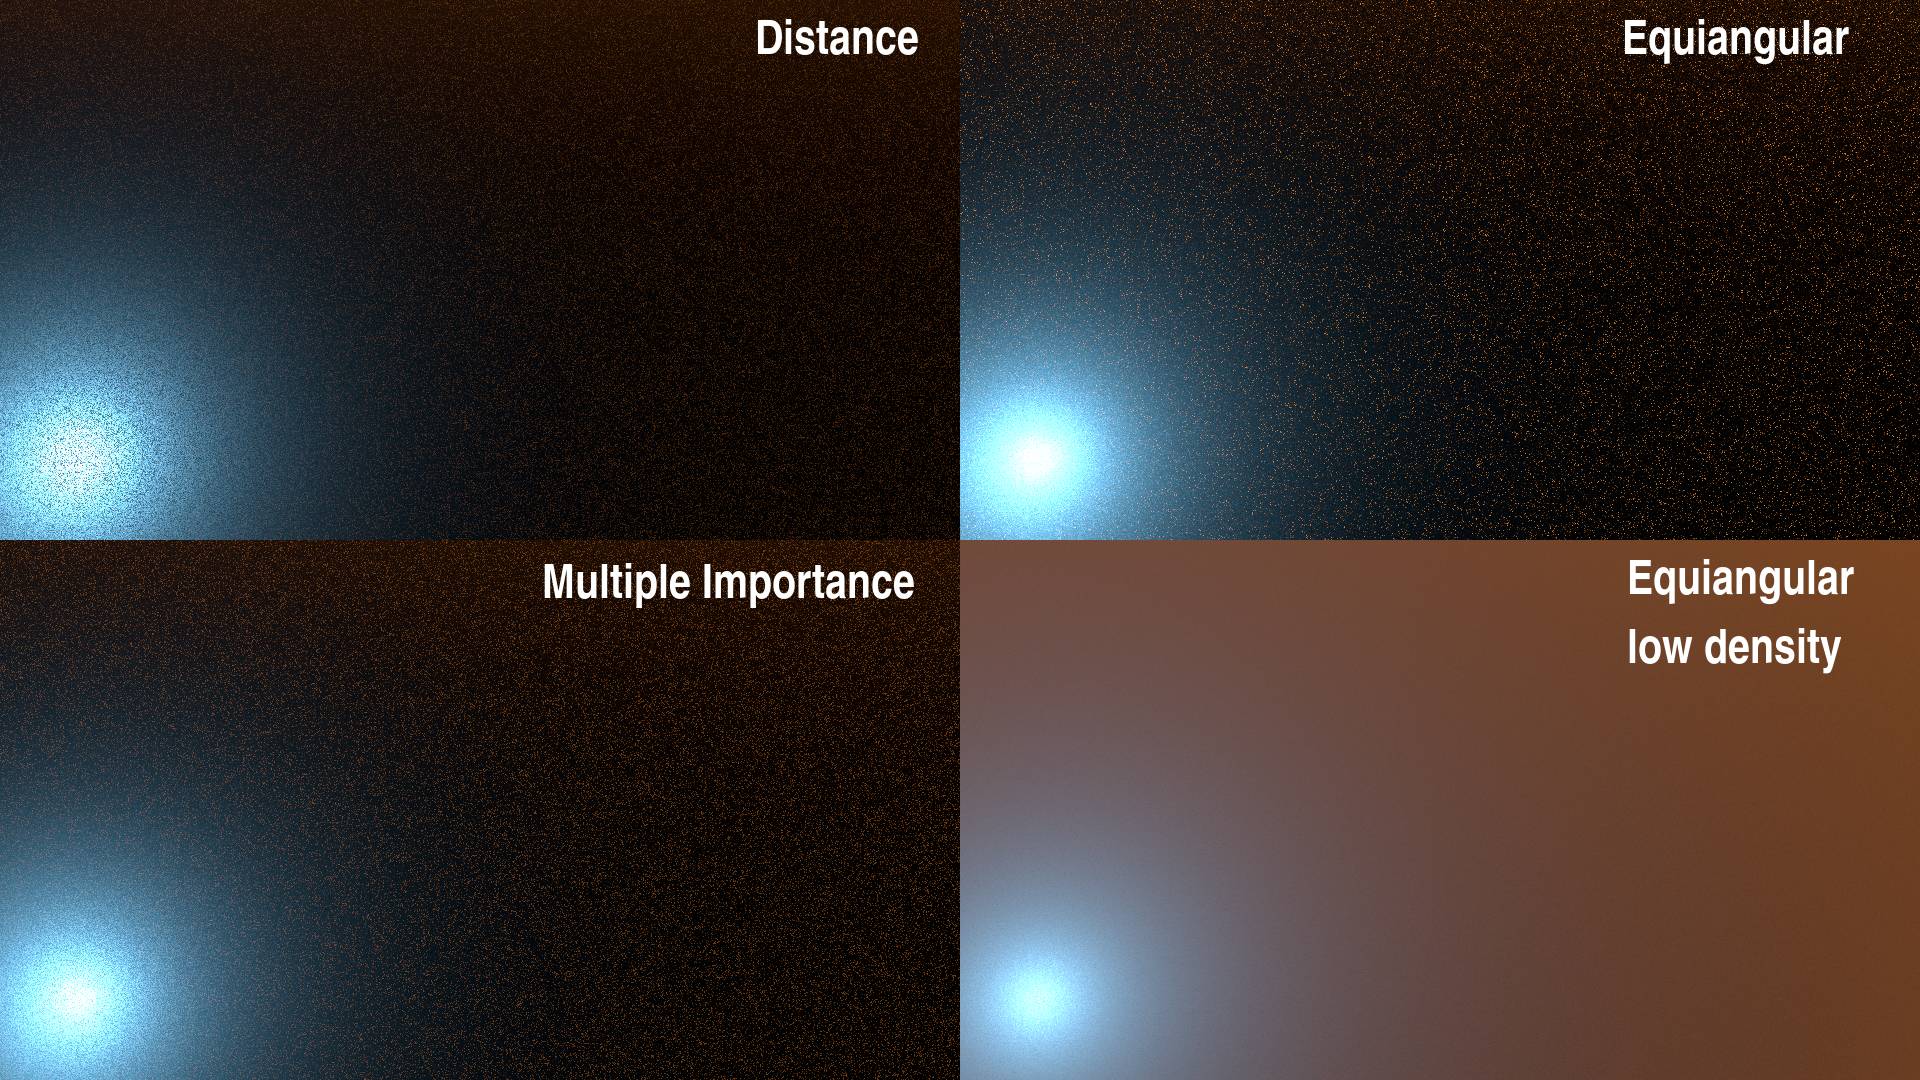
Fig. 15.1) A cube with a volume scatter material with a density of 2.0. The blue lamp was inside the volume while the orange one was outside and 30 BUs away. Rendering was conducted with 10 samples each. Top left was distance sampling, which produced the least noise for the far away lamp (orange) but the most noise for the lamp that was inside the volume (blue). Top right was set to equiangular sampling, which yielded in the least noise for the lamp inside, but the most noise for the far away lamp. Bottom left was multiple importance sampling which resulted in a medium amount of noise for both lamps. On the bottom right there was the same scene with a density of 0.1 - in that case equiangular sampling will result in the least noise, no matter where the lamps are placed.
Linear
If voxel data is used to control the density, use linear as a method of interpolation between voxel grid cells.
Cubic
If voxel data is used to control the density, use cubic as a method of interpolation between voxel grid cells. This will look smoother and can help you getting rid of artifacts in the smoke but it will also take longer to render.
Homogenous
When a volume has the same density at each point (no texture attached to density), it is homogenous. Cycles detects this case automatically and will use optimized algorithms.
The checkbox allows the user to force homogenous computation, which will result in a strange, but not necessarily unwanted effect when a texture is used to control the density .
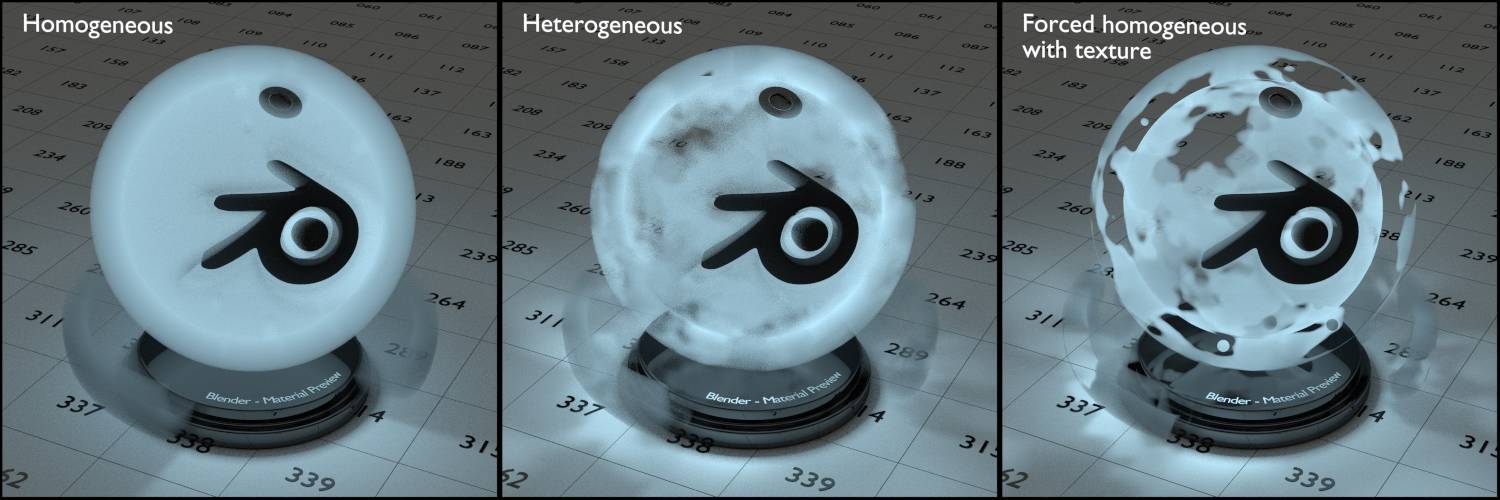
Fig. 15.2) A blueish light was placed inside the test object, which had an 80% gray volume scatter material with density 10 applied. On the left the homogeneous version. In the middle, a noise texture is plugged into the density input, resulting in a heterogeneous volume. On the right the same setup but with the homogeneous checkbox ticket. This resulted in a material that was only visible on the surface. This effect is intended by the Blender developers.
Ray Visibility
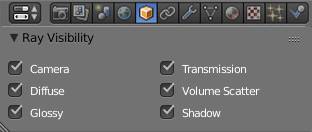
You can turn on and of the visibility of the object for different types of rays. You can do the same to the , except the world does not cast shadows, the shadow option is not displayed there.
Camera
Makes your object invisible in render, but it will still cast shadows and caustics and it will be seen in reflections. You usually turn this option off for mesh lights you want to stay invisible.
Diffuse
If you turn this off on an object, it will no longer influence global illumination. This means it will still cast shadows from lamp objects, but not influence ambient occlusion. If you disable it on a light source, it will no longer illuminate diffuse surfaces.
Glossy
Disabling this option will make your object not being seen in reflections sort of like a vampire.
Transmission
Disabling this will make the object invisible if it is behind a refractive or glass material. Its shadow however will still appear, even if it is cast behind a transmission material.
Volume Scatter
Unchecking this will make the object invisible to volume scatter materials. This option is more useful with lamps since their influence on scattered volumes is much greater than that of non-emission objects and this way they will no longer illuminate them.
Shadow
Unchecking this box will make the object not cast any shadows. Transmission caustics will still occur . It is not available for lamps, because they do not cast their own shadows.
World Settings
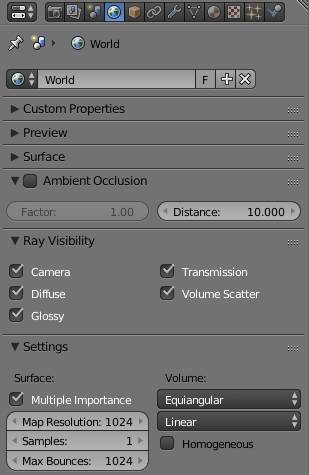
The settings for the world are very similar to the settings for objects and materials. You can also set the there (missing shadow of course). And you have settings for volume just like in the . But two things are different:
Ambient Occlusion
Turning this on will add an over your entire scene, brightening everything considerably. It gives the image a more dull and less contrasty feel.
Factor
The amount of ambient occlusion added to every object.
Distance
How far away geometry needs to be from other geometry for the ambient occlusion to lose it’s effect. You can also set this value when ambient occlusion is turned off. This will then set the distance for all in your scene.
Settings
Multiple Importance
Turning this on will enable for the world background, but with a twist. The background texture will be divided into small areas, where each area gets a weight factor assigned, according to its average brightness. This way, can be cast towards the background, with a higher probability for bright parts like a sun in an HDRi, which will greatly help clearing up noise. For backgrounds of one single solid color this setting will not yield any benefit but will make rendering slower because for each frame the map needs to be rebuilt.
Map Resolution
This is the resolution of the map used for storing the average brightness values of the background. It is always square, so you only have to set the length of one side here. Higher values in general will clear up noise faster but it comes with a performance penalty due to generating a larger map, which will also take up more RAM.
Samples
This setting will only show up when is turned on. It will determine the amount of shadow rays to cast when sample all direct or sample all indirect is turned on in the settings for branched path tracing. This way, Cycles will not sample the entire map, which even at the default resolution of 1024 x 1024 would require more than a million shadow rays.
Max Bounces
You can also limit the maximum bounces for the light emitted by the world. If the max bounce value exceeds the settings in the , the latter will be used.
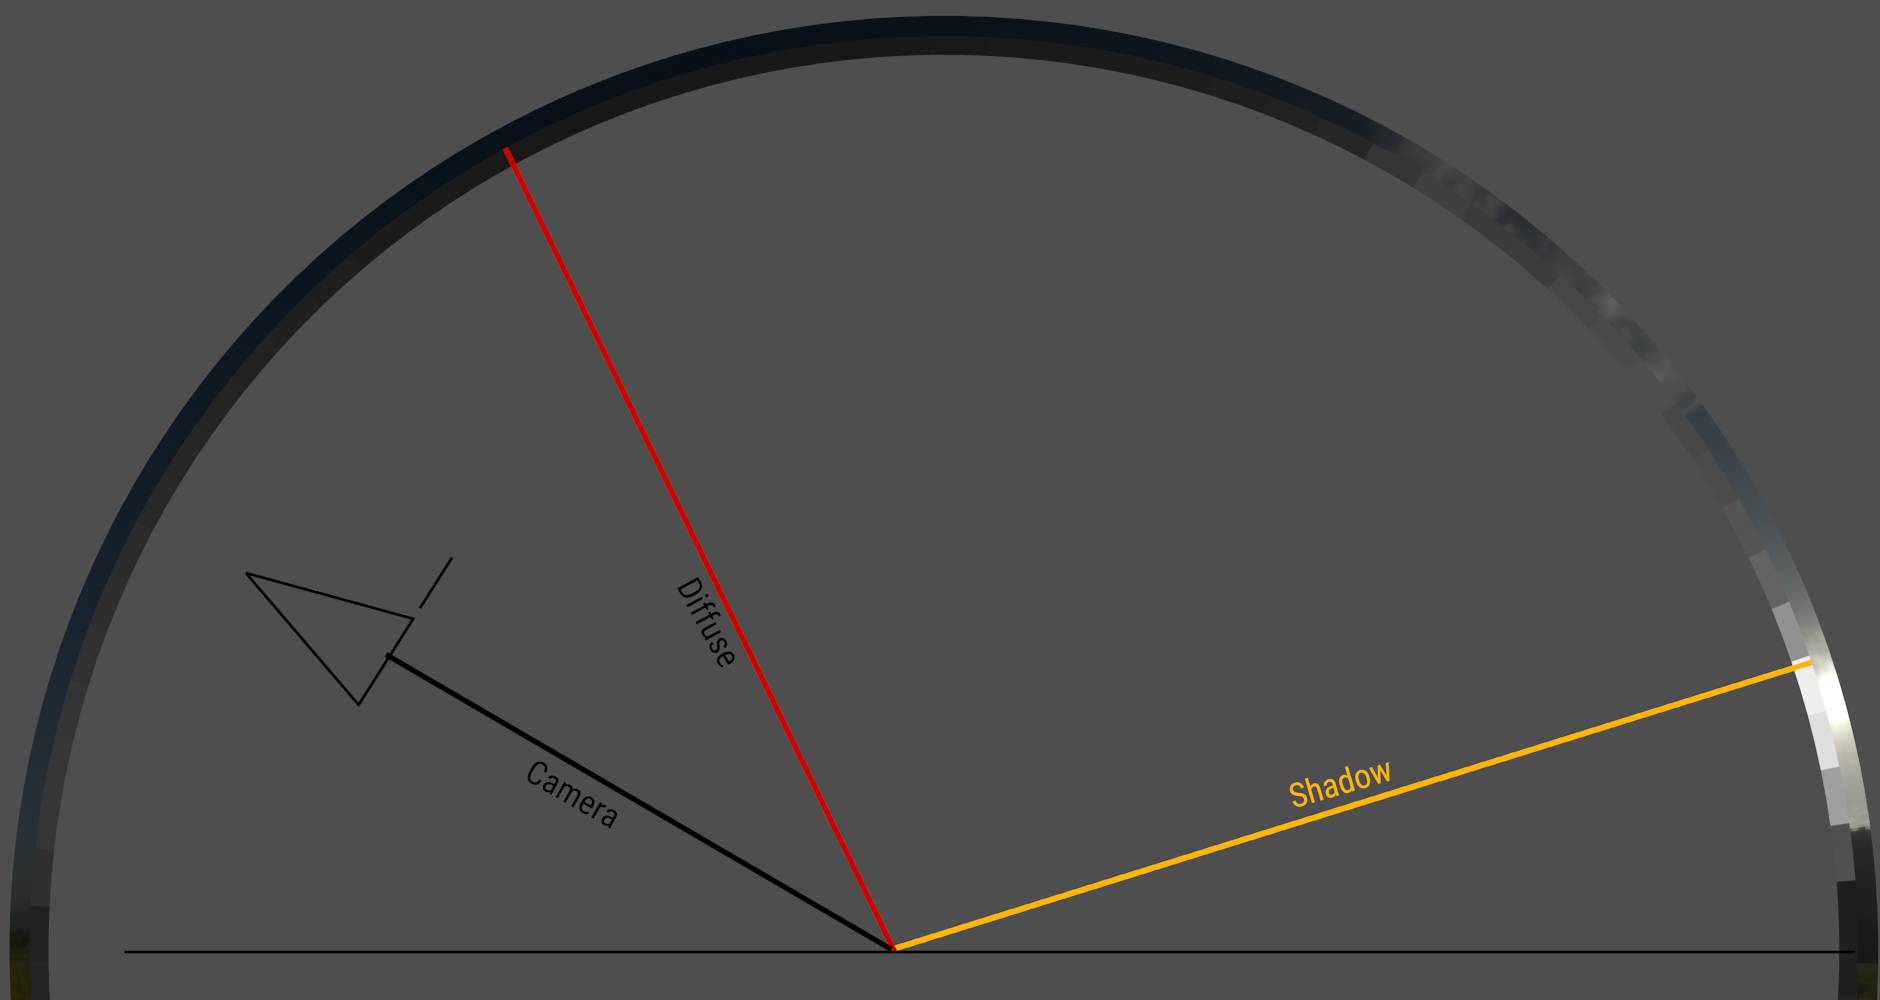
Fig. 15.3) Turn MIS in the world settings turned on allows to be cast towards bright spots on the world background. For this, a map is created that is by default more coarse than common HDRI images, saving RAM and processing time but leading to misses of the true locations of bright spots sometimes.
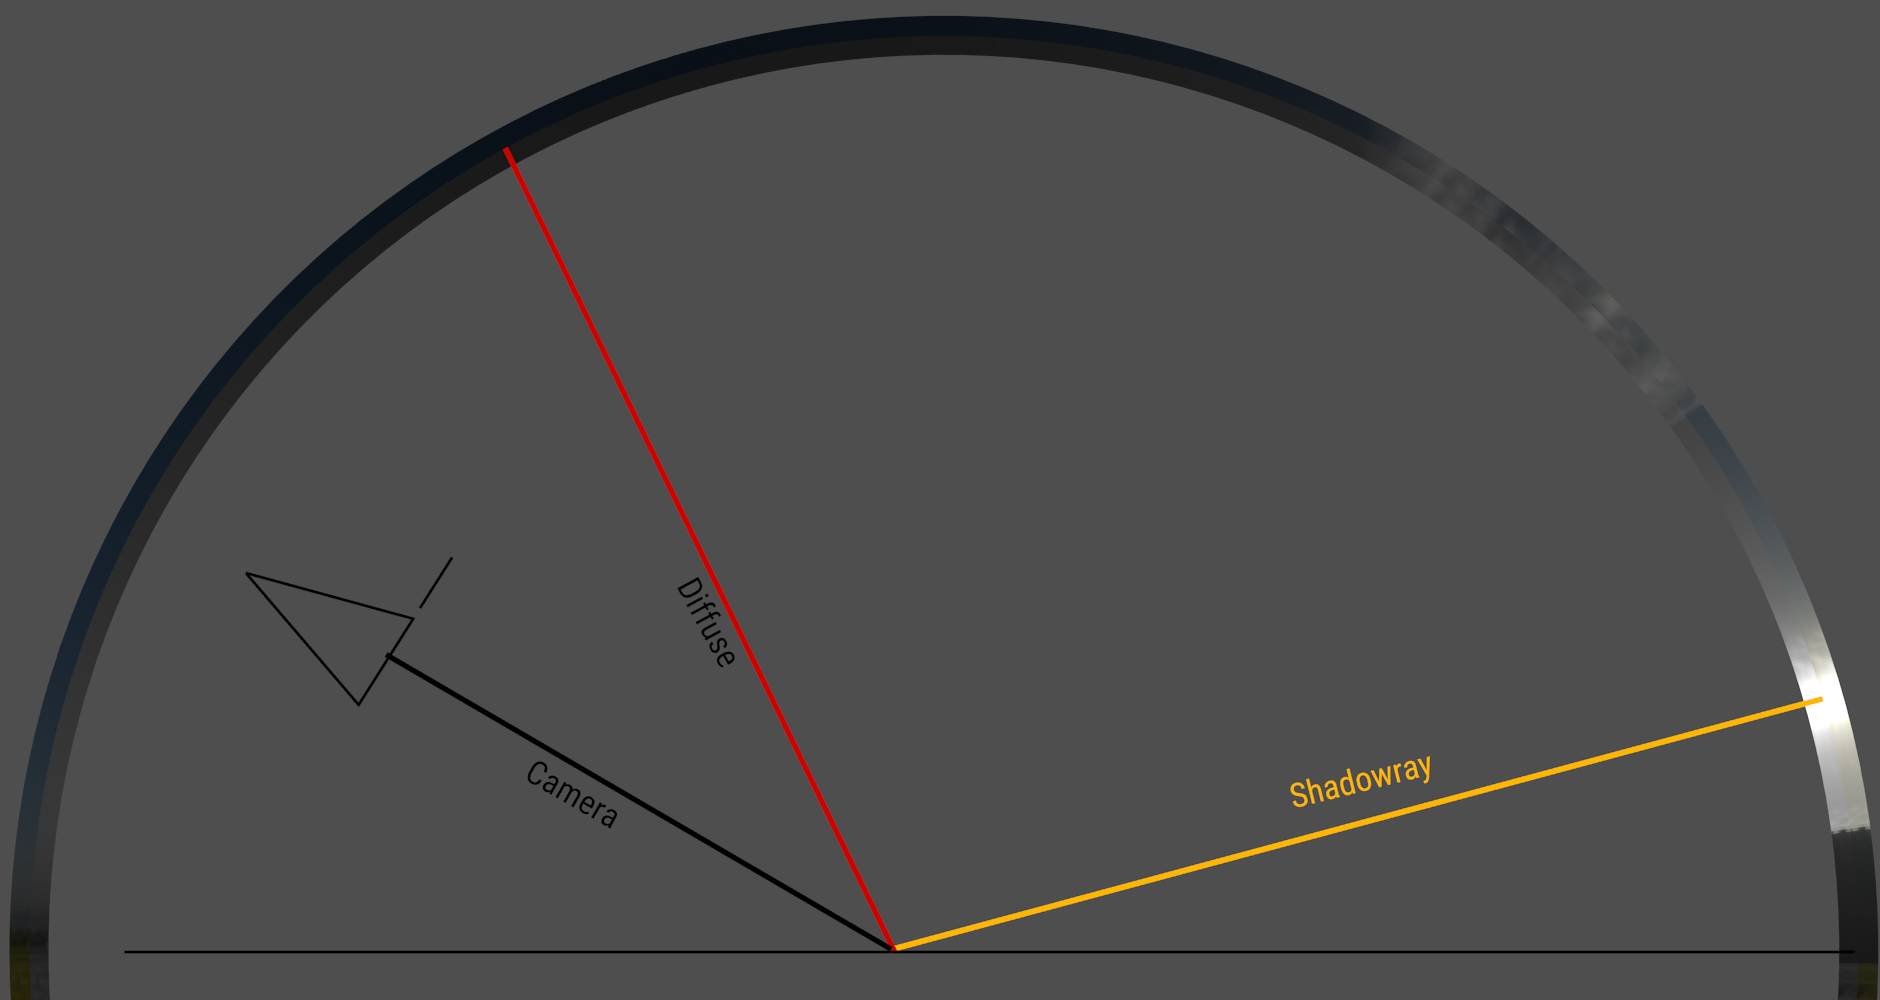
Fig. 15.4) A higher resolution for the MIS map allows the to target bright areas a lot better, but takes more RAM and a little more processing time.

Fig. 15.5) The b.p.m.s. lit only by the environment and rendered with 10 samples each. Left: MIS disabled. Right: MIS with map resolution of 2048. The entire image has less noise, but especially the area on the top of the sphere where shadow rays can easily reach the environment. Render times are 2.19 vs. 2.51 seconds.
Sometimes it may look like MIS for the world background introduces more noise even vor HDRIs, but by cranking up the map size you might encounter an entirely different picture:

Fig. 15.6) The b.p.m.s. lit only by a difficult to resolve environment HDRi with the sun close to the horizon. Caustics are enabled and it is rendered at half resolution and 50 samples to make noise more visible. Left: World MIS off. Middle: MIS turned on with map size of 256. More noise is introduced, but the shadow also becomes more pronounced. Right: Map size set to 2048, the same size as the HDRi texture. Now the floor is almost noise free and the correct lighting becomes visible. Note that the image appears brighter. While the brightness in the first 2 renders was concentrating in small fireflies, in the third the light sampling is simply more even. Even the first setup would converge to lighting similar as the third one with enough samples (see fig. 15.7). Notice that there is some noise around the sphere that does not change with MIS. It’s noise from caustics. MIS cannot help here because it only affects shadow rays.
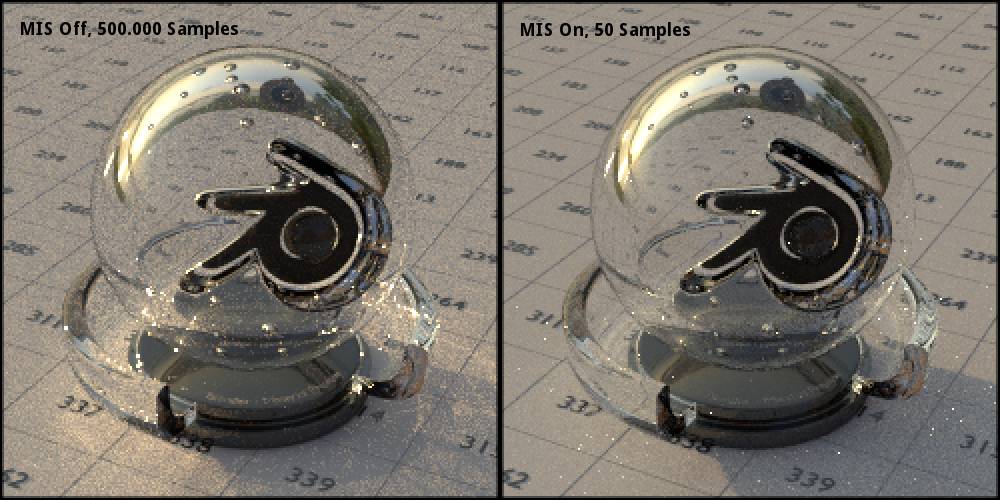
Fig. 15.7) The example from fig. 15.6 rendered at 500,000 samples with MIS turned off (left) and at 50 samples with MIS turned on and a map size of 2048 (right). On the right the image is much clearer at 1/10,000th of samples and render time. But you don’t get visible caustics at 50 samples, just fireflies. Turning them off would remove the fireflies.
Scene Settings
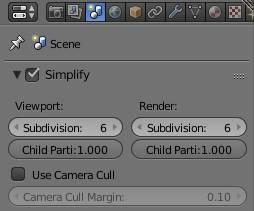
There is only one setting in the scene tab of the properties editor that is Cycles-specific. It can be found in the Simplify panel where options to reduce the complexity of a scene for viewport and render reside:
Use Camera Cull
Extremely big scenes might not fit into memory and rays bouncing around endlessly in parts of the scene not visible to the camera contribute to global illumination, but are expensive to compute. Camera cull will not render objects outside of the camera’s field of view. This reduced RAM requirements and speeds up the render a little. It is especially useful when using particle systems to scatter a huge amount of objects around the scene like for example in a grass field.
Camera cull in addition has to be individually enabled for every object in the scene you want to disappear. You can find the checkbox in the Cycles Settings -panel in the object tab of the properties editor.
Camera Cull Margin
Adds an extra margin to the camera’s field of view before objects are removed from the scene. If you render an animation and encounter flickering from objects popping into the scene and casting their shadow, increase this.

