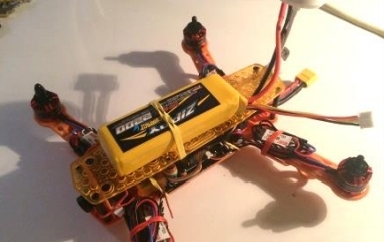
In this section, you will finish the final touches of your Quadcopter. The last step is setting up the FPV. It’s important that you test everything to make sure it’s working before your maiden flight. Once everything is finalized, you are ready to fly!
Step One: The first thing to do is take your propellers off. If the propellers are on the motors while you’re testing the Quadcopter, the motors could start spinning and injure you. I highly recommend you remove the propellers and keep them off until you are completely setup and ready to fly.
Once the props are off, plug in your battery and power up the flight controller. It is recommended that you update to the latest version of your flight controller. I didn’t on mine because I don’t have the cable to plug it in. But, I’ve been flying it for a while now, and I haven’t experienced any issues without updating.
Step Two: Once you’re into the flight controller with the battery plugged in, scroll through the menu and calibrate the sensor. It should be under something like, ‘Sensor Calibration’ (make sure the Quad is on a level surface before calibrating). After the Quadcopter is calibrated, you can adjust any other settings you’d like to. But, at this point, your Quad should basically be ready to fly. If for some reason it isn’t, contact me or google; “how to setup (your specific flight controller).”
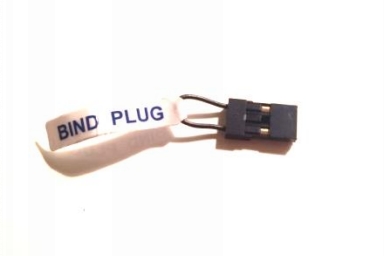
Step Three: Now it’s time to bind your transmitter to your Quadcopter. Take the bind plug and stick it into one of the receiver slots (a bind plug is a plug with one wire coming out the top and going back into the bottom of the plug. It’s really small). Then plug the battery into the Quadcopter. You should see a flashing light coming from the receiver.
Next, turn your transmitter on into bind mode. This is usually done by holding the trainer switch while turning the transmitter on. Stay in bind mode until the transmitter binds with the receiver (the flashing light should quit and become steady). Once you’ve connected to the Quadcopter, you shouldn’t ever have to bind it again.
With the Quadcopter and transmitter connected and both powered on, arm the Quadcopter (usually done by pushing the rudder all the way right. Disarm it by pushing the rudder all the way left), and give it some throttle without the propellers on. Ensure that the motors and everything else are working properly.
Step Four: With the Quadcopter disarmed and grounded, go to the ‘motor layout’ section in the flight controller menu. This should give you a diagram of which direction the motors are programmed to spin. Two motors will spin one way while the other two spin opposite. This helps stabilize the Quadcopter during flight.
Note which ways the motors are supposed to spin, and check to see if the motors spin the correct way. If they don’t, you will have to switch two of the wires from the motor to the ESC. Take the positive and negative wires that come from the motor and switch them with the wires from the ESC. This will reverse the direction of the motor.
Side note: After flying a few times, it may be necessary to adjust some settings. Also, if you are having a hard time controlling the Quadcopter because it’s moving too fast and out of control, you can lower the dual rates on your transmitter. I did this and it helped a ton!
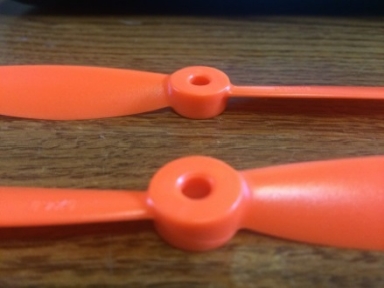
Step Five: Now that the motors are spinning correctly and everything seems to be operating properly, put the props on! There are specific propellers for each motor. Two props should be different from the other two. Look at one motor and note which way it spins.
Take a propeller and place it on the motor. The propeller needs to be angled upwards as the motor spins. In the picture below, the top propeller is meant to spin clockwise, and the bottom prop counter-clockwise. Do this for each motor and be sure to tighten the propellers down securely.
It is now time to truly test your Quadcopter! Take it outside for a test flight. Be extra cautious on the maiden flight. Look for any issues with the Quadcopter and correct them. Otherwise you’re now done and ready to have several adventures with your very own self-made Quadcopter. Happy flying!

