This is where your Quadcopter turns into a drone. You will need a headset, camera, transmitter, receiver, and a few miscellaneous parts. For my setup, I bought a package deal that comes with everything on Hobby king for $100. It claims a range of up to 1500 km (almost one mile), without any interference. For the price, this is a really good deal.
Step One: Assemble the video ground station (the headset). Whatever brand or type of FPV headset you get, it may require some assembly. If you get Fat Sharks, there isn’t much you need to do except plugging in wires. However, my setup required more assembly, here’s what I did.
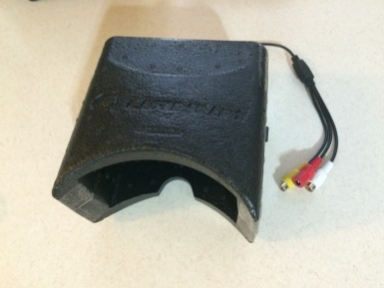
First, I had to glue/tape foam pieces on and around the video screen. Then I had to plug in cords from the receiver to the video. Next, I put on Velcro for a battery location. Lastly, I secured everything to the headset to make it portable. One thing I don’t like is how heavy my headset is. With everything attached, it probably weighs about five pounds!
Step Two: Connect everything else together. Take the camera, plug in the cord to the transmitter, and then screw on the transmitter antenna. It’s extremely important that you don’t power on the receiver or transmitter without the antennas on. It’s like an exhaust pipe, without it, the receiver or transmitter would fry up and get damaged.
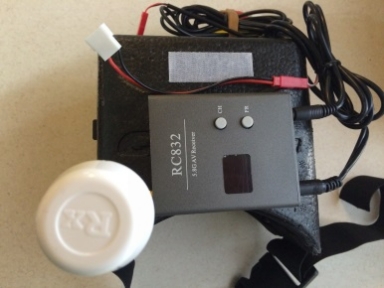
After your headset assembly is done, screw on the antenna for the receiver. Now, plug in a battery to the camera and headset to power everything up.
In order to receive live video from the camera, both the transmitter and receiver need to be on the same channel. I won’t go in depth on the best channel to use, but, the lower the frequency means the farther the range. 5.8 Ghz is the most common frequency for FPV, and there are usually several sub channels that you can tune to. For more information on FPV, look at my webpage,
Once everything is connected, powered on, and tuned to the same channel, you should see live video on your headset. If not, check for loose wires and anything that appears out of the ordinary.
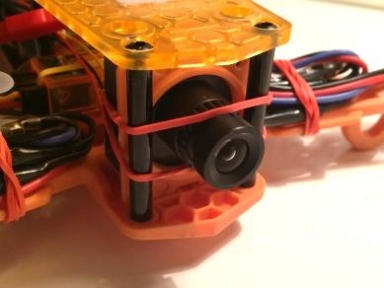
Step Three: Attach the FPV camera. Now you need to place your FPV camera on your Quadcopter. I placed mine in the very front, facing straight forward. If you plan on fast FPV racing, then I suggest you angle your camera upwards. This way you can still see where you’re going when the Quadcopter is at a steep forward angle.
Now you are completely finished with your Quadcopter drone. It’s an exciting and different experience when flying FPV. It may take some getting accustomed to. Here are some tips to help you fly well.
- Know your aircraft – I highly recommend flying your Quadcopter regularly at first. Figure out how it likes to fly, especially speed. Master your Quadcopter first and then try out the FPV.
- Fly the Quad into the air first, and then pull the goggles down over your eyes to fly FPV.
- Always move forward, don’t let your Quadcopter fly backwards while in FPV. It’s hard to know your quadcopter’s orientation through FPV.
- Don’t fly out of signal range. You can do a range check to see exactly how far away you can fly FPV. If your video gets blurry or starts cutting out, fly closer to home base.