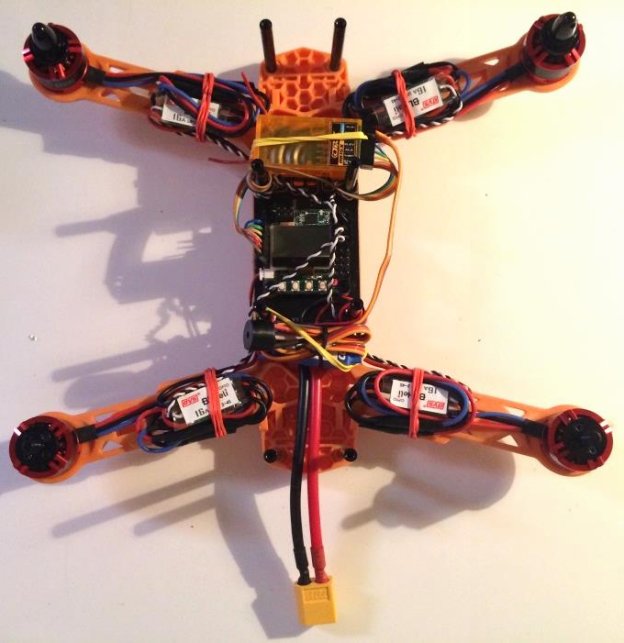
Now that everything essential is on board, it’s time to plug everything together and tie everything down. In this section you’ll need data wires and zip ties, Velcro, and/or rubber bands.
Step One: Check to make sure your motors, ESC’s, battery plug, and BEC are properly connected or soldered to the PDB. If you notice a loose connection, take the time to re-solder it, you will be thankful in the end.
Step Two: Plug in each of the signal wires from the ESC’s into the flight controller from top to bottom in this order; refer to the diagram below. The motor one signal plug from the ESC (top left) plugs into the M1 slot on the right side of the flight controller.
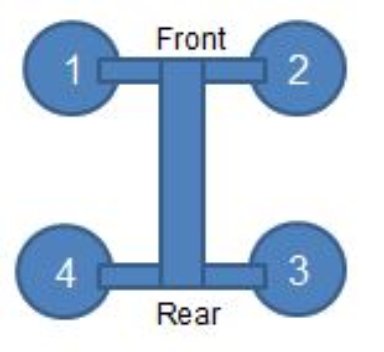
You can also see in the picture below how the ESC’s plug into the flight controller. Start with the top left, then top right, bottom right, and bottom left. They plug into the flight controller from top to bottom on the right side. Make sure you plug them in correctly with the negative (black) wire towards the outside, the power (red) wire in the middle (only if you have a BEC in your ESC), and the signal (white) wire towards the middle of the flight controller.
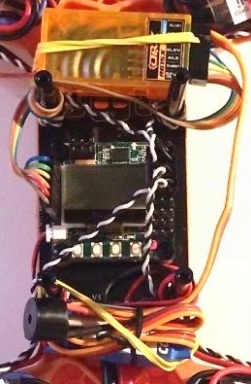
Step Three: Now you’ll need to connect the flight controller and the receiver together. They have nifty wiring now that saves time, space, and money! It’s a data wire with nine wires stuck together (shown below), perfect for Quadcopters. It comes with 7 plugs; the first plug carries the power and throttle signal, while the other six are basic data wires that don’t need to be individually powered!
Plug in the throttle data plug into the flight controller on the left side. Place the negative wire at the bottom, the power (red) wire above that, and the throttle signal wire above that. Then simply plug in three more single data wires right next to the throttle/power plug, and tear off the remaining wires that you don’t need from the group. These data wires are for rudder, ailerons, and elevator.

Once these are plugged into the flight controller, go ahead and plug the other ends into the receiver. Start with the throttle data plug and plug it into the throttle slot on the receiver. The negative (brown) wire should be facing down, the power (red) wire in the middle pin, and the throttle signal (pink) wire in the top slot. Then plug in the next three single data wires in order on the top slots. Yellow in the aileron, green in the elevator, and blue in the rudder.
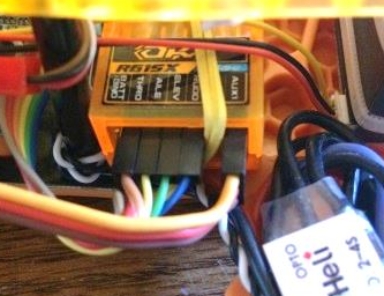
The last thing to check is if you are using a separate BEC. If you are, then that needs to be plugged into the receiver to power the receiver and flight controller. The negative wire plugs in the bottom, the power wire in the middle, and the signal wire in the top. It does not matter which slot the BEC plugs into. I have my BEC plugged into the AUX slot. If you’re not using a separate BEC, then the Rx and FC are powered by the BEC’s in your ESC’s through the signal wire that plugs into the flight controller.
Step Four: Now that everything is plugged in, connected, and/or soldered, it’s time to strap everything down. Make sure that there aren’t any loose wires, connections, electronics, etc. Everything needs to be secure and away from the propellers when running. It’s important that everything on the Quadcopter is properly secured down so that nothing comes apart or is damaged by the propellers.