The barcode interface is super smart; it understands the operation to be performed based on the barcode scanned. It identifies the reception or delivery operation and opens that operation quickly in edit mode, you just need to print the Picking Operation for all the incoming shipment and delivery orders: the reports are available under the Print option.
The internal transfer can be created directly from the barcode interface screen; you just need to scan the source and destination locations and products to be transferred, it will automatically create an internal transfer and you will be redirected to that screen. The rest of the process will remain the same to scan the product and serial or lot numbers.
Let's set up barcode on the location before we proceed for an internal transfer of products using the barcode interface:
- Go to the list of locations through Configuration | Warehouse Management | Locations. It is advisable to set the barcode for all the locations, so that you can transfer the stock between them, or you can choose a few locations and set the barcode on those for which you would like to allow the transfer using the barcode interface:

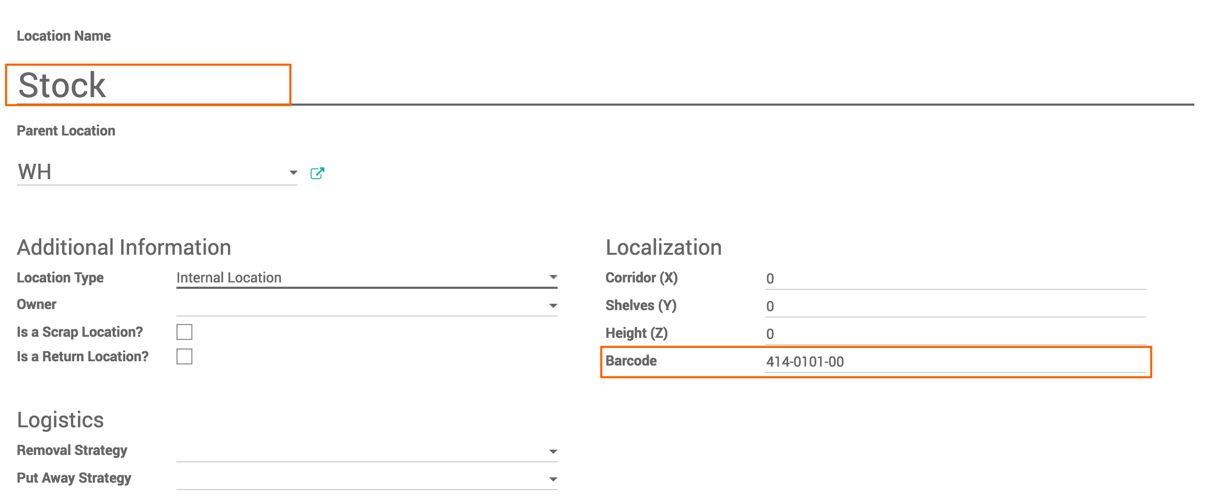
- Open the form view of location and set the barcode on it, the number for the location has to be started with the specific digits according to the Barcode Nomenclatures. A single screen scans the different barcodes; there should be some coding system to identify which operation has been initiated. The Barcode Nomenclatures defines those coding systems, either you can use existing or you can change those at your convenience.
The Barcode Nomenclatures can be accessed from Inventory | Configuration | Barcode Nomenclatures, after entering into the debug mode:

This was the reason I have entered the location code 414-0101-00, which actually starts with 414.
I will not go into much detail, I will let you explore this by yourself, it is easier to identify what could be the code that you should use for Serial, Lot, Location, and more.

