The Raspberry Pi comes in a variety of forms, all of which follow the same basic idea. They are in essence caseless computers, and contain all the necessary circuits, hook-ups, and other components to control electronic devices or perform the functions you’d expect from devices like tablets and computers.
Because it is only the circuit board portion of the computer, you will need to invest in some additional hardware and supplies for most projects. Exactly what you’ll need will depend on exactly what it is you’re hoping to accomplish with your Pi. Many of the components will be things you may have sitting around your home already, left over from previous desktops or other items, while others will be more specialized and will most likely need to be sought out in stores.
Of course, the main thing you’ll need for a Pi-based project is the Raspberry Pi computer itself. You can find these in a variety of forms. The newest and most comprehensive version is the Raspberry Pi 3, which is in their line of full-size computers. It gives you an HDMI output for the monitor, a microUSB port for charging, four standard USB ports for peripherals, a general in/out, a MicroSD slot for memory, and standard Wi-Fi and Bluetooth compatibility.
For most people, the Pi 3 is going to be your best option. At $35 a computer, it’s the most expensive of the offerings but is still very affordable, especially compared to buying pre-made versions of the products you can complete with it, and gives you the most flexibility and versatility in terms of the kind of projects it can be utilized in.
There are also smaller versions of the computer available if you’re planning on making something more compact, or simply something that won’t require the full hookup options on the Pi 3. The Raspberry Pi Model A+ is a slightly smaller and streamlined option. It only has a single USB port, but the rest of its features are the same and it costs less, too, at around $20 a computer. For even smaller projects, you could also use a Raspberry Pi Zero, which is the company’s smallest offering, around the size of a battery. Though you won’t get any USB ports, making it tricky to use in tandem with other devices, it also only costs around $5.
There have been several other models of the Raspberry Pi released since the product first hit the market back in 2012. Older versions will typically have a slightly slower processing speed and fewer features and input/output options than the most recent iterations, but may be just as viable for your purposes, depending on the kind of project that you’re making. You can also find starter packs, kits, and bulk packs featuring all of the different computers that can offer savings on the individual components, if all the included pieces are things you’ll be using anyway.
There are a wide array of peripheral device options that can be used with a Pi computer, some of which are offered directly by the Raspberry Pi Foundation and others of which are made and sold by third parties. A few of these add-ons are discussed in more detail later on in the book.
The rest of this chapter will be dedicated to the other hardware that the majority of users will find necessary as they’re embarking on their first Pi project. As mentioned above, you won’t need all of these for every situation, but it can at least give you an idea of what to expect as you’re planning out your budget.
Monitor
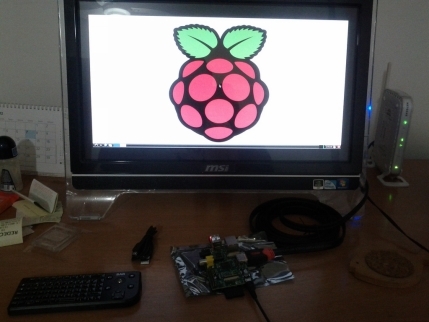
Before you can make use of the Pi computer, you’ll need to have some kind of interface that lets you interact with its various programs and features. You can access the Pi remotely from another computer if you’d like (a process explained in detail in chapter 4) but for the majority of projects, a dedicated screen for the Pi will be key. Even if you will be using the Pi remotely eventually, you’ll find it much easier to get acquainted with the Pi and learn everything it can do with a dedicated monitor first.
You can use any display that has an HDMI port with your Pi. This includes most modern desktop monitors and televisions, and these are the two most popular screen choices. You can also purchase a touchscreen interface that works with all current Pi iterations if this is better-suited to your project, as well as a variety of more compact displays specifically designed for use with computers like the Pi if you don’t want a bulky display.
Keyboard and mouse

To actually control your Pi, you will need to have a keyboard and mouse that can be connected to the computer through some means. Most people utilize a USB keyboard and mouse, but you can also use Bluetooth devices if you don’t want to take up two USB slots for basic controls (or if you’re using a Pi Model A+ or Pi Zero that don’t have two USB slots).
Again, even if your ultimate plan is to use the Pi remotely, or to control it using a touchscreen interface, you’ll want to have a keyboard and mouse to control it during the initial set-up and as you’re getting used to the functions and features the Pi has to offer.
MicroSD card
There is no hard-drive or memory included in a Raspberry Pi, but it does have a designated slot for a MicroSD card which can be loaded up with the operating system and any other files you want to store directly on the Pi. For most projects, you’ll want to have a card with a capacity of at least 8GB.
If you buy a blank SD card for your Pi, you’ll need to download the operating system onto it manually on your computer. Depending on the card and your project, it may also need to be formatted to function correctly in a Pi. If your computer doesn’t have a MicroSD reader, you can get an external SD reader for right around $10. Alternatively, you can purchase SD cards pre-loaded with the basic operating systems; there’s more information on that in the next chapter.
Power supply
The power for a Raspberry Pi is plugged in using a micro USB port, similar in shape and size to the charging port on many cell phones. The amount of power you’ll need to run your Pi will depend on which version of it you have; for a Pi 3, you will want to use a power supply that provides at least 2.5A. Smaller versions of the computer will require less power. Beyond this requirement, you can use any charger that will fit into a micro USB port; re-purposing an old phone charger is often the most economical choice, if it provides enough power for the device.
Case
Strictly speaking, a case is not necessary to the function of your Raspberry Pi. You can use the device in the naked form it’s in when it comes out of the box, if you’d like. The only potential impact to its functionality is the fact that it’s much more likely to take damage outside a case, but if this isn’t a concern, the case is technically an optional accessory.
There are a variety of different forms the case of your Pi can take. You can purchase cases designed specifically for certain versions of the Pi, or use in conjunction with various peripheral devices. You can also repurpose a wide range of different objects as cases for your Pi, as specific projects dictate. So long as it fits the internal components of your computer set-up, you can be incredibly creative with the kind of case you use.

