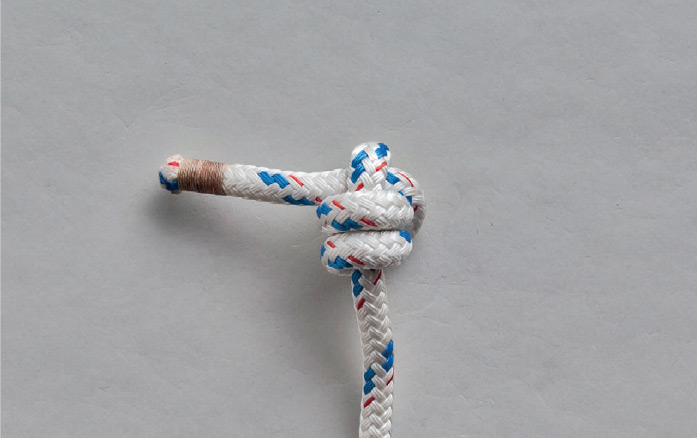
Stopper knots: “true” knots, in which the rope is tied to itself to create a structure—usually at an end—that prevents it from escaping through a narrow opening, adds weight that allows it to be thrown, or serves as a handhold. See .

Stopper knots: “true” knots, in which the rope is tied to itself to create a structure—usually at an end—that prevents it from escaping through a narrow opening, adds weight that allows it to be thrown, or serves as a handhold. See .
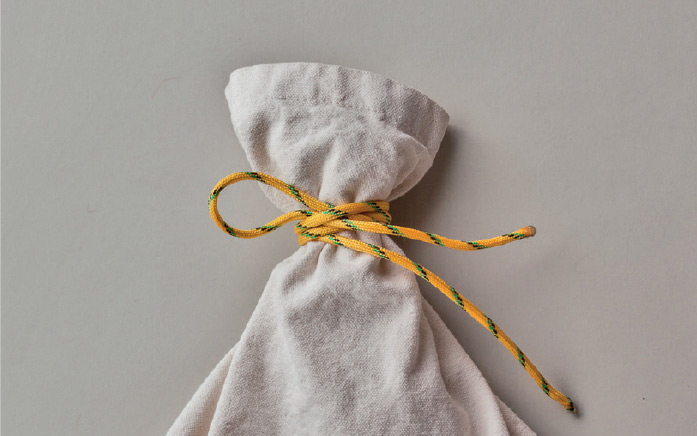
Binding knots: true knots in which the rope is tied to itself to tightly enclose or bind together another object or objects. See .
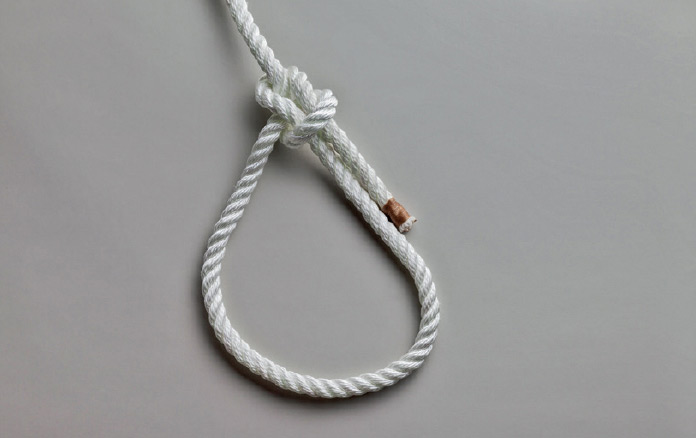
Loop knots: true knots in which the rope is tied to itself to form a closed loop that can be placed around an object (like a post), or to which an object can be connected (like a carabiner). Loop knots may fit loosely or tightly around the object and the size of the loop may be adjustable (known as sliding loops or nooses) or fixed. See .
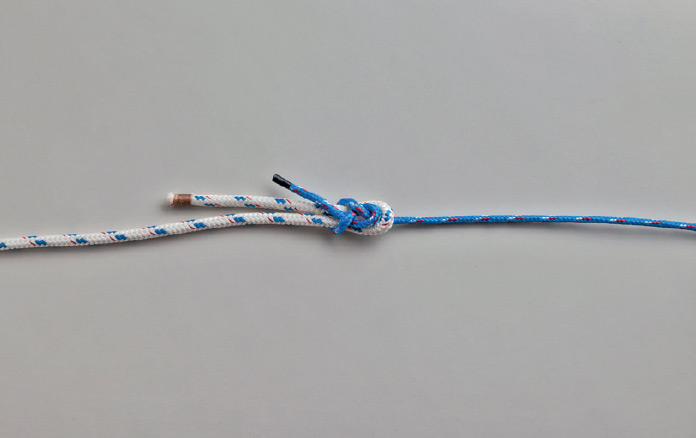
Bends: rope structures that tie the ends of two ropes together. Not true knots. See .
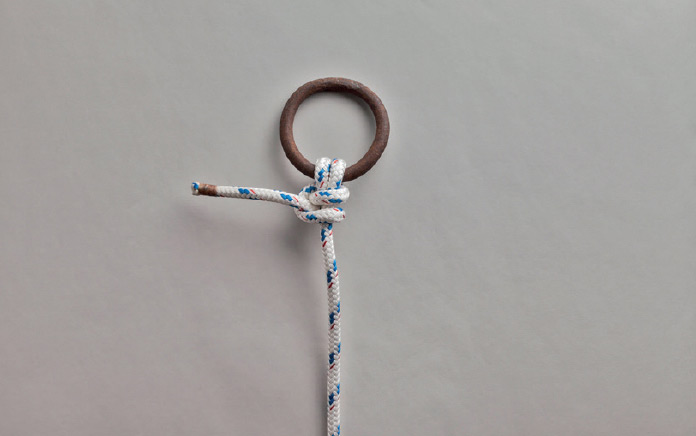
Hitches: rope structures that tie a rope to an object such as a ring or a post, usually at one end. (The other end is generally tied to something else, like a boat or a tarp.) Hitches are not true knots, as they are tied to the object and depend upon it for part of their structure, whereas a loop knot is freestanding and independent of the object it surrounds. See .
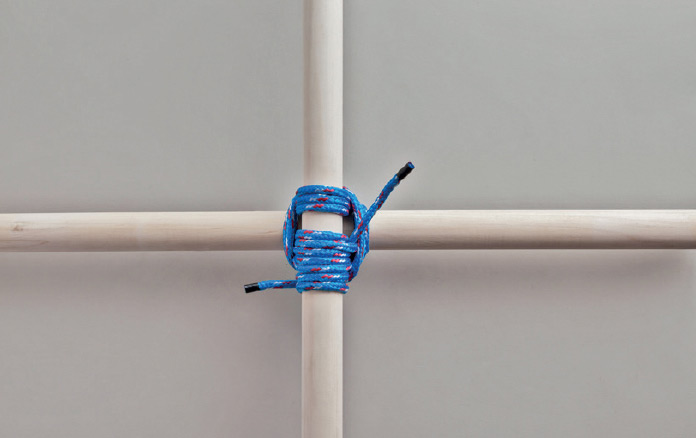
Lashings: considered by some ropeworkers to be in a special class of binding knots, these rope structures generally incorporate numerous round turns or wraps, to tie two or more poles tightly together when building a structure. See .
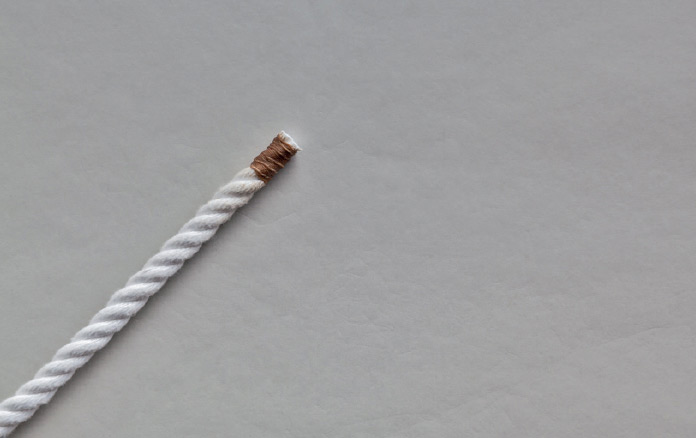
Whipping: a tight wrapping of heavy thread or small cord around the end of a rope, to prevent it from unraveling. A whipping is not a knot, even in the general sense. See .
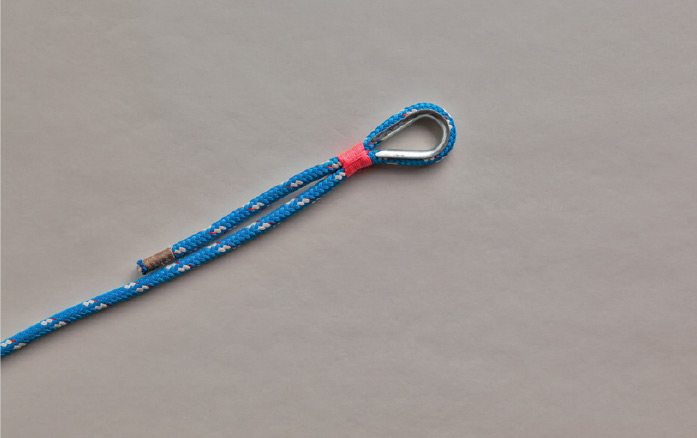
Seizing: a tight wrapping of heavy thread or small cord around two sections of rope, used to join two ropes end-to-end, or to form an eye (a permanent loop) in the end or in a bight of a single rope. Like whippings, seizings are not knots. See .
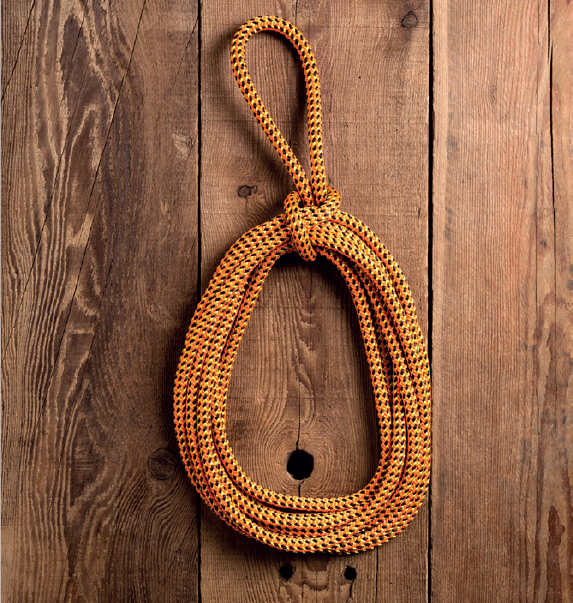
Coil: an arrangement of rope that keeps it orderly and prevents it from tangling during storage or transportation. As a measure of basic rope care, coils are covered in this part of the book, under .
Splice: a structure in which the strands of a rope are separated and then woven together in order to: terminate the end of a rope to keep it from unraveling; form an eye in the end of a rope; or join two ropes end-to-end. A splice is not a knot: it is not tied, and it is considered permanent and never to be undone. Splices are not covered in this book.
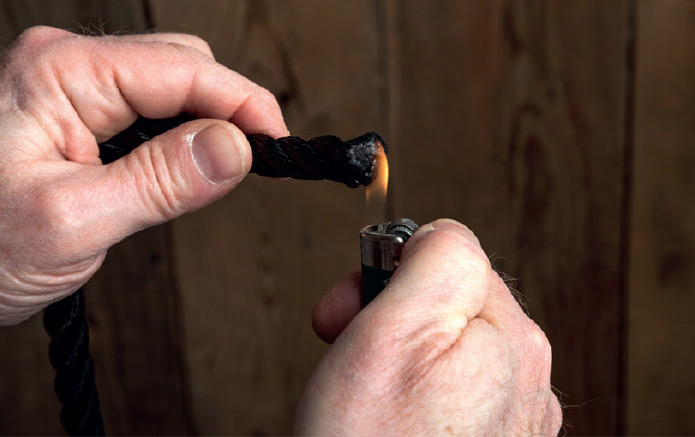
When using a cigarette lighter or a match to melt a rope’s end, beware of dripping molten plastic onto bare skin or clothing
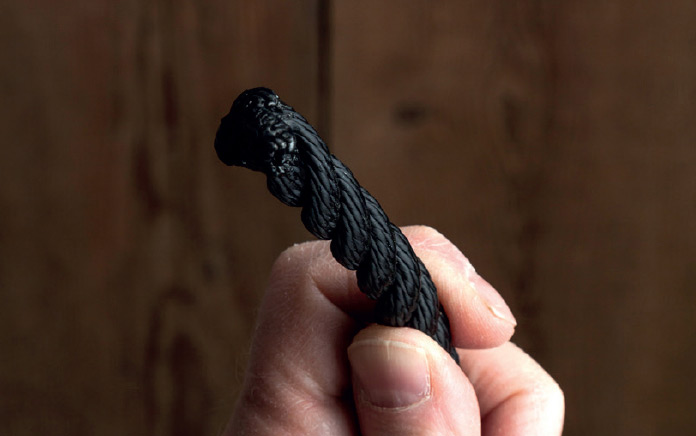
Melting a rope’s end is not pretty, but it’s an effective way to prevent fraying
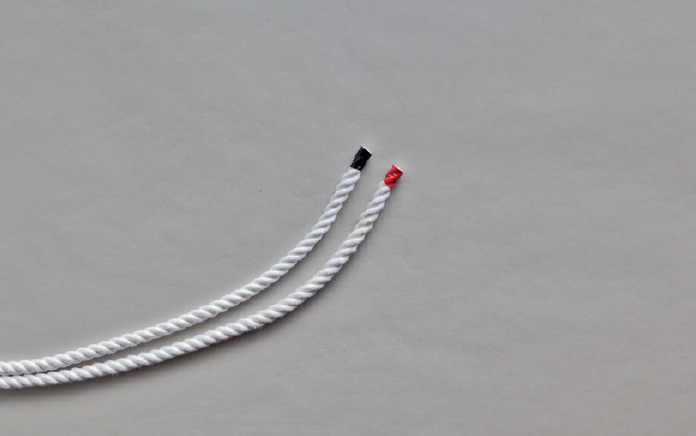
Electrical tape is an effective, if not quite permanent, method to prevent fraying
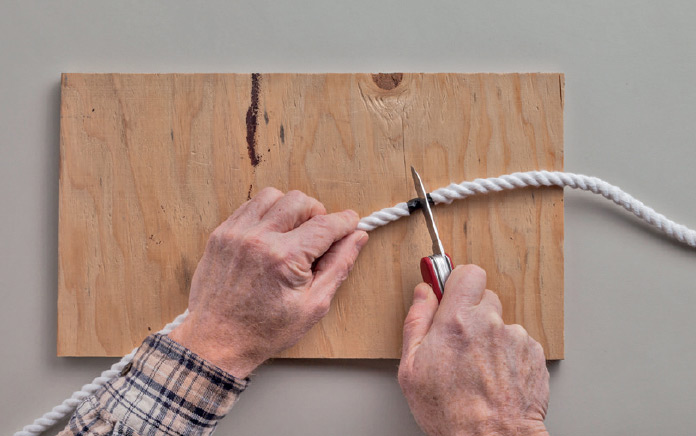
Wrap tape around the rope and cut right through it to secure both new ends against fraying
Melting is an option only for synthetic rope. If the rope is not melt-cut with a heated blade, as described above, the fibers of a cut rope may be melted with a cigarette lighter or other flame (see above). Some synthetic ropes will burn and melt, while others just melt. If the rope catches fire, blow it out before applying the flame again. Beware of dripping the molten plastic onto your skin or clothing.
A melted end will never unravel (although the heat of melting makes the fibers on cheap polypropylene rope so brittle that the end may break off after short usage). On the downside, a melted end is ugly, and it often has sharp points that inconveniently catch on the rope’s fibers when tying knots or coiling. Those points can also occasionally cause skin cuts.
Plastic electrical tape is not as permanent an end-sealer as a whipping, but it works pretty well and is easily replaced. Wrap it two or three times around the rope and cut directly through it, so that both ends are secured in a single operation (see above). For large-diameter rope, cover a longer surface of the rope and make additional wraps.
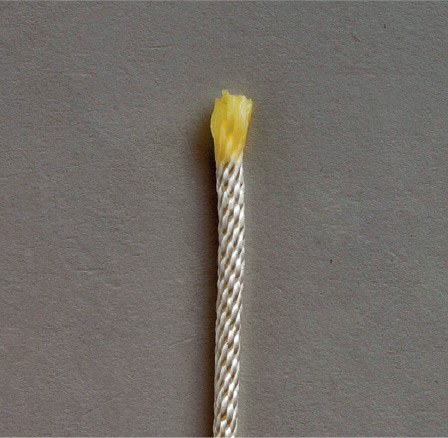
Dipping a rope’s end in carpenter’s glue will prevent fraying
Masking tape may be used as a temporary measure only: for example, when cutting lengths at the store, or when cutting just prior to whipping the ends.
Twine or other small stuff can also be used as a strictly temporary measure to prevent fraying. Tie around the rope on each side of where you will cut. You can’t readily tie a knot with a rope whose ends are secured in this manner, but it suffices to keep the ends unfrayed while a whipping is applied.
Rope ends can also be sealed with heat-shrink tubing similar to that used for electrical connections. There are liquid “whipping” solutions into which one dips a rope end. After they dry, these are quite permanent, but they do not work with all types of rope. Dipped finishes can also be applied with polyvinyl acetate (PVA, sold as “white glue” and yellow carpenter’s glue) and latex-based glues (see above).
A stopper knot tied in the end of a rope will also prevent fraying. This is often the only practical approach for jute twine or other natural cordage that’s too small to whip or tape. It’s not a viable permanent solution for good rope, but it has its place as an expedient.
If a rope will move relative to a hard rough surface—in other words, if it will rub—it must be protected from abrasion or chafe. Climbers habitually place chafing gear on top ropes where they pass over sharp rock edges. If specialty gear is not available, a patch of carpeting or a thick piece of cloth will suffice, but it must be secured well to prevent shifting and loss.
Where the same, relatively short section of a rope will be subjected to abrasion repeatedly (as on a dedicated dockline for a boat in its regular berth), then it is often practical to protect only that section with a piece of plastic tubing or hose (see right). This can be held in place attractively with heavy whippings on both ends, or with duct tape if appearance is not a priority. If the rope can’t be pushed through a tight-fitting piece of tubing, then the tubing can be split lengthwise and sewn right onto the rope with a heavy-duty sailmaker’s needle and palm. A third option, usually employed when the rope will remain stationary and something else will rub against it (usually another rope), is : a tight wrapping of heavy whipping thread around the section of rope in question.
If different ropes will be used regularly against a rough edge that would cause rapid abrasion (as in a canal lock or a gas dock, where different boats are always tying up), then the edge itself may be protected with a patch of leather, a sheet of plastic, or a smoothly curved piece of sheet metal fastened permanently in place (see below).
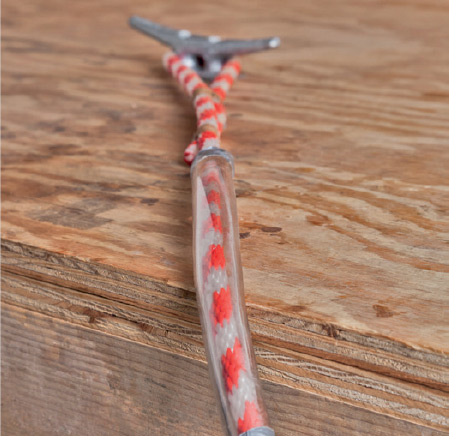
Plastic hose may be applied to a section of rope that will be frequently subject to abrasion
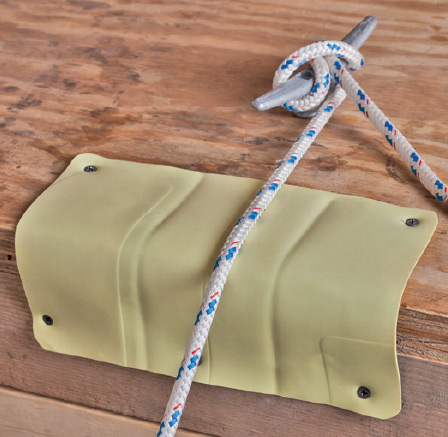
Alternately, a hard edge can be protected with a sheet of plastic, metal, or leather to prevent chafe
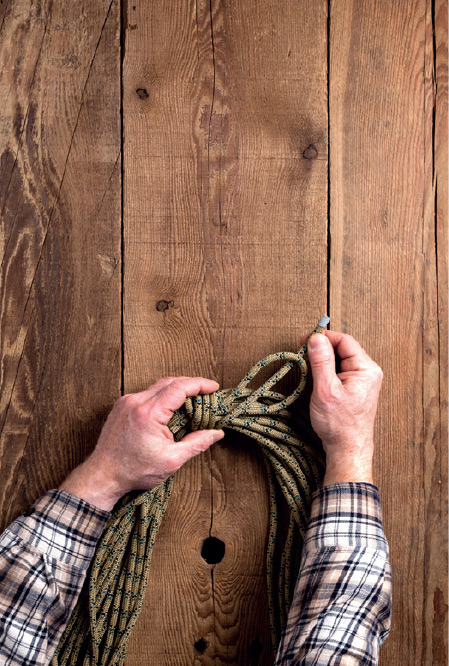
4. Make at least three round turns around the bight and the coils, then pass the working end through the bight.
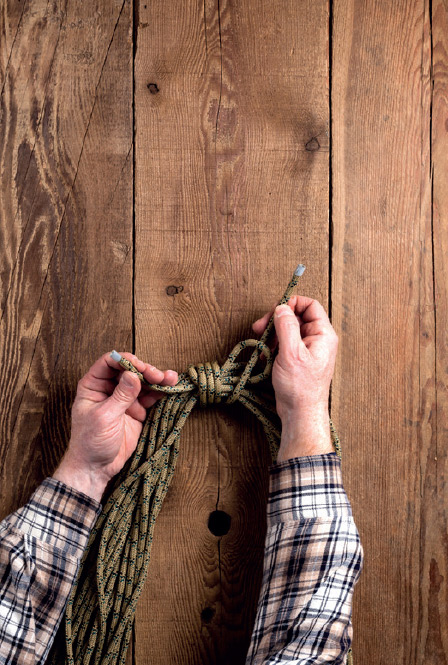
5. Ready to tighten.
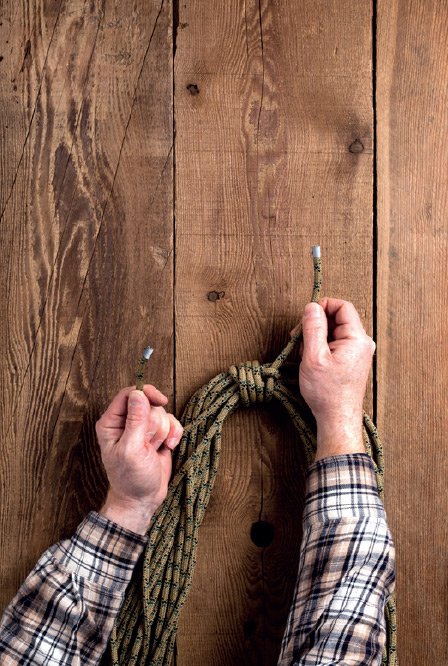
6. Pull the free end of the bight so that the bight captures the working end.
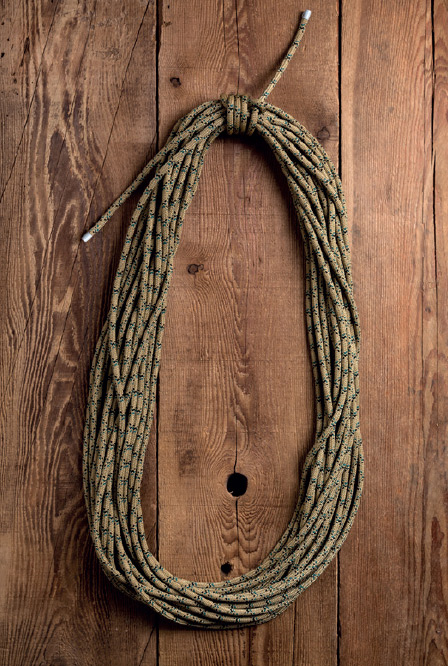
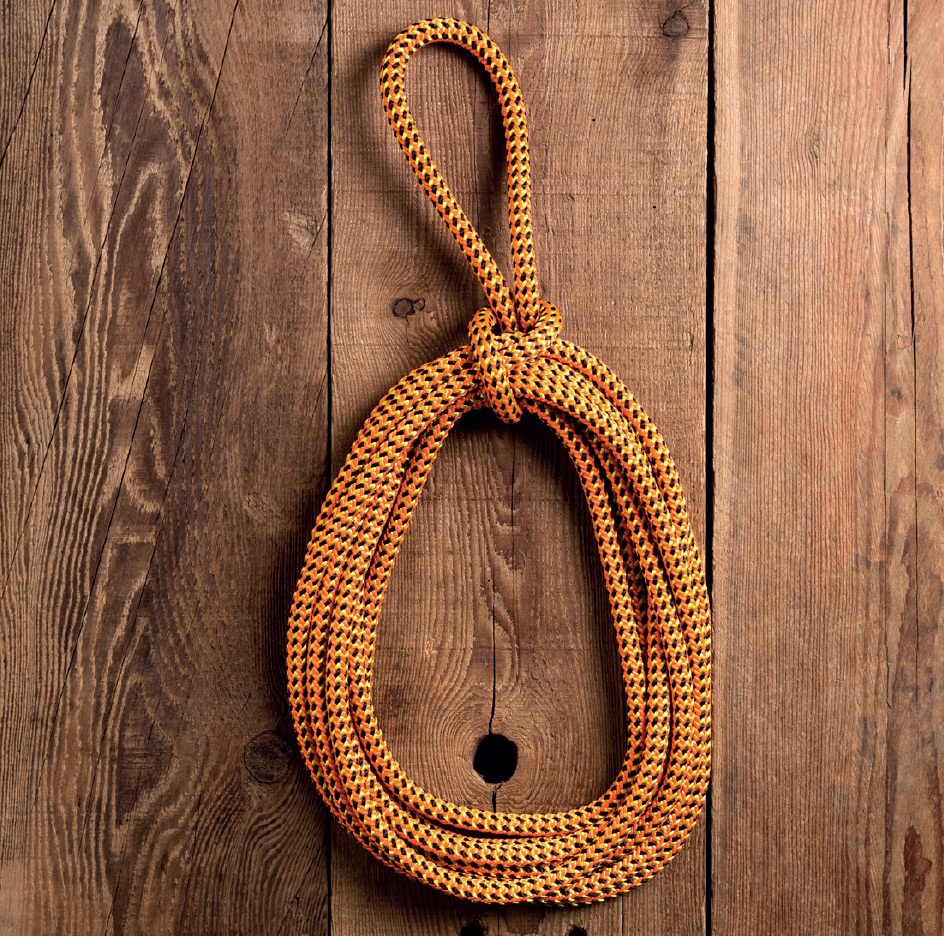
7. The completed Alpine Coil.
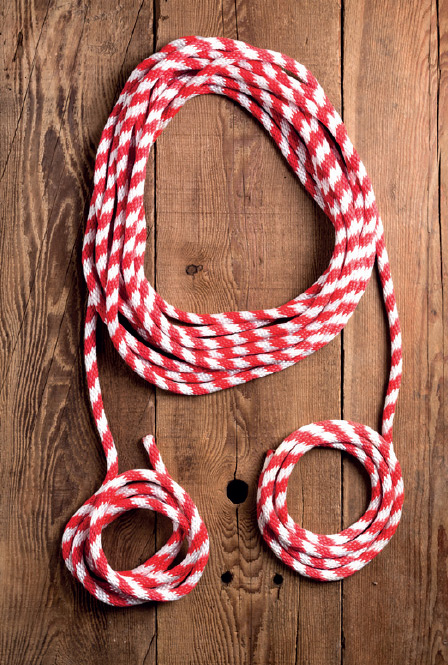
1. Coil the rope, leaving about 3 ft. (100 cm) loose at both ends.
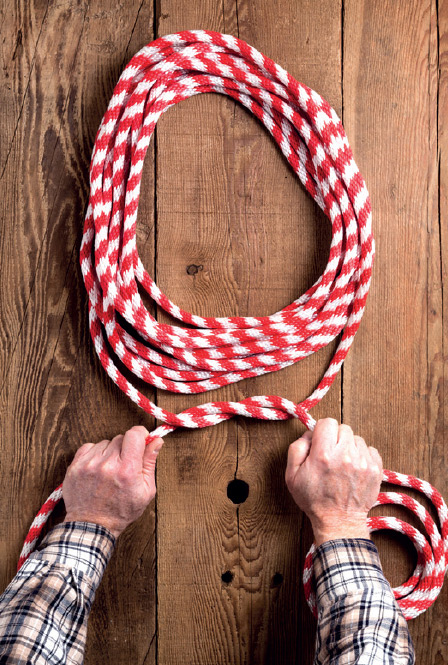
2. Tie a with the two ends.
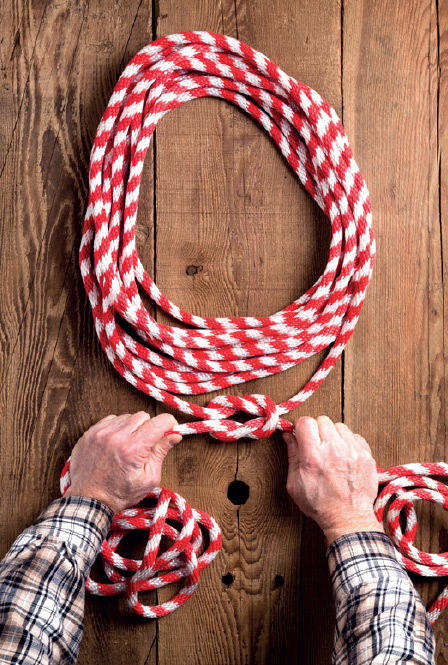
3. Tie another Half Knot in the opposite direction, completing a .
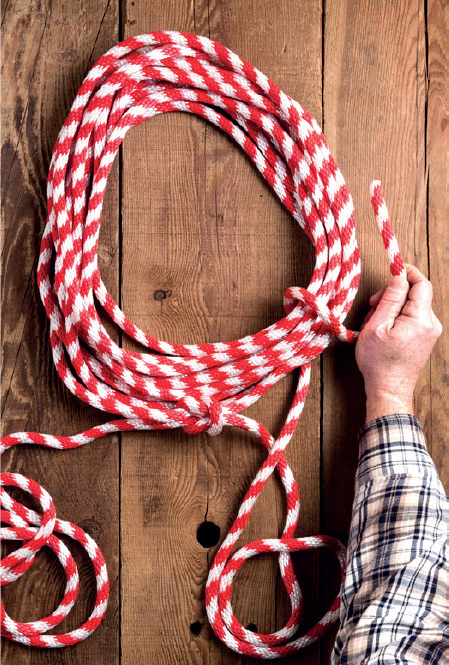
4. Begin wrapping one end in spirals around the coils, making each wrap 2–3 in. (5–8 cm) from the previous one. Continue wrapping until it is opposite from the Square Knot.
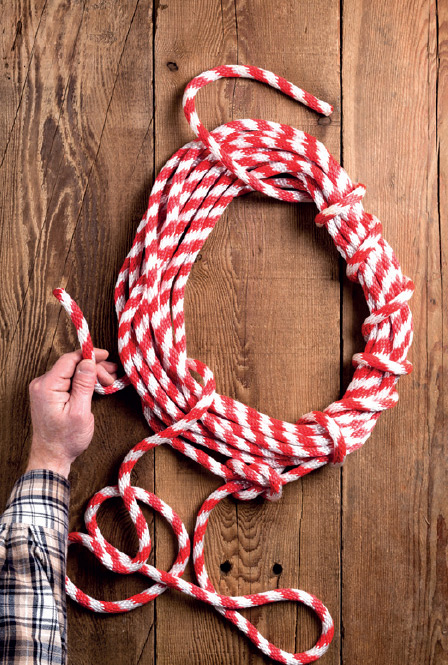
5. Begin wrapping the other end in identical spirals around the other side of the coil. These wraps should not be a mirror image of the first set. They should continue the spiral direction of the first set of wraps.
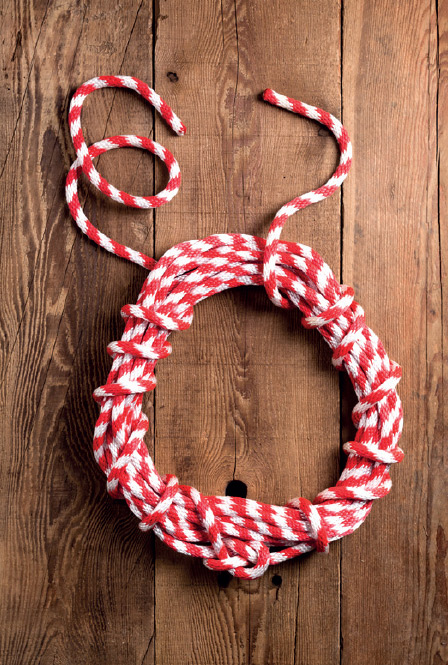
6. Continue the second wrap until it is opposite the Square Knot.
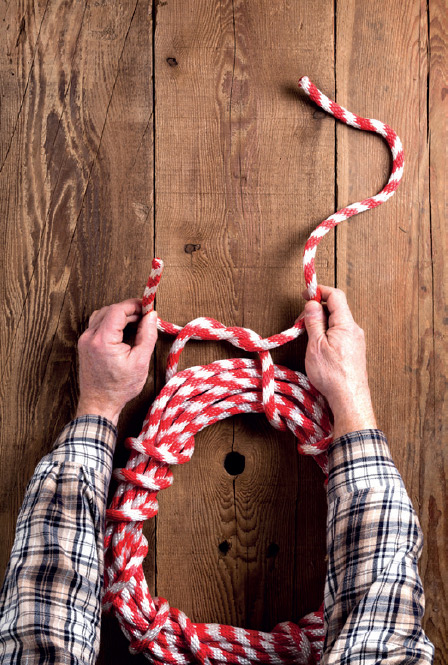
7. Tie a Half Knot with the ends.
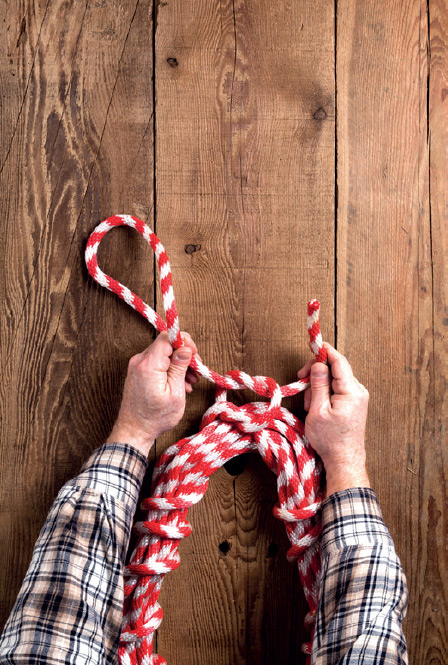
8. Tie a second Half Knot in the opposite direction, to complete a second Square Knot.
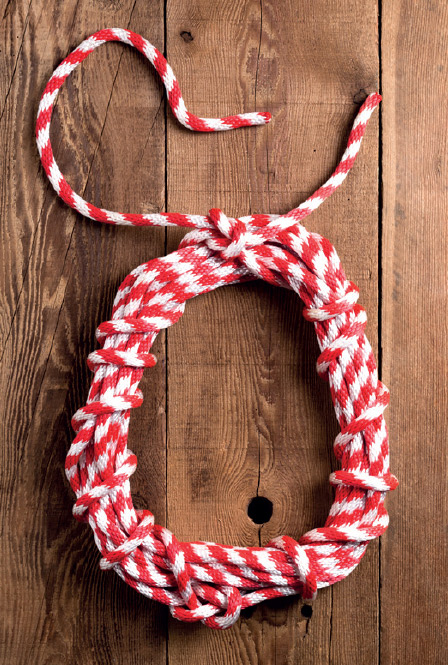
9. The completed coil.
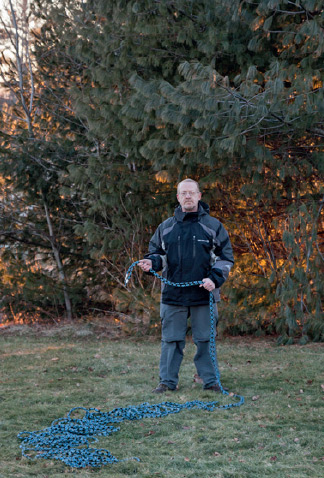
1. Working on clean ground, double the rope by bringing both ends together and pulling both parts equally through one hand. The rope should be laid out before you with no tangles or kinks.
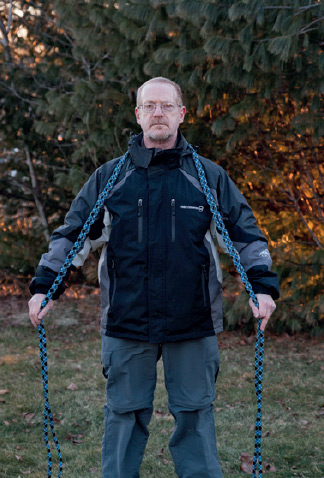
2. Pull about 20 ft. (6 m) of rope into the ends, then place both parts over your shoulders and behind your neck. (The ends are out of frame to the left side of the photograph, i.e., to the climber’s right.) For brevity, we’ll call the long, doubled rope on the side opposite the ends the “standing part.”
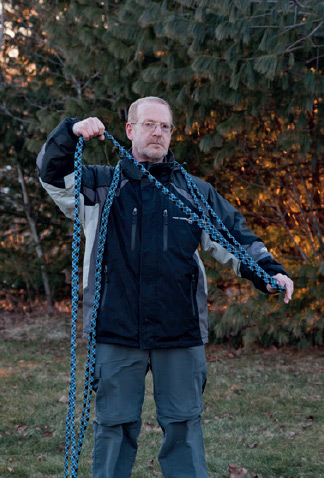
3. Pull an arm’s length of the standing part, forming the first “butterfly wing” (on the right side of the photograph). Bring your arm all the way down to draw the greatest length possible into this wing.
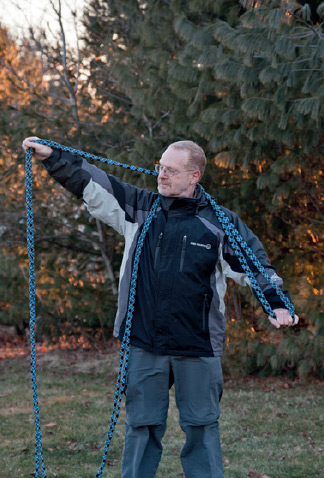
4. Pull another arm’s length of the standing part with the other arm and place it behind your neck.
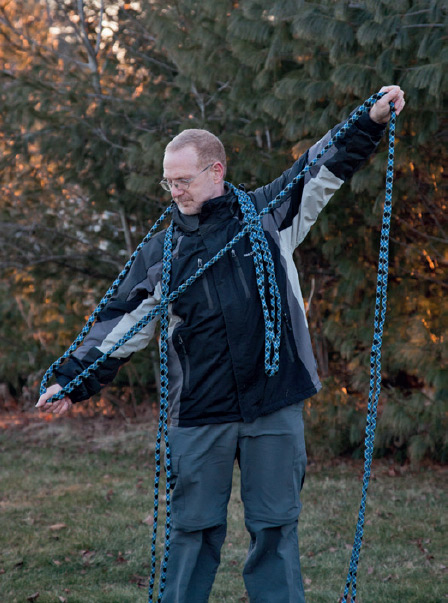
5. Bring that arm down all the way, forming the second butterfly wing (on the left side of the photograph).
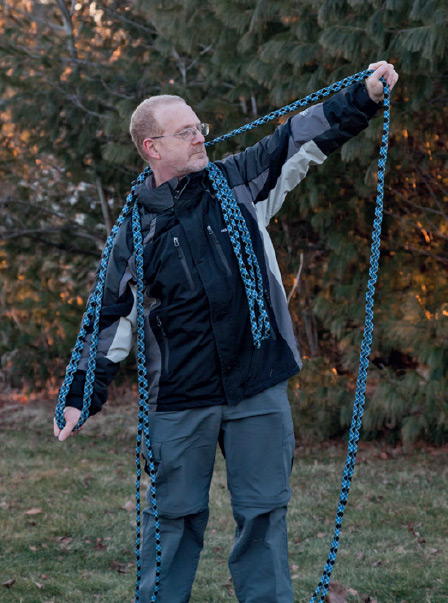
6. Switching to the other arm again, pull another arm’s length of the standing part behind your neck and bring it down to your side.
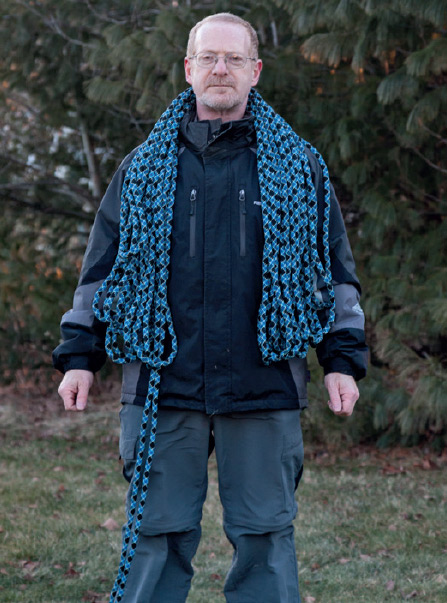
7. Continue pulling loops into the doubled rope and placing them over your neck on alternating sides until all of the standing part is over your shoulders.
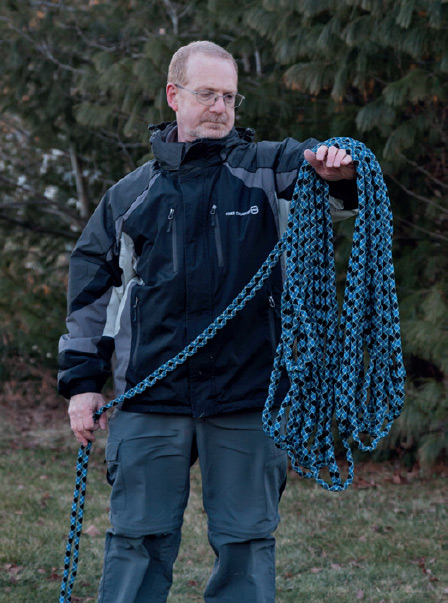
8. Remove the coil from your neck, supporting its folded shape over the arm opposite from the working ends.
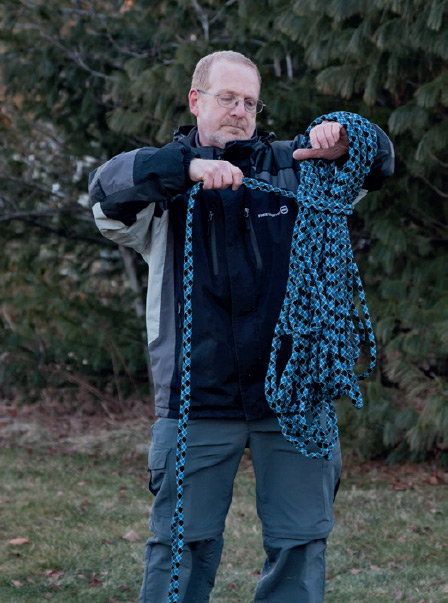
9. Wrap the working ends around the folded coil just below the supporting arm, leaving enough room to remove your hand.
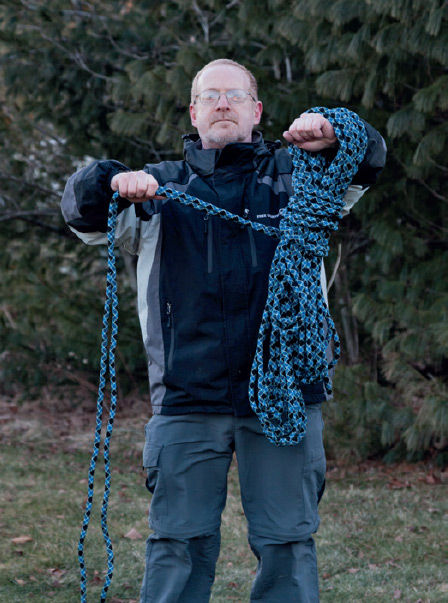
10. Continue wrapping the working ends downward over the coil until about 10 ft. (3 m) of both ends remain.
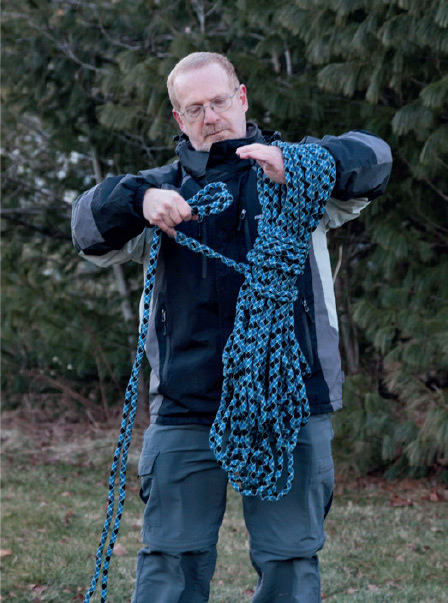
11. Make a bight in the working ends about 1 ft (30 cm) from the last wrap.
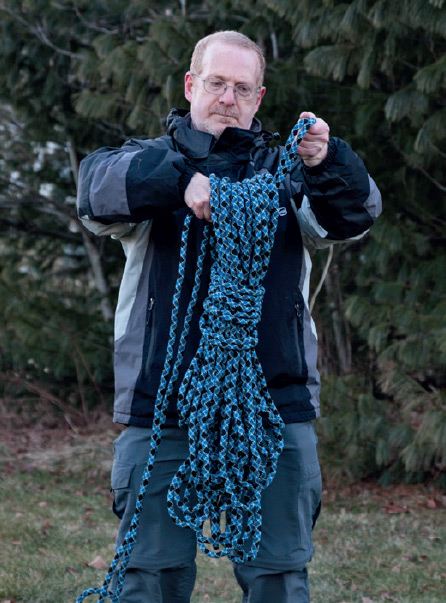
12. Pass the bight to the hand that supports the coil, then pull that hand through the top of the coil, pulling the bight through as well.
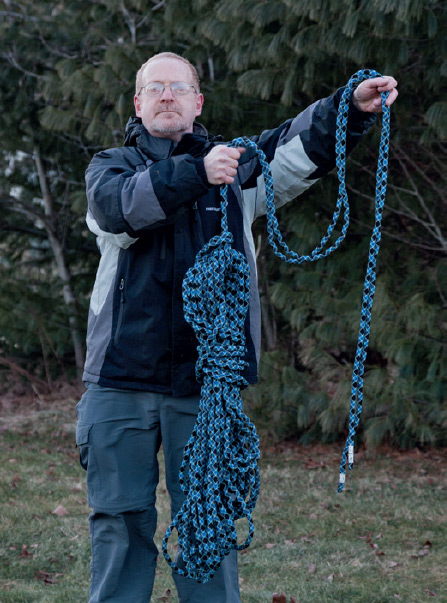
13. Pull the working ends all the way through the bight, so that they support the coil.
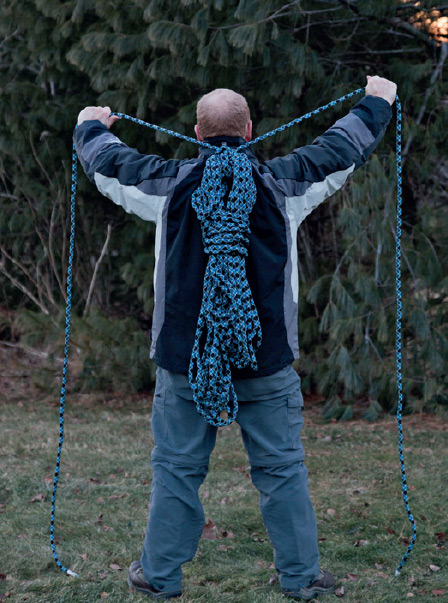
14. Holding one working end in each hand, hoist the coil high onto your back.
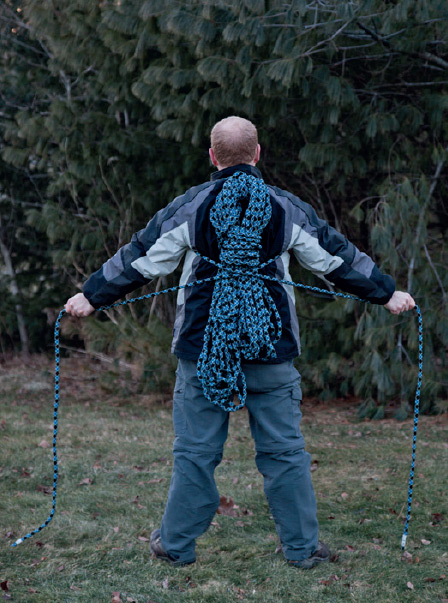
15. Bring the working ends down over your shoulders like backpack shoulder straps. Take both hands behind your back and switch the ends of the rope between your hands. Bring your arms out to the side so that the crossed ends secure the coil against your back.
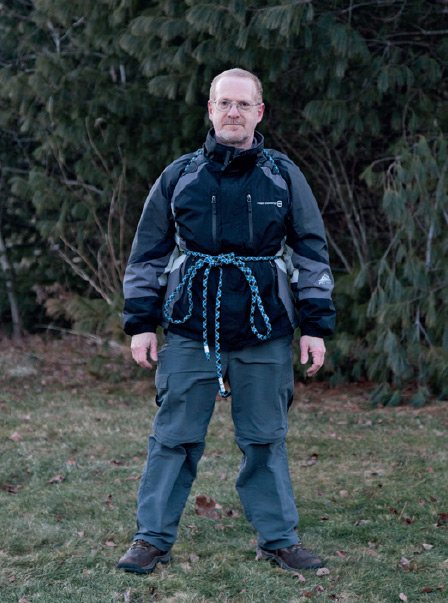
16. Bring your arms to the front and tie the rope ends together around your waist with a or a Double Slipped Square Knot as shown (see ).