For example:
{
"AppSyncApiName": <api-name>,
"DynamoDBBillingMode": "PAY_PER_REQUEST",
"DynamoDBEnableServerSideEncryption": false,
"CreateAPIKey": 0
}
143
Chapter 4 IntegratIng reSt apIS wIth a Frontend reaCt app 3. The value 0 means to delete the existing key.
4. Run amplify push, and accept the changes.
5. After the successful push, open the same file and change the value to 1, which denotes create the key.
6. You can now choose from the CLI menu how long you want the
key to be alive.
7. Run amplify push to recreate the API key with a new TTL.
Summary
This chapter covered the process of integrating a REST API with a frontend React app.
We started by creating a basic React todo app and then learned how to get data from a REST API using the fetch() method in JavaScript. Next, we introduced GraphQL as an alternative to REST APIs and discussed its pros and cons. We then moved on to using GraphQL with AWS Amplify, setting up the API for CRUD operations and creating custom resolvers for complex data operations.
We also covered testing GraphQL APIs with the Amplify console, adding new items to our GraphQL API using mutation queries, and integrating our GraphQL API with React. We then introduced GraphQL subscriptions and learned how to define them in our schema and integrate them with our React app using the Apollo client library.
Throughout the chapter, we covered a range of topics related to integrating APIs with React, including both REST and GraphQL APIs. We discussed the benefits and drawbacks of each approach and provided practical examples and code snippets to help readers implement the concepts covered in the chapter. By the end of the chapter, readers should have a good understanding of how to integrate APIs with React and how to choose the best approach for their specific needs.
144
CHAPTER 5
Offline-First App
Offline-first is not just a feature, it’s a mindset. It’s about building resilient systems that empower users, no matter their connection status.
—Akshat Paul
Most of the web or mobile applications require an Internet connection to work. This especially has changed in the last decade when the world adapted the client and server model, and both of these instruments interact using APIs, and the server will be on the cloud and require an active Internet connection to interact with, which makes the client more mobile and decouples itself with the physical location; In the late 1990s, applications used to be more client side, that is, on the desktop you install the software, and without any Internet, all the operations were allowed and all the user data were stored in the machine itself, in the hard disk. This model used to be much different than applications we use nowadays. These client-side applications never supported more than one user and also did not support multidevice features, because nothing was on the cloud and the data, device, and users were tightly coupled.
Benefits of the Client-Server Model
The reason why the client-server architecture has tons of benefits and the world has shifted to the cloud is because of the following:
1. Privacy: The server is secured and is not publicly accessible, unlike the client app; hence, we can keep valuable business logic and keep secret keys on the backend server.
2. Multitenancy: We can design the server architecture in a way
that we can support more than one user and add some security
policies, namely, one user will not be able to see other users’ data; this is known as a multitenant application.
145
© Akshat Paul, Mahesh Haldar 2023
A. Paul and M. Haldar, Serverless Web Applications with AWS Amplify,
Chapter 5 Offline-first app
3. Easy updates: As the code is deployed on the server, it can be updated any number of times and doesn’t depend on the client
whether the customer has updated or not; it gives the flexibility of updating the server code as much as required, and changes are
reflected instantly.
4. Multidevice support: Given the user data is mostly stored on
the server side, the application can be simultaneously logged
on multiple devices, and the same data gets replicated instantly
without any manual steps involved.
5. Accessible anywhere: Given the server is on the cloud, this model reduces the dependency of specific devices; if it is a web app, just open any browser irrespective of the operating system you get the access to; if the device is mobile, then all you need is to install the app and log in. This model allows users to use any device.
We understand this solves a lot of problems, but it takes away some of the benefits which client-only apps had.
There can be times when the Internet is not active but you still want to access the app. As per the Internet stats data, still 63% of the world population don’t have access to the Internet.
Sometimes, the business requires offline apps and expects the Internet is not available in some isolated areas or secured areas.
If we can make the web app also work without an Internet, and later sync with the cloud when the Internet is back, then it can be labeled as an offline-first app.
This will give the benefit of both worlds.
Use Cases of Offline Apps
Let’s discuss some of the real-life use cases of offline apps to better understand why we are even discussing this:
1. Deep tunnel application: Suppose you are creating an application to record data for workers in a deep tunnel. If there is no Internet available in the tunnel, then the data cannot be recorded. In this case, having an offline-first app would solve the problem, allowing data to be recorded even without an Internet connection.
146
Chapter 5 Offline-first app
2. Lift or pipeline inspection app: Similar to the previous example, if you are part of a lift inspection application, you cannot expect the Internet to work with high bandwidth. Hence, an offline app
would solve the problem by allowing data to be recorded without
a reliable Internet connection.
3. Application for tourists when traveling outside the country:
Imagine if you could not download Google Maps for offline use or
could not access a tourism guide. As a tourist, this would cause a lot of problems, especially if Internet access is expensive. Hence, an offline-first app is valuable in such scenarios.
4. Improving user experience: Many times, even if the user has an Internet connection, there can be obvious Internet breakages due
to various reasons such as Internet issues or unexpected jammers.
This can negatively impact the user experience. By implementing
an offline-first strategy, the user experience can be drastically improved. For example, the first screen can appear instantly, and the user would not have to wait for all the JavaScript, CSS, and
images to load. Additionally, the user’s data can be cached on the browser to minimize the number of loaders and improve overall
performance.
5. Field service applications: Imagine if you are a field service engineer who needs to access customer data, work orders, and
service manuals while in remote locations with poor connectivity.
With an offline-first app, you can download all the necessary
information beforehand and access it offline, ensuring that you
have everything you need to do your job.
6. Point-of-sale systems: In busy retail environments, network
connectivity can be unpredictable. An offline-first app for point-of-sale systems allows transactions to be processed offline and
synced with the server when a connection is reestablished,
preventing loss of sales and customer frustration.
147
Chapter 5 Offline-first app
7. Learning and educational applications: Students and educators in remote areas may not have reliable Internet connectivity. An
offline-first learning app can provide access to course materials, videos, and other educational content even without an Internet
connection, enabling continuous learning.
8. Remote and rural health applications: In remote and rural areas, Internet connectivity can be scarce or expensive. An offline-first health app can enable healthcare providers to collect and store
patient data offline, ensuring continuity of care and enabling
remote consultations when an Internet connection is available.
The Offline App – Design Overview
Even before we make our hands dirty with code, let’s discuss how the offline feature would work in general, and let’s together create a mental map of the same.
Goal
Let’s list down the goals we want to achieve:
1. When the application is connected to the Internet, the application should work as expected.
2. When the Internet is not available, we should be able to interact with applications.
3. When the Internet connection is back, the data gets synced with our backend systems.
To achieve the preceding goals, when the Internet connection has failed, instead of crashing the application and acting helpless, the application needs to be smarter.
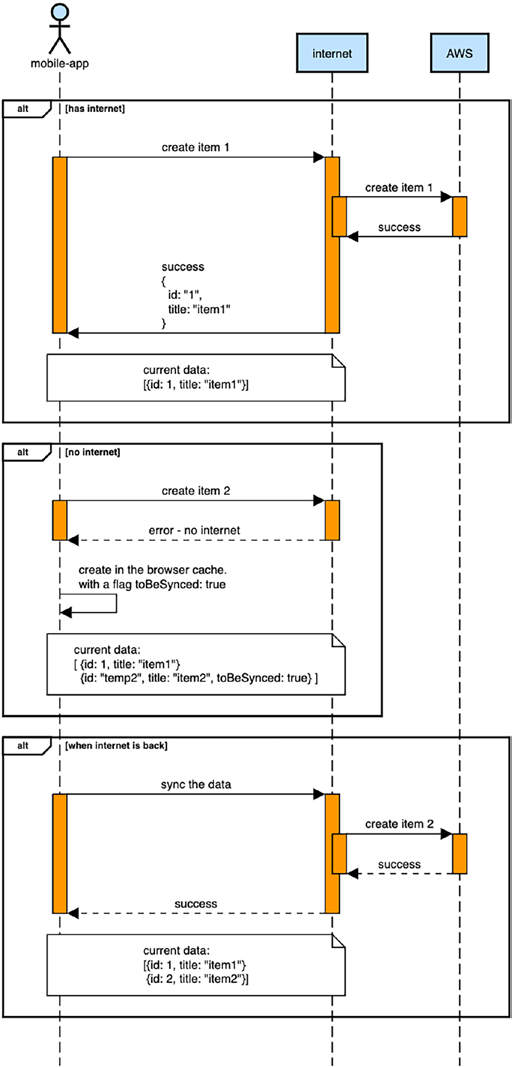
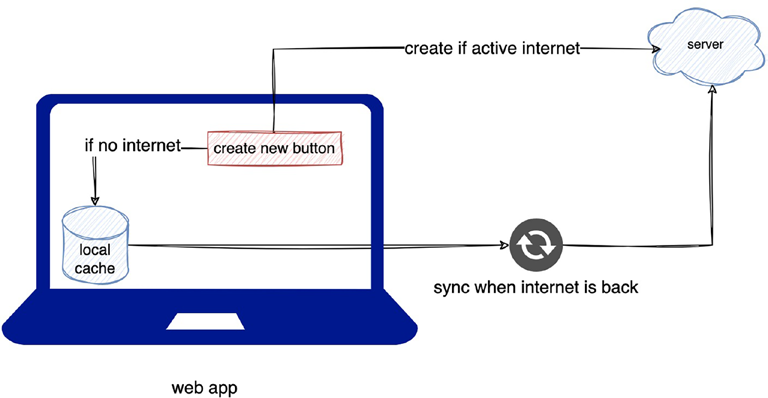
We can keep track of when the Internet connection has failed, then we can store the data local cache with a flag that the items are local only, and when the Internet is back, we replicate the behavior and remove it from our local cache.
We can refer to Figures to represent what we just discussed.
148
Chapter 5 Offline-first app
Figure 5-1. The offline app sequence diagram
149
Chapter 5 Offline-first app
Figure 5-2. The offline app high-level diagram
Add Offline Features in React.js
We will keep the cache store in the client-side application; hence, the majority of effort will be on the backend. Let’s modify our todo application further and already created GraphQL APIs to add todo items.
We will use the AWSAppSyncClient provided by the Amplify team, which provides all the capabilities of offline cache management and syncing of data.
The AWSAppSyncClient internally uses the Apollo Client to achieve the functionality; for more information, you can refer to the official Apollo documenta
Assumption
If you have followed the previous chapters, I am assuming you have achieved the following:
1. We have the GraphQL queries to get all items.
2. We have GraphQL mutations to create, delete, and update items.
3. We have the React code which integrates with the preceding APIs.
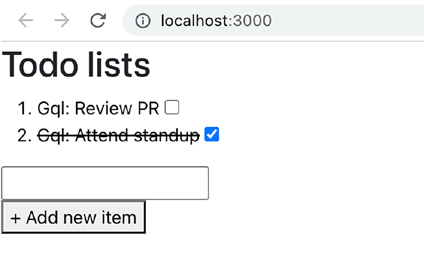
4. And our React app looks similar to Figur
150
Chapter 5 Offline-first app
Figure 5-3. Demo of the React application output
The Page Render Function
153: <div>
154: <button onClick={() => addNewItem(newItemField)}> 155: + Add new item
156: </button>
157: </div>
When the add new button is clicked, we call the function addNewItem.
In this function, while trying to create an item on the server, there are two possibilities:
1. The Internet connection is stable and the API call is a success; voila, we already have this working end to end.
2. The device is not connected to the Internet and the API call fails; in this case, our smart app should handle the edge case and do the caching stuff to sync it when the Internet connection is back.
Let’s see #2 in action:
70: const addNewItem = async (title) => {
71: let data;
72: try {
73: console.log("Trying to add through internet"); 74: const response = await addItemWithOnlineClient(title);
151
Chapter 5 Offline-first app
75: data = response.data.addItem;
76: console.log(
77: "You are online now, hence added via network with response", 78: data
79: );
80: setTodoList([...todoList, data]);
81: } catch (err) {
82: console.log(
83: "The api call failed, may be you are offile, trying offline client"
84: );
85: console.log(">>> CALLING ADD WITHOFFLINE"); 86: const response = await addItemWithOfflineClient(title, setTodoList);
87: data = response.data.addItem;
88: console.log(">> Data stored in localstorage to sync when online", data);
89: } finally {
90: setNewItemField("");
91: }
92: };
LINE 74: Notice the function addItemWithOnlineClient; this is the client which will try to create items via the Internet, and this client doesn’t have cache integration.
LINE 75: If the creation API is successful, we will get data; if the Internet is not there, then an error will be thrown. That’s why we have wrapped this function with a try-catch block so that we can handle the cases when the Internet connection is not present and the app is offline.
LINE 80: If we get a response, this is the happy case, and we set the response in our state to rerender the UI with a new set of lists.
LINE 81: If the creation failed, then the error thrown will be caught here.
LINE 86: Then we try a different HTTP client using the function addItemWithOfflineClient; this client has all the capability of caching and syncing of data.
LINE 89: As discussed in the previous chapter, we want to reset the input field, hence resetting to the empty field via the useState function.
152
Chapter 5 Offline-first app
Real-Time Online HTTP Client
We have already done this in the previous chapter; let’s still check the function: 53: async function addItemWithOnlineClient(title) {
54: return API.graphql({
55: query: `
56: mutation {
57: addItem(done:false, title: "${title}") {
58: id
59: title
60: done
61: }
62: }
63: `,
64: });
65: }
LINE 54: It integrates with the API instance from the AWS-amplify plugin and calls the mutation GraphQL query.
Offline HTTP Client
Let’s discuss how we use the Amplify prebuilt HTTP client to achieve most of the offline capabilities:
07: import awsconfig from "./aws-exports";
08: import AWSAppSyncClient, { AUTH_TYPE } from "aws-appsync"; 09:
10: const client = new AWSAppSyncClient({
11: url: awsconfig.aws_appsync_graphqlEndpoint,
12: region: awsconfig.aws_appsync_region,
13: auth: {
14: type: AUTH_TYPE.API_KEY,
15: apiKey: awsconfig.aws_appsync_apiKey,
16: },
153
Chapter 5 Offline-first app
17: cacheOptions: {
18: dataIdFromObject: (obj) => `${obj.__typename}:${obj.id}`, 19: },
20: });
LINE 7: Import the aws config like the GraphQL endpoint and apikeys to be used to communicate with the servers.
LINE 8: We will install the aws-appsync package to get the appsync client.
LINE 10: Create a new instance of the client and pass the required configurations.
LINE 17: This configuration is for creating the entries in local cache; when the Internet connection is not there, then under which key the objects will be stored. In our case, we are forming the keys by combining the typename and id of the object, so that there is no conflict.
Handling Errors in Real-Time API Clients with Offline Clients As discussed in the previous section, this offline client will be used when the real-time API client fails and throws an error; hence, we catch and call the function to handle via the offline client.
Let’s expand and discuss the function we wrote in the previous section: 20: async function addItemWithOfflineClient(title, setTodoList) {
21: return client.mutate({
22: mutation: gql(`mutation {
23: addItem(
24: done:false,
25: title: "${title}")
26: {
27: id
28: title
29: done
30: }
31: }`),
32: update: (cache, { data }) => {
33: setTodoList((currentTodoList) => {
34: let newListOfTodos = currentTodoList;
154
Chapter 5 Offline-first app
35: if (!data.addItem) {
36: newListOfTodos = [
37: ...newListOfTodos,
38: {
39: title,
40: done: false,
41: isOffline: true,
42: },
43: ];
44: } else {
45: newListOfTodos = currentTodoList.filter((item) => !item.
isOffline);
46: newListOfTodos = [...newListOfTodos, data.addItem]; 47: }
48: return newListOfTodos;
49: });
50: },
51: });
52: }
LINE 21: The mutate function is called when we want to do the mutation operation.
LINE 22: The mutation key takes the mutation query as a string. This query is the same as the one we developed in the previous chapter.
LINE 32: The update key requires a function to be operated. This function gets called two times: the first time when the Internet is off and the mutation is successful in the cache, and the second time again when the app is online and when syncing is done and, actually, mutation is successful on the server.
LINE 33: When the mutation is done in local, then we also want to reflect the data in the list of items, hence we are using the setTodoList which is the useState function.
LINE 35: If the response comes from the server, the data is defined; if it is stored in local, the data.addItem response is undefined; we are using this value to identify whether the data is stored locally for later syncing or is created in the server.
LINE 41: When we are confident the data is stored in the local cache for later syncing, we are updating the list with a flag isOffline to true, so that we can identify which data is offline and which is not.
155
Chapter 5 Offline-first app
LINE 45: When again the update function is called, with a valid data.addItem response from the server, we know the data is synced to the server; hence, we are removing the item which has an isOffline flag and setting the new data to our list.
Rendering the Offline and Online Items in the List
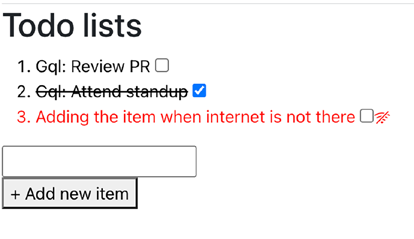
To improve the user experience, we should flag the offline data and show the synced data differently.
Figurcreenshot of when we tried to add one item in the absence of an Internet connection.
Figure 5-4. React application screenshot rendering the item added in offline mode And the moment we connect to the Internet, the item should be synced, and the red color should be gone, and the wifi icon should also disappear.
Let’s modify our render function to achieve this:
123: return (
124: <>
125: <h1>Todo lists</h1>
126: <ol>
127: {todoList.map((item) => {
128: return (
129: <li style={{ color: item.isOffline ? "red" : "black" }}> 130: {item.done ? <strike>{item.title}</strike> : item.title}
131: <span>
132: {" "}
156
Chapter 5 Offline-first app
133: <input
134: type="checkbox"
135: defaultChecked={item.done}
136: onChange={(event) => updateItemStatus
(item.id, event)}
137: />
138: </span>
139:
140: <span>{item.isOffline ? <BsWifiOff /> : ""}</span> 141: </li>
142: );
143: })}
144: </ol>
This is the extend render function from the previous chapter.
LINE 127: todoList is the current list of items from useState, which initially is populated from the get all item API using useEffect.
LINE 129: If the data has isOffline as true value, we set the color in style to red, else black for non-offline data.
The React code we have already discussed in the previous chapter, if you skipped that, even then also its simple code to render some components.
LINE 140: We also wanted to render a wifi off icon, hence one more check and render icon for offline data.
Testing Offline Feature
Let’s start our server and open our landing page.
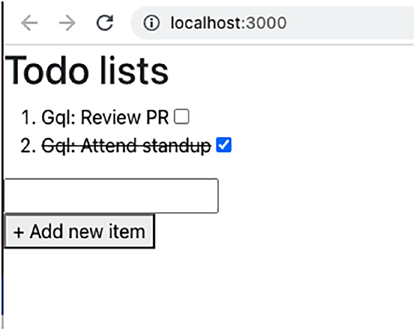
Figurws what is expected; the list will have two items already rendered if you are consuming the same get all query.
157
Chapter 5 Offline-first app
Figure 5-5. Screenshot showing different states of data Let’s make our app offline.
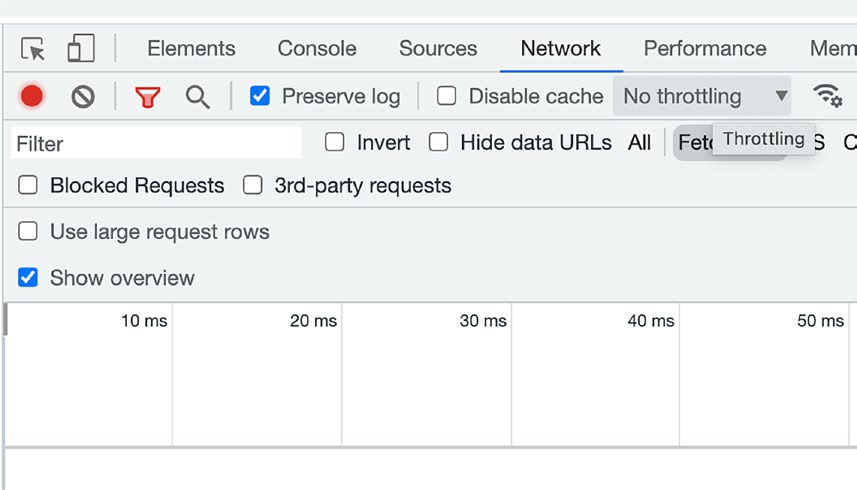
Open the inspect element or developer tool on a browser, and navigate to Network; click the arrow which has No throttling as shown in Figure .
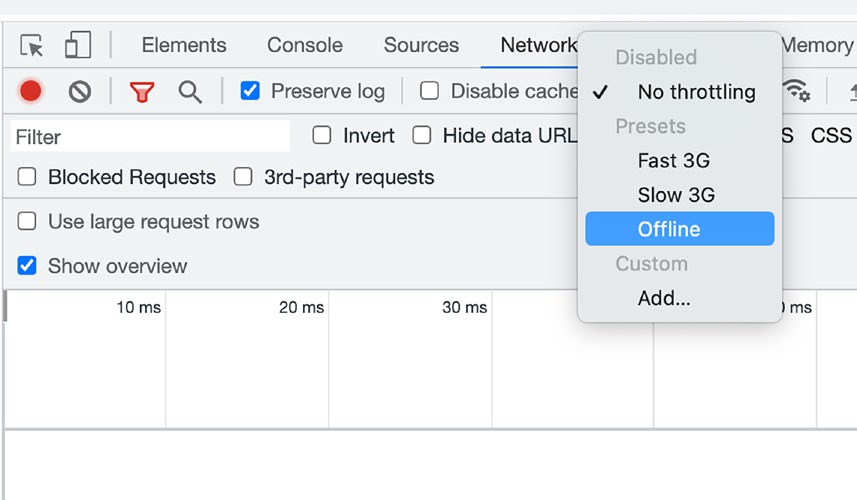
Figure 5-6. Screenshot of the Network tab to control the throttling configuration Click the Offline option as shown in Figure .
158
Chapter 5 Offline-first app
Figure 5-7. Screenshot of the Network tab to switch to offline mode Basically, this throttling tool is for developers to test your application and replicate scenarios of low Internet bandwidth or no Internet.
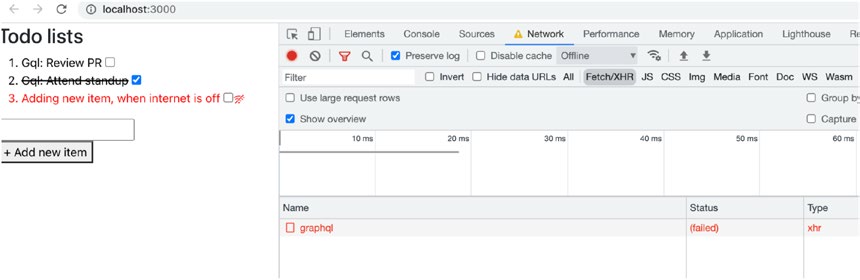
Once your app is offline, let’s try to add an item in our todo list application.
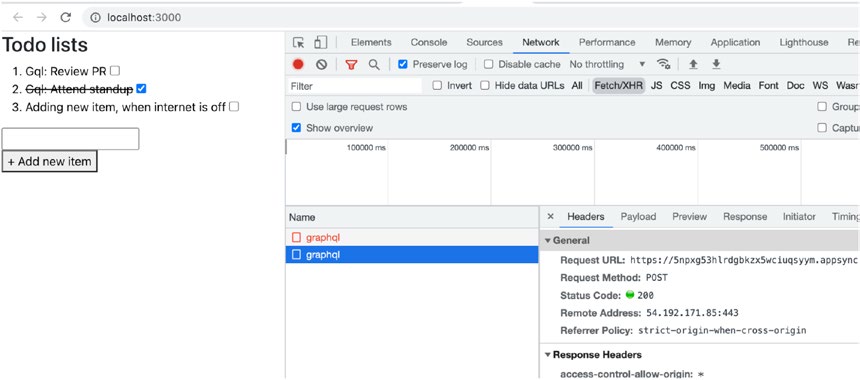
As you can see in Figurwork logs, one GraphQL API tried to communicate, but it failed as our app is offline.
Figure 5-8. Screenshot of the Network tab and application to show the failed API call due to offline mode
159
Chapter 5 Offline-first app
And please note, the same item is added in the list as a third item, with red color.
That means our item is added in local storage.
Let’s see what’s there in the local storage cache.
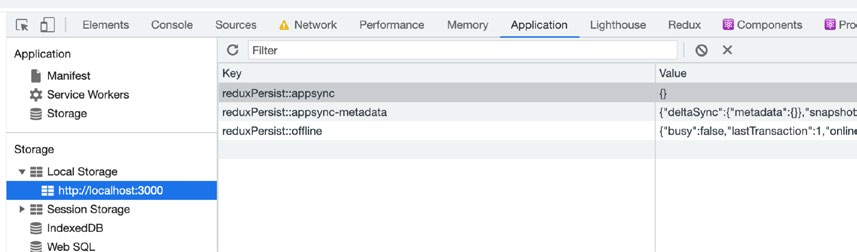
In the same panel, navigate to the Application tab, and on the left section, click Storage ➤ Local Storage ➤ first item for your localhost as shown in Figur
Figure 5-9. Screenshot of the Application tab showing the information in local storage
You see some data is there; this data is added by the aws-appsync client, as we expected.
Let’s see what type of data is added in this local storage.
The appsync-metadata has the following data:
{"deltaSync":{"metadata":{}},"snapshot":{"enqueuedMutations":1,"cache":{}},
"idsMap":{}}
This says enqueuedMutations counts to be one; this is the new item we added.
The reduxPersist::offline has the following data:
{
"busy": false,
"lastTransaction": 1,
"online": false,
"outbox": [
{
"type": "ENQUEUE_OFFLINE_MUTATION",
"payload": {},
"meta": {
160
Chapter 5 Offline-first app
"offline": {
"query": {
"kind": "Document",
"definitions": [
{
"kind": "OperationDefinition",
"operation": "mutation",
...
{
"kind": "Argument",
"name": { "kind": "Name", "value": "title" },
"value": {
"kind": "StringValue",
"value": "Adding new item, when internet
is off",
"block": false
}
},
"transaction": 1
}
}
],
"retryCount": 0,
"retryScheduled": false
}
I have removed a few keys and values from the preceding code to make it short; you can navigate to your browser to see the data in detail.
If you check data, it stores some information like online: false.
The operation kind is mutation and also stores the data which needs to be synced when the app goes online.
Well, this shows we have successfully stored the data in the local cache when the app is not connected to the Internet.
161
Chapter 5 Offline-first app
Testing the Online Syncing Feature
Now that we have offline data, let’s replicate the situation when the app gets back the Internet connection and see the online syncing process in action.
Before making your application to the online state, let’s navigate back to the Network tab and set the throttling to No throttling in developer tools.
As you can notice in Figure work log, the moment we made the network throttling to no throttling, there is a new API request which is successful with a 200
HTTP status.
Figure 5-10. Screenshot of the Network tab showing a successful API when the Internet is connected
And our list got refreshed with a new item, and the red color and wifi icon are also gone.
Voila, congratulations, our first offline storage and online syncing feature is working as expected.
Things to Consider While Creating Offline Apps
Developing and maintaining offline features for an application is not an easy task; the major problem lies in making the data consistent across the system. The complexity is directly proportional to various parameters, like a number of features to have the offline capability and a number of users trying to modify the same data parallelly when offline.
162
Chapter 5 Offline-first app
The following steps should be taken when planning to build an offline-first app: 1. Well-thought-of use case for offline scenario
The scope of offline use cases should be well planned and
handled. The user should be informed which data is not synced
and also when the app is running in offline mode.
2. API standard error codes
The API should throw the correct and meaningful error codes, so
that the client can respond accordingly.
3. Error handling
When we switch to offline, all the APIs will start breaking; hence, the client app should gracefully handle these errors and perform
the actions of the offline journey.
4. Data syncing strategy
The application should subscribe to an Internet connection state, and the moment the Internet is back, the data should instantly
start syncing.
5. Mindful deleting of local cache data
The application should mindfully remove the unsynced data only
after a confirmation from the server, if the data is synced to the server. If this is not handled, then the user will end up losing the data forever.
6. Testing
The application should be thoroughly tested for all the use cases before going live on production.
163
Chapter 5 Offline-first app
Summary
In this chapter on building offline applications, we learned to create an application which can function without a reliable Internet connection. This is an important consideration for any application which needs to work even when the Internet connection is guaranteed.
First, we discussed the limitations of a traditional web application and how they can be improved with offline functionality. We also discussed about various use cases in real life, where the offline-first application can really help the business to generate value and also get the benefits of the client-server model. We also explored the use of AWS Amplify services which helps in achieving the offline-first app.
Throughout the chapter, we provided the examples of how to use AWS Amplify and React.js to build offline functionality to create a todo application.
164
CHAPTER 6
Data Storage
Data really powers everything that we do.
—Jeff Weiner, CEO of LinkedIn
In the previous chapters, we have discussed how to create the backend and frontend of the application using the AWS Amplify service. The server and frontend interacted via REST and GraphQL APIs. However, we still need a place to store our data. This is where the data storage systems like databases or file storage come into the picture and play an important role in data-centric applications. In this chapter, we will explore the ways to store and retrieve data efficiently and reliably.
We will start with understanding the requirements of such systems, types of data and storages, and AWS services, and then we will do some coding to provision data storage and integrate with our APIs.
Introduction
In computing context, the data is a piece of information that has some meaning and some value to a particular business or process; the data represents the state or information about an individual or a process. The data can be in different languages and different formats, like text, numbers, images, or videos. For example, the transactional data from a bank account can help the banks to calculate how much money is remaining in a particular bank account, and the ticket number, name, and photographs can help a person to get entry to the airport and travel from one place to another.
If we can store these data in a particular structure and store them in a computer to make it easy to search, filter, and readable by different systems and machines, this is termed a database. For example, a ticket number is the data, and the database is the computer where this is stored. Databases are the most important element in the human world. The database in the modern world is generally associated with the storage part 165
© Akshat Paul, Mahesh Haldar 2023
A. Paul and M. Haldar, Serverless Web Applications with AWS Amplify,
Chapter 6 Data Storage
of any computer software. We interact with them almost every day, whenever you log in, search for products, view product reviews, or watch YouTube videos – all of these are possible because of databases.
The database has been existing way before computers and the Internet became reachable to humans. Before computing databases, humans used libraries, journals, and cabinets to store data in files. Even the shares in the stock market were traded on paper before the Internet. And, physical records were maintained in files by a bunch of humans to keep the process on.
Given the records were kept on paper, the challenge was searching for the right data; it took a lot of physical space and backup if something goes wrong, for example, accidental fire and rats chewing, wiping off the data records in minutes. Like many other problems in the world, the computer and the Internet solved the data storage problem as well. Data storage became digital, and it was a blessing to humanity.
Types of Data to Store
Broadly, all the data in the world can be categorized into two buckets that are valuable for businesses or processes to run smoothly:
• Files: File-based data are an important part of the storage, for example, if we want to create and store a copy of our ID card in our phone, it has to be an image; if we want to store the memory of our travel, it has to be photos or videos. These data are raw file based.
Other examples are Excel sheets, pdf, etc.
If we upload these files on the cloud and generate a URL, we need not carry over a hard disk or pen drives anymore.
We can control the access policy to make these files public or
private. For example, your passport photo can be a public URL,
but your driving license needs to be private and not public for
security concerns.
• Data: The data is any other information that is not a file, for example, a list of students’ names and addresses. These are generally strings, numbers, or special characters – basically, a combination of whatever keys you have on your keyboard.
166
Chapter 6 Data Storage
These data are stored in databases in a particular manner and
style, so that searching and filtering can be easier. We can interact with the data via a query language, which helps to easily search, filter, delete, or create data.
Cloud Storage As a Service
Even after humans got the computerized database and solved all the problems with data storage, before the Internet, the data was still stored in floppy disks, pen drives, and hard disks. With applications going over the Internet and solving a bunch of problems, it was obvious and required to make the data storage available on the cloud and accessible via the Internet. Especially, AWS solved both problems with their services. The file-based storage and database are available as a service.
1. Amazon Simple Storage Service: Also known as AWS S3, it is a
service offered by AWS to store and share raw files, for example, images, videos, sheets, pdf, etc. There are other similar service providers like Azure Blob Storage and Dropbox.
2. Amazon DynamoDB: DynamoDB is a fully managed NoSQL
database service by AWS.
The Amplify CLI has the capability to provision and manage these services for our application. In the upcoming sections of this chapter, we will follow a hands-on guide to provide this data storage and make our application interact with these services.
Database Provision and Integration
In the last couple of chapters, we have been successfully able to create RESTful and GraphQL APIs, and also we have created our Todo items React application to consume these APIs. Until this chapter, in our Todo application, the data was stored in in-memory variables, because we did not introduce the databases. Now we should extend our backend APIs to integrate with the database and fetch and store the data in the database.
167
Chapter 6 Data Storage
Provisioning Database
Even before we modify our APIs to integrate with the database, let’s start with provisioning our database and check if we got our database up and running or not. Let’s start with our Amplify CLI on the terminal with following command to add storage in our Amplify application:
amplify add storage
The CLI will ask some questions for the new database that we are going to create; let’s answer them:
01: ? Please select from one of the below mentioned services: NoSQL
Database
02:
03: Welcome to the NoSQL DynamoDB database wizard
04: This wizard asks you a series of questions to help determine how to set up your NoSQL database table.
05:
06: ? Please provide a friendly name for your resource that will be used to label this category in the project: todolist
07: ? Please provide table name: todos
08:
09: You can now add columns to the table.
10:
11: ? What would you like to name this column: id
12: ? Please choose the data type: string
13: ? Would you like to add another column? Yes
14: ? What would you like to name this column: title
15: ? Please choose the data type: string
16: ? Would you like to add another column? Yes
17: ? What would you like to name this column: status
18: ? Please choose the data type: boolean
19: ? Would you like to add another column? No
20:
21: ? Please choose partition key for the table: id
22: ? Do you want to add a sort key to your table? No
168
Chapter 6 Data Storage
LINE 6: I have provided todolist as the data storage name, which is basically the database resource name.
LINE 7: I have named my database table todos; we can create more than one table in one database.
LINES 11–19: I have added the id, title, and status column, as these are what our todo application requires.
LINE 21: We choose the column id as the partition key.
LINE 22: Given that our database structure is quite simple and flat, we choose no for the sort key.
Let’s push these changes to the AWS cloud, by running the following command: amplify push
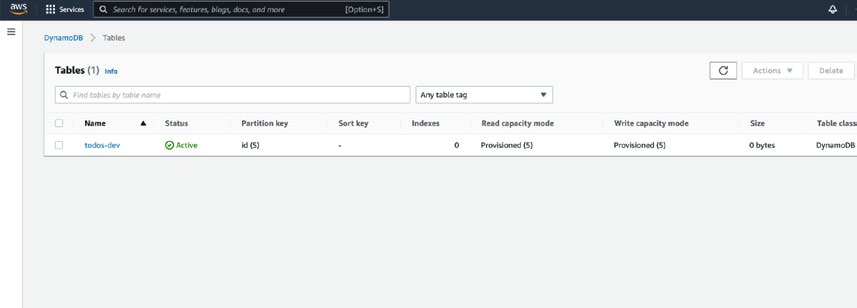
Once done, let’s navigate to the browser on our AWS cloud console to verify these changes. Open the DynamoDB from the service list and open the tables (Figur
Figure 6-1. Screenshot of our newly provisioned database from the AWS console We can confirm that our todos table is created.
Integrating the Database with APIs
In the chapter where we learned to create REST and GraphQL APIs, we skipped the database integration with our APIs and temporarily stored data in memory. Now that we have our Amplify database, we should modify our APIs to integrate with our database, so that our function deployment becomes stateless.
169
Chapter 6 Data Storage
The Lambda functions and databases we created in the previous section are two different entities and live in two different servers; if our Lambda function wants to access the database, it has to be provided the access to the database by the admin, in this case, us. This makes our Amplify entities’ boundaries more secure, and hence without the admin’s permission, no one can access the services like the database.
We are assuming you are following the chapters sequentially, and so far you have the following in your Amazon console and in your local codebase:
1. The todo React.js application.
2. The GraphQL or REST endpoints, integrated with the
React.js code.
3. The Lambda function gets triggered on operations like create new, delete, or update.
4. The Lambda function gets and updates the variable in memory.
At this stage, we need to update the Lambda function and give permission to access the newly created database:
amplify function update
We are going to update the function config, as we have already created the function in the past; in case you don’t have Lambda already created, then you can follow Chaptou can add the database access while creating it:
? Select the Lambda function you want to update
› todosfunctiongql
The CLI will show all the list of Lambda functions you have created, and you can choose one to start updating it.
We are going to modify our GraphQL APIs; hence, we choose the todosfunctiongql function.
If you have more than one function, change your selection using the up or down arrow key.
Press enter to select the function.
? Which setting do you want to update?
› Resource access permissions
Scheduled recurring invocation
170
Chapter 6 Data Storage
Lambda layers configuration
Environment variables configuration
Secret values configuration
The next question the CLI asks is what kind of setting we want to update for our Lambda; this time, we are going to modify the access-related settings for the function; hence, as shown above choose thèResource access permission`.
Press enter to move to the next question.
? Select the categories you want this function to have access to.
◯ auth
◯ function
◯ api
›◉ storage
The next question is about the kind of access we want to modify or add to our functions.
The database falls under the storage category; hence, move to storage and press the space bar to select the option.
Note that this is a multi-option menu; hence, you can navigate to more than one option and press the space bar to select more than one option.
Hit enter once you select the storage option.
Storage has 2 resources in this project. Select the one you would like your Lambda to access (Press <space> to sel
ect, <a> to toggle all, <i> to invert selection)
◯ thumbnail
›◉ todolist
The next option will show which storage resource name we want to add the access policy; in my case, we created functions named thumbnail and todolist. The todolist is our DynamoDB resource; hence, we select this and hit enter.
? Select the operations you want to permit on todolist
◉ create
◉ read
◉ update
›◉ delete
171
Chapter 6 Data Storage
The next option pops up with what kind of operations we want to permit to our Lambda functions.
As we have CRUD APIs and we want our Lambda function to be able to create, read, update, and delete, we will select all using the space bar and hit enter.
? Do you want to edit the local lambda function now? (y/N)
When the CLI asks to edit the local Lambda function now, you can choose Yes if you are not sure about the location of the function.
Given we already discussed the pattern of the directory structure of Amplify files, I will choose N and continue to navigate the file and edit.
Congratulations, the policy to access the database is added to our Lambda function.
Let’s now start modifying our Lambda function attached to the GraphQL APIs, so that we can create the items in our database.
Please note, we create this function in Chapter .
Assigning IDs to New Items
When we create new items in our database, we need unique ids to assign to the items.
We will use the npm package named UUID which will guarantee uniqueness.
In the terminal, navigate to the directory where package.json is located by running the following command:
cd amplify/backend/function/todosfunctiongql/
And install the UUID npm package:
npm install uuid
Modifying the Create Todo Item Function
Navigate to the Lambda function by opening the following file:
amplify/backend/function/todosfunctiongql/src/index.js
Modify the file to create a new DynamoDB instance client from the AWS-SDK: 8: const AWS = require("aws-sdk");
9: const dynamodbClient = new AWS.DynamoDB.DocumentClient();
172
Chapter 6 Data Storage
Let’s modify our addNewItem function which gets called when the GraphQL creation query is triggered:
21: const addNewItem = async (title, done) => {
22: const id = uuid.v4();
23: const item = { id, title, done };
24: await dynamodbClient
25: .put({
26: TableName: "todos-dev",
27: Item: item,
28: })
29: .promise();
30: return item;
31: };
LINE 22: Get a new id for our new item to be created.
LINE 23: The new item to be created will be the new id, title, and done status from the params.
LINE 24: Use the same dynamodbClient to create the item. As we are using the async-await syntax, we need to add the async keyword in line 21.
LINE 25: Use the put function from the client to create the item.
LINE 26: We need to pass the table name, followed by env, for example, todos-dev; for now, we are hardcoding the env, but please note that we should pick the env from the env variables, which we will discuss in the upcoming chapters; otherwise, when we deploy this function to prod, it will still try to connect to the dev env database, which we don’t want.
LINE 30: If creation is successful, we will return the item to the client, and if something fails, the exception will be thrown to the clients.
Let’s push the changes and test our API:
amplify push
If you followed all the steps before pushing, you will see the Lambda function’s access changes and Lambda function code updates.
Let’s now run our React application and add a new item and hit the add button.
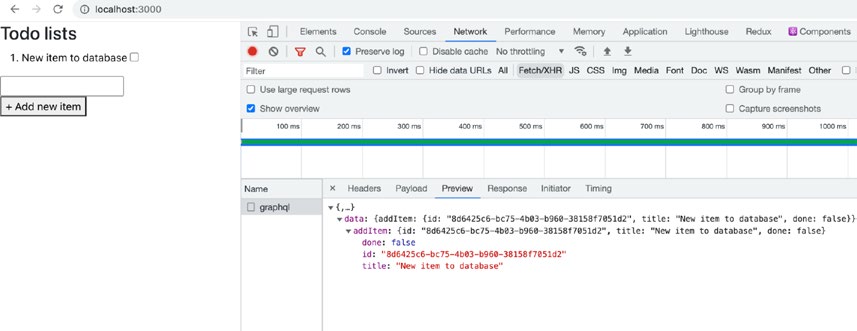
If you track the Network tab, you will notice the GraphQL mutation API was hit and the response looks as we expected, along with our new UUIDs, as shown in Figur
173
Chapter 6 Data Storage
Figure 6-2. Network tab showing the GraphQL mutation request Modifying the Get All Items API
Instead of now returning the data from the in-memory variable, we will read from the database and return the data list, let’s see how the query resolver function will change: 56: const resolvers = {
57: Query: {
58: todos: async (ctx) => {
59: const data = await dynamodbClient
60: .scan({
61: TableName: "todos-dev",
62: })
63: .promise();
64: return data.Items;
65: },
66: },
LINE 59: Use the dynamodbClient to read the list of data.
LINE 60: The DynamoDB client exposes the scan function to read all data.
174
Chapter 6 Data Storage
LINE 61: We need to pass the table name, in this case, todos-dev where dev is the env name.
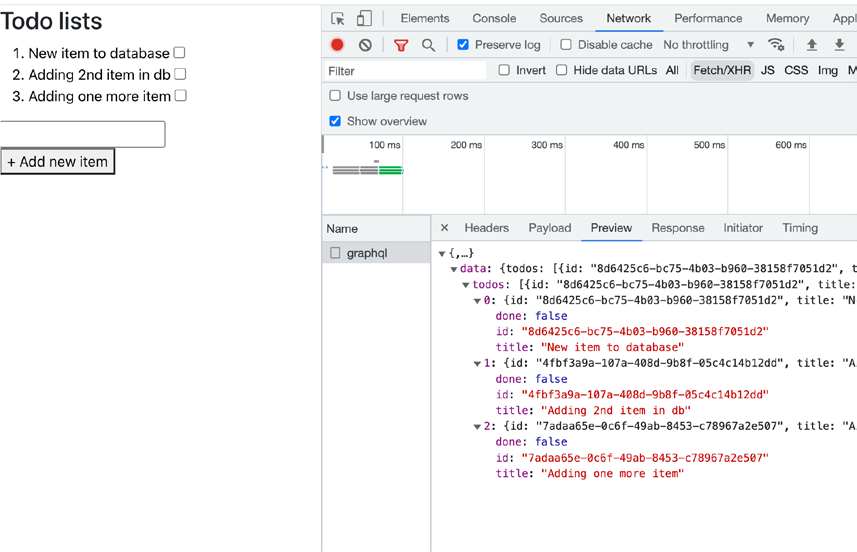
LINE 64: The response from the DB client has a few other options apart from the data, for example, total count and scanned count; the data list is under the key Items; hence, we are returning data.
Let’s hit refresh on our React app, and we should get all the data loaded from the database.
Figure 6-3. GraphQL request showing get all todos
If you notice the Network tab, in Figureloading the query returns all the data from the database. Congratulations on this integration.
Do It Yourself (DIY)
Similarly, you should now modify the delete APIs and update APIs.
175
Chapter 6 Data Storage
File Storage – S3 Bucket
As we introduced already, AWS provides a service to manage the raw file of almost all file types. The service is named S3 or Amazon Simple Storage Service. The service offers all the capabilities required to manage the files of formats like jpg, png, video, pdfs, and documents which are scalable, highly available, secured, and cost-effective.
Goal
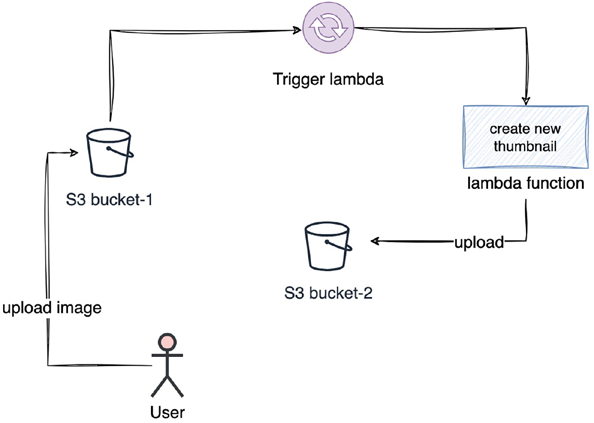
In this section, we will write a thumbnail generator function; whenever an image is uploaded in an S3 bucket, two different sizes of thumbnails will be generated automatically.
To achieve this, we will create an S3 bucket and attach a Lambda function which will be triggered on the object creation event, where the object is an image.
Approach
Before we start with the code and creating the S3 resources, let’s plan and understand what we are going to do:
1. The user will upload one image in one bucket.
2. On successful upload, one Lambda function will be triggered.
3. This function will generate two thumbnail images of
different sizes.
4. The images will be uploaded to different S3 buckets.
Figurocesses we are going to follow.
176
Chapter 6 Data Storage
Figure 6-4. The Lambda trigger flow on image upload
The Need for Two S3 Buckets
If you notice, the user uploads in one bucket, and the thumbnails are uploaded in a different bucket. If we don’t do this, on upload of the generated thumbnail, it will trigger the Lambda again, and the S3 Lambda function will fall into infinite recursive calls, which will result in unwanted flow.
Provision S3 Bucket
amplify add storage
This will ask what type of storage we want to create; choose the content, and hit enter:
Please select from one of the below mentioned services: (Use arrow keys)
› Content (Images, audio, video, etc.)
NoSQL Database
Provide a name to this resource; we are going to name it amplifythumbnail:
? Please provide a friendly name for your resource that will be used to label this category in the project: amplifythumbnail
177
Chapter 6 Data Storage
Provide a name to the S3 bucket:
? Please provide bucket name: amplifythumbnail
Then it will ask what type of users will access this bucket. As of now, we don’t plan to make it public; hence, let’s choose auth users:
? Who should have access:
› Auth users only
Auth and guest users
It will then ask the kind of access you want to set for users. This is multi-option; hence, press the space bar to select more than one option and hit enter:
? What kind of access do you want for Authenticated users?
◉ create/update
◉ read
›◉ delete
Enter yes to add a Lambda trigger for this bucket:
? Do you want to add a Lambda Trigger for your S3 Bucket? (y/N) y Given we want to create a new function, choose the following option:
? Select from the following options
Choose an existing function from the project
› Create a new function
Enter no for editing the function now; let’s test this trigger, and later we will edit the function to add the capability:
? Do you want to edit the local S3Trigger8b84f142 lambda function now? (Y/n) n
amplify push
Once you approve the changes, let’s wait for this push to complete.
Now let’s verify these resources on console.amazon.com.
178
Chapter 6 Data Storage
Verifying the Resources on Amazon Console
Log in to the console, and from the services, the section opens the Lambda service.
From the list of functions, select the one which starts with the S3Trigger name.
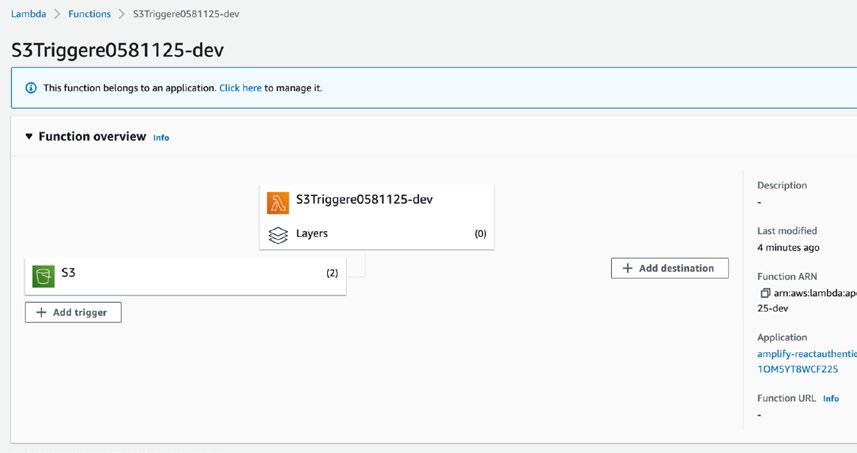
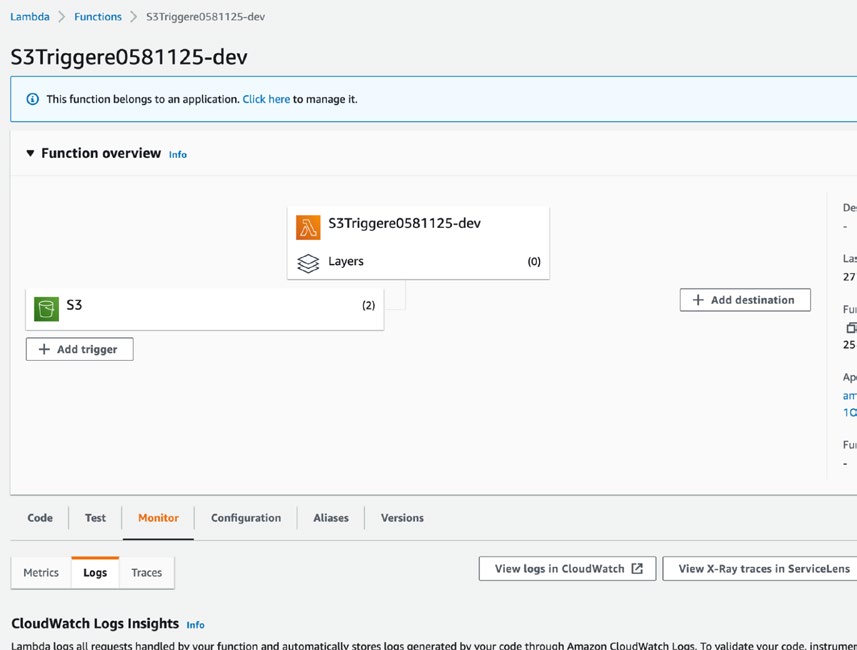
You will see the Lambda function is connected to S3 in the representation; this is proof that the Lambda function and the S3 buckets are connected via some event, as shown in Figure .
Figure 6-5. Screenshot from the AWS console showing the Lambda function and triggers
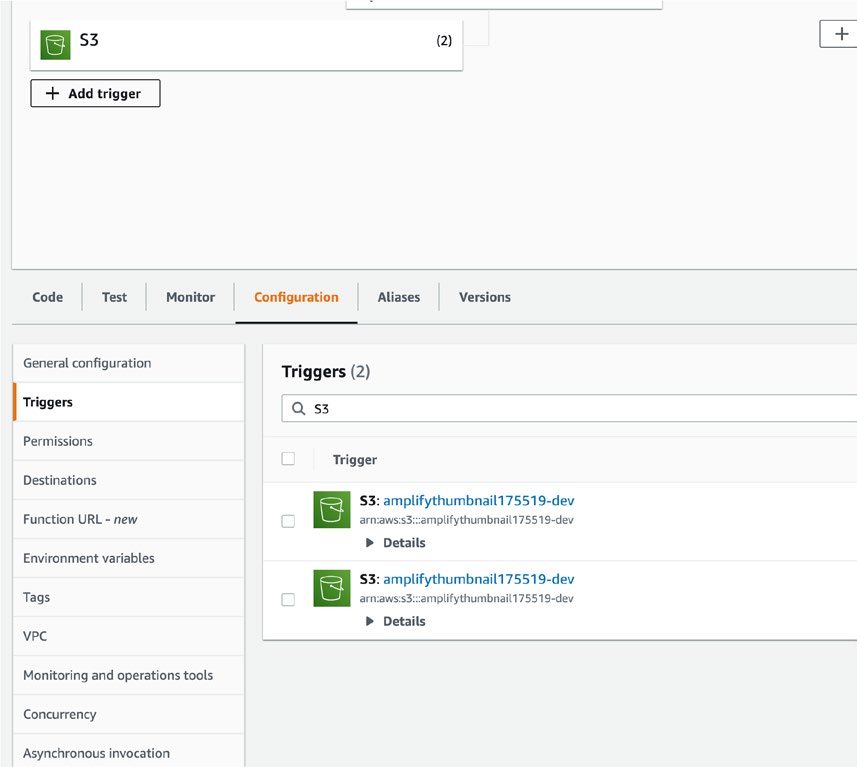
In the function overview, click S3, as shown in Figure and Figur.
179
Chapter 6 Data Storage
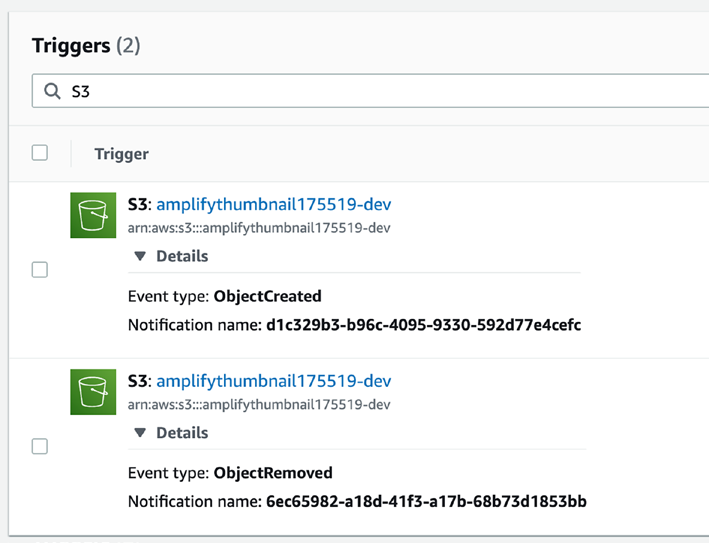
Figure 6-6. Screenshot from the AWS console showing the trigger details This will open the triggers; as shown in Figur, you will notice two triggers. Let’s check the details.
180
Chapter 6 Data Storage
Figure 6-7. Screenshot from the AWS console showing the name and ids of the triggers
The Amplify CLI has added two triggers on event types Object Created and Object Removed.
181
Chapter 6 Data Storage
Testing the Triggers
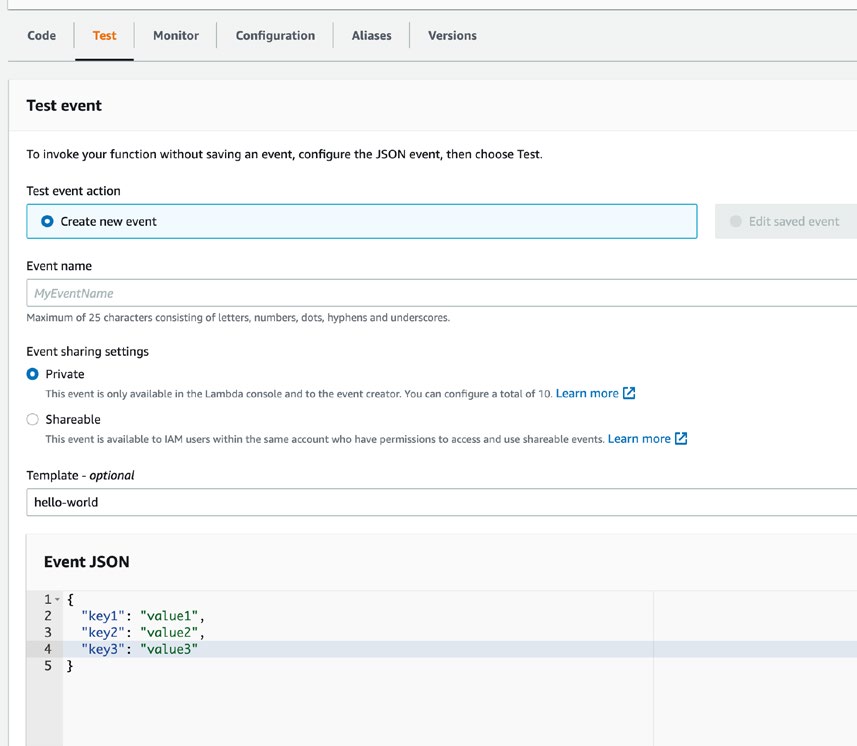
We can also test the triggers using the test feature of Lambda.
Click the Test tab, which will open a window to pass the event JSON, as shown in Figur
Figure 6-8. Trigger test console from the AWS console
Let’s see what our default function is doing now.
182
Chapter 6 Data Storage
Navigate to the Lambda path to see function details:
/amplify/backend/function/S3Triggere0581125/src/index.js
1: // eslint-disable-next-line
2: exports.handler = async function (event) {
3: console.log('Received S3 event:', JSON.stringify(event, null, 2)); 4: // Get the object from the event and show its content type
5: const bucket = event.Records[0].s3.bucket.name; //eslint-disable-line 6: const key = event.Records[0].s3.object.key; //eslint-disable-line 7: console.log(`Bucket: ${bucket}`, `Key: ${key}`);
8: };
9:
The default function generated by the CLI simply reads the event object and logs the bucket name and key.
Let’s replicate this event and test our trigger; in the browser test window, modify the event JSON to the following:
{
"Records": [
{
"s3": {
"bucket": "test bucket name",
"object": {
"key": "test key"
}
}
}
]
}
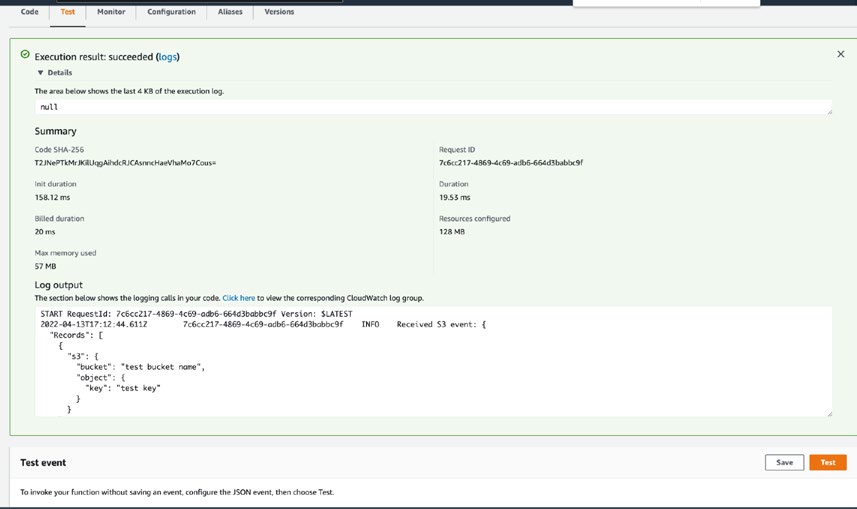
Pass this event and hit the Test button, as shown in Figure .
183
Chapter 6 Data Storage
Figure 6-9. Screenshot of the result from the test console of triggers You will see the execution result to be a success.
You can also see the logs in a dedicated window to monitor.
Click the Monitor tab and then navigate to logs; you will see the same log there as well.
The Lambda Function
Given the Lambda trigger function is working as expected, now let’s write code to create the thumbnail image of a smaller size and upload it in the same bucket.
Resizing the Image to Create a Small Thumbnail
We will use the npm package named sharp to resize our images. Sharp is a high-speed Node.js module that helps in various image operations.
The following is how we can resize an image to 320x240 size and create a new image file:
sharp(inputBuffer)
.resize(320, 240)
.toFile('output.webp', (err, info) => { ... });
You can refer to the sharp npm package for more APIs and capabilities.
184
Chapter 6 Data Storage
Lambda Function to Create Small Thumbnails
Let’s open the Lambda function in VS Code and add the thumbnail creation code: cd amplify/backend/function/S3Triggere0581125/src
Please note S3Triggere0581125 is the Lambda function name in my system; it can be a different name in your machine.
As discussed in Chapter about Lambda functions, this is a self- sufficient node project which has its own package.json and package-lock.json.
Let’s install the sharp npm package:
npm install --arch=x64 --platform=linux sharp
Please note we are passing architecture and platform information while installing; if we don’t do this, by default it installs the package by detecting the system, in my case macOS, and it will install the macOS binary; given our Lambda function will run on Linux machines which have x64 processors, we need to pass this.
Open index.js and we will add the following snippet:
01: const sharp = require("sharp");
02: const aws = require("aws-sdk");
03: const s3 = new aws.S3();
04:
05: const THUMBNAIL = {
06: width: 100,
07: height: 100,
08: };
09:
10: const THUMBNAIL_DIRECTORY_NAME = "thumbnails";
11:
12: exports.handler = async function (event, context) {
13: const BUCKET_NAME = event.Records[0].s3.bucket.name;
14: const KEY = event.Records[0].s3.object.key;
15: const DIRECTORY_LIST = KEY.split("/");
16: const BASE_FOLDER = DIRECTORY_LIST[0];
17: if (BASE_FOLDER === THUMBNAIL_DIRECTORY_NAME) {
18: console.log(
185
Chapter 6 Data Storage
19: ">> Stopping the function execution, as the event is for new thumbnail file."
20: );
21: return;
22: }
23: console.log(">> The new file uploaded by customer"); 24: let FILE_NAME = DIRECTORY_LIST[DIRECTORY_LIST.length - 1];
25: try {
26: const image = await s3
27: .getObject({ Bucket: BUCKET_NAME, Key: KEY })
28: .promise();
29:
30: const resizedImage = await sharp(image.Body)
31: .resize(THUMBNAIL.width, THUMBNAIL.height)
32: .toBuffer();
33:
34: await s3
35: .putObject({
36: Bucket: BUCKET_NAME,
37: Body: resizedImage,
38: Key: `${THUMBNAIL_DIRECTORY_NAME}/thumbnail-${FILE_NAME}`, 39: })
40: .promise();
41:
42: return;
43: } catch (err) {
44: context.fail(Èrror resizing files: ${err}`);
45: }
46: console.log(`Bucket: ${BUCKET_NAME}`, `Key: ${KEY}`);
47: };
48:
LINES 1 and 2: Require the sharp npm module to resize the image and AWS SDK.
LINE 3: Assign the s3 instance to get an object from s3 and create new images in the bucket.
LINE 5: The constants for the width and height of the thumbnail to be generated.
186
Chapter 6 Data Storage
LINE 10: The name of the directory to store the thumbnails.
LINE 12: The handler function that will run whenever the event is triggered, in this case, the upload event.
LINE 13: Get the current bucket name.
LINE 14: The key is the file name we uploaded; this key will be used to fetch the object from this bucket.
LINE 15: We are going to split the file path by “/” when the thumbnail will be created, and the event will be triggered again; we want to keep track of the directory path whether the file is a thumbnail or an actual image.
LINE 17: We are checking if the directory is a thumbnail or not.
LINE 21: If the file is from the thumbnail directory, we will exit the function by calling return, just to avoid creating a thumbnail from the thumbnail.
LINE 25: Here, we are confident we are not processing a thumbnail image; hence, we will start resizing in a try-catch block to handle any failure like corrupted file or access issues.
LINE 26: We are getting the actual image from the bucket using the key.
LINE 30: We will use the sharp module to resize our image.
LINE 34: We are uploading the thumbnail in the thumbnail directory.
LINE 38: We are creating a file with a new name by prepending the thumbnail word.
LINE 44: Let’s log if there is any kind of error to debug later.
Deploying the Function
Once done, save the file and push the changes, by running the following command: amplify push
Approve the changes and let the CLI push and deploy the function.
Testing the Thumbnail Creation by Lambda Trigger
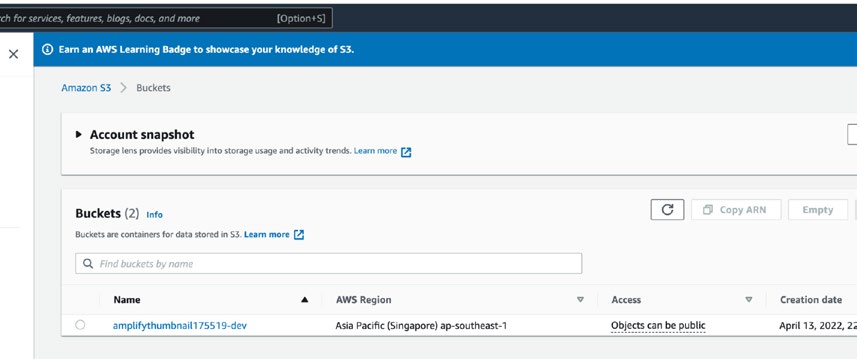
Let’s see our trigger in action. Open console.aws.amazon.com and log in using your credentials. Click the search bar and search for S3 service, as shown in Figur
click it.
187
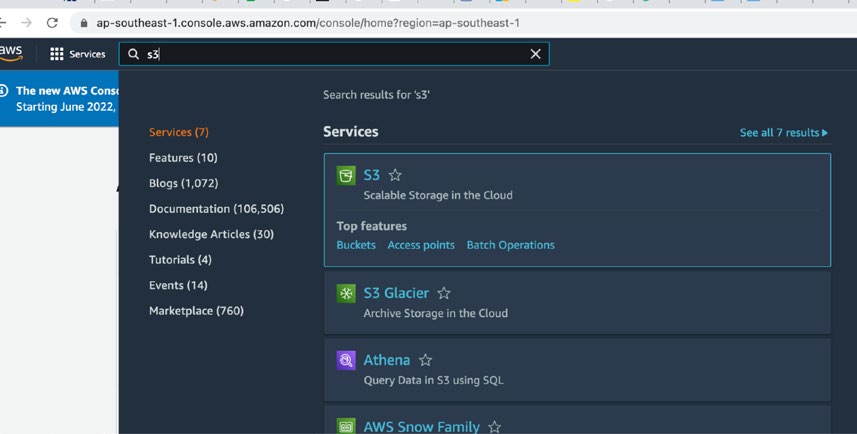
Chapter 6 Data Storage
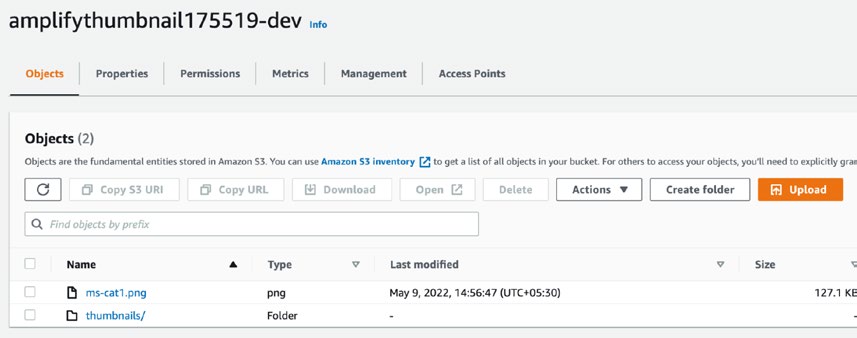
Figure 6-10. Screenshot of the AWS console from the search result of services You will land on your bucket list, and click the bucket where the Lambda trigger was set up, the reference is shown in Figur.
Figure 6-11. AWS console listing the S3 buckets
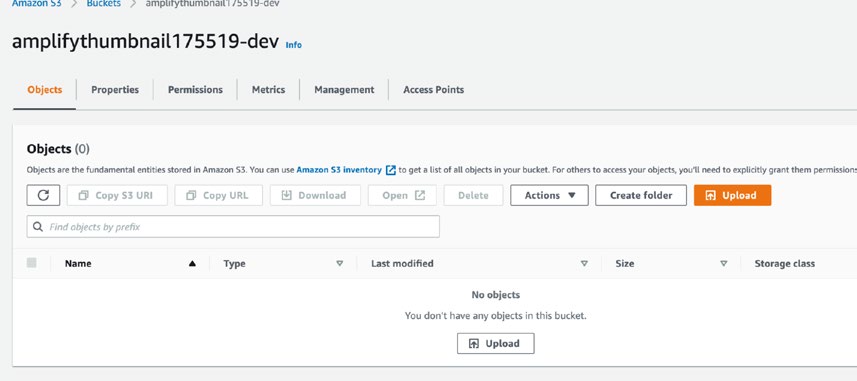
You will see an empty bucket, as no files have been uploaded yet, refer Figure .
188
Chapter 6 Data Storage
Figure 6-12. Screenshot of an empty S3 bucket
Let’s check the Lambda trigger by uploading one image. Click the Upload button, choose the image file, and click Upload.
After the upload is successful, come back to the bucket and refresh the page, as depicted in Figure
Figure 6-13. Screenshot of the S3 bucket after an image is uploaded with a new directory
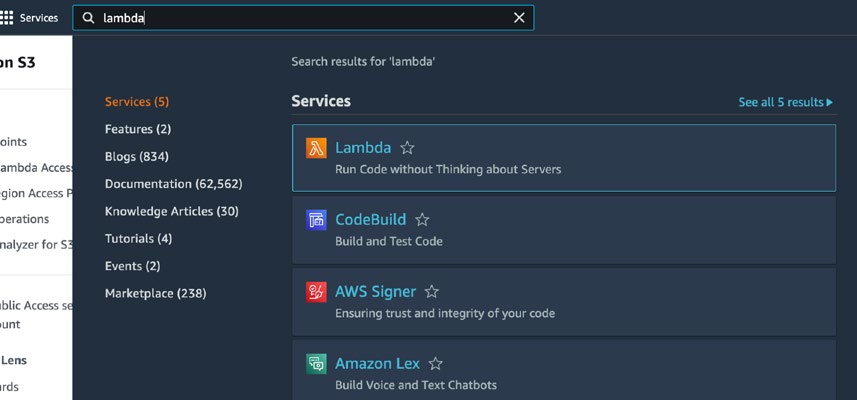
You will see the image is uploaded, and the thumbnail directory is also created.
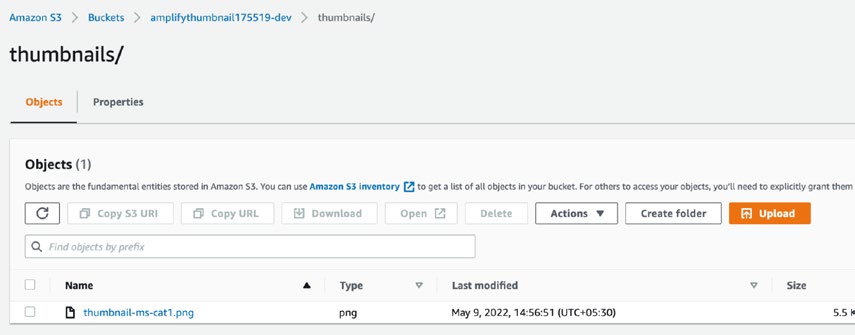
Congratulations, the directory is created; it looks like our trigger worked. Let’s open the directory, refer Figure .
189
Chapter 6 Data Storage
Figure 6-14. S3 bucket showing a list of files under the new directory The smaller size file with the same name prepended with a thumbnail is also created.
Congratulations, you can open the file to cross-check the file width and height. Now let’s check our Lambda function logs.
Checking the Lambda Function Logs
Click the search bar and search for Lambda service, the search result is shown in Figurigure
Figure 6-15. AWS console search result
190
Chapter 6 Data Storage
Figure 6-16. The Lambda function overview showing the bucket and triggers Open the S3 trigger function, and click Monitor ➤ Logs.
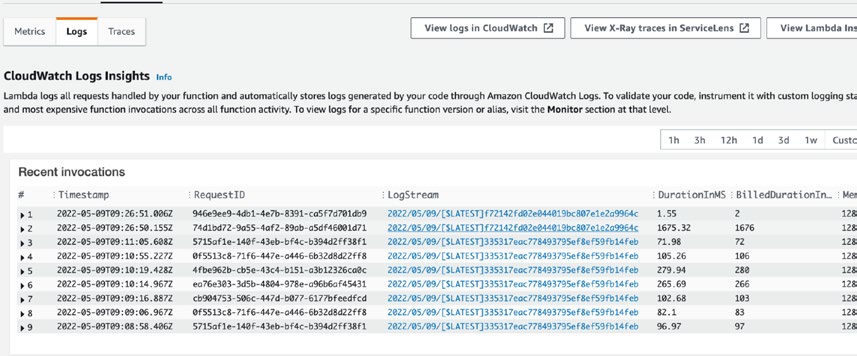
Depending on the number of files uploaded, you will see invocation logs, as shown in Figure .
191
Chapter 6 Data Storage
Figure 6-17. The log of the Lambda trigger function
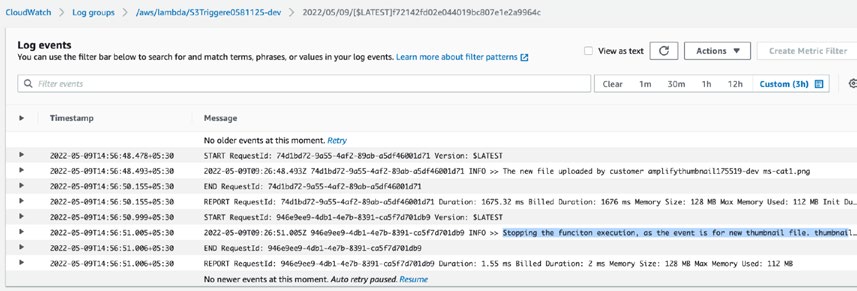
Open the function invocation logs and try to read the logs which we added using console.log, the screenshot of logs are shown in Figure
Figure 6-18. The log from the trigger function
In Figur, if you notice the highlighted line of logs, this is the second invocation of the trigger, when the thumbnail was created, and using the thumbnail directory condition, we were able to stop the function from falling in an infinite loop. Please refer back to the code snippets of this trigger function.
192
Chapter 6 Data Storage
Summary
This chapter covered the importance of data and storage required and gave a detailed hands-on guide to procure the database using AWS Amplify. This chapter also discussed the different ways to store and transfer data via a network.
This chapter also discussed in detail how to integrate our APIs with databases, and we wrote code to implement the use case of creating different-sized thumbnails from a parent image.
By the end of the chapter, readers should understand the basics of data storages, ways to implement the methodologies in their own problems, and how to debug issues to find the root cause of problems they face.
193
CHAPTER 7
Analytics
Analytics will not replace decision-makers, but decision-makers who use analytics will replace those who do not.
—Akshat Paul
Analytics is essentially a framework that is used to gain insights into the behavior of end users. By analyzing data related to user behavior, businesses can gain valuable insights and know which products or services are popular among different groups of users, as well as which aspects of their application may be causing users to leave.
The data collected through analytics helps businesses in many areas, such as marketing, sales, user experience, and prioritizing features, to make informed decisions about how to improve their products and services. By analyzing user behavior, businesses can gain a deeper understanding of what is working and what is not and use this information to improve their offerings.
With analytics, we can do systematic analysis of data to find patterns and correlations. This can be achieved through various techniques such as data mining, predictive analytics, and machine learning. This chapter is intended to provide a deeper understanding of analytics and how it can be used to gain valuable insights into user behavior and ultimately help businesses make better decisions using technologies we have discussed so far along with new AWS services we will explore in this chapter.
In short, analytics is the systematic analysis of data available to find similar patterns across. In this chapter, we’ll take a deep dive into analytics, understand it, and start writing code, but before we do, let’s take a step back so that we see a panoramic picture.
A High-Level View of Analytics
Data analytics is a powerful tool that can help businesses gain valuable insights into their operations, customers, and competition. With the right analytics framework in place, businesses can make informed decisions and improve their bottom line. Whether it’s 195
© Akshat Paul, Mahesh Haldar 2023
A. Paul and M. Haldar, Serverless Web Applications with AWS Amplify,
Chapter 7 analytiCs
improving sales, streamlining processes, or gaining a competitive edge, analytics can help businesses achieve their goals and outperform their competitors.
By analyzing data from various sources, such as sales figures, customer behavior, and market trends, businesses can gain a deeper understanding of their operations and identify areas for improvement. They can use this information to optimize their processes, develop more effective marketing strategies, and make better decisions about product development and pricing.
Moreover, analytics can help businesses build customer loyalty and improve retention by understanding their customers’ preferences and behavior patterns. By analyzing customer data, businesses can personalize their offerings, anticipate their customers’ needs, and provide them with a seamless, personalized experience.
In short, analytics is a powerful tool that can help businesses of all sizes make smarter, data-driven decisions. With the right analytics framework in place, businesses can unlock the full potential of their data and gain a competitive edge in today’s fast-paced business environment.
In the past, businesses heavily relied on customer feedback collected on physical paper or forms on tablets, which were then grouped together to identify problems and discuss solutions. However, this traditional approach to collecting customer feedback presents several challenges in a modern business context.
Firstly, not all customers are willing to provide feedback, resulting in a limited and biased dataset. This makes it difficult to accurately identify areas for improvement and make informed decisions.
Secondly, even when feedback is collected, it may not be accurate or comprehensive.
Customers may rush through the process or simply tick boxes without fully understanding the question or considering their response. This can lead to incomplete or misleading data, which may hinder the business’s ability to make informed decisions.
Thankfully, with the advancement of technology, businesses now have access to a wide range of tools and platforms that make it easier to collect, analyze, and act on customer feedback. By leveraging the power of data analytics and machine learning, businesses can gain deep insights into customer behavior and preferences, identify trends, and develop more effective strategies to meet their customers’ needs.
While traditional methods of collecting customer feedback may have served their purpose in the past, modern businesses need to embrace new technologies and data-driven approaches to stay competitive and meet the evolving needs of their customers.
196
Chapter 7 analytiCs
I have talked to a few friends and family, and in my sample, most of the people do the same. Hence, we cannot depend on this, and we will never be able to find the real customer pain points. We need a more robust and automated way to visualize customer activities on our application, gather those data points, and analyze them to find problems. For example, we need to know how many customers are active and when and why they drop off from the app; if we are an ecommerce app, then we need to know how many customers visit products and why they don’t end up buying. And the problems and use cases are infinite.
There are four steps to solve a problem:
1. Finding the current problems
Using analytics data, businesses can identify problem areas and
understand the root causes behind them. This allows them to
develop more targeted and effective solutions to address the
problems.
2. Proposing a few solutions
Once the problems have been identified, businesses can
brainstorm and propose various solutions to address them.
This may involve collaboration with cross-functional teams,
stakeholders, and customers to ensure that the proposed solutions are feasible and aligned with the business’s goals.
3. Finding which solution works and which doesn’t
To determine the effectiveness of different solutions, businesses can leverage A/B testing, where two groups of users are provided
with different solutions and their behavior is analyzed. This allows businesses to compare and contrast the effectiveness of different solutions and make data-driven decisions about which solutions
to deploy.
4. Deploying the solution in which we have gained more confidence Based on the results of A/B testing and other data analyses,
businesses can confidently deploy the solutions that have been
shown to be effective. By deploying proven solutions, businesses
can optimize their operations, improve customer satisfaction, and gain a competitive edge.
197
Chapter 7 analytiCs
In summary, data analytics can provide businesses with valuable insights into their operations and customers, allowing them to identify problems, propose effective solutions, and make data-driven decisions. By leveraging analytics and A/B testing, businesses can gain a competitive edge and improve their bottom line.
Analytics Fundamentals
Let’s understand the whole fundamental of analytics by one use case. Let’s say we have launched a new product, baby shampoo.
There are two aspects of this business:
1. Marketing: Via various channels like Google Ads and blogs, which will increase customer reachability
2. Ecommerce portal: One where customers can visit and buy the
product by placing an order
Both of the preceding steps are crucial for a business. If marketing is not successful, customers will never know about the product and won’t land on the website to make a purchase. And if the ecommerce portal’s user experience is poor, customers will not buy, which is the only point where businesses generate revenue. The crucial aspect is measuring the effectiveness of our strategies to ensure they are working.
For instance, suppose we market using both Google Ads and blogs. How do we determine which of the two methods is generating the maximum impact? By analyzing the data, we can quantify the effectiveness of each approach. For example, if we find that for every $100 spent on blog marketing, we generate 10 leads, while for every $100 spent on Google Ads, we generate only 1 lead, we can make an informed decision to focus solely on blog marketing and discontinue Google Ads.
This is an example of the quantification process, which involves using data and analytics to measure the effectiveness of various strategies. By adopting this framework, businesses can make data-driven decisions and optimize their operations to achieve their goals.
Let’s zoom in further on the marketing strategy, and let’s assume the following list is the outcome from our analytics framework:
1. 90% of the users are women.
2. 80% of the users are between the ages of 28 and 38.
3. 75% are from metro city locations.
198
Chapter 7 analytiCs
The business can use this outcome to improve its marketing strategy and attract more customers. The business will now focus on writing more blogs, targeting only women customers, targeting the age range which buys more, and also targeting only the metro locations.
This is called targeted marketing, and there will be points where the marketing strategy is so precise that any marketing campaign will produce best results.
Analytics can be used to identify patterns in available data, allowing businesses to gain insights and make data-driven decisions.
Google Analytics is a powerful and widely used tool that can be easily integrated into your website or mobile application. It requires only a few lines of code and a few simple steps to set up, after which you can gain valuable insights into user behavior and website performance. Most of the features are available for free, making it an accessible option for small companies and website owners to quickly analyze user behavior and optimize their operations.
Terminologies
Before delving into the details, it’s important to have a basic understanding of key terms that will be used further in this chapter. This will provide a foundation for better comprehension and prevent confusion in the future.
• User segments: The segmentation is basically breaking down the data by different dimensions – by age, sex, location, etc. For example, males and females are two user segments, and users from Tokyo is
another segment.
• Events: Every user action that needs to be recorded is an event. For example, click a button is an event, and close the app is another event. Events have a name and some metadata. For example, the
CLICK_BUTTON event will have metadata like button title and page
name metadata so that data analysts can identify which button was clicked.
• Sessions: A session is a sequence of user actions that are performed by the same user in the app in a given time frame. The same user’s activity on the app defines the session.
199
Chapter 7 analytiCs
• Amazon Kinesis: This is the AWS service that will help us in
streaming the user analytics data and storing it. Later, we can use these data to do our analysis and find various patterns.
• Amazon Pinpoint: This is an AWS service that enables businesses to engage with their customers through various channels. It offers personalized campaigns and in-depth analysis of customer behavior to improve engagement. With powerful A/B testing tools, businesses can optimize their campaigns for better results.
Setting Up Amplify Analytics Backend
Let’s start setting up our analytics backend so that it can start receiving the events and record them for our analysis to understand our users better.
Just like adding any other Amplify service, we will use the CLI to add analytics: amplify add analytics
This will ask us to choose the analytics provider we want to use.
We will go ahead with pinpoint:
? Select an Analytics provider (Use arrow keys)
› Amazon Pinpoint
Amazon Kinesis Streams
? Select an Analytics provider (Use arrow keys)
› Amazon Pinpoint
Amazon Kinesis Streams
Press enter for Amazon Pinpoint.
This will ask you to give a name to the pinpoint resource; let me name it analyticsreactapp, and hit enter.
? Provide your pinpoint resource name: analyticsreactapp
You will get a success message, and that’s all required to set up our analytics backend; it is that simple.
200
Chapter 7 analytiCs
Now we only need to push the changes, and we can start recording the event from our React application and various kinds of information.
Let’s publish our changes:
amplify push
Confirm the changes after reviewing by pressing `yànd pressing enter.
Voila, our backend is ready to start recording the events and the user actions and show us the data.
Recording Events and Actions
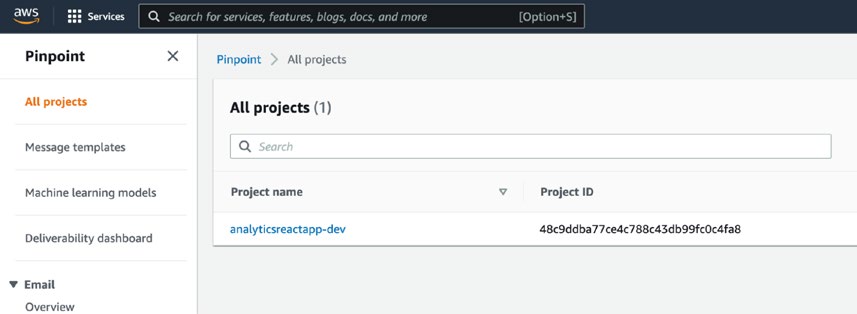
Let’s open the dashboard on the Amazon cloud console. Log in with your credentials and search for the Amazon Pinpoint service. You will see the screen in Figure ith different project IDs or names.
Figure 7-1. AWS console pinpoint service
201
Chapter 7 analytiCs
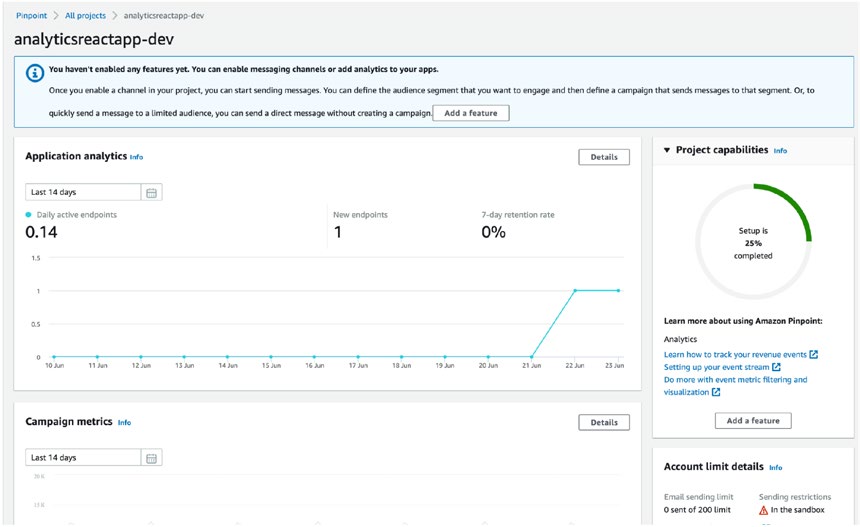
Click the project; you will land on the analytics dashboard, this is shown in Figure .
Figure 7-2. AWS Pinpoint project analytics dashboard
If you are opening it for the first time, there might be zero events to show on the graph. On the left menu pane, expand the Analytics tab, and you will see more options related to the Analytics tab. We can explore these options once we integrate the analytics into our frontend code and start sending the events.
Let’s jump to our React app and integrate the analytics service.
Recording Events from our React App
In order to collect and analyze user data, it’s essential to have a fully functional application with multiple pages and different types of pages. The application should also offer users a variety of options to choose from.
Continuing to add records in our todo application may not provide the full flavor of analytics in a production app due to its small use case. To replicate a production type of app, let’s create a dummy page and smaller components, where we will treat each component as a page.
202
Chapter 7 analytiCs
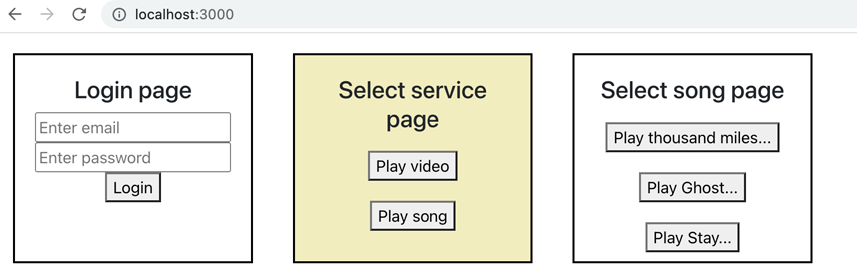
We will have three pages for this app. Refer to Figur
Figure 7-3. UI design for the analytics application
In our React application, the preceding three cards represent three different pages, and when the mouse hovers over the card, it glows with a yellow color that represents the user has visited the page; in the real-world web application, the page view is counted when the URL changes and the user navigates from one URL to another on the browser.
In this application, on clicking buttons nothing happens; we will only record events.
The goal here is that with a very small and simple imitation of a real-world application, you will be able to understand the fundamentals of analytics easily.
As application owners, we want to know in our dashboard about various user actions we need to name the event, and call an API to create an entry in our analytics backend system.
Let’s define our goal and outcome for page/card 2:
Goal: We want to know how many times users click the Play video button vs. the Play song button.
Result: As business owners, we will know users’ behavior whether they like playing videos or listening to music. Accordingly, we can take a decision to further build on either of the options as investments.
How to achieve this: On every button click, call the record function from Amplify, for example:
Analytics.record({ name: "playVideoButtonClicked" });
where name is the unique key of the event.
203
Chapter 7 analytiCs
Recording Button Clicks on the Sign-In Page
Import the Amplify-related objects to access the backend:
2: import { Amplify, Analytics } from "aws-amplify";
3: import awsconfig from "./aws-exports";
4: Amplify.configure(awsconfig);
LINE 2: We will require Amplify to configure Amplify on this page and Analytics to record events or sessions.
LINE 3: Get the AWS export configuration to configure Amplify.
LINE 4: Configure Amplify.
The following is our React login page component:
01:
02: <h4>Login page</h4>
03: <div>
04: <input
05: type="text"
06: placeholder="Enter email"
07: />
08: </div>
09: <div>
10: <input
11: type="text"
12: placeholder="Enter password"
13: />
14: </div>
15: <div>
16: <button
17: onClick={() => {
18: Analytics.record({
19: name: "signInButtonClicked",
20: });
21: }}
204
Chapter 7 analytiCs
22: >
23: Login
24: </button>
25: </div>
LINES 1–15: This is a very simple component, with two input boxes for login id and password.
LINE 16: This is our login button where we want to track events.
LINE 18: Call the record function whenever the button is clicked, and a unique name is passed in the key name, and this key will be recorded with count and timestamp.
Let’s run the React server and see the event recording in action.
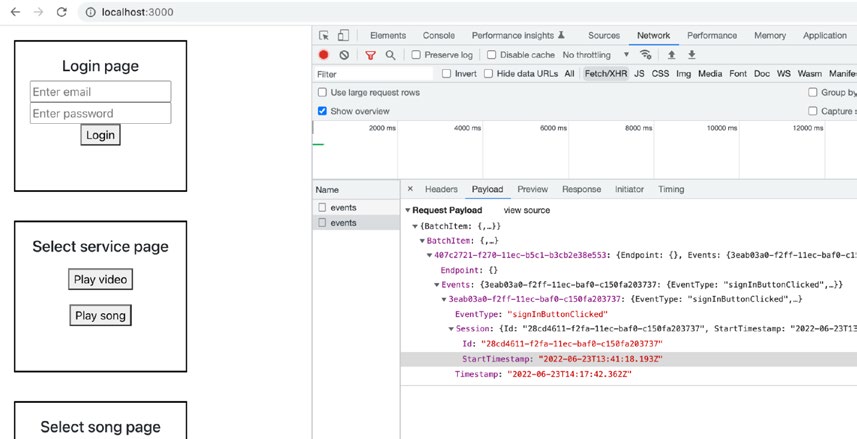
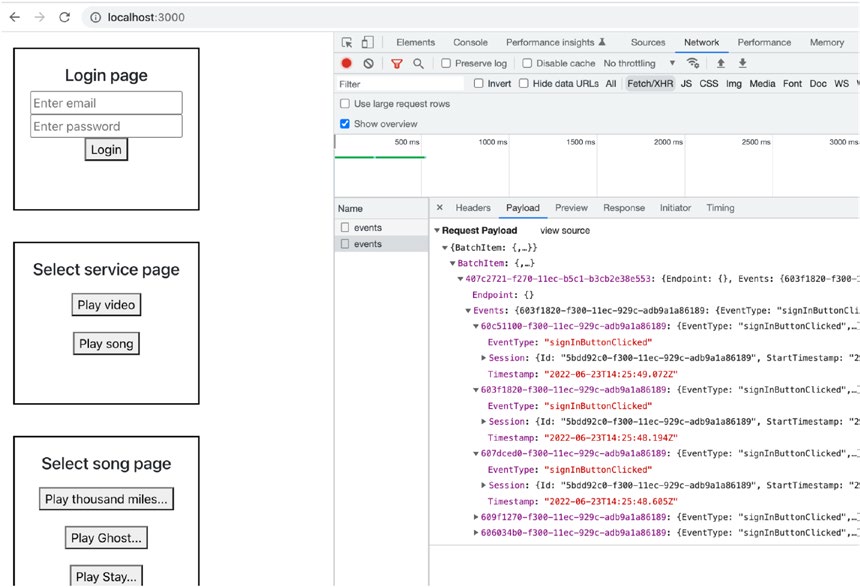
Run the frontend server and open the Network tab in the browser before clicking it, this is shown in Figure .
Figure 7-4. Demo analytics application
As you click the login button and wait for a couple of seconds, you will notice one API being called with events, and if you expand the payload of the API call, you will notice the eventType with the same namèsignInButtonClicked` called, with other metadata like a timestamp and sessions, etc.
205
Chapter 7 analytiCs
Why Is There a Delay in API Calls After We Click
the Button to Record?
I will be very happy to know if you asked this question before reading this question.
If you notice the behavior of how the APIs are being called, they are not real time, so what Amplify by default does is it batches the events to record in a couple of seconds; to explain this in detail, if you click the button ten times continuously, this will batch all the ten event records and call one API, say, in two seconds.
This way, all the records are also published via the API, and Amplify saves on calling ten APIs to record events.
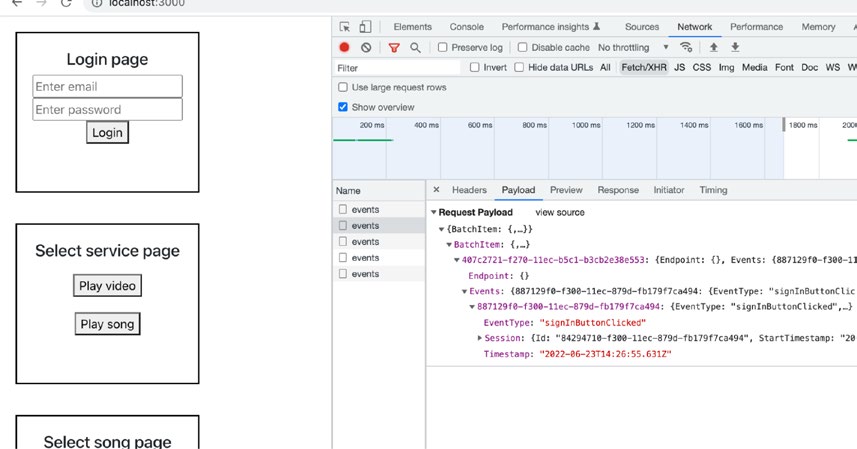
Here is the result if I click the login button five times continuously, shown in Figur
Figure 7-5. Network calls made with gap to Amplify
If you notice, there are five items in one API call.
If you don’t want to batch these and want to record events immediately, you can configure that as well.
206
Chapter 7 analytiCs
1: Analytics.record({
2: name: signInButtonClicked,
3: immediate: true
4: });
LINE 3: In the same record function, pass the boolean flag with key name ìmmediatè, and set it to true.
Here is the result if I click the login button five times.
Figure 7-6. Network calls made immediately to Amplify
Now there are five API calls that are recorded immediately.
Tracking Page Views
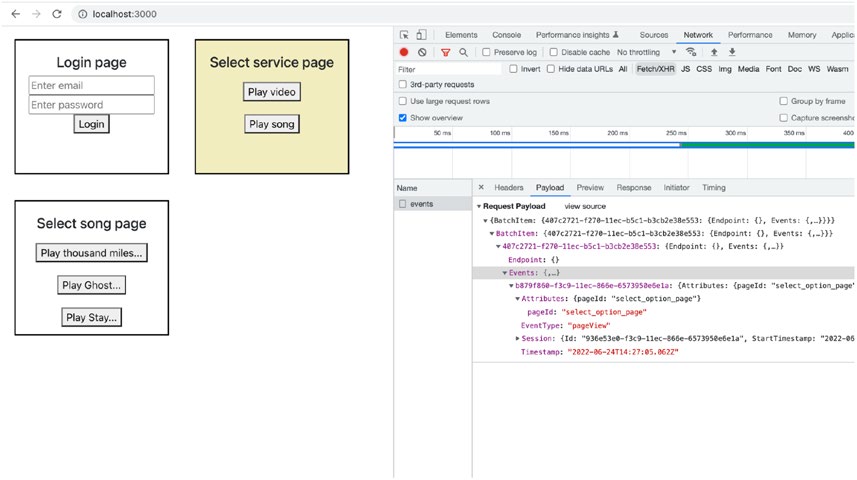
In our scenario, we have created three smaller components to replicate the pages in less time to understand the crux of analytics. In this case, when the user’s mouse hovers over the component, we are considering it a page view; hence, in our scenario, this should also record the page view event in our analytics backend.
207
Chapter 7 analytiCs
Let’s see the code snippet to record events on page views:
06: const MyPageContainer = (props) => {
07: const [isCurrentlyOnPage, setIsCurrentlyOnPage] = useState(false); 08: return (
09: <div
10: onMouseEnter={() => {
11: setIsCurrentlyOnPage(true);
12: Analytics.record({
13: name: "pageView",
14: attributes: {
15: pageId: props.pageId,
16: },
17: });
18: }}
19: onMouseLeave={() => {
20: setIsCurrentlyOnPage(false);
21: }}
22: style={{
23: background: isCurrentlyOnPage ? "#f2edbf" : "", 24: }}
25: >
26: {props.children}
27: </div>
28: );
29: };
LINE 6: This is a common page container, which all the pages in our application will use to create the parent container that wraps some common functionality across any React component and renders the children whatever passed to it. This is a very good example of HOC (higher-order component) which abstracts the logic of registering analytics logic in one place.
Note in react, higher-order components (hOCs) are functions that accept a component as an argument and return a new component with enhanced functionality.
208
Chapter 7 analytiCs
LINE 7: Create the local state to rerender the UI when the mouse enters and leaves.
LINE 10: We are listening to when the mouse enters we call a function, which sets the local state to true and records page view event, with the page Id as the attribute so that we can identify each page.
LINE 19: Set the local state value back to false when the mouse leaves this component.
LINE 23: We are using the local state to decide when to glow the component with background color, which as explained in the previous paragraph depends on when the mouse leaves or enters the components.
LINE 26: Given this is a HOC and we want to use this as the component which can wrap around any other component, we are rendering the children as is.
And that’s all; if you load your application and hover the mouse in and out, you will see the pageView event getting registered, as shown in Figure
Figure 7-7. Registers pageView event
Automatic Tracking
If you see the pattern of recording events on every button click, everything remains the same code-wise apart from name and attributes, and we have to add in every onclick function, the Amplify has given one more way to add the tracking to the buttons on the various other events.
209
Chapter 7 analytiCs
Let’s configure our first auto-event tracker:
06: Analytics.autoTrack("event", {
07: enable: true,
08: events: ["click"],
09: selectorPrefix: "data-amplify-analytics-"
10: });
LINE 6: Call the autoTrack function to configure an auto-event tracker of type event.
LINE 7: This flag is required to enable or disable the auto tracker.
LINE 8: The list of events we want to track; we are mentioning click here.
LINE 9: We need to mention the HTML element selector prefix; we will set this prefix to our buttons, and automatically this configuration will record the events on the mentioned HTML events.
Let’s see how to attach attributes on the buttons so that the preceding auto-event tracker can be attached to the button and reacts to the events:
65: <button
66: data-amplify-analytics-on="click"
67: data-amplify-analytics-name="signInButtonClicked"
68: >
69: Login
70: </button>
LINE 66: We are using the same selector prefix and add -on against which event we want to register the record.
LINE 67: The -name for the selector prefix is the name of the event we want to register. As you can notice here, the function onclick and registering the events by calling the record function is vanished.
Events Dashboard on AWS Console
Ideally, when you publish your application to your customers, we want to know how our customers are reacting and which features they are using the most and which pages they are visiting the most.
To see our customer’s behavior, log in to your AWS console and open the pinpoint service.
210
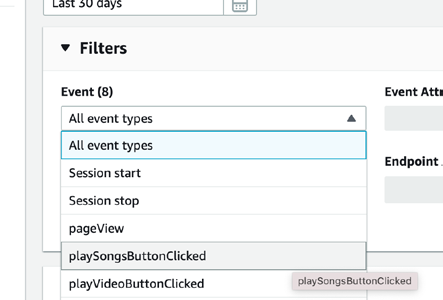
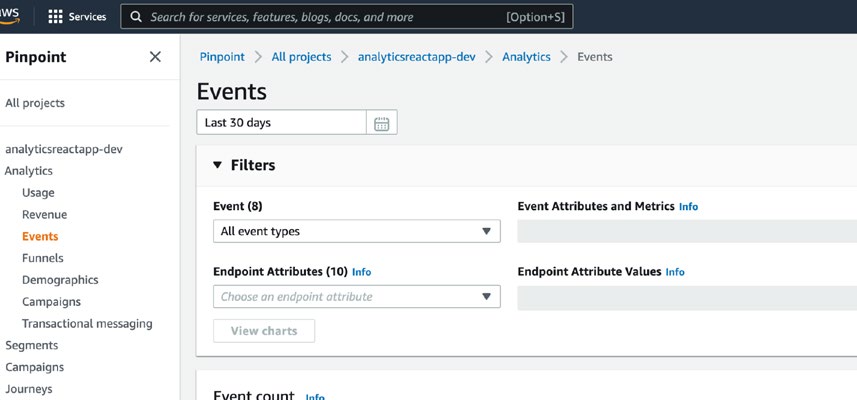
Chapter 7 analytiCs
From the left pane, choose Analytics, and click Events, the screenshot in Figur
shows the same.
Figure 7-8. Pinpoint Analytics Events dashboard
Please refer to Figuren the Filters accordion; in this section, we will be able to see our various events, shown in Figure .
Figure 7-9. Pinpoint Analytics Events dashboard filter Click the events list drop-down.
As you can see, you will see all the events coming from our application.
211
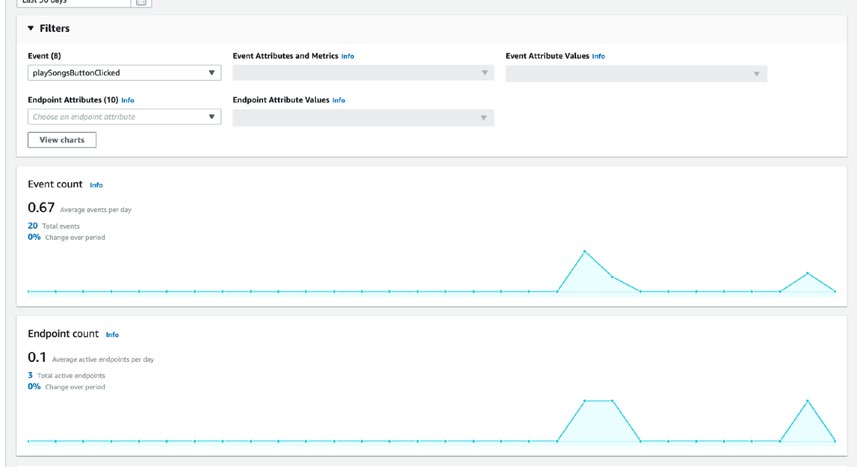
Chapter 7 analytiCs
You can select the event which you are interested to know the statistics for, Figurws a view of the event selected.
Figure 7-10. Pinpoint Analytics Events dashboard for a event view If you click the “View charts” button, you will see various charts against timelines with the count of events.
You can also click the demographics from the left pane which will tell the users’
demographic data, as shown in Figure
212
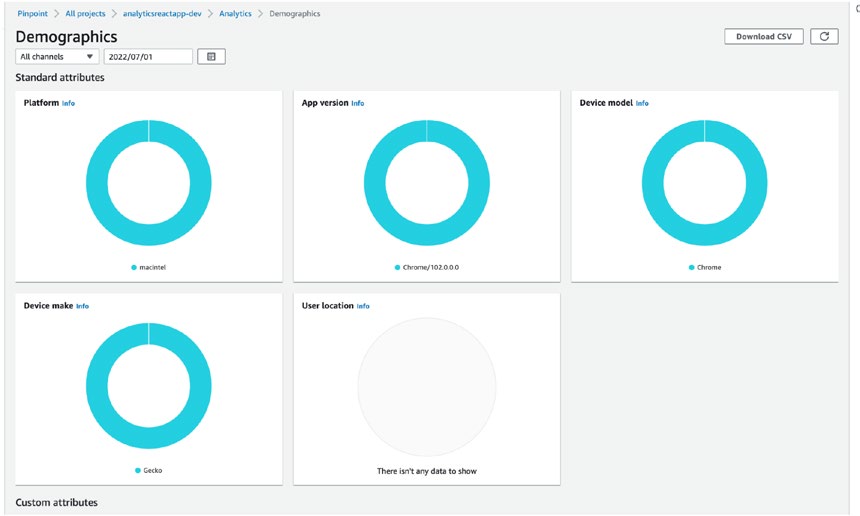
Chapter 7 analytiCs
Figure 7-11. Pinpoint Analytics Events dashboard for demographics charts view Given that our application is not published on the Internet for the users, and I am running only from my local machine, we cannot see more than one location and more than one device.
Limitations of AWS Pinpoint Service
In the previous section, using the AWS Pinpoint service, we have seen whenever the analytics events and their metadata are being sent to our analytics backend, the data is collected by the AWS Pinpoint service, and it creates some default dashboards and charts. Pinpoint also provides basic filters where we can roughly analyze how many users are active and how the users are interacting with our application by checking on various events of button clicks and page views. The following are some limitations with Pinpoint:
• Limited charts on the dashboard: The events dashboard in the
pinpoint service is limited and will be controlled by Amazon; if
we want to read the analytics data and create a custom chart, it is impossible. We will be restricted, and we will have to live with what Amazon provides by default.
213
Chapter 7 analytiCs
• Limited filters to conclude on user behavior: If you try to play around with the pinpoint dashboard, you will notice the filter feature is quite limited. What if we want to find how many users are clicking the
play song button from the London location only? With the default
pinpoint dashboard, we will not be able to achieve this as of now.
• Cannot process the data and programmatically send alerts: There can be a use case where our business wants to analyze the user
interaction events and process them in real time to check on the
frauds or send alerts. For example, let’s assume the analytics data are coming from one heart rate medical equipment, and whenever the
current heartbeat reaches a threshold, we want to alert the doctors in real time, but we cannot do that. This is a huge requirement in IoT.
• Cannot feed the events data to our ML models and train them: A lot of times when we are building a customer-facing large application like an ecommerce application, we want to feed the user interaction data to our ML models so that we can train our models, and our ML
models can recommend personalized components, for example, if a
user buys a washing machine, it can recommend a washing machine
cover to that user. For training our ML models, we need these
datasets which Pinpoint doesn’t provide out of the box.
To mitigate these issues, we need a different approach of recording our event’s data, so that we have better control. To mitigate these, we will now learn about the service named AWS Kinesis.
Introduction to Kinesis
Kinesis is a fully managed, scalable, cost-effective, and flexible service that enables us to collect, process, and do whatever we want to do with the incoming data in real time.
This service helps us easily stream the data so that we can store or react instantly instead of waiting for the data to process and draw conclusions later, which might impact the crucial journeys of the application.
Kinesis offers robust capabilities in a cost-effective way, which is scalable and has the flexibility to connect with any tools of our choice to get the maximum output from the data.
214
Chapter 7 analytiCs
Kinesis is not limited to analytics and is a service that we can use to ingest any real-time data like analytics events, application logs, video, audio, or in IoT for various devices’ event log data and further use these data to perform any action, send alerts, train ML models, or draw a conclusion.
Streaming Analytics Data
Now that we understand the capabilities of Kinesis, we will use the Kinesis service to stream our analytics data, and we will discuss how we can plug more tools and processes to consume this stream data and get more output as per our needs. Instead of recording our analytics events to Pinpoint, we will send each event data to Kinesis.
We want to receive the data from users’ actions, and we want to write these analytics data in a file with the required metadata and timestamp so that we can do the following: 1. Translate raw data output into GraphQL APIs, which our web
application can use to draw more custom charts.
2. We can also feed this raw data, massage it in the required format, and feed it to our ML models, and our ML models can draw
conclusions or make recommendations for each user.
3. We can also process the real-time data and check for a few
thresholds and send alerts if required.
In the following sections, we will only set up the kinesis backend, stream the analytics data, write the data into the file, and store the file in S3. Let’s set up our backend first, and then we will go through the demo.
Setting Up Kinesis Backend
Let’s start by adding kinesis to our project:
amplify add analytics
This will ask which service we want to use to record our events; this time, we will choose the Kinesis streams, use the arrow key, and press enter:
? Select an Analytics provider
Amazon Pinpoint
› Amazon Kinesis Streams
215
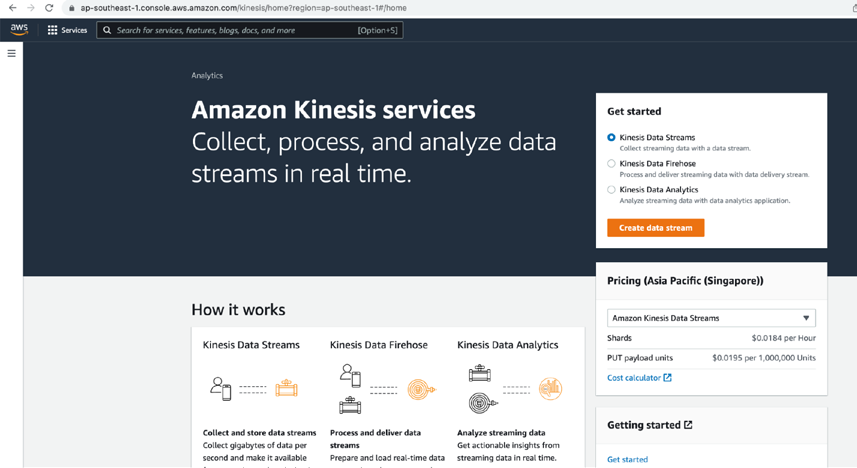
Chapter 7 analytiCs
Then it will ask to enter a name; you can name whatever you want. I will choose the default namèreactauthenticationKinesis`.
The next question would be how many shards we want; let’s choose one for now.
The configuration is done; let’s push the changes to the cloud:
amplify push
Review and confirm the changes by pressing Y and enter.
Once this is done, roughly we are good at setting up the ingestion stream.
Let’s check our AWS console dashboard if the stream is set up.
Log in to your console, and select the kinesis service.
You will see something like Figure .
Figure 7-12. AWS Kinesis services home page
Click the hamburger menu on the top left, just below the AWS logo.
216
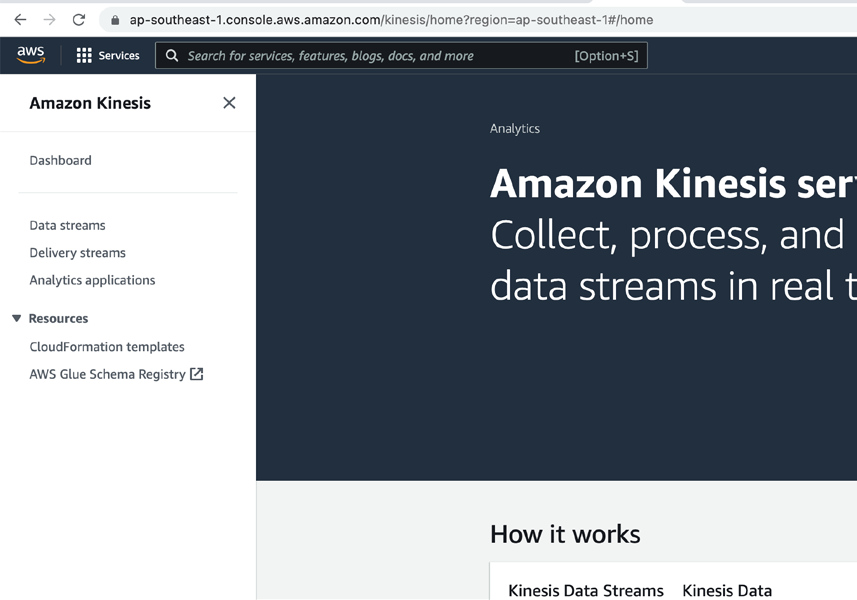
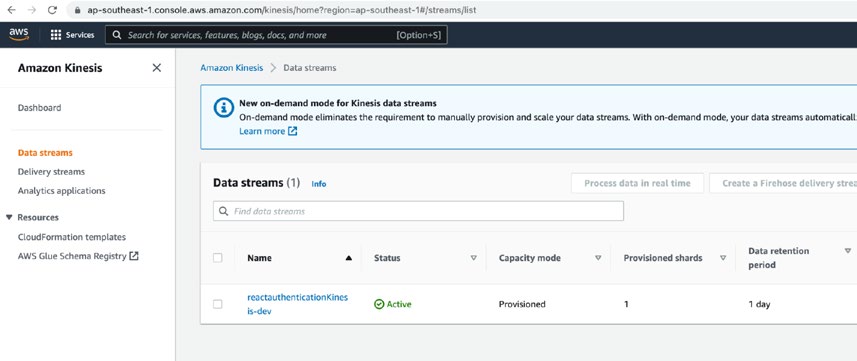
Chapter 7 analytiCs
Figure 7-13. AWS Kinesis services menu
Click the Data streams.
Figure 7-14. AWS Kinesis data streams
217
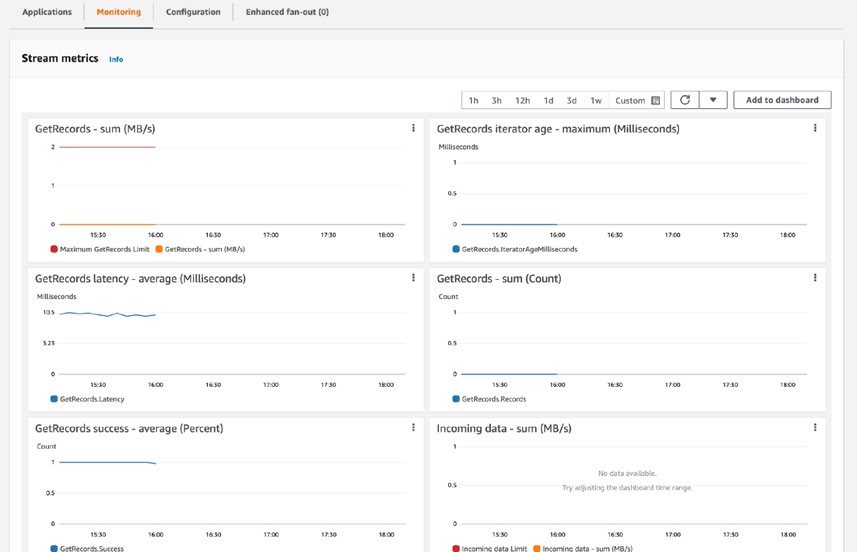
Chapter 7 analytiCs
You will see one data stream is created with an active status by the name we entered in our CLI; yes, this data stream resource is ready to ingress our data.
Note “ingress data” refers to data that is coming into a system, network, or device from an external source or device. it is the opposite of “egress data,” which refers to data that is exiting a system, network, or device and going to an external source or device.
Click the item and open the page.
Figure 7-15. AWS Kinesis monitoring
The Monitoring tabs basically show how the data has flown on the timeline.
If you click the Applications tab, you will see something like Figur.
218
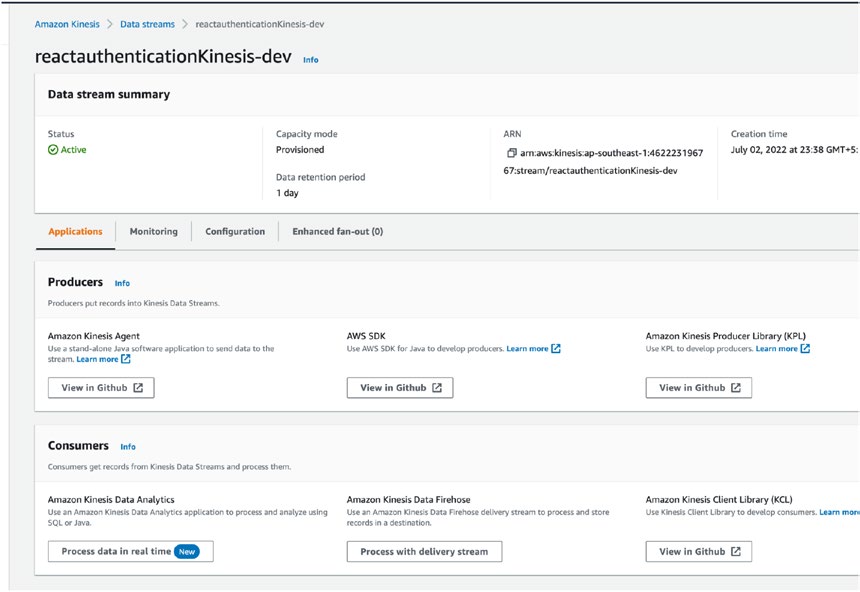
Chapter 7 analytiCs
Figure 7-16. AWS Kinesis Applications tab
The data stream has two important ends:
1. Producers
This is the initiation end of the stream, the part of the client which produces the data, for example, in our case it is going to be a
React.js application, which on user interaction it will send the
analytics data. If we were into IoT, the sensors would have been
our producers.
2. Consumers
If the data is produced, then some other tool or program has to
listen to it and react as per the requirement; given kinesis is quite flexible, we can do whatever we want to do on the consumer end,
either process in real time and call APIs or store as a CSV file in an S3 bucket.
219
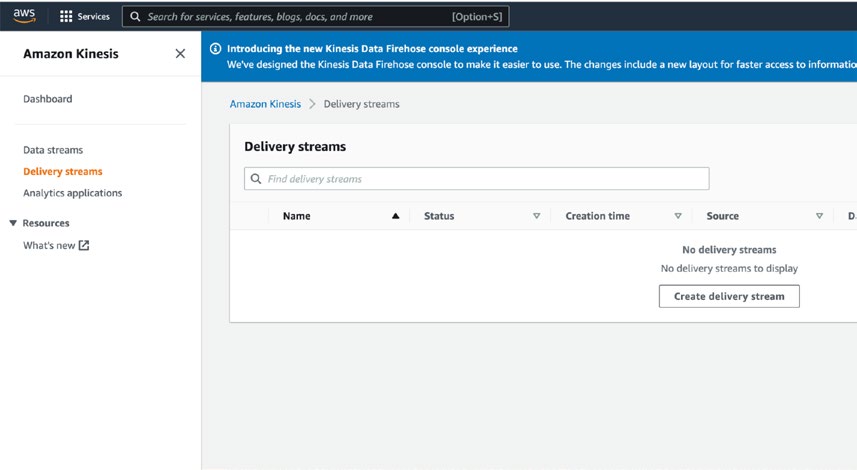
Chapter 7 analytiCs
In our case, let’s store the events data in a file and store the file in an S3 bucket, which can be further used to either process and store in DB to expose the API or feed the file to ML models to train them.
Delivery Stream
From the left-side pane, let’s click the Delivery streams option.
Figure 7-17. AWS Kinesis delivery streams
Click Create delivery stream.
220
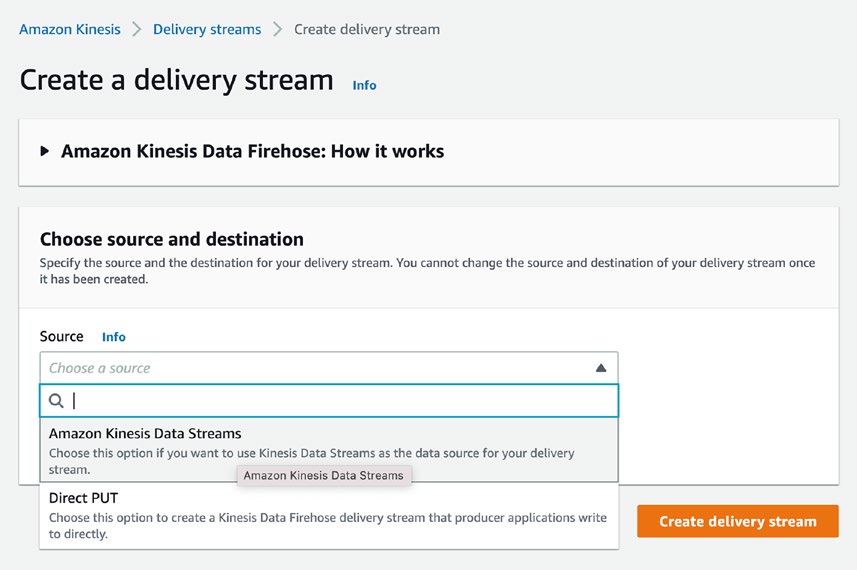
Chapter 7 analytiCs
Figure 7-18. AWS Kinesis Data Streams details
As we want the kinesis data stream, from the source drop-down choose the kinesis data stream option.
221
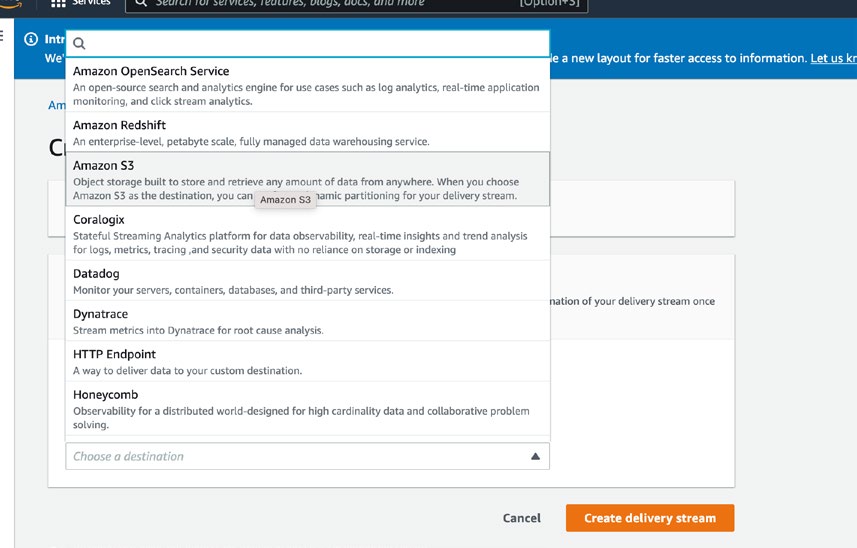
Chapter 7 analytiCs
Figure 7-19. Writing data in an S3 bucket
Writing the Data into the File
As we want to write the data in an S3 bucket, let’s choose the S3 from the drop-down.
Figure 7-20. Select source
222
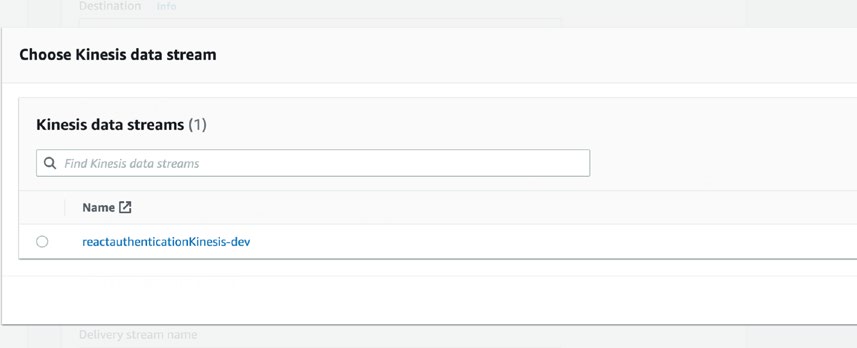
Chapter 7 analytiCs
We will be asked to choose the source; click Browse.
Figure 7-21. Selecting Kinesis data stream source
Choose the kinesis data stream we just created.
Enter the delivery stream name; I will go ahead with the default name.
In the destination setting, choose the S3 bucket name where you want to write the file of events.
223
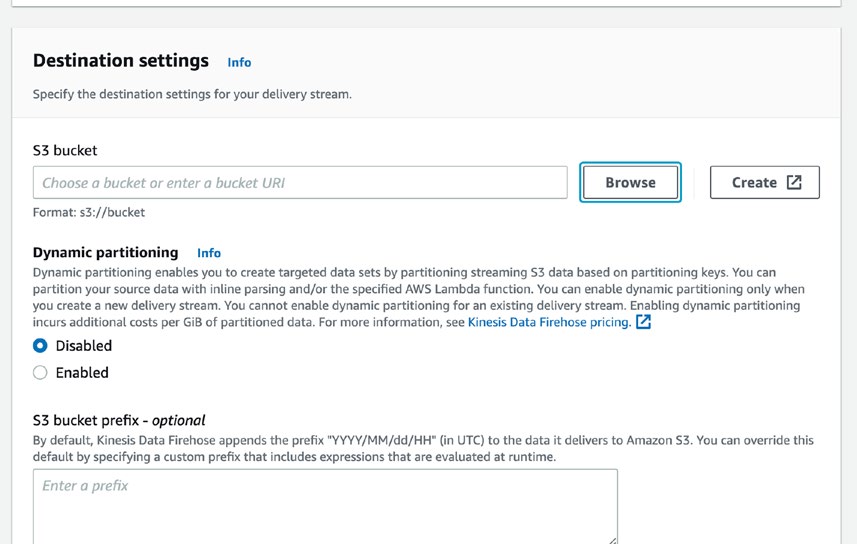
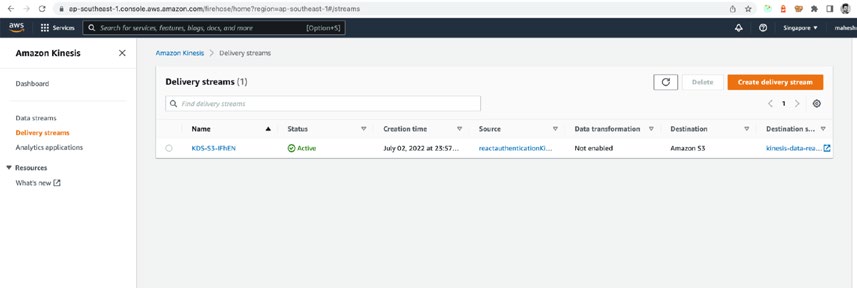
Chapter 7 analytiCs
Figure 7-22. Selecting an S3 bucket
Click Browse and select the S3 bucket from the list.
Click the Create delivery stream button, and on success go back on the delivery stream dashboard.
Figure 7-23. Delivery stream dashboard
224
Chapter 7 analytiCs
If you see Figure with an active status, congratulations, your delivery stream is ready as well to create a file in the S3 bucket.
Please note in the source column, we have a valid data stream, and in the destination, we have our selected S3 bucket to write the files.
Streaming the Analytics Data from React App
We will use the same React application and remove the Pinpoint recording registration login from the onClick event function and onMouseEnter event function.
Let’s modify our React application code:
02: import { Amplify, Analytics, AWSKinesisProvider } from "aws-amplify"; 03: import awsconfig from "./aws-exports";
04: Amplify.configure(awsconfig);
05:
06: Analytics.configure({
07: AWSKinesis: {
08: region: awsconfig.aws_project_region,
09: },
10: });
11: Analytics.addPluggable(new AWSKinesisProvider());
LINE 2: Import the AWSKinesisProvider from the npm package, which will help in streaming the data to Kinesis.
LINE 6: Using the analytics, configure the function to configure the kinesis stream.
LINE 11: Add the kinesis provider plugin to amplify analytics configurations.
Recording Event to Kinesis Streams
This is simple, similar to recording in Pinpoint.
Please follow the following in all the buttons or page load events: 58: <button
59: onClick={() => {
60: Analytics.record(
61: {
62: data: {
225
Chapter 7 analytiCs
63: eventType: "buttonClick",
64: eventName: "playSongClicked",
65: timestamp: new Date(),
66: },
67: streamName: "reactauthenticationKinesis-dev", 68: },
69: "AWSKinesis"
70: );
71: }}
72: >
73: Play song
LINES 59 and 60: In the event onClick, call the record function to stream the data.
LINE 62: Pass the data we want to stream under the key name data.
LINE 63: The event type is buttonClick.
LINE 64: The name of the event is as required on the event we want to register, in this case, its playSongClicked.
LINE 65: We want the current timestamp to process later. Please note, you can add more data if required, like user info, device info, or anything else.
LINE 67: As this is a kinesis stream, we need to pass the name of the stream where we want to register.
LINE 69: This is a type we need to pass to the analytics provider, in this case, AWS Kinesis.
Once you add the kinesis analytics recording function in all the buttons and page load events, save the changes and load the React server.
Hover on the components, and click various buttons to stream the analytics data on kinesis.
226
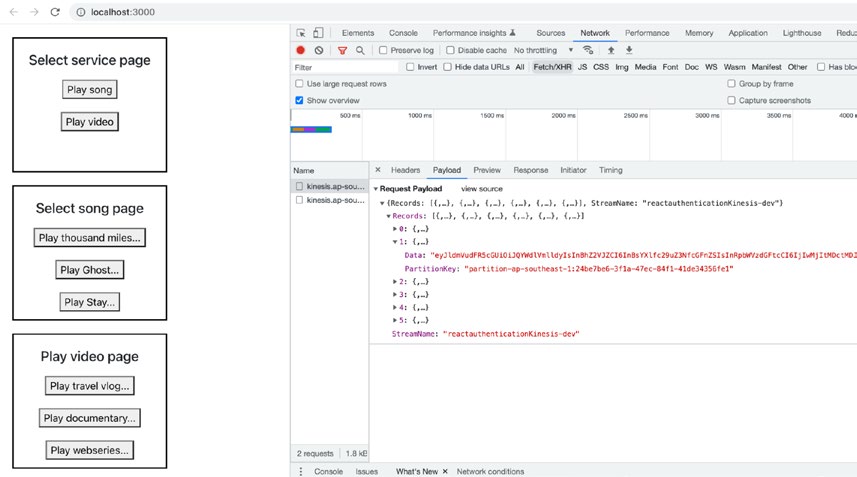
Chapter 7 analytiCs
Navigate to the Network tab; you will notice the events data are streamed using kinesis as shown in Figurhe value in Data key is base64 encoded; you can copy the value and decode the base64 from your terminal or any online tool.
Figure 7-24. Web application streaming data to Kinesis You will see something like Figure , which is exactly the data that we wanted to record.
227
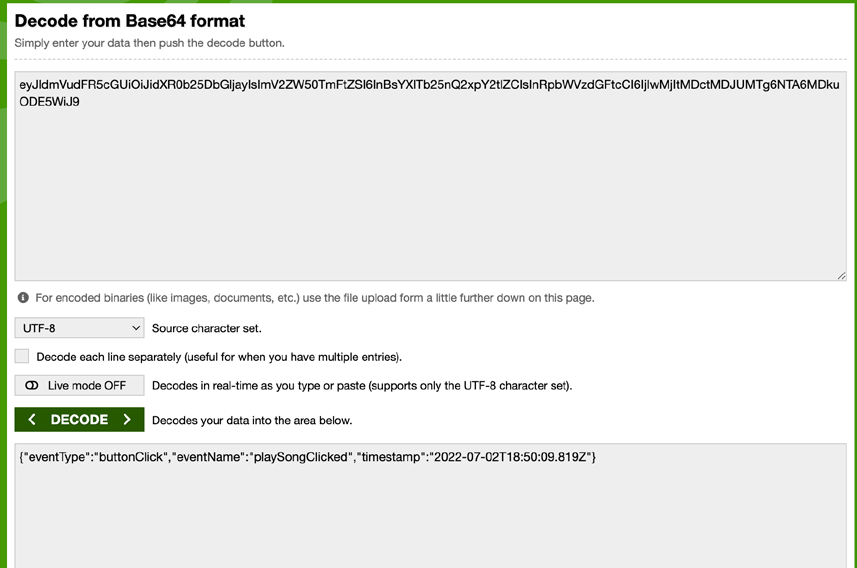
Chapter 7 analytiCs
Figure 7-25. Usin to decode base64-encoded data Congratulations on integrating from the producers’ side of the data stream and successfully streaming our analytics data from the events from the React application.
Kinesis Data Stream Dashboard
Navigate to the kinesis service on the AWS console on the browser and click the data stream; under the Monitoring tab, you will see something like Figur.
228
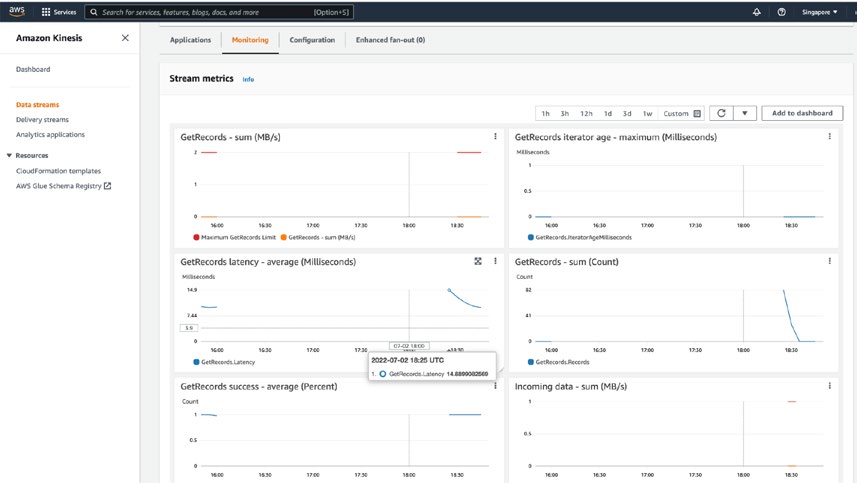
Chapter 7 analytiCs
Figure 7-26. Amazon Kinesis Monitoring tab
As you can see, as we interacted on the React application we have streamed the data, and that is reflected on the charts.
Kinesis Data Delivery Dashboard
Click the data delivery; you will see something like Figur.
229
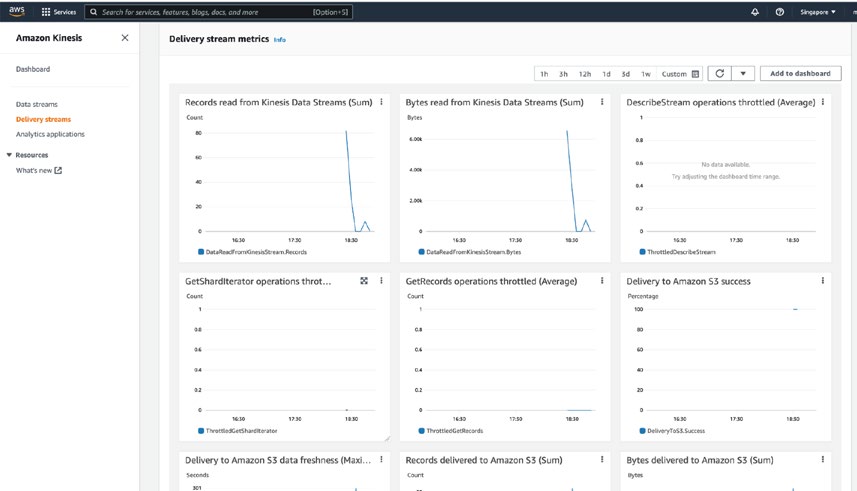
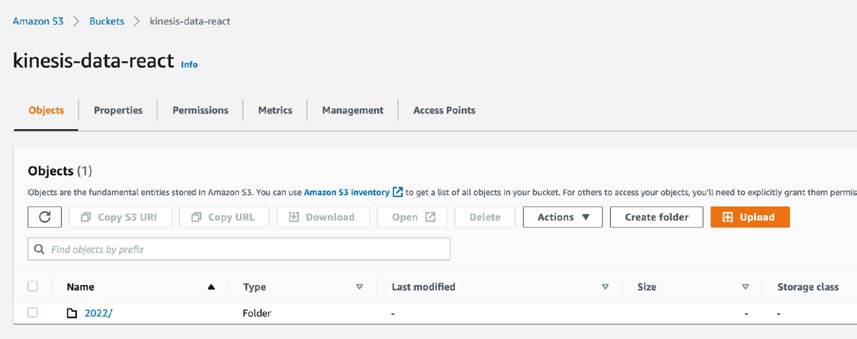
Chapter 7 analytiCs
Figure 7-27. Amazon Kinesis data delivery dashboard
Data in the S3 Bucket
Open the S3 bucket, the one which was selected as the destination in the delivery stream configurations.
You will notice one directory is created, as shown in Figure .
Figure 7-28. Amazon S3 bucket
230
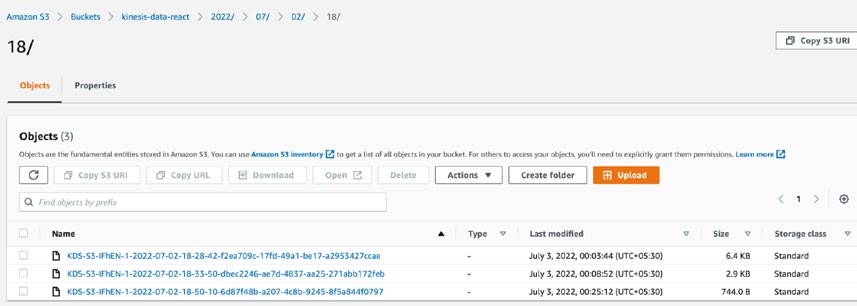
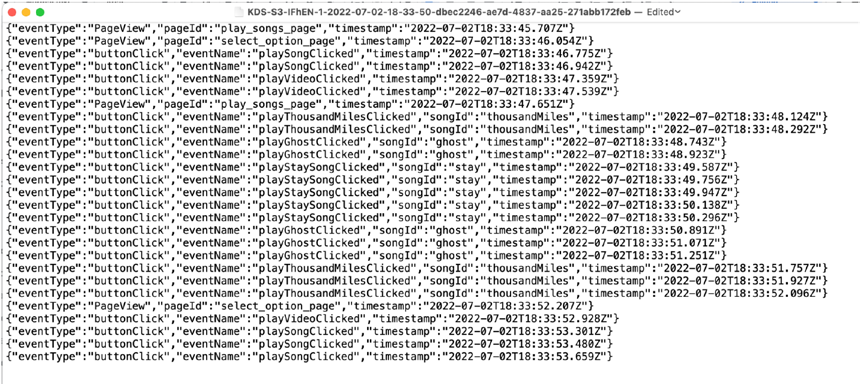
Chapter 7 analytiCs
Open the directories until you reach the files, shown in Figure .
Figure 7-29. Amazon S3 bucket view data
In my case, it was 2022/07/02/18. The various directories will follow year/month/
date/UTC hour. You will get the directory names and the day and time you receive the stream from your application.
Let’s open the file, you will can see the file preview in Figur
Figure 7-30. Data file
As you can read through the file, it contains the various data we streamed from our React application.
231
Chapter 7 analytiCs
Summary
The chapter provided a high-level view of analytics and covered the fundamentals of analytics and its terminologies. It then moved on to discuss how to set up the Amplify Analytics backend and use AWS Pinpoint to record events and actions. Readers learned how to record events in a React app, track page views, and use automatic tracking. The chapter also highlighted the limitations of the AWS Pinpoint service.
To address these limitations, the chapter introduced Amazon Kinesis as an alternative solution for streaming analytics data. It covered the steps involved in setting up the Kinesis backend and monitoring Kinesis data streams. Readers learned how to write the data into a file and stream analytics data from their React app to AWS Kinesis.
Overall, the chapter provided a comprehensive guide to implement analytics using AWS Pinpoint, React web app, AWS Kinesis, and AWS Amplify. Readers learned how to record and track events, stream data, and monitor Kinesis data streams. The chapter also covered the limitations of the Pinpoint service and how to overcome them by using Kinesis.
232
CHAPTER 8
Continuous Integration
and Continuous
Delivery/Continuous
Deployment
Continuous integration doesn’t get rid of bugs, but it does make them dramatically easier to find and remove.
—Martin Fowler
The Goal of This Chapter
1. Understand the CI and CD in detail and their differences
2. Understand Pipeline as Code and its benefits
3. Publish apps in multiple environments
4. Password-protect the development environment using Amplify’s
access control feature
Defining CI/CD
Continuous integration/continuous delivery (CI/CD) is a set of practices that an application development team uses to automate and streamline the process of sanitizing, testing, building, and deploying the application quickly and efficiently, as soon as there is any code change.
233
© Akshat Paul, Mahesh Haldar 2023
A. Paul and M. Haldar, Serverless Web Applications with AWS Amplify,
Chapter 8 Continuous integration and Continuous delivery/Continuous deployment To deliver high-quality and bug-free code at a high velocity with minimum errors, software development teams rely on fast and reliable CI/CD pipelines. These pipelines enable the team to take an agile approach to deliver the applications.
The guiding principle of CI/CD is the frequent and continuous delivery of software updates, which encompasses a range of activities including integration, testing, building, delivery, and deployment of applications. This end-to-end process is commonly referred to as the CI/CD pipeline, which is composed of multiple phases. Typically, some of these phases depend on previous phases and require the one phase to complete successfully before proceeding further. This process of breaking down the CI/CD pipeline into smaller, more manageable phases gives the team more flexibility and control to deliver high-quality software and helps business by reducing the time to market for new features and updates.
Difference Between CI and CD
CI and CD have different responsibilities in the pipeline; let’s try to understand that.
Continuous Integration
Continuous integration (CI) emphasizes the need of frequent merging of code changes from the feature branches into the main branch. With typical development teams comprising anywhere from 8 to 10 developers, if all the developers contribute to the repository, there can be a minimum of 10–15 branches. If integration of these branches into the main branch is postponed until the release day, the likelihood of conflicts and delays in the release process significantly increases. To avoid such problems, CI practices require developers to merge their code changes regularly and promptly, enabling them to catch and resolve issues early, leading to a smoother, more efficient release process.
CI enforces continuous integration of code changes into the main branch while validating them through a set of phases.
CI emphasizes a lot on automating the test cases and checking the quality of code to really make sure the application is not breaking by any code change, before merging to the main branch.
234
Chapter 8 Continuous integration and Continuous delivery/Continuous deployment Continuous Delivery
Continuous delivery (CD) is the next phase in the CI/CD pipeline, which involves the automated deployment of code changes to either a test environment or a production environment. After passing through the CI pipeline, which includes phases like testing and linting, the newer version needs to be deployed to the test environment to QAs or in a production environment to the customers. This means after the automated testing and build phase, it’s time for the automated deployment of the application, which is as simple as clicking a button of approval whenever the team wants the newer version to appear to the customer.
CD ensures that the delivery process is controlled and planned with a manual button click, allowing teams to maintain greater control over the integration and delivery phases of their application.
Continuous Deployment
Continuous deployment (CD) significantly steps up the deployment process in the CI/
CD pipeline, which emphasizes the automated deployment of code changes to the environments without any manual intervention. With continuous deployment, every approved small change is continuously delivered to customers as soon as possible, automatically.
The CI/CD pipeline recommends frequent and smaller deployments to make it easier to track and identify any issues that may arise. This approach enables businesses to quickly revert small portions of the code, if necessary, rather than having to revert entire features that may impact multiple areas of the business, resulting in a significant amount of time and effort being wasted. By leveraging continuous deployment, teams can significantly reduce the time it takes to deliver code changes to customers, minimize the risk of human error, and ensure the smooth and efficient operation of their software applications.
In Figure can see an overview of the flow of the CI/CD pipeline. When code is merged to the main branch, the CI pipeline is triggered, which consists of multiple jobs.
These jobs include testing, code quality checks, and creating a build of the application, either as a zip of files or a Docker image. Once all of the jobs are successfully completed, the CD pipeline is triggered.
235
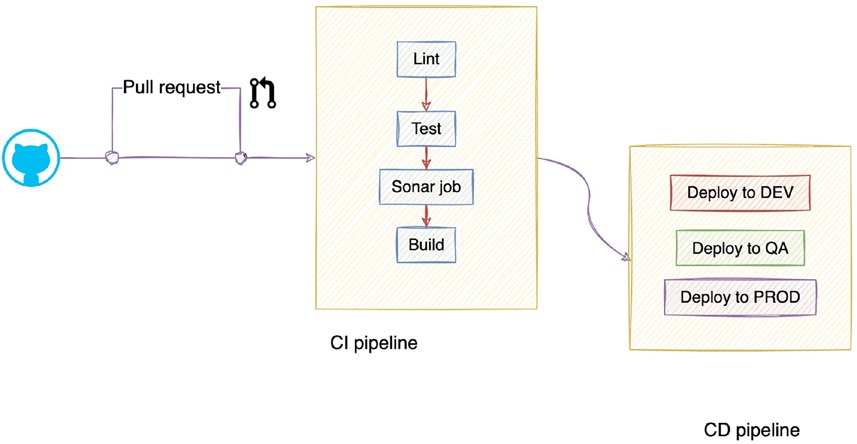
Chapter 8 Continuous integration and Continuous delivery/Continuous deployment
Figure 8-1. CI and CD pipeline flow
The Objective of the CI/CD Pipeline
The primary objective of the CI/CD pipeline is to provide immediate feedback to developers regarding the code modifications they have made. By doing so, it helps ensure that the development team avoids introducing any faulty code into the software automatically and instantaneously. This feedback is a critical component of the development process, as it enables developers to identify and resolve issues quickly, leading to more efficient and effective software delivery. The real-time nature of the feedback allows for the creation of a continuous improvement cycle, where the development team can continually refine their code and delivery processes, leading to better software quality and faster time to market.
Pipeline As Code
Pipeline as Code is a methodology that entails incorporating the pipeline configuration and definition into the codebase in version control, such as Git, in which it coexists with the application code. If, for example, the team decides to add an integration test phase 236
Chapter 8 Continuous integration and Continuous delivery/Continuous deployment after the unit test phase, rather than manually adding this phase from some dashboard, a team member must add the configuration to the codebase and raise a pull request against the main branch.
All configurations, such as testing, linting, building the docker image, pushing the image, and deployments, are established by coding, that is part of the repository. With this approach, as long as the pipeline configuration is versioned, it can be tested by adding it to a separate branch, and once the configuration is deemed satisfactory, it can be merged into the main branch.
Benefits of Pipeline As Code
The Pipeline as Code has effectively addressed various issues that arise from manual configurations of pipelines:
• Version control: Similar to version-controlling business logic code, the team can now create new versions of the pipeline and regulate configurations using code. This enables them to revert to the previous version or create distinct configurations for different branches.
• Audit trails: If we keep our Pipeline as Code, then it is possible to easily track who modified what and when.
• Testing before integrating into the main branch: Pipeline as Code enables the team to carry out the testing of the pipeline prior to integrating it into the main branch. The team can raise a pull request as a feature and test the pipeline in a different branch, which provides assurance before merging it into the main branch.
Repository and Environments
A team requires multiple environments to cater to different types of users to ensure that one type of user does not interfere with another type of user and breaks the user flow.
Typically, there are three types of users for a team:
1. Developers: The developers need a development environment,
which they use to integrate basic features and store the most
recent changes. However, this environment may have bugs and
unstable features.
237
Chapter 8 Continuous integration and Continuous delivery/Continuous deployment 2. Testers: The testers require a relatively stable environment to test the features that developers have marked ready for QA. Once
developers are satisfied with their feature, they move it to the test environment. This test environment is closer to production and is more stable compared to the development environment.
3. End customers: The end customers use the production
environment once the feature is thoroughly tested, and only then
is the feature marked ready for production and deployed to the
production environment.
It is crucial to maintain control over every environment using specific git branches.
In doing so, the team can follow the agreed git flow to manage the smooth transition of the features from the development environment to the test environment and finally to the production environment. It should be noted that the number of environments and their respective responsibilities are decided by the team members, and the practices and terminologies may vary from one team to another. As such, there is no universal rule, and teams work together to create their own set of guidelines.
Hosting the Application for Development Environment
To commence with the hosting and deployment of an application in the development environment, the primary step is to create a GitHub repository and push our source code. We will start with creating a development branch named `develop`, by running the following git command:
git checkout -b develop
Should you have any changes that have not been committed, kindly add, commit, and push the changes to the develop branch. Upon completion, the first step is to establish a connection between the repository and the branch to our Amplify app.
Access the AWS console and log in to your account. Proceed to the Amplify service, and click the hosting environment tab. Select your git repository host depending on where your repository is located. For instance, in our case, as shown in Figure have pushed to GitHub; thus, we will opt for GitHub.
238
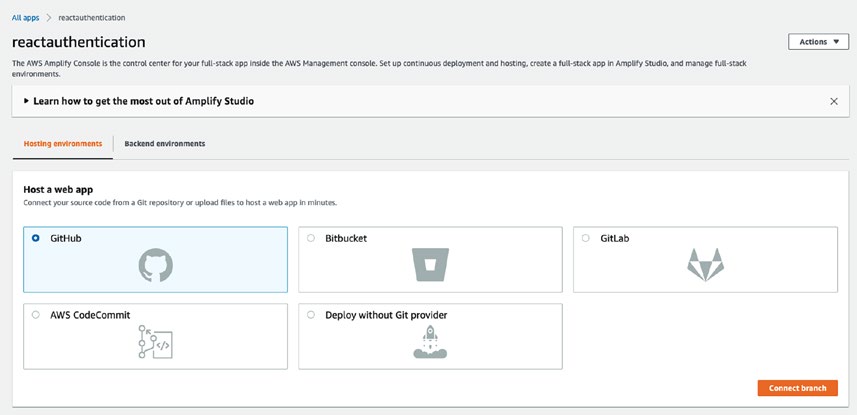
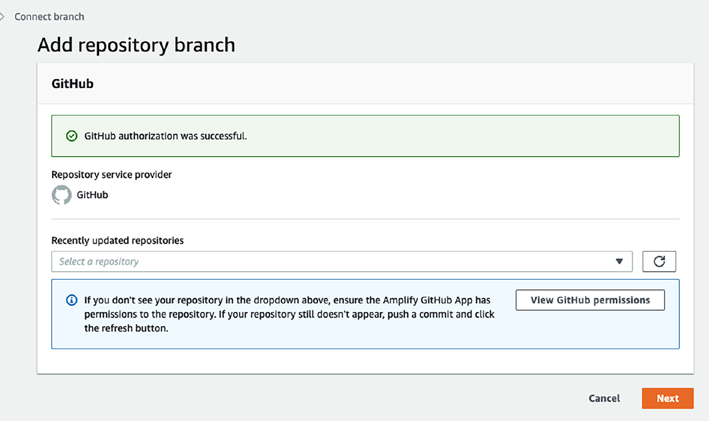
Chapter 8 Continuous integration and Continuous delivery/Continuous deployment
Figure 8-2. Connecting the Amplify app with the GitHub repository Authorize GitHub by providing your account credentials. You will be directed to a screen. The step is illustrated in Figurou will be required to select which repositories you want to grant access to. You can choose to give access to all repositories associated with your account or just one specific repository.
Figure 8-3. Prompt after successful account authorization 239
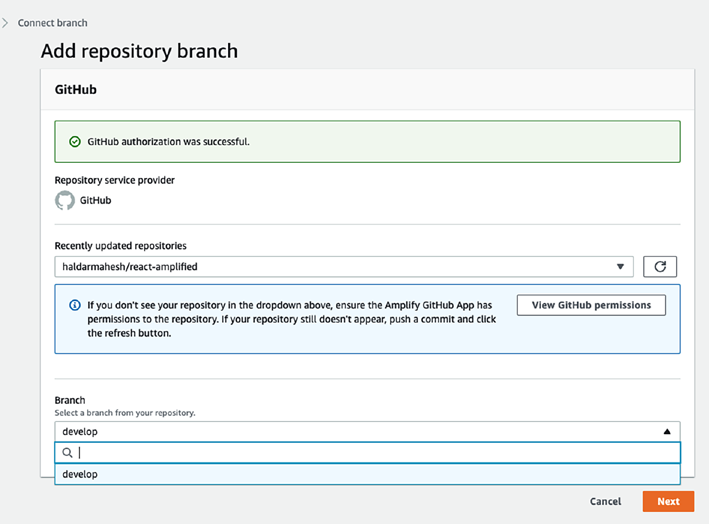
Chapter 8 Continuous integration and Continuous delivery/Continuous deployment The next step would be to select the branch that will be used for the hosting process.
In this instance, we will select thèdevelop` branch, which was previously pushed before commencing the hosting process. As illustrated in Figurter in the branch field to find your desired branch.
Figure 8-4. Selecting the branch to connect GitHub with the Amplify app If you have multiple Amplify apps, you need to select the appropriate app you want to connect to the repository from the drop-down. The step is illustrated in Figur
240
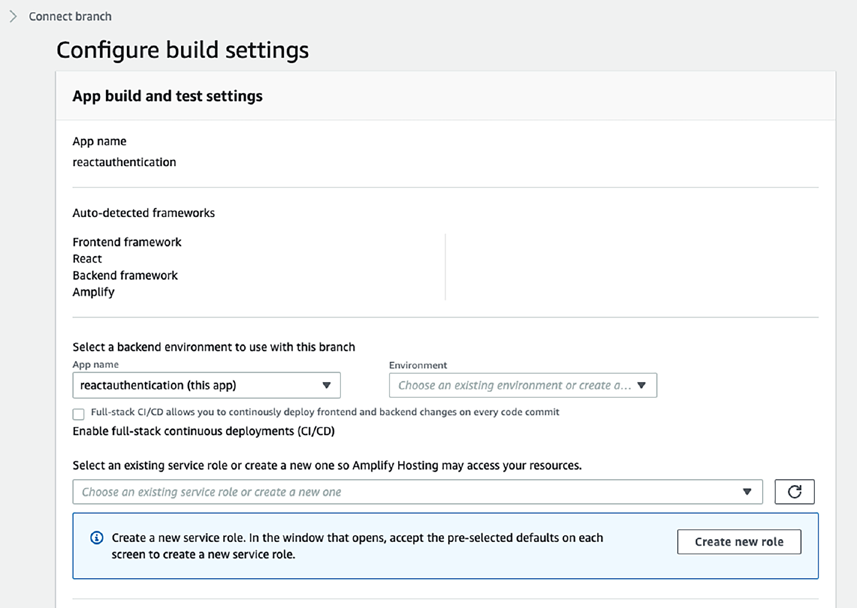
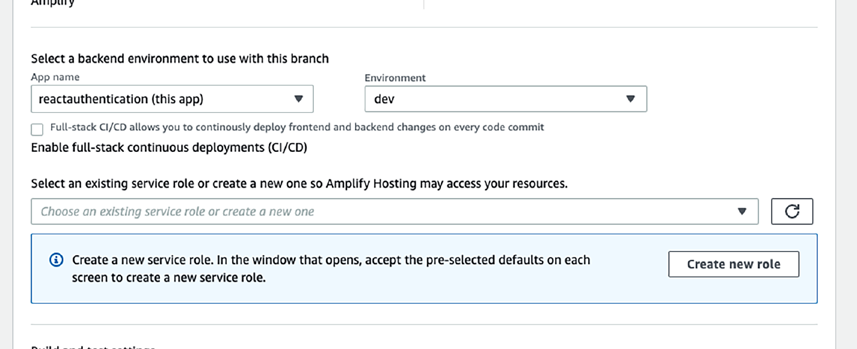
Chapter 8 Continuous integration and Continuous delivery/Continuous deployment
Figure 8-5. Select the Amplify app from the drop-down
Please select the appropriate environment by navigating to the relevant section in the hosting console. In this case, since we have already created a development environment, we can select it from the list of available environments. Refer to Figure
Figure 8-6. Select the environment
241
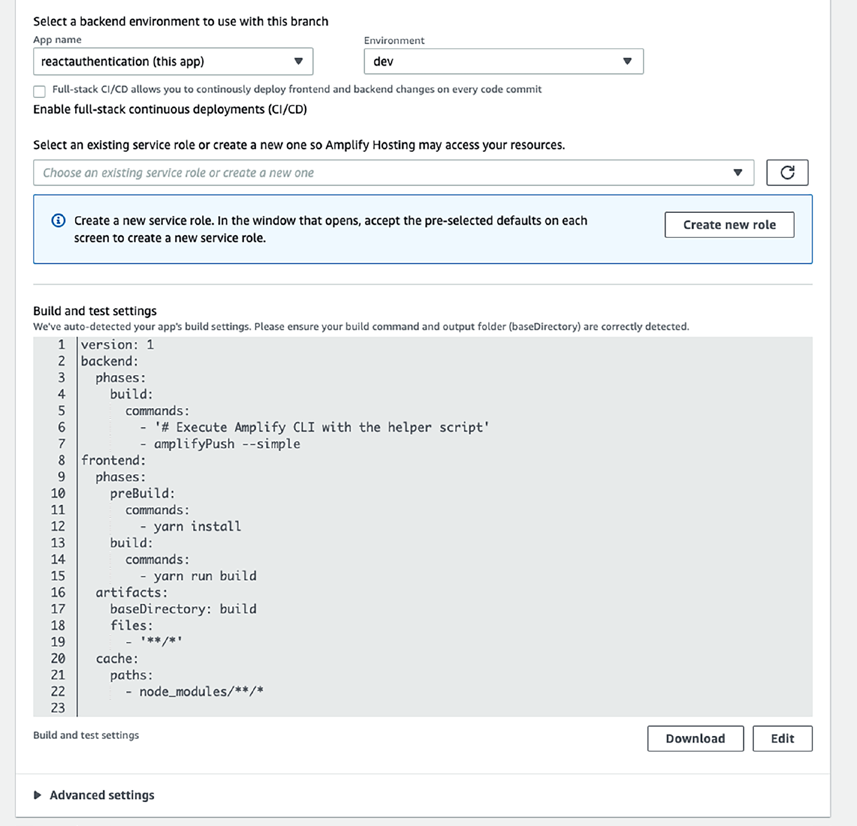
Chapter 8 Continuous integration and Continuous delivery/Continuous deployment The continuous integration (CI) pipeline is generated automatically under the “build and test” setting; refer to Figure . These configuration files are in YAML format, so it is important to verify that the commands used in the configuration files match those used by npm or yarn scripts.
Figure 8-7. The autogenerated CI config file for review 242
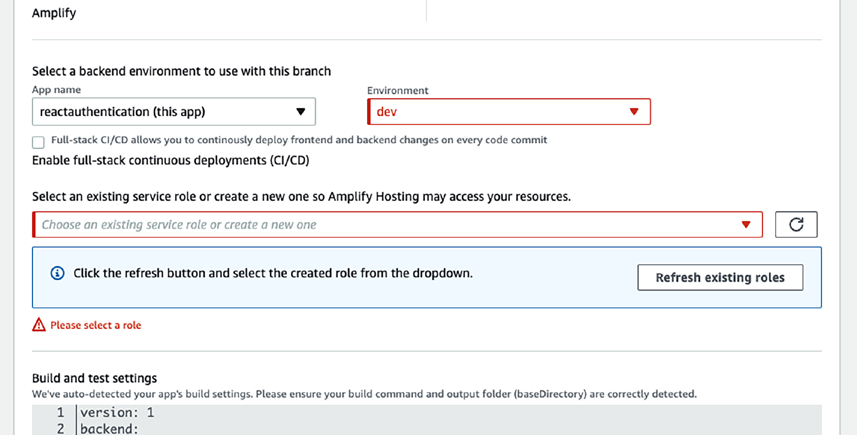
Chapter 8 Continuous integration and Continuous delivery/Continuous deployment If an attempt is made to submit it without selecting a role, an error will occur, prompting the selection of a role, as illustrated in Figure . This role is an AWS role specifically created for the CI/CD pipeline to access AWS resources and deploy the application.
Figure 8-8. The error state to select the role
Therefore, it is necessary to create a new role and assign it to the CI/CD pipeline.
This role has multiple benefits, including aiding in auditing, access control, and increased application security. In case any access key is leaked, the impact on the application would be minimal. Furthermore, the roles can be disabled at any point in time.
To create a new role, click the “Create a new role” option, which will navigate you to a new tab, as illustrated in Figur
243
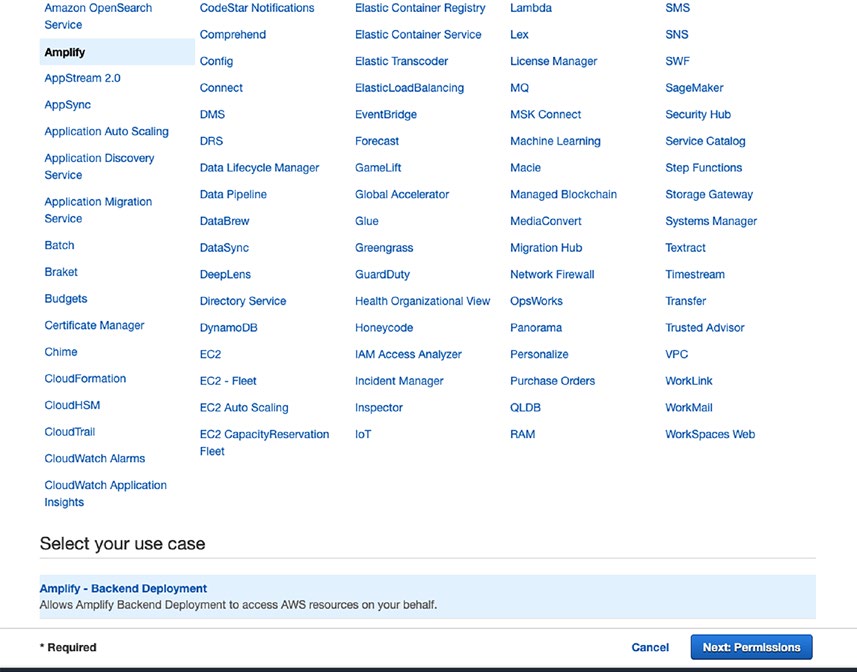
Chapter 8 Continuous integration and Continuous delivery/Continuous deployment
Figure 8-9. Use case list for creating a new role
Select the Amplify use case and click Next to add the permissions.
The permission is added automatically to the role, as illustrated in Figur. As we don’t want to add more permissions to this role, we may proceed to the next step by selecting the “Next” option.
244
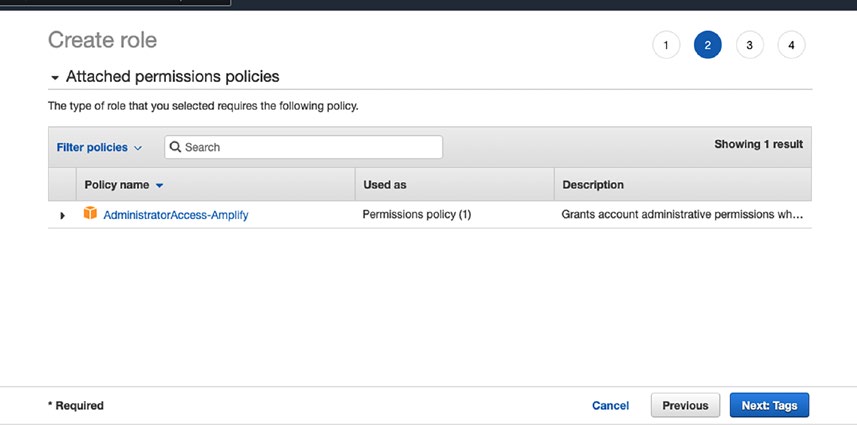
Chapter 8 Continuous integration and Continuous delivery/Continuous deployment
Figure 8-10. The permission policy for the Amplify app In the next screen, you will be prompted to add some tags to the role. These tags are used to group roles into desired categories. For now, you can skip this step and proceed by clicking the “Next” button.
In the subsequent screen, you need to specify a name for the role and provide a brief description. The screen is illustrated in Figur. This will help you identify the purpose of the role when you have multiple roles in the future.
245
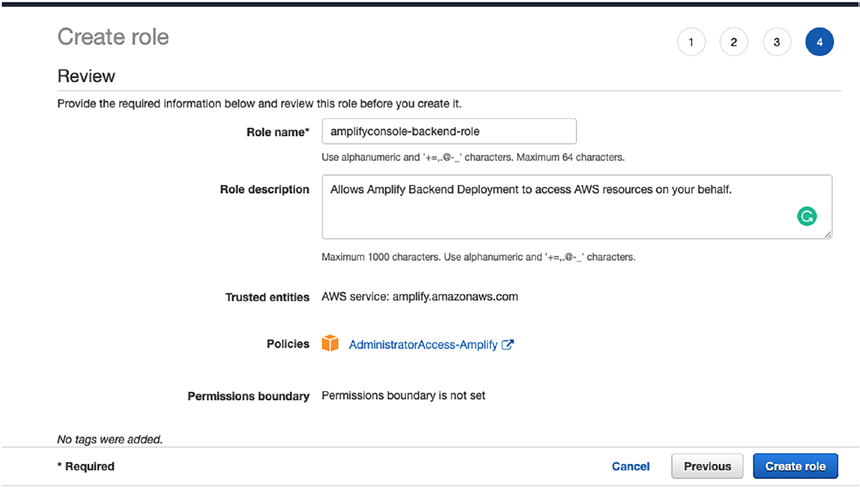
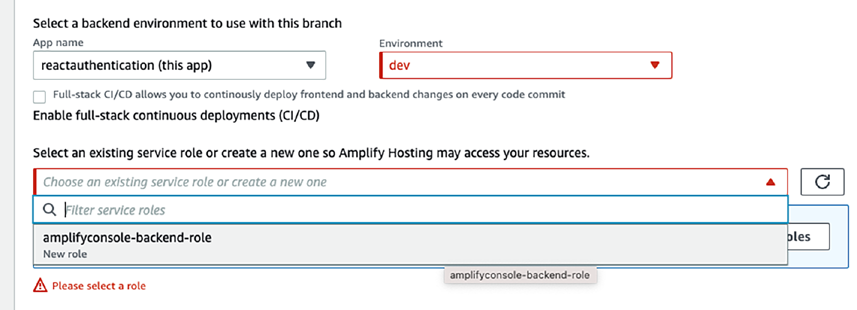
Chapter 8 Continuous integration and Continuous delivery/Continuous deployment
Figure 8-11. Form fields to add the name and description of the role to be created After creating the new role, return to the previous tab and refresh it to fetch the newly created role. Once the page is refreshed, the newly created role should appear on the list, as illustrated in Figure elect it in order to proceed to the next step.
Figure 8-12. Selecting the newly created role from the drop-down In conclusion, it is essential to review the entire configuration carefully before proceeding. After reviewing, click the “Save and deploy” button, as illustrated in Figuro initiate the deployment process. This step ensures that the application is properly configured and ready to be deployed.
246
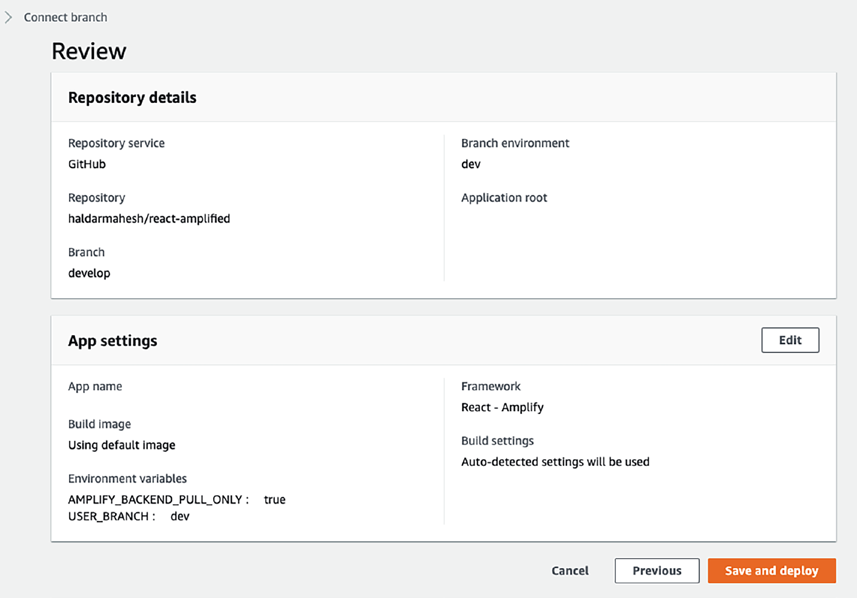
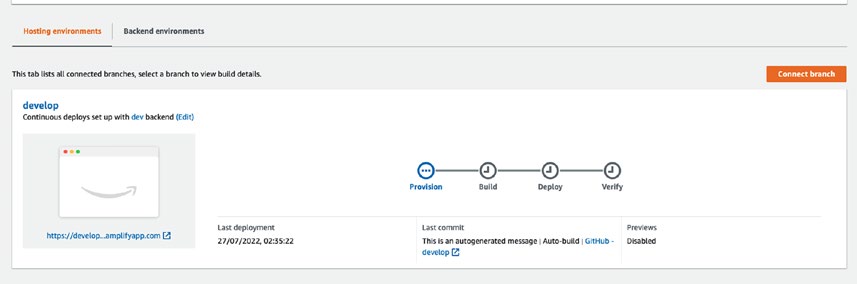
Chapter 8 Continuous integration and Continuous delivery/Continuous deployment
Figure 8-13. The review screen to save and deploy the application After completing the aforementioned steps, you can view the CI pipeline in action. The pipeline consists of several phases for CI and CD, which can be viewed in Figuro check the logs and details of each job in the pipeline, simply click the respective jobs.
Figure 8-14. In progress CI/CD pipeline
247
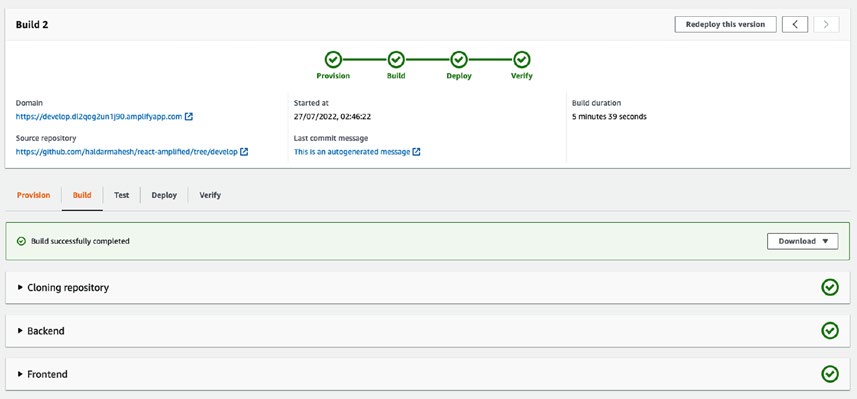
Chapter 8 Continuous integration and Continuous delivery/Continuous deployment After the successful deployment, verify all the phases are successful and green, as illustrated in Figure ain where the application is deployed will be displayed. By clicking it, you will be able to see that your latest code has been deployed on the development environment.
Figure 8-15. The successful screen after completion of the CI/CD pipeline Creating a New Environment and Hosting It
It is possible to effortlessly create numerous environments for development as desired.
Let us proceed to create a production environment.
To create the new environment, it is necessary to create a new branch in git and push it. We shall name the new branch as master and push it to the repository: git checkout -b master
Creating a Production Environment in Amplify Backend
In order to host the code in the production environment, we need to create a new environment. To view the list of existing environments, you can execute the following command:
248
Chapter 8 Continuous integration and Continuous delivery/Continuous deployment amplify env list
| Environments |
| ------------ |
| *dev |
As we currently have only one environment, which is “dev,” the command will display only that environment.
Let’s create a new environment.
In the master branch, run
amplify add env
Enter the name of the new environment; let’s name it production:
? Enter a name for the environment: production
? Select the authentication method you want to use: (Use arrow keys)
› Amplify Admin UI
AWS profile
AWS access keys
Select Amplify Admin UI to authenticate and allow sign-in from the browser.
If you are deploying the same application as created in Chapt, the creation of a new environment will require a new Google web client id and client secret to be added. This is because the authentication added in application in Chapt, will also be deployed.
Please obtain these values from the Google console app and add them.
Enter your Google Web Client ID for your OAuth flow: xx-xx-xx
Enter your Google Web Client Secret for your OAuth flow: xxxxx
Once done, you can check the status by entering the following command: amplify status
Upon completion of this process, a number of resources will be generated for the production environment. The status is illustrated in Figur.
249
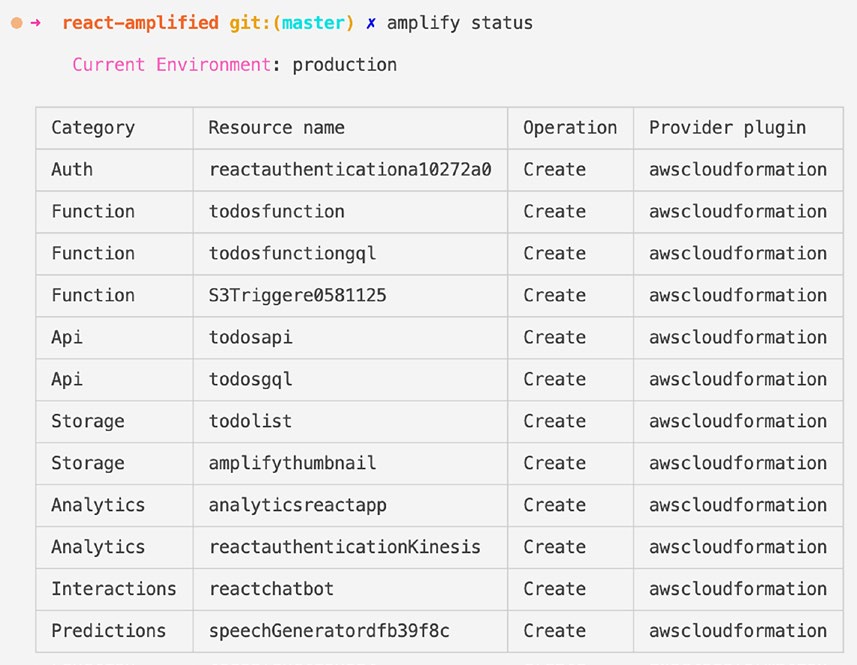
Chapter 8 Continuous integration and Continuous delivery/Continuous deployment
Figure 8-16. The Amplify status for the new environment We can push these by entering the following command:
amplify push
After confirming the changes, wait for Amplify to finish creating the resources on the cloud.
Let’s now set up the CI/CD for the master branch and production environment to provision and host the application.
To do so, navigate to the Amplify application in the Amplify service and click
“Connect branch.” From there, select the master branch and app name. This step is illustrated in Figur. Also assign the environment to the branch, as shown in Figur
250
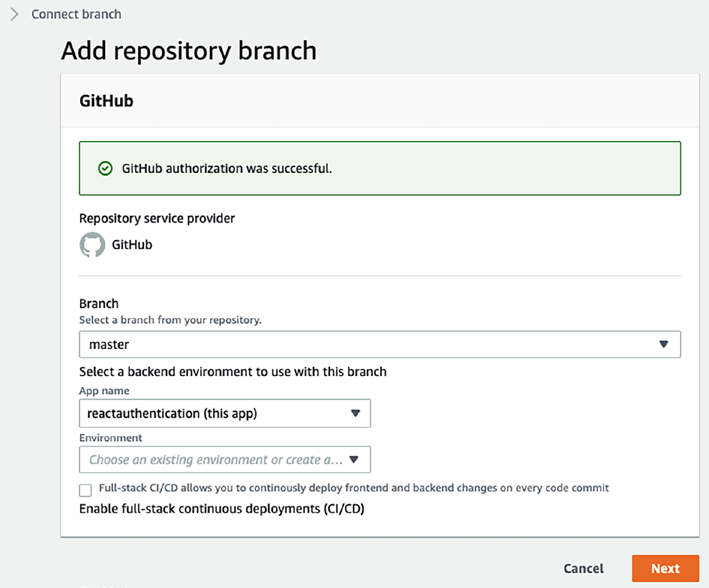
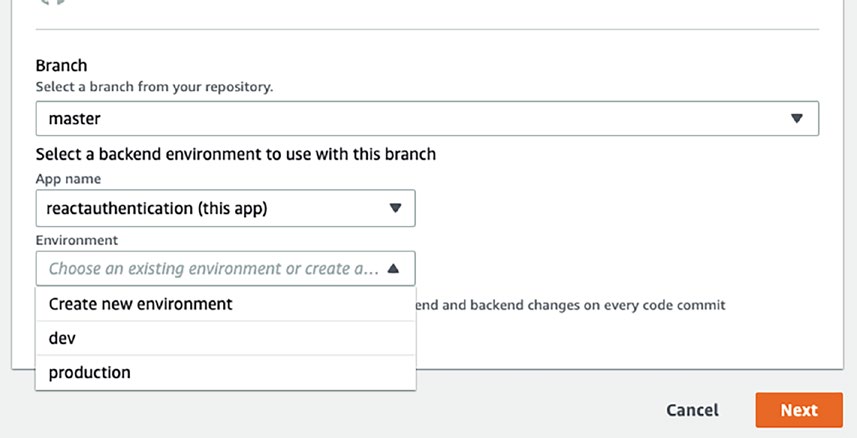
Chapter 8 Continuous integration and Continuous delivery/Continuous deployment
Figure 8-17. Add the branch of GitHub to the Amplify app
Figure 8-18. Link the branch and environment to our Amplify app 251
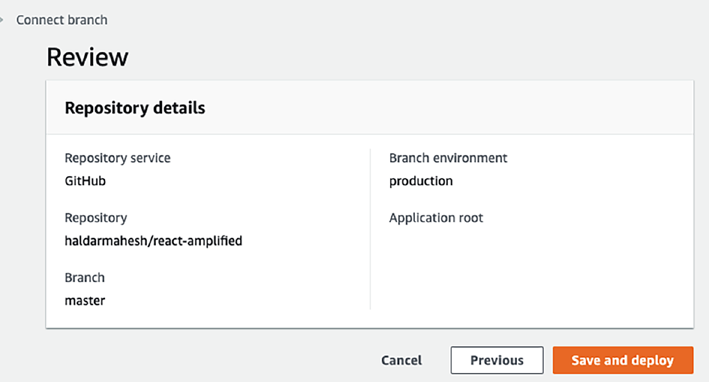
Chapter 8 Continuous integration and Continuous delivery/Continuous deployment If we want to create a new environment from the AWS console, we can do it from here as well. After reviewing the configurations, if everything looks good, we can click the
“Save and deploy” button as illustrated in Figur. This will confirm the changes and wait for Amplify to finish the resource creation on the cloud.
Figure 8-19. The review screen of connecting the branch As shown in Figur, you will notice the master branch appears which is connected to the newly created environment, production. Furthermore, there are two distinct CI/CD pipelines, so that the code pushed to individual branches is deployed individually.
252
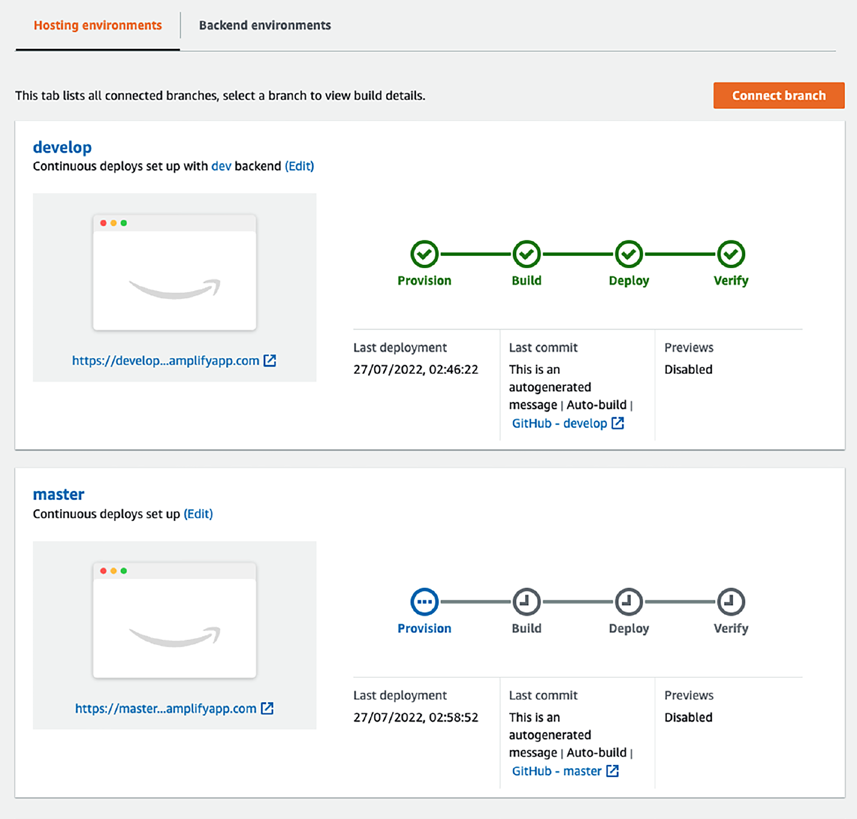
Chapter 8 Continuous integration and Continuous delivery/Continuous deployment
Figure 8-20. The CI/CD pipeline of both branches
As soon as the deployment is successful, you can access the application on the production environment. From here on, you can develop a new feature on the develop branch and raise a pull request (PR) to merge it with the master branch. The new feature will be deployed to the production environment.
253
Chapter 8 Continuous integration and Continuous delivery/Continuous deployment Password Protecting the Nonproduction Environment
To enhance security, we can utilize Amplify’s out-of-the-box solution to password-protect nonproduction environments. Since features in lower environments are used for internal testing and are not yet ready for public release, exposing them to the public is not recommended. By adding a root user ID and password, we can prevent unauthorized access. By default, all the environments are publicly accessible.
To do this, as shown in Figure o to the Amplify screen on the browser and click
“Access control” on the left pane.
Figure 8-21. The Amplify options in the AWS console
254
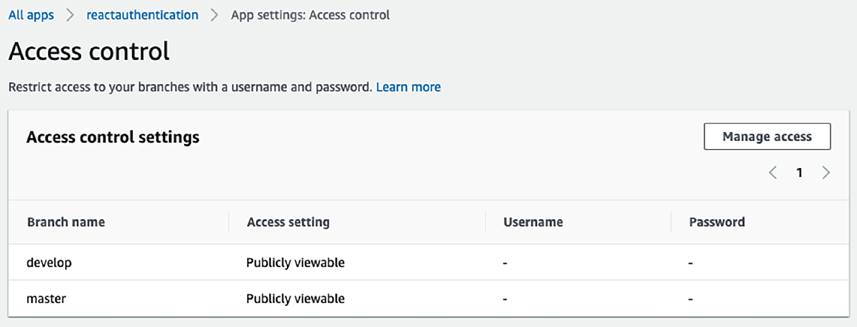
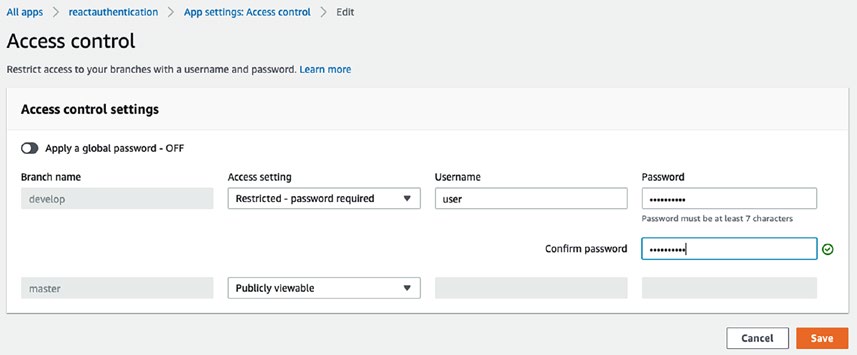
Chapter 8 Continuous integration and Continuous delivery/Continuous deployment As illustrated in Figuroth environments are publicly viewable.
Figure 8-22. The access control setting of our Amplify app Let’s password-protect our develop environment; click Manage access on the top right.
Click the “Manage access” button on the top-right corner. Change the access setting to “Restricted” against the develop branch and add a username and password, as shown in Figure . Finally, click “Save” to apply changes.
Figure 8-23. Adding security to our environment for private access Now try to open the develop environment.
255
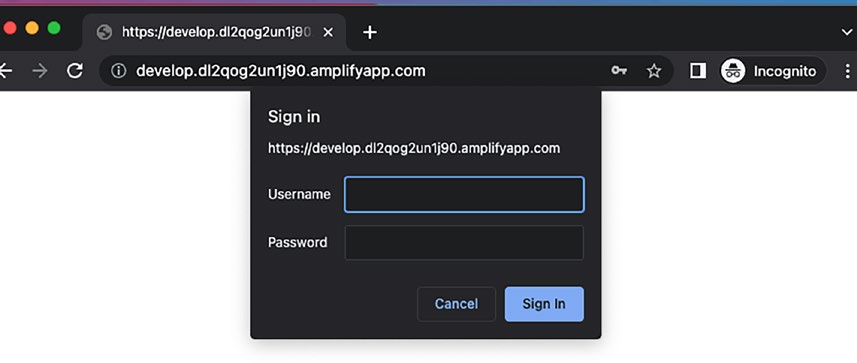
Chapter 8 Continuous integration and Continuous delivery/Continuous deployment As illustrated in Figurou will be asked to enter your username and password.
And congratulations, you have secured your nonreleased features under a username and password.
Figure 8-24. The credential input dialog to access the private app Summary
This chapter discussed how to use AWS Amplify to implement CI/CD for an application.
It started with a brief overview of CI/CD and then moved on to how to set up CI/CD for an application using Amplify.
The chapter covered how to create a CI/CD pipeline using Amplify for both the development and production environments. The chapter went through the steps to create a development environment in Amplify, which includes creating a repository in GitHub, setting up a new Amplify app, connecting to the GitHub repo, and creating a CI/CD pipeline. The chapter also explained how to create a production environment in Amplify by creating a new branch in the GitHub repository and pushing the code to that branch.
Once the production environment was set up, the chapter showed how to connect the production environment to the CI/CD pipeline and how to password-protect the development environment. It also covered how to add new features to the application and deploy them to the production environment using the CI/CD pipeline.
Overall, the chapter provided a comprehensive guide to using AWS Amplify to implement a robust CI/CD pipeline for an application.
256
CHAPTER 9
Amplify Supplements
The future is not going to be driven by people, but by artificial intelligence.
—Sundar Pichai, CEO of Google
Amplify is not just limited to these core features which we have discussed in previous chapters – there are also a number of supplementary services and capabilities that can be used to enhance and extend application’s functionality. From creating chatbots with AWS Lex service to adding AI/ML capabilities to applications, Amplify provides a wide range of capabilities to enhance the development process. In this chapter, we will explore some of the key features of AWS Amplify, including its support for multiple frameworks, its integration with AI/ML services, and its capabilities for chatbot development. We will also introduce AWS Amplify Studio, a powerful tool for UI development. By the end of this chapter, you will have a solid understanding of the many ways in which AWS Amplify can help you streamline your development process and build powerful, responsive, and scalable applications.
Building Interactive Bots with AWS Lex Service
A chatbot is a computer program designed to simulate conversation with human users, typically via a messaging interface. AWS Lex helps us to build chatbots that uses natural language processing (NLP) algorithms to understand and interpret the user’s queries, and they can provide automated responses to these queries in a conversational way.
AWS Lex is a service that helps us build interactive ML-based chatbots in no time.
Lex internally uses deep learning technologies like automatic speech recognition which converts speech to text and natural language processing. Lex is also used to empower Amazon Alexa. Lex will help us to achieve the same output without diving deep into these core technologies.
257
© Akshat Paul, Mahesh Haldar 2023
A. Paul and M. Haldar, Serverless Web Applications with AWS Amplify,
Chapter 9 amplify SupplementS
AWS Lex has also the capability to integrate with other services like AWS Lambda, which can call APIs, write data in the database, or integrate with third-party systems to act on users’ requests. In Amplify these capabilities are grouped under interactions; let’s now use interactions with Amplify.
Run the following to add interaction using amplify:
amplify add interactions
This will ask you to give a name to this chatbot; I will name it `reactchatbot`.
? Provide a friendly resource name that will be used to label this category in the project: reactchatbot
There are some chatbot configurations; let’s choose a sample:
? Would you like to start with a sample chatbot or start from scratch?
› Start with a sample
Start from scratch
There are three options; you can choose any of them. For this chapter’s scope, let’s choose the Order Flowers sample:
? Choose a sample chatbot:
BookTrip
› OrderFlowers
ScheduleAppointment
This will ask if children’s privacy policies are applicable; answer accordingly.
? Please indicate if your use of this bot is subject to the Children's Online Privacy Protection Act (COPPA).
Learn more: https://www.ftc.gov/tips-advice/business-center/guidance/
complying-coppa-frequently-asked-questions (y/N)
Once this is done, approve and push the changes to the Amazon backend: amplify push
Once successful, log in to the AWS console on the browser and open the Lex service from the list (Figure ).
258
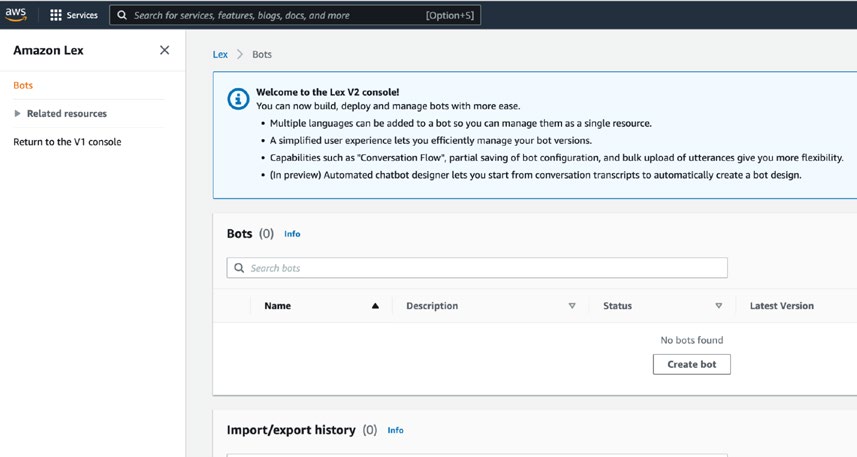
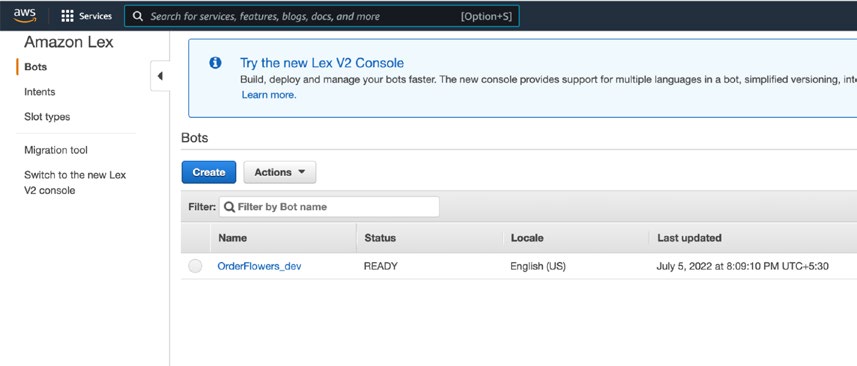
Chapter 9 amplify SupplementS
Figure 9-1. Amazon Lex service on AWS Console
You will probably see no bots created; this is because when we are writing this chapter, Amplify by default creates bots in Lex V1, hence the new Lex V2 console doesn’t show up the bots created from the Amplify CLI. Let’s hope in near future Amplify will add a support to enable us to choose the version to create chatbots. Let’s switch to the V1
console from the left pane, the Lex V1 preview is shown in Figure .
Figure 9-2. Amazon Lex V1 dashboard
259
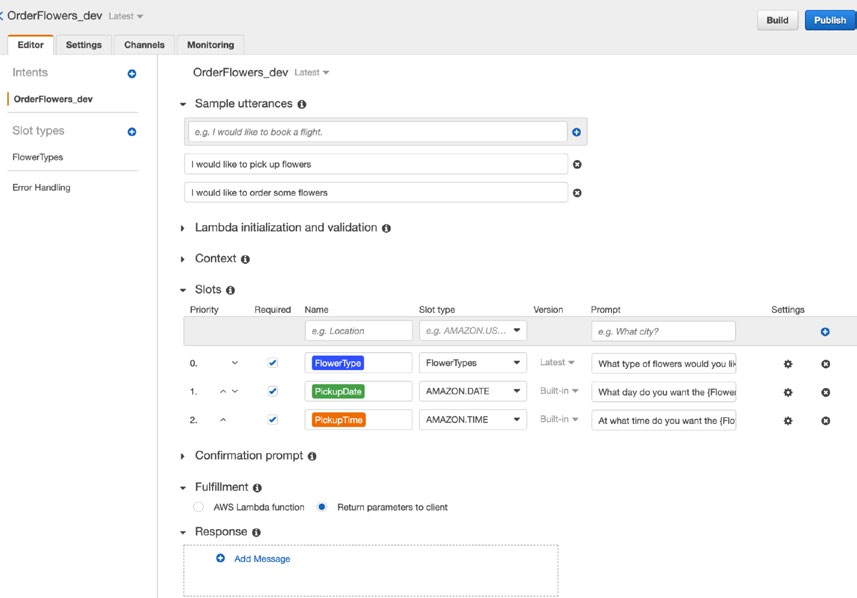
Chapter 9 amplify SupplementS
No we can see the Order Flowers bot we created from the Amplify CLI.
Let’s open it up to see the configurations (Figur
Figure 9-3. Order Flowers bot details
There are some terminologies which we should understand before testing the chatbot; let’s have a quick glance of the same.
Important Terminologies
1. Intent
Intent is an action that the user wants to perform. For example,
ordering flowers is intent, and similarly ordering pizza is intent.
2. Utterances
Utterances are various ways of conveying the same intent. For
example, the following are utterances of the same intent:
260
Chapter 9 amplify SupplementS
a. I want to order the flowers.
b. Can I order the flowers, please?
c. I need help ordering flowers.
3. Slots
In order to fulfill the intent, the chatbots need some required set of parameters without which one intent cannot be fulfilled. For
example, to order flowers, the required parameters are as follows: a. Flower type
b. Pickup time
c. Delivery time
These parameters are called slots.
4. Slot types
Given slot is a parameter, there will be a type associated with it, for example, pickup time would be date-time type, and the flower
type will be of type Rose, Lilly, or Tulip. The slot types can be built-in or custom defined.
5. Intent fulfillment
Intent fulfillment refers to the set of actions that a chatbot needs to perform in order to fulfill a user’s intent after it has correctly understood their utterance and extracted all the required
slots. This can be achieved in a couple of ways. One way is by
integrating a Lambda function that takes the required parameters
and carries out the intended action, such as creating an order or fulfilling a request. Alternatively, the parameters can be passed to the client application, which can then handle the fulfillment of the intent without relying on a Lambda function. Both approaches
have their own advantages and disadvantages, and the choice
between them largely depends on the specific use case and
requirements of the chatbot.
261
Chapter 9 amplify SupplementS
6. Lambda function as a code hook
The Lex chatbot service also provides a way to attach the Lambda
function as a hook in various steps, where we can validate the user input and show a proper error message to the users. For example,
let’s say if the chatbot asks about the delivery time, and if the user enters a past date, the code hook can validate the input and respond with a message that the orders cannot be delivered in
past, please reenter a future date.
Test the Chatbot
Once you open the chatbot, which is forked from the sample Order Flowers chatbot, from the AWS console, on the top right there is a test chatbot option, follow Figure .
Figure 9-4. Test chatbot
262
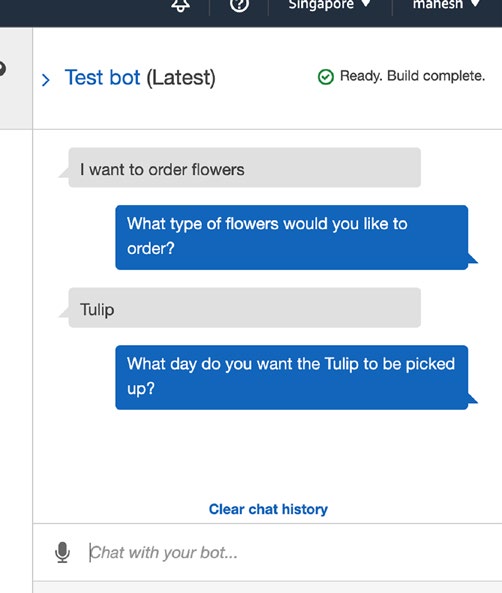
Chapter 9 amplify SupplementS
Click that, and try to add some utterances, as shown in Figur
Figure 9-5. Testing the chatbot with utterances
Voila, you can further configure more utterances and fulfillment Lambda functions to take action, as shown in Figur
263
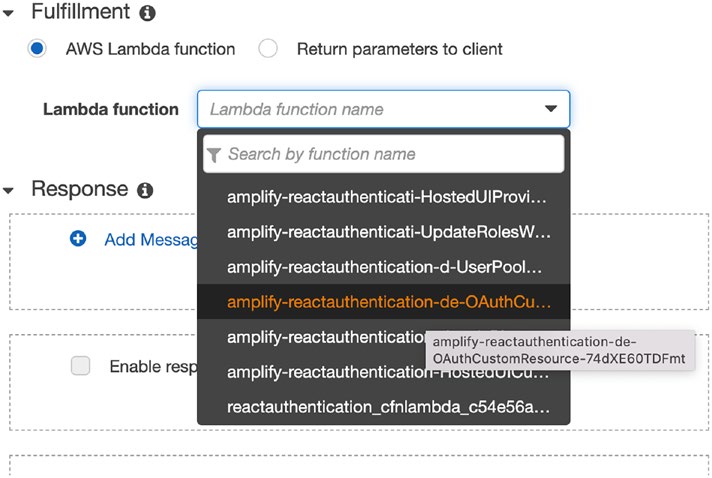
Chapter 9 amplify SupplementS
Figure 9-6. Lambda function to take action
Boost Your Application with AI/ML Capability
The AWS Amplify has a package of artificial intelligence and machine learning capabilities. AWS has beautifully packaged those capabilities to make them easy to use instead of diving deep into these technologies. AWS’s effort is to let the developers focus more on delivering the business outcome instead of learning the core and reinventing the wheel of AI and ML technologies.
What Is Artificial Intelligence?
Artificial intelligence (AI) is a field of computer science that focuses on developing machines that can perform tasks that would typically require human intelligence, such as learning, problem-solving, and decision-making. AI technologies rely on mathematical operations and algorithms to analyze input data, identify patterns, and produce output.
AI is being used in various industries to solve real-world problems, such as data analysis, chatbots, and manufacturing. For example, chatbots are computer programs that use natural language processing and machine learning to understand user input and provide helpful responses.
264
Chapter 9 amplify SupplementS
Some specific examples of AI technologies include speech to text, which processes spoken input and converts it to text output, and chatbots, which can simulate human conversation and make decisions based on user input.
What Is Machine Learning?
Machine learning is a subset of AI that focuses on teaching computers to learn from data and identify patterns in that data. By analyzing vast amounts of data, machine learning algorithms can identify patterns and make predictions about new data that they haven’t seen before. For example, if we want a computer to recognize images of dogs, we can train a machine learning algorithm by feeding it thousands of sample images of dogs so that it can learn to identify common features and characteristics of dogs.
AWS provides a range of AI and ML services that can help developers build more powerful and interactive applications. For example, the Predictions category of AWS
Amplify includes services such as text to speech, language translation, image recognition, and entity recognition. These services enable developers to add advanced AI capabilities to their applications without having to build these capabilities from scratch.
In addition, AWS offers the SageMaker service, which allows developers to quickly build and train machine learning models using a range of prebuilt algorithms and frameworks. This service can help developers to accelerate the development of machine learning models and bring them to market more quickly.
Predictions is categorized into the following three categories:
1. Identity: The services in this category will help us in analyzing the input image and finding various things in the provided image.
This can identify a particular text, face, entities, chairs, desks, animals, or celebrities from the image provided as input.
2. Convert: The services in this category will help us in converting the given input from one form to another, for example, translating text from one language to another, converting text to audio
speech, or speech to text.
3. Interpret: The services in this category will help us in listening, reading, or analyzing the input and drawing a conclusion on
behalf of a human. For example, it can take the paragraph as
input and interpret whether the sentiment is positive, negative, or neutral.
265
Chapter 9 amplify SupplementS
Text to Speech with Amplify
Let’s start adding the amplify predictions package:
amplify add predictions
This will ask which category of prediction we want to start integrating with our application:
? Please select from one of the categories below
Identify
› Convert
Interpret
Infer
Learn More
You can choose to convert.
Now we have various conversion options, like translation and transcribing text from audio.
Let’s choose speech from text:
? What would you like to convert?
Translate text into a different language
› Generate speech audio from text
Transcribe text from audio
Provide a name to this resource and hit enter.
This will ask what the source of the language is:
? Provide a friendly name for your resource speechGeneratordfb39f8c
? What is the source language?
Dutch
Russian
South African English
› US English
German
Italian
Chinese Mandarin
266
Chapter 9 amplify SupplementS
I will choose US English.
The next option would be the output speaker option:
? Select a speaker
Salli - Female
Joanna - Female
Kevin - Male
› Matthew - Male
Kendra - Female
Ivy - Female
Justin - Male
If you want to listen to which speaker sounds like what, you can check the AWS Polly service; there will be a sample text, and you can listen to various speakers from the list and choose one, the same is shown in Figur.
Figure 9-7. AWS text-to-speech dashboard
267
Chapter 9 amplify SupplementS
Once done, review and push the changes.
On the client application, if we want to generate an audio buffer from the text, we can call the convert function from Predictions and pass the text as follows: 1: Predictions.convert({
2: textToSpeech: {
3: source: {
4: text: textToGenerateSpeech
5: },
6: }
7: })
8: .then(result => console.log({ result }))
9: .catch(err => console.log({ err }));
Similarly, you can use other AI/ML capabilities from AWS using Amplify like identifying from images or translating from one language to another and enhance your applications.
Amplify Beyond React Web Apps
Amplify is a super powerful tool for today’s developers and software businesses; this gives the capability of building the whole backend system, cloud-based services, and infrastructure with no code, in no time, which is secured, can handle any scale of traffic, and is super cost-efficient. Amplify is not only meant for React web apps, it can also integrate with Android, iOS, or React Native mobile apps similar to React web apps. The following are some highlights of Amplify:
1. Next.js support
The Amplify recently added support for the Next.js framework,
which makes it compatible with many production apps.
2. Flutter support
Amplify has also added support for Flutter apps; this makes the
whole Flutter community more excited, as Amplify can cater to
one more group of developers.
268
Chapter 9 amplify SupplementS
3. Geo support
With Amplify, we can easily create maps, add markers, and
search locations just by adding a few lines of code. We can also
implement the areas on the map or geo-fencing in the maps.
4. PubSub
Amplify has the capability to send messages in real time from the backend to the client or vice versa. PubSub is available on the
MQTT protocol as well, to support IoT devices.
5. Push notifications
The Amplify also can help developers quickly set up push
notifications for their mobile applications to quickly receive and send mobile notifications on Android or iOS devices.
6. AR and VR features
Amplify also has the capabilities to implement augmented reality
(AR) and virtual reality (VR) content within the applications. This is provided by the component named XR in Amplify.
7. Internationalization
Amplify also helps the client apps to implement and handle
the internationalization for the application; we can import the
i18n module from Amplify and set the vocabulary of the various
languages to load in our applications.
8. Logger
Amplify also has a module named Logger, which helps to log
important information and errors on the client side.
9. Admin UI data explorer
Many times, we need to create a user-friendly data explorer UI to manage or modify the data in our system; we cannot give database
access to our business owners or content managers. Amplify has
this capability; with some configurations, we can get the data
explorer UI and invite users to modify and save the data.
269
Chapter 9 amplify SupplementS
10. Data seeding
Often in our application, we need to test our application
with various edge cases to make it look like a real production
application. Amplify has the capability to generate random seed
data in our application.
AWS Amplify Studio
The Amplify team has also recently launched a visual development environment, where developers can also build UI components with minimal code and also can integrate the Amplify powerful backend configurations from this UI-based development studio.
Developers can now create UI components, set up the Amplify backend, and connect the two from this powerful tool. This tool can also create React components right from the Figma (tool used by designers and developers) designs to accelerate further the whole development cycle so that developers and the business team can launch their applications as soon as possible.
To enable the Amplify Studio, open the Amplify project and click Set up Amplify Studio, as shown in Figure .
Figure 9-8. Setting up Amplify Studio
270
Chapter 9 amplify SupplementS
Once approved and done, wait for some time and click Launch studio to open Amplify Studio.
As you can see, in Figure , we have almost all the Amplify components and UI library to start creating UI and create or configure the Amplify backend components and bind both of them, including the authentication, storage, REST API, analytics, etc. Go ahead and explore the Amplify Studio. Since this tool is out of scope, we will skip getting into details.
Figure 9-9. Amplify Studio for UI development
271
Chapter 9 amplify SupplementS
Summary
In this chapter, we explored the many ways in which AWS Amplify can help developers build powerful, cloud-based applications quickly and easily. We started by discussing how AWS Lex service can be used to create chatbots and examined the important terminologies associated with building chatbots. We then looked at how AWS Amplify can be used to create chatbots and add AI/ML capabilities to our applications. We explored the concepts of AI, ML, and predictions and how they can be used to enhance the functionality of our applications. We also discussed how AWS Amplify can be used to integrate with AI/ML services such as Amazon SageMaker and support frameworks besides React, such as Angular and Vue.js. Finally, we introduced AWS Amplify Studio, a powerful tool for UI development. By the end of this chapter, you will have a solid understanding of how AWS Amplify can be used to create robust, scalable, and responsive cloud-based applications that can meet the needs of your business or organization.
272
Index
A
events/actions, 201
events dashboard, 211–214
AI/ML technologies
fundamentals, 198, 199
amplify predictions package, 266
high-level view, 195–198
categories, 265
kinesis ( see Kinesis)
conversion options, 266
limitations, 213, 214
definition, 264
login button, 206, 207
speaker option, 267
quantification process, 198
text-to-speech dashboard, 267
recording events, 202, 203
Amazon Simple Storage Service (S3),
registers pageView event, 209
167, 176
segmentation, 199
Amazon Web Services (AWS), 2
sign-in page, 204, 205
Amplify ( see AWS Amplify services)
systematic analysis, 195
analysis
terminologies, 199, 200
charts view, 213
tracking page views, 208–210
events dashboard, 210–213
traditional methods, 196
filters accordion, 211
UI design, 203
limitations, 213, 214
Application programming interfaces
pinpoint services, 212
(APIs), 6
authentication, 35–57
Bluetooth connection, 76
cloud computing, 3
database, 169–172
hosting applications, 2
definition, 76
Kinesis ( see Kinesis)
GraphQL, 111–118
Lambda, 80
GraphQL API, 114, 115
supplements ( see Supplement
JSON Web Token, 33
services, AWS)
login flow, 76
trigger test console, 182
Open Authorization (OAuth), 58
Analytics, 195
REST APIs, 85, 88, 97–99
amplify service, 200
specifications/protocols, 79, 80
automatic tracking, 210, 211
subscription, 139–141
AWS console pinpoint service, 201
system interaction, 76
dashboard, 202
273
© Akshat Paul, Mahesh Haldar 2023
A. Paul and M. Haldar, Serverless Web Applications with AWS Amplify,
INDEX
Application programming
definition, 13
interfaces (APIs) ( cont. )
GraphQL/DataStore, 13
ToDo application, 142–144
PibSub/interactions, 14
URL path, 77
REST APIs/analysis, 13, 85
usages, 77, 78
Authentication
B
application/servers, 25, 26
AWS Amplify
Backend as a Service (BaaS), 1, 6–7
access key and secret key, 39
Biometric authentication, 29, 30
Auth service, 42, 43
Broken authentication, 27, 28
components, 41
configurations, 38–41
C
HeaderStrip, 53, 56
index page, 37
Client-server model, 145, 146
logging in and logging out, 51–53
Cloud computing, 1
objectives, 35
advantages, 4, 5
React application, 36, 37
PaaS/IaaS, 3
UI react components, 43–50
Command Line Interface (CLI)
user information, 53–57
authentication, 42
users list, 53
command information, 15
Broken authentication, 27, 28
configuration, 16
digital platforms, 24
database, 170
fundamental aspect, 24
GraphQL API, 114, 115
login process, 26
identity and access
MFA ( see Multifactor
management, 18–22
authentication (MFA))
pre-requisites, 15
OAuth ( see Open Authorization
REST APIs, 85
(OAuth))
web services login, 16
types, 28–30
Container as a Service (CaaS), 4
user/incoming request, 24
Content Delivery Network (CDN), 6
Authorization, see Authentication
Continuous integration/continuous
AWS Amplify services
delivery (CI/CD)
AI (artificial intelligence)/ML
continuous integration, 234
(machine learning), 14
definition, 233
authentication, 35–57
delivery definition, 235
authentication/storage, 13
deployment process, 235
Command Line Interface (CLI), 15–21
development environment application
274
INDEX
account authorization, 239
D
amplify app, 240
Data storage
build/test configuration, 240, 241
addNewItem function, 173, 174
config file, 242
business/process, 165
environment, 241
cloud services, 167
error messages, 243
DIY, 175
form fields, 246
file-based data, 166
GitHub repository, 239
file storage (S3 bucket)
hosting process, 238
approach, 176, 177
permission policy, 244, 245
console.amazon.com, 179–181
in progress, 247
goals, 176
review screen, 247
lambda trigger flow, 177
role creation, 243, 244, 246
provision, 177, 178
subsequent screen, 245
testing tab, 182–184
environment/hosting
trigger details, 179–181
process, 248
graphql mutation request, 174
amplify status, 249, 250
GraphQL request, 175, 176
branch/environment, 252
in-memory variable, 174
branches, 253
integration, 169–172
Google web client, 249
lambda trigger function, 184–192
production environment, 248
new items creation, 172
repository branch, 250, 251
provisioning database, 168, 169
review screen, 252
requirements, 165
flow chart, 236
types, 166
high-quality/bug-free code, 234
Do It Yourself (DIY)
nonproduction environments
amplify console, 121
access control, 255
AppSync, 122
amplify options, 254
data storage, 175
credential input dialog, 256
deleting/updating, 111
password-protect, 254
event query, 134
private access, 255
function file, 119
objective, 236
GraphQL, 111–118
pipeline as code, 236–238
high-level workflow, 135
principle, 234
lambda handler, 119, 120
responsibilities, 234
mutation operation
Create, read, update, and delete (CRUD)
AppSync console, 124
operations, 75
275
INDEX
Do It Yourself (DIY) ( cont. )
performance, 113
deleting item, 128–131
query, 122
gql lambda function, 126
query information, 111, 112
graphql schema, 125
react app, 132
new item creation, 122–124
schema file, 122
query execution, 127, 128
schema.graphql file, 116
query information, 124, 125
security concerns, 113
todo records, 130
types, 117
resolver, 118, 119
UI react code, 131
subscription API, 134–139
Todo record, 138
H
Hash-based message authentication code
E
(HMAC), 32, 34
Elastic Computing (EC2), 2
Higher-order component (HOC), 45, 208
Eye/iris authentication, 30
I
F
Identity and Access Management (IAM)
accessKeyId and secretAccessKey, 21
Face authentication, 30
management console, 18
Fingerprint authentication, 29
page creation, 21
Function as a Service (FaaS), 1, 6–9
review page, 20
tags details, 19, 20
G
user addition and access, 18
user policy, 19
GraphQL API
Infrastructure as a Service (IaaS)
amplify setup, 114–119
cloud computing, 3
caching, 113
cloud service, 2
CLI, 114
Infrastructure as Code (IaC), 39
configuration, 118
definition, 111–118
graphql mutation API, 133
J
graphql schema, 115
JSON Web Encryption (JWE), 32
handler code, 132
JSON Web Token (JWT)
Hello World template, 118
definition, 32
integration, 130
flow and system interaction, 33, 34
learning curve, 113
structure/components, 34, 35
modification, 117
token validation mechanism, 33
276
INDEX
K
DIY, 119, 120, 123
file storage (S3 bucket), 177
Kinesis
AWS console, 188
analytics data, 215
deployment, 187
Amazon S3 bucket, 230
directory, 189, 190
buttons/page load events, 225
empty bucket, 188, 189
data file, 231
logs, 191–194
delivery dashboard, 230, 231
resizing image, 184
directories, 231
search bar, 187, 188
encoded data, 228
thumbnail creation code, 185–187
monitoring tab, 229, 230
trigger function, 192
onMouseEnter function, 225
layers, 83, 84
recording events, 225–228
REST APIs, 86, 89
web application, 227
serverless functions, 80
applications tab, 218, 219
server setup and operations, 81
backend setup, 215
supplement services, 263
data stream, 217, 219
triggers, 179–181, 184
data streams details, 221
use cases, 82
data stream source, 223
working process, 82, 83
definition, 214
delivery stream dashboard, 224
delivery streams option, 220–222
M
ingress data/egress data, 218
Machine learning (ML), 14, 195, 196,
metadata and timestamp, 215
264, 265
monitoring tabs, 218
Message Queue Telemetry Transport
S3 bucket, 222
(MQTT), 80, 269
S3 bucket selection, 224
Multifactor authentication (MFA)
services home page, 216, 217
approaches, 30
source selection, 222
JWT model, 32–35
methods, 31, 32
L
one-time password (OTP), 31
Lambda functions
configuration, 87
N
cons, 82
Natural language processing (NLP),
data storage, 170
257, 264
277
INDEX
O
credential menu, 66
definition, 58
Offline-First App, 145
Google Cloud console, 61
client-server, 145, 146
login screen, 71, 72
deep tunnel application, 146
project screen, 63
design view
redirect URLs, 69–71
goals, 148–150
selection process, 62
high-level diagram, 150
sequence flow, 58–60
sequence diagram, 149
social login, 57, 58
features, 148, 162, 163
field service applications, 147
learning/educational applications, 148
P, Q
lift/pipeline inspection app, 147
Pipeline as Code
point-of-sale systems, 147
benefits, 237
react application screenshot, 156, 157
configurations, 237
ReactJs
definition, 236
assumption, 150, 151
repository/environments, 237
features, 150
Platform as a Service (PaaS)
handling errors, 154–156
cloud computing, 3
offline HTTP client, 153, 154
Heroku, 3
page render function, 151, 152
virtual machines (VMs), 3
react application output, 151
real-time online HTTP client, 153
remote/rural health applications, 148
R
testing
Remote Procedure Calls (gPRC), 79
application tab, 160
Representational State Transfer (REST), 80
enqueuedMutations, 160, 161
AWS Amplify, 85
network tab, 159
CLI tools, 85
online syncing process, 162
configuration, 87
screenshot, 157, 158
delete, 99, 100
throttling configuration, 158
ExpressJS function, 87
todo list application, 159
ExpressJS template, 87, 88
user experience, 147
GraphQL, 130
Open Authorization (OAuth)
hardcoded response, 91, 92
amplify auth service, 68, 69
JSON object, 88
API credentials, 64
lambda function, 86
client ID form, 67
path, 86
consent screen, 65
POST, 94
278
INDEX
prompt app, 90
AI/ML technologies, 264–268
push operation, 89
amplify studio, 270, 271
PUT, 97–99
Lex services
React ToDo application ( see ToDo
browser window, 258, 259
application)
chatbot configurations, 258
resource, 86
dashboard, 259
response, 91
interaction, 257
save file/push, 92–97
lambda function, 264
selected options, 87
order flowers bot details, 260
Things Todo application, 85
terminologies, 260–262
Request for Comments (RFC), 58
test chatbot option, 262
REST APIs, see Representational State
utterances, 263
Transfer (REST)
react web apps
Rivest-Shamir-Adleman (RSA), 32
amplify, 268
internationalization, 269
S
push notifications, 269
seed data, 270
Serverless architecture
UI development, 271
Backend as a Service (BaaS)
model, 6, 7
benefits, 10
T
cost-effective solution, 6
ToDo application
costs, 11
amplify project settings, 143
definition, 1
data lists, 104
disadvantages
DIY ( see Do It Yourself (DIY))
application size, 12
error messages, 142–144
cold start, 12
file information, 101
debugging, 13
GraphQL, 130–133
Function as a Service (FaaS), 8, 9
integration, 101
less code, 10
item information, 105–108
reliability, 11
network tab, 142
scalability, 10
offline-first app, 150
security and scalability, 11
output window, 105
server operations, 2
subscription API, 139–141
velocity, 10
ternary operator, 105
Simple Object Access Protocol (SOAP), 79
TodoPage.js, 102, 104
Software as a Service (SaaS), 6
user experience
Supplement services, AWS
HTML attribute, 110
279
INDEX
ToDo application ( cont. )
integration, 45
Input box, 110
login screen, 47
items, 108
log out, 48–50
POST API, 108, 109
network tab, 48
text field, 110
react components, 43
user interface, 102, 141
user registration/login/
Token authentication, 29
functionalities, 45–48
User interface (UI)
U, V
components ( see UI components)
ToDo application, 106
Universally Unique Identifier (UUID), 83
UI components
W, X, Y, Z
aws-exports file, 44, 45
index.js file, 44
WebSocket, 79, 134, 135
280

