Serverless Web
Applications with
AWS Amplify
Build Full-Stack Serverless
Applications Using Amazon
Web Services
Akshat Paul
Mahesh Haldar
Serverless Web Applications with AWS Amplify: Build Full-Stack Serverless
Applications Using Amazon Web Services
Akshat Paul
Mahesh Haldar
Gurgaon, Haryana, India
Bahraich, Uttar Pradesh, India
ISBN-13 (pbk): 978-1-4842-8706-4
ISBN-13 (electronic): 978-1-4842-8707-1
Copyright © 2023 by Akshat Paul, Mahesh Haldar
This work is subject to copyright. All rights are reserved by the Publisher, whether the whole or part of the material is concerned, specifically the rights of translation, reprinting, reuse of illustrations, recitation, broadcasting, reproduction on microfilms or in any other physical way, and transmission or information storage and retrieval, electronic adaptation, computer software, or by similar or dissimilar methodology now known or hereafter developed.
Trademarked names, logos, and images may appear in this book. Rather than use a trademark symbol with every occurrence of a trademarked name, logo, or image we use the names, logos, and images only in an editorial fashion and to the benefit of the trademark owner, with no intention of infringement of the trademark.
The use in this publication of trade names, trademarks, service marks, and similar terms, even if they are not identified as such, is not to be taken as an expression of opinion as to whether or not they are subject to proprietary rights.
While the advice and information in this book are believed to be true and accurate at the date of publication, neither the authors nor the editors nor the publisher can accept any legal responsibility for any errors or omissions that may be made. The publisher makes no warranty, express or implied, with respect to the material contained herein.
Managing Director, Apress Media LLC: Welmoed Spahr
Acquisitions Editor: James Robinson-Prior
Development Editor: James Markham
Coordinating Editor: Jessica Vakili
Distributed to the book trade worldwide by Springer Science+Business Media New York, 233 Spring Street, 6th Floor, New York, NY 10013. Phone 1-800-SPRINGER, fax (201) 348-4505, e-mail [email protected], or visit www.springeronline.com. Apress Media, LLC is a California LLC and the sole member (owner) is Springer Science + Business Media Finance Inc (SSBM Finance Inc). SSBM Finance Inc is a Delaware corporation.
For information on translations, please e-mail [email protected]; for reprint, paperback, or audio rights, please e-mail [email protected].
Apress titles may be purchased in bulk for academic, corporate, or promotional use. eBook versions and licenses are also available for most titles. For more information, reference our Print and eBook Bulk Sales web page at http://www.apress.com/bulk-sales.
Any source code or other supplementary material referenced by the author in this book is available to readers on the Github repository: https://github.com/haldarmahesh/amplify-book. For more detailed information, please visit http://www.apress.com/source-code.
Printed on acid-free paper
Table of Contents
About the Authors ���������������������������������������������������������������������������������������������������� ix Acknowledgments ��������������������������������������������������������������������������������������������������� xi Introduction ����������������������������������������������������������������������������������������������������������� xiii Chapter 1:
Chapter 2:
iii
Table of ConTenTs
Chapter 3:
iv
Table of ConTenTs
Chapter 4:
v
Table of ConTenTs
Chapter 5:
Chapter 6:
vi
Table of ConTenTs
Chapter 7:
vii
Table of ConTenTs
Chapter 8:
Chapter 9:
Index ��������������������������������������������������������������������������������������������������������������������� 273
viii
About the Authors
Akshat Paul is the Founder and CTO of Company360, a technology leader, author of four books on React Native, Ruby, and RubyMotion, and a former consultant at McKinsey & Company. With his extensive experience in mobile and web development, coupled with his strategic insights gained at McKinsey, he has delivered numerous enterprise and consumer applications over the years. As an influential voice in the tech industry, Akshat frequently speaks at conferences and meetups on various technologies. He has given talks at React Native EU, Cross-Platform Mobile Summit, Devops@scale Amsterdam, the DevTheory Conference India, RubyConfIndia, and #inspect-RubyMotion Conference Brussels and was a keynote speaker at technology leadership events in Bangkok and Kuala Lumpur. Besides technology Akshat spends time with his family, is an avid reader, and is obsessive about healthy eating.
Mahesh Haldar is a passionate software engineer and expert in building scalable systems. With extensive experience in designing robust architectures, Mahesh empowers the team to fully harness the potential of cloud-based solutions. As a sought-after speaker, Mahesh has presented at technical meetups and conferences in Bangalore, Johannesburg, and Singapore. His outstanding contributions have earned recognition, including features in Yourstory magazine and being listed among India’s top 20 apps.
Currently serving as a Principal Software Engineer at Carrefour, Mahesh leads a team of talented developers, delivering exceptional eCommerce experiences. His expertise has been pivotal in designing and implementing high-impact functionalities, effectively serving millions of daily customer requests. With a proven track record in developing complex large-scale systems for start-ups and renowned enterprises like Jago Bank and Mckinsey & Company, Mahesh brings a wealth of practical knowledge and expertise to the table.
ix
Acknowledgments
As the saying goes, “If I have seen further, it is by standing on the shoulders of giants.” In the context of this book, those giants are the individuals who offered their unwavering support and invaluable guidance throughout my journey.
Firstly, I want to express my profound gratitude to my parents, Shakuntala Paul and Anup Paul. Your unwavering belief in my abilities and steadfast encouragement have always propelled me forward. The spirit of continuous learning that you fostered in me has not only been instrumental in my personal growth, but it has also profoundly influenced my professional trajectory as a technology leader, and your tireless cheerleading during my biggest victories has always been my motivation to keep moving forward.
I am eternally thankful for my wife, Anu Sharma. She has been my rock and my sanctuary throughout the process of writing this book. Her understanding, patience, and unconditional love were invaluable during those late-night writing sessions and bouts of writer’s block. Her ability to uplift my spirits during challenging moments and celebrate with me during my triumphs has been a constant source of inspiration. This book is as much her accomplishment as it is mine.
I would also like to extend my heartfelt thanks to the Apress team: Jessica Vakili, James Robinson-Prior, and James Markham. Your collective expertise, support, and collaboration have played a vital role in the successful completion of this book. Your dedication to maintaining the quality and integrity of this work has not gone unnoticed, and I am deeply grateful for your tireless efforts. A special acknowledgment to Louise Corrigan, who was instrumental in the initial conceptualization of this book.
To each and every one of you, I express my sincerest appreciation. This book would not have been possible without your enduring support, faith, and encouragement.
Thank you for being a part of my journey.
—Akshat Paul
xi
aCknowledgmenTs
I would like to express my heartfelt gratitude to the following individuals who have been instrumental in the creation and completion of this book.
My dearest friend and mentor, Akshat Paul, whose guidance, expertise, and unwavering support have been invaluable throughout this journey. Your wisdom and insights have shaped not only this book but also my growth as a technologist and as a writer. Thank you for believing in me.
To my late father, Ram Ratan Haldar, who always taught me to work hard and instilled in me the love for knowledge and learning. Though you are no longer with us, your presence and influence continue to inspire me every day.
To my mother, Champa Rani Haldar, whose unwavering love, encouragement, and sacrifices have been a constant source of strength and motivation. Your belief in my abilities and your unwavering support have been the driving force behind this accomplishment.
And finally, to my loving wife, Prachita, who sacrificed many late nights and weekends without me while I was working on this book. Thank you for your unwavering support, encouragement, and patience.
I must also extend my earnest appreciation to the team at Apress: Jessica Vakili, James Robinson-Prior, and James Markham. Your combined knowledge, unwavering support, and collaborative efforts were pivotal to the book’s successful completion.
I am deeply grateful to each and every person who has played a role, big or small, in the creation of this book. Your contributions, encouragement, and belief in my abilities have made this book possible.
—Mahesh Haldar
xii
Introduction
As we progress further into the digital age, serverless architectures and web applications are continuously reshaping the technological landscape. As technology leaders, we often faced challenges when searching for thorough, hands-on resources on this topic. This motivated us to compose Serverless Web Applications with AWS Amplify, a book that represents the guide we wished existed when we first ventured into the field of serverless architecture.
Serverless Web Applications with AWS Amplify is intended for a broad audience – from newbies taking their first steps in cloud development to advanced developers aiming to broaden their understanding of modern web application technologies. While prior knowledge of cloud computing might be helpful, it is not a prerequisite. The aim is to assist all readers in scaling their web applications, reducing costs, enhancing scalability, or simply exploring the expansive domain of serverless web development with AWS Amplify.
The structure of this book is carefully designed, beginning with the fundamentals of cloud computing and serverless architectures, followed by an introduction to AWS
Amplify. Subsequent chapters dive into topics such as authentication, authorization, REST APIs, GraphQL, and offline- first applications. As we progress, we delve into data and storage, analytics, continuous integration/continuous delivery (CI/CD), with AWS
Amplify, and, eventually, the integration of AI and ML capabilities into your applications, by building interactive chatbots and building application to convert text to speech.
In addition to detailed explanations, this book includes practical examples, code snippets, and hands-on exercises to solidify your understanding of the concepts. To further support your learning journey, additional online resources are available.
Reflecting on our journey, we recall the intriguing challenge that programming initially posed for us. It was the transformative power of code, the ability to turn ideas into reality, that fueled our fascination. AWS Amplify, in particular, revolutionized our approach to web application development. This book is the culmination of our journey, experiences, and accumulated knowledge, which we are eager to share with all readers.
As the famous quote by Albert Einstein goes, “The measure of intelligence is the ability to change.” By the end of Serverless Web Applications with AWS Amplify, our hope is to provide you with the knowledge and skills to adapt to the fast-paced world of serverless web applications, fostering your growth in this dynamic field.
xiii
CHAPTER 1
Introduction to Serverless
In the world of cloud, scale is the game changer.
—Akshat Paul
Cloud computing has transformed the way we store, process, and manage data. In this chapter, we will cover the basics of cloud computing, including its evolution from traditional IT, its key advantages, and the next generation of cloud technologies. We will explore serverless architectures, BaaS (Backend as a Service) and FaaS (Function as a Service), discussing their benefits and weaknesses. We will also introduce AWS Amplify, a platform for building web and mobile applications with AWS services, and guide you through setting it up locally and configuring the Amplify CLI with AWS.
Whether you’re new to cloud computing or an experienced developer looking to learn about next-generation cloud technologies, this chapter will provide you with a solid foundation to build upon. So, let’s dive into the world of cloud computing and explore the latest and greatest technologies that it has to offer.
A Little Background
In 2017 at AWS re:Invent, I became intrigued by a new architecture for application development called serverless architecture. Initially, I had reservations about serverless applications, as it seemed like someone else would be running a server for me, which meant giving up control. As a developer, I was reluctant to relinquish control over my application. However, I soon discovered that serverless architecture offers much more.
In this book, we will explore how this game-changing architecture can save developers a significant amount of time on repetitive tasks, allowing them to focus on tasks that have the maximum impact. But before we dive into that, let’s take a brief look at the background and history of how we arrived at this point.
1
© Akshat Paul, Mahesh Haldar 2023
A. Paul and M. Haldar, Serverless Web Applications with AWS Amplify,
Chapter 1 IntroduCtIon to ServerleSS
If we time travel back to almost 20 years and see how traditional IT used to work, life was not easy. There used to be a dedicated team to handle all the operations tasks of the server setup and maintenance, and once the servers were ready, the developers would be writing business logic and deploy the application on those servers.
The server operations team was responsible for setting up firewalls and compute servers, installing the operating system, and configuring database servers. Additionally, they were tasked with monitoring the temperature of the server rooms to prevent server failures caused by excessive heat. They also had to plan for potential damage caused by natural calamities such as heavy rainfall or other extreme weather events.
In the past, hosting an application required a significant amount of time and effort.
Before writing the first line of business logic, one had to perform a series of operational tasks. This was akin to having to build a car from scratch before embarking on a family trip. It was an extremely painful and time-consuming process.
However, a revolutionizing change came in the form of cloud computing. Services such as AWS transformed the hosting model. Rather than building a car from scratch, users could now simply rent one and focus on itinerary planning and enjoying the trip.
With AWS, hosting applications in the cloud has become incredibly easy. There is no need to invest in physical space or worry about maintaining data centers. Compute, storage, and databases can be quickly provisioned on demand, without having to worry about setting up and maintaining hardware.
This approach saves companies from up-front investments in procuring hardware, paying rent for a data center, and paying the bills for electricity. In addition, it enables businesses to scale their infrastructure as per their requirements, without having to worry about infrastructure management. As a result, cloud computing has become an essential component of modern software architecture, and AWS is a leading provider of cloud computing services.
EC2 (Elastic Computing Cloud) from AWS (Amazon Web Services) was one of the early Infrastructure as a Service (IaaS) products. IaaS allows users and companies to buy computing capacity on rent rather than setting up and buying all those physical machines on their own. It allowed them to provision infrastructure just in time when required, which means the commissioning of machines to availability will happen in minutes, if not in seconds. This was revolutionary at that time to even think.
IaaS is a type of cloud service that offers required resources like compute engine, database, storage, artificial intelligence services, and networking configurations on demand; these are basically on the model of pay as you go. Over the years, companies 2
Chapter 1 IntroduCtIon to ServerleSS
realized there is a huge overhead just to commence a digital footprint on the World Wide Web or even spinning up simple internal apps, which involved physical infrastructure operations like electric power for machines, setting up data centers. All these resources can be provisioned quickly and easily with the advent of cloud.
Rise of Cloud Computing
If we look closely, all the things involved in computing infrastructure are a bunch of repetitive tasks. There were inefficiencies and a high learning curve for any new company to set up its infrastructure. Cloud computing giants were able to find this opportunity and establish best practices in order to take away this stress from end consumers.
Further, they also have multiple options in these instances. They also have options like spot instance which can further help you lower the costs; these are a few examples, but the probability to play around with options is huge to bring down cost and improve efficiency.
The evolution of cloud computing led to the introduction of Platform as a Service (PaaS). Among the most popular and my personal favorite PaaS services is Heroku. PaaS
builds on the foundation of Infrastructure as a Service (IaaS) and provides additional tools and resources to help you deploy your application quickly. With PaaS, you can leverage prebuilt services such as OS installation, language-specific environment setup, service discovery, and monitoring, which are completed up front.
PaaS enables developers to focus on the core business logic of their application, rather than worrying about the underlying infrastructure. This significantly reduces the time and effort required for deployment while also providing greater flexibility and scalability. By leveraging PaaS, businesses can rapidly deploy and iterate on their applications, reducing time to market and improving overall efficiency. Heroku is an excellent example of a PaaS service that offers a wide range of features and capabilities, making it a top choice for many developers and businesses.
Platform as a Service (PaaS) is a layer that sits on top of virtual machines (VMs), but we can also use containers to achieve the same. Containers, such as Docker, are a popular example that isolates application requirements from operating system dependencies. When containers run on top of virtual machines, it is called 3
Chapter 1 IntroduCtIon to ServerleSS
Container as a Service (CaaS). Container orchestration is a sophisticated task that requires tools such as Kubernetes and Mesos, which can be run on both public and private clouds (we will discuss private cloud in more detail shortly).
So far, we have discussed the three main genres of cloud computing: Infrastructure as a Service (IaaS), PaaS, and CaaS. Together, they come under the umbrella of compute as a service. All three are closely associated with each other and are interdependent.
Now, let’s review some of the advantages of cloud environments.
Key Advantages of Cloud Environments
By leveraging cloud computing services, businesses can focus on their core competencies and achieve greater operational efficiency.
The following are some key advantages:
• Cheaper cost: Before Infrastructure as a Service, you would need to set up data centers which in turn would require specialized skilled engineers who would work in these data centers to maintain apps
and servers. Things from networking to installations, power, and
physically fixing issues which means high cost of assets and team.
With IaaS, all this cost is outsourced to cloud providers like AWS (in the case of EC2), and you can pay as you go.
• Less risk: Managing your own physical servers can expose you and your company to many unplanned incidents like hardware failure,
downtime during high volume, or scaling up the servers due to
unplanned surge in traffic. There is also a high risk that the servers you own are in a region which has become hostile. With IaaS spread across continents and backups available in multiple regions, you are secured in every manner. Downtime is managed since cloud providers have
endless computing capacity, so risk is pretty much at bay.
• Scaling: Scaling has a cost attached to it, and it is significantly pulled down when we bring IaaS. With IaaS, there is flexibility in paying as you scale. You are no longer required to make up-front investment on servers which might never be used or could be used very quickly.
There is also an option to start with the minimal configuration of infrastructure and move to high-power infrastructure as and when
4
Chapter 1 IntroduCtIon to ServerleSS
needed. You are also free from procurement and provisioning of
servers every time you start a new proof of concept or a planned
application. If you just want to try an idea for a short period of time with IaaS, you can go live in minutes instead of months. This is one of the main reasons of small start-ups experimenting ideas like any big corporation and scaling only when required.
• Increased efficiency: Cloud environments provide automated
provisioning, orchestration, and management, which results in
increased efficiency and reduced downtime.
• Improved agility: With cloud computing, developers can rapidly deploy and iterate on applications, reducing time to market and
improving overall agility.
• Flexibility: Cloud environments provide the flexibility to run workloads on public, private, or hybrid clouds, as well as the ability to leverage multiple cloud providers for different services.
Now that we’ve discussed the advantages of cloud computing, let’s dive into the next evolution in cloud development: serverless computing. With serverless, developers can take their applications to the next level, leveraging the power of the cloud without worrying about the underlying infrastructure.
The Emergence of Serverless Computing:
A Game- Changer for Cloud Development
After a decade of cloud computing, the technology industry started exploring new ideas for the next evolution of infrastructure outsourcing. The focus was to make the process more efficient and cost-effective for the end consumer. The concept of serverless emerged from this, but it does not mean that applications run without servers. Instead, serverless architecture allows applications to run without being tied to a specific server.
Traditionally, an application would require a dedicated server even if it was only needed for a few hours a day. With serverless architecture, when a request is made, one of the available servers is assigned to execute the required business logic, and the function runs on that server. This means that the same function may not run on the same server 5
Chapter 1 IntroduCtIon to ServerleSS
if it is required at different times of the day. With serverless architecture, you only pay for the time the function consumes the computing engine, making it a more cost-effective solution.
Serverless architecture is a way of providing backend services on an as-needed basis.
In this architecture, resources are not held in volatile memory. Computation is done in short bursts of requests, and the results are persisted. When the application is not in use, no computing resources are allocated. However, serverless architecture comes with a range of techniques and technologies that can be grouped into two categories: Backend as a Service (BaaS) and Function as a Service (FaaS). Let us take a closer look at these two categories.
Backend As a Service (BaaS)
In the Backend as a Service (BaaS) model, developers can focus solely on building the client side of applications while outsourcing the backend activities as services through APIs (Application programming interfaces). This means the various essential functionalities such as authentication, database management, and push notifications, can be outsourced to third party service providers, and directly consumed in the applications, without managing it. To put it simply, it is similar to a fast-food restaurant where the waitstaff is responsible for serving clients and chef prepares the food in the back kitchen. The basic idea of BaaS is to reduce complex backend tasks that can be reused and enable the team to focus more on the frontend development.
BaaS can be seen as a variation of Software as a Service (SaaS), where business processes are consumed through tools and services such as GitHub, Salesforce, Dropbox, and Google apps. BaaS breaks down an application into smaller pieces, where the implementation can be entirely in-house, using external products, or a combination of both, with APIs and SDKs (software development kits) being the typical integration methods used. BaaS has become very popular ever since the advent of single-page web apps and mobile apps. Some common features which BaaS services easily provide are 1. Authentication
2. CDN (Content Delivery Network)
3. API integration
4. Database management
6
Chapter 1 IntroduCtIon to ServerleSS
5. Geographical location
6. Cloud storage and backup
7. Email service and verification
8. Regulatory compliance
9. Social media integration
10. Push notifications
Popular BaaS service providers include
• Apache Usergrid
• Auth0
• Back4App
• Backendless
• 8Base
• Built.io Backend
• Couchbase
• Kii
• Kumulos
• Kuzzle
• MongoDB Stitch
• Parse
• Firebase
• Windows Azure Mobile Services
• AWS Amplify (one we will discuss in depth in this book)
Now let’s move on to Function as a Service (FaaS), which is another type of serverless architecture that focuses on the backend code execution.
7
Chapter 1 IntroduCtIon to ServerleSS
Function As a Service/Serverless Computing
Function as a Service (FaaS) is another part of serverless computing where an environment is provided to customers to develop, execute, and manage application functionalities without setting up or maintaining complexity of building a full-blown server. By full-blown server here we mean instead of deploying server-side software, the deployment is limited to only functions and operations. The most popular form of FaaS
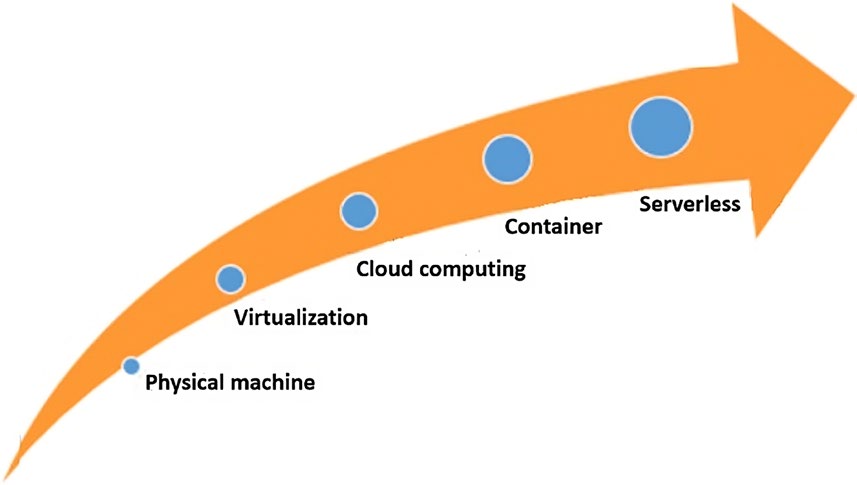
implementation is Lambda from AWS. Figurws the evolution path of application infrastructure from a physical machine to serverless.
Figure 1-1. Evolution of IT infrastructure
The evolution of serverless computing can be analogous to human evolution; with every passing step, the productivity and ease for end users increased manyfolds.
Traditionally, applications had to deploy their server-side software with a host instance, which used to be a virtual machine (VM) instance or container. The application contains functions that have the business logic to act based on user requirements.
However, with the rise of Function as a Service (FaaS), developers can now focus only on writing these functions, while the service providers manage everything else. FaaS is 8
Chapter 1 IntroduCtIon to ServerleSS
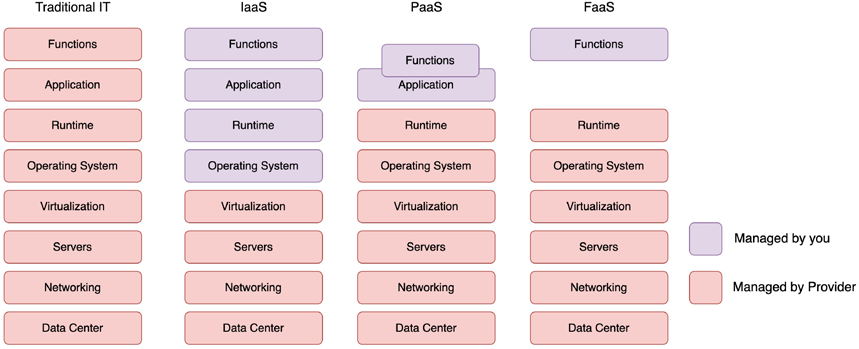
at the top of the chain, offering developers a way to execute code on demand without the need to manage servers, operating systems, or infrastructure. The block diagram in Figurains parts of infrastructure managed by you and the provider in different strategies.
Figure 1-2. Infrastructure components managed under different infrastructure strategies
As seen in Figurith FaaS we strip away everything from the host instance to the application process from our model. Instead, we focus on just the individual operations or functions that express our application’s logic. We upload those functions individually to a vendor-supplied FaaS platform.
The functions or operations are the basic and only unit in a FaaS system. They are not constantly active but sit idle until they need to be run. A FaaS platform is set up to listen for a specific event for each operation; basically, it works on an event-driven approach. When that event happens, the function is triggered.
AWS Lambda is a highly popular and stable FaaS option, which was launched in 2014
and has since become a go-to choice, especially for those using AWS services. Apart from AWS Lambda, other widely used FaaS offerings are provided by Google, Microsoft, IBM, and smaller players such as Auth0.
9
Chapter 1 IntroduCtIon to ServerleSS
Benefits and Weaknesses of a Serverless Architecture
While architecting an application, it is necessary to take the right decision; though we are focusing on serverless applications in this book, traditional architecture having a backend server altogether is still a preferred architecture based on the problem at hand.
Hence, we must look at the benefits and weaknesses of serverless architecture to come to a conclusion when to opt for it.
Benefits of Serverless Architecture
Scalability
One of the key advantages of going serverless is getting scalability out of the box. If your application goes viral, you don’t have to worry about how you would manage high traffic and too many sign-ups, the cloud service provider handles this for you. Since in a serverless architecture your code in function runs in parallel based on individual trigger, scaling with size is automatic. You don’t have to worry about scaling either your server or databases.
Less Code
Less code is not just a buzzword, it is actually the crux of serverless architecture. Since you are focused on writing the business logic, most of the repetitive and bootstrapping part is already managed by cloud providers. This also makes things simple for new team members to understand a simple architecture and corresponding functions. Though it’s not guaranteed, usually less complexity means less bugs and it’s easy to debug them. The tech team often plugs existing managed services to implement features, further reducing burden of building and maintaining code.
Better Velocity
With fewer features to build and complex repetitive ones outsourced to other services, developer velocity increases drastically. Spinning up features like authentication, databases, APIs, etc., is super fast, and developers can focus on core business logic.
10
Chapter 1 IntroduCtIon to ServerleSS
Fail Fast
Most of the repetitive tasks are outsourced to other services; there is ample time to experiment new features with less risk. A focus is on to go live with business features that work and retire the features which are not making any impact is totally possible in such environment. This type of testing is called A/B testing where we can compare different versions of an application to conclude which one performs the best.
Improved Reliability
Serverless architectures often include built-in fault tolerance and redundancy features, which can help ensure that your applications remain available and reliable even in the face of failures.
Cost
The pricing of a serverless architecture is far different from traditional on-premises infrastructure and cloud-based hosting. In a traditional infrastructure, there are exuberant costs for data centers and day-to-day maintenance of the application, while cloud-based hosting also has many of the costs associated with maintaining an application. With serverless technologies, you basically pay for what you use. FaaS
further drops your price arrangement to the number of requests your functions serve, reserved memory for each function, and time taken for the code to execute.
You are not paying anything when your app is sitting idle. Besides that, most of cloud providers have managed services to satisfy key complex requirements, and the cost is only based on usage. This significantly reduces overall costs and allows developers to spend time on the unique features of the application rather than implementing the same features again like authentication, etc. This also means reduced time to market, which is additional saving.
Security and Stability
Since we are going to consume many services related to core functionalities, we are actually reusing time-tested software which comes with security and scalability. For example, authentication is a very complex piece of software in a serverless architecture; we will outsource it to a managed service, which means we don’t need to worry about implementation but also day-to-day vulnerabilities which are managed by the respective owner.
11
Chapter 1 IntroduCtIon to ServerleSS
Another advantage of using these managed services is that service owners make sure to avoid any kind of downtime possible. We basically outsource them, not just building but also deploying and maintaining these services, keeping them stable for day-to-day operations.
Weaknesses of Serverless
The Cold Start
A cold start happens when a function is invoked, but there is no running function available to execute; rather, a new function container will spin up; this will increase time for users to start interacting with the app. Developers avoid this situation by keeping functions warm, but this workaround kind of beats the purpose of going serverless at the first place.
This cold start issue is there but continues to have less impact with time. For example, AWS Lambda significantly improved its start-up time for cold starts by reinventing how it connects a function to a private network.
VPC/Network Issues
If the application needs to operate within a private network, there may be limitations in a serverless architecture. Subnets with limited IP addresses have a constraint on the number of concurrent executions. Depending on your company’s requirements, it is important to plan the capacity of private networks adequately to ensure they are large enough to accommodate the application. Additionally, it is advisable to avoid relying heavily on classic serverless architecture, where we can outsource many core features to cloud services.
Application Size
We have discussed about cold start time earlier, and it becomes a serious problem if the application size is huge. The impact of this limitation is, you cannot pack a huge Java application or node application with huge dependencies to a serverless function; therefore, a choice of better technology that complements well with your serverless architecture could be an alternate strategy.
12
Chapter 1 IntroduCtIon to ServerleSS
Debugging
Chances of failure are inevitable, so a strategy of debugging has to be part of software development; however, when the runtime is dynamic, debugging at times becomes complicated. However, the savior here is, since core functionalities can be outsourced to managed services, we can pinpoint the issue if our architecture is set up correctly.
Vendor Lock-In
Moving from one serverless platform to another may be challenging due to the proprietary nature of serverless architectures.
AWS Amplify Introduction
AWS Amplify is a comprehensive suite of services and tools that empowers frontend and mobile developers to build highly scalable and secure full-stack applications by leveraging the robust features of AWS. Amplify offers an open source framework that provides libraries tailored to specific use cases and a robust toolchain to easily integrate cloud-based functionalities into your application. Additionally, Amplify includes a web hosting service that enables hassle-free deployment of static web applications.
Amplify boasts a plethora of services in its toolkit, which we will explore in detail in subsequent chapters. However, to provide a brief overview, Amplify offers the following services as part of its out-of-the-box offerings:
• Authentication: Enable sign-in, sign-up, and sign-out within minutes with prebuilt UI components and powerful authentication APIs
• Storage: A simple mechanism for managing user content in public, protected, or private storage
• GraphQL API: Easy and secure solution to access your backend data with support for real-time updates using GraphQL
• DataStore: Seamlessly synchronize and persist online and offline data to the cloud as well as across devices
• REST API: A straightforward and secure solution for making HTTP
requests using REST APIs
13
Chapter 1 IntroduCtIon to ServerleSS
• Analytics: Make informed decisions with drop-in analytics to track user sessions, custom user attributes, and in-app metrics
• Push notifications: Drive customer engagement using push
notifications with campaign analytics and targeting
• XR (Extended Reality): Engage your customers in a different
dimension with augmented reality (AR) and virtual reality (VR)
content within your app
• PubSub: Provide best-in-class real-time experiences by connecting your application with a message-oriented middleware in the cloud
• Interactions: Automate customer workflows by enlisting the help of conversational chatbots powered by deep learning technologies
• AI/ML predictions: Design delightful experiences with the power of AI (artificial intelligence) and ML (machine learning) functionality such as computer vision, translation, transcription, and more
Local Setup
In this book, we will be creating a web application which will use React as frontend technology.
For that purpose, let’s use create-react-app npm package to create our hello world React application, using the following command:
npx create-react-app react-amplified
Note Since we are creating our react application using create-react-app please install node and npm globally if you haven’t. You might have to add sudo based on your system policy.
Next, let’s set up the AWS Amplify CLI so that we can get started working with Amplify.
14
Chapter 1 IntroduCtIon to ServerleSS
Setting Up AWS Amplify CLI
The Amplify Command Line Interface (CLI) is a unified toolchain to create, integrate, and manage the AWS cloud services for your app. Basically, with React we build the frontend or client side of a web application, and Amplify helps us set up anything related to the backend.
The following are prerequisites for setting up the Amplify CLI:
1. Install Node.js and NPM if they are not already on your machine.
2. Verify that your Node.js version is at least 10.x and npm version 6.x or greater; this can be done by the following commands: `node -vànd `npm -v`.
3. You must have a valid AWS account. In order to create an AWS
account, simply visit ign up.
There is no up-front cost for creating a new account with AWS;
however, you would have to provide your credit card to get started.
Install the Amplify CLI using the following command:
npm install -g @aws-amplify/cli
Note Since we are installing the ClI globally, you might have to add sudo based on your system policy.
While writing this book, I have used Amplify CLI version @aws-amplify/[email protected]; please use the same version in order to run all the examples exactly how we implement throughout this book, avoiding any confusion. To specify the exact version, you can add it in the following way:
npm install -g @aws-amplify/[email protected]
Before we start using the Amplify CLI, we would have to configure it with our AWS
account; let’s do that in this section.
15
Chapter 1 IntroduCtIon to ServerleSS
Configuring Amplify CLI with AWS
To set up our AWS account with the Amplify CLI, we would have to run the following command, which we would be using just one time to tie our AWS account with the Amplify CLI:
➔ react-amplified git:(develop) amplify configure
Follow these steps to set up access to your AWS account:
➔ react-amplified git:(develop) amplify configure
Follow these steps to set up access to your AWS account:
Sign in to your AWS administrator account:
https://console.aws.amazon.com/
Press Enter to continue
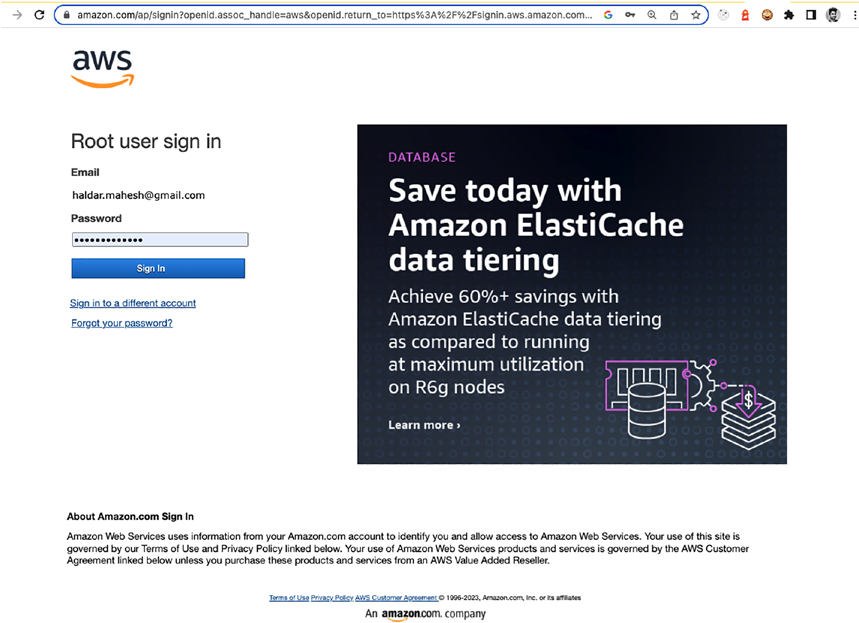
What happens now is that a browser page opens up, and we will be prompted to sign in into our AWS account. Enter your AWS account email and password. This is illustrated in Figure .
Figure 1-3. Amazon Web Services login
16
Chapter 1 IntroduCtIon to ServerleSS
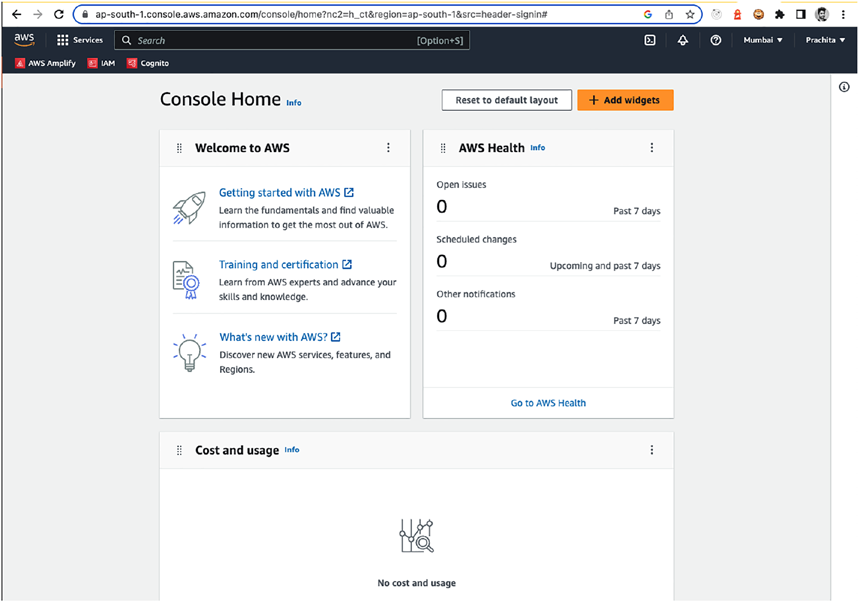
Upon successful login, as shown in Figur, we will be taken to the home page of AWS Management Console.
Figure 1-4. AWS Management Console
We don’t have to do anything here; simply switch back to your terminal. You will have to now select your AWS region. Select the closest one from all the provided options: Specify the AWS Region
? region:
ca-central-1
me-south-1
sa-east-1
❯ us-east-1
us-east-2
us-west-1
us-west-2
(Move up and down to reveal more choices)
17
Chapter 1 IntroduCtIon to ServerleSS
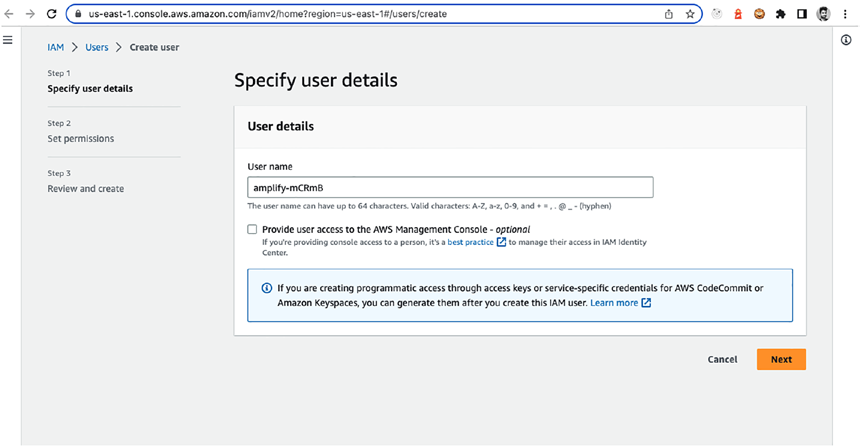
Next, you will be navigated to AWS console on browser to create a new user and you will be asked to name your new IAM (Identity and Access Management) user. This user is an entity that is created in AWS to represent the application which will interact with AWS. The reason for this new IAM user to be created is to make sure only authorized person can manage and modify different resources.
Adding a New IAM Management Console
The first step is to add the user details, you will see the username will be prefilled with what we have selected the CLI and also you have the ability to add multiple users.
We will set the permission in next screen, which will provide us required accesses to our Amplify app via an access key ID and a secret access key which we will get at the end of this process. Click Next and move to the next step.
Figure 1-5. IAM user addition and access
18
Chapter 1 IntroduCtIon to ServerleSS
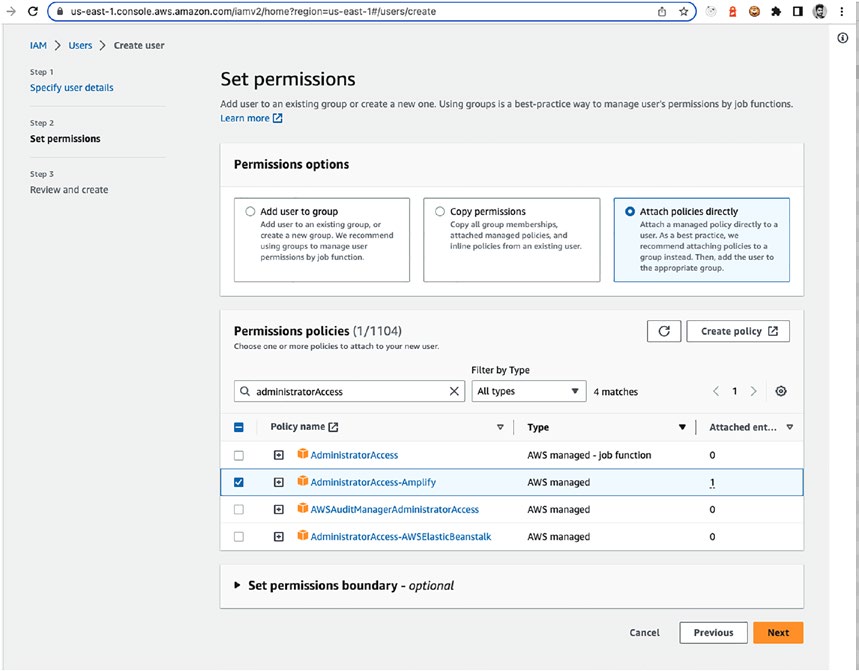
In this setup, we will provide a policy for our user; click on Àttach policies directly`
tab to attach the policy for this user. In our case, since we have one user and we want to provide it full access, let’s select AdministratorAccess-Amplify, you can type in the filter input as illustrated in Figurou had created multiple users, we could add them in groups and select desired limited access with limited policies. Click Next to move forward.
Figure 1-6. User policy
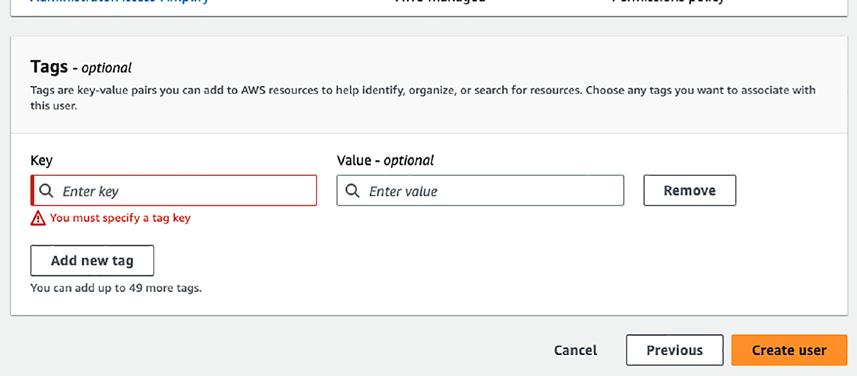
In this section, we can provide certain tags to our user. This is an optional step; we will skip it and move to the next step, as shown in Figure .
19
Chapter 1 IntroduCtIon to ServerleSS
Figure 1-7. Optional step to add a tag
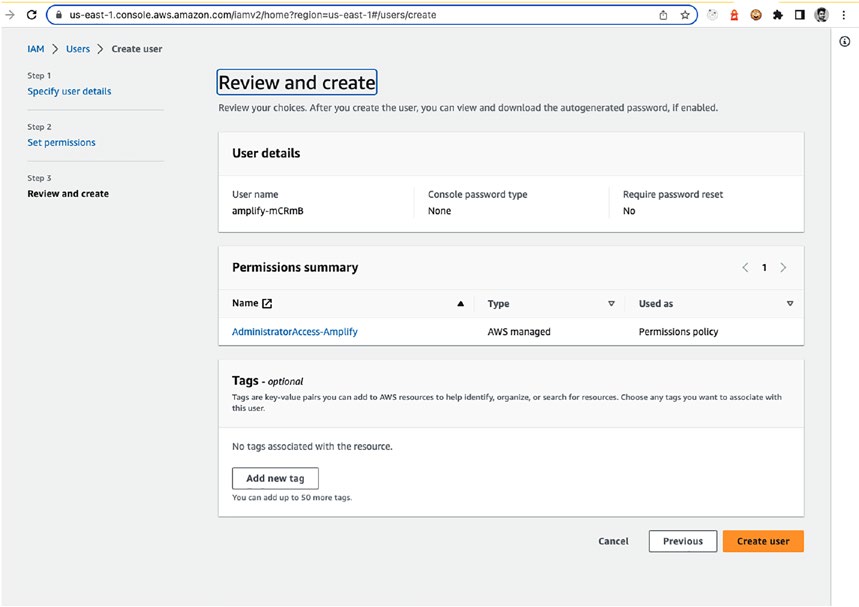
This is a review page to review various parameters we had selected in previous steps.
Review them to create a user. Once reviewed, click the Create user button.
Figure 1-8. Create user review page
20
Chapter 1 IntroduCtIon to ServerleSS
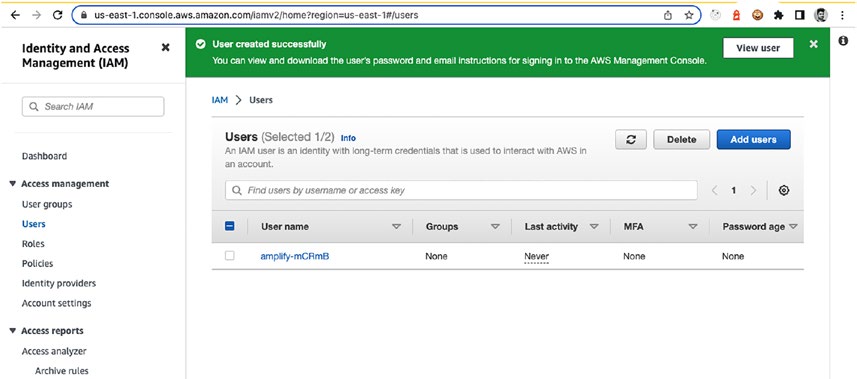
This is the final step where our new user is created and we get a success message.
We will require to generate this user’s access key, as the terminal in next step will ask to enter the access key and secret, so that it can validate the user. From the success screen shown in Figure , select the user you just created, navigate to Security credentials tab, and under Access keys section click on the Create access key button. Next you will be asked to select the use case for the access keys, select Command Line Interface (CLI) option and click on confirm to create access key. It’s important to note that we can only see these values once. The secret access key is hidden, but we can reveal it by clicking the Show button or download the .csv file to store it locally. Before you move forward, make sure you copy both values.
Figure 1-9. User creation page with keys
Go back to the terminal and press enter to continue.
After pressing enter, we get an option to add accessKeyId and secretAccessKey –
press enter. You get an option to add a profile name; you can skip it as default and hit enter again. With this step, you get successfully set up new user message, and we have configured AWS Amplify successfully before we start building our first app.
21
Chapter 1 IntroduCtIon to ServerleSS
Enter the access key of the newly created user:
? accessKeyId: ********************
? secretAccessKey: ****************************************
This would update/create the AWS Profile in your local machine
? Profile Name: default
Successfully set up the new user.
Summary
In this chapter, we covered the background of cloud computing and how it has evolved from traditional IT to become the dominant technology paradigm today. We discussed the rise of cloud computing and the key advantages that it provides, such as scalability, cost savings, and flexibility.
We also looked at the next generation of cloud computing, including serverless architectures, BaaS and FaaS, and the benefits and weaknesses of these approaches. We discussed how serverless architecture can help reduce costs and improve scalability, but may be more complex to manage.
We then introduced AWS Amplify, a platform for building web and mobile applications with AWS services. We discussed how to set up Amplify locally and configure the Amplify CLI with AWS. Finally, we covered how to set up an IAM user to start building applications in the next chapter.
Overall, this chapter provided an overview of cloud computing and its evolution, as well as an introduction to AWS Amplify and the tools needed to build applications with it, which we will use in next chapter.
22
CHAPTER 2
UI Component and
Authentication
The essence of authentication is being able to prove the assertion you are making.
—Akshat Paul
In this chapter, we will explore the concepts of authentication and authorization and how they are essential for secure application development. We will discuss different types of authentication and authorization mechanisms. Furthermore, we will dive into the AWS Cognito service, which is used for managing registered users and their access to the application. We will also demonstrate how to implement a login flow, sign-up flow, and basic password management in a React app using AWS Amplify.
Additionally, we will showcase how to implement social authentication, such as using a Google email ID and password.
Authentication Basics
Can you watch a Netflix show without having a valid login credential or without paying with your credit card? Obviously not. Imagine if there was a security flaw in Netflix’s security systems and users could watch the shows without subscribing, this may cost billions of dollars to the business, and if not fixed in time, it could lead to a significant loss, ultimately impacting the financials of the company. This is the business importance of the user login credential in the digital industry.
Similarly, the offices require employees to carry an access card to enter the office and access specific areas like meeting rooms and cafeterias. The repercussions of allowing 23
© Akshat Paul, Mahesh Haldar 2023
A. Paul and M. Haldar, Serverless Web Applications with AWS Amplify,
Chapter 2 UI Component and aUthentICatIon
unauthorized access could be severe, leading to potential losses for the company, in many aspects. Hence, it is essential to have a security check at the gateway to avoid any such losses.
In this chapter, we will discuss the importance of authentication and authorization in digital platforms and implement it in our app using AWS Amplify. We will discuss the various types of authentication, along with the AWS Cognito service, a fully managed service that provides basic user management, sign-up, sign-in, and access control, without having to rebuild the authentication and authorization system. We will also use the AWS Amplify to implement the login flow, sign-up flow, and basic password management in our React app. Additionally, we will also explore how to implement social login, like using Google email ID and password for logging in.
What Is Authentication?
Authentication is a fundamental aspect of security and access control in the digital world. It involves verifying the identity and credibility of a user and granting access to the resources of a system. The authentication process typically requires the user to provide proof of their identity, such as a password, PIN, or biometric information.
In our daily lives, we interact with authentication systems frequently, often without realizing it. For example, we need to provide a PIN to withdraw cash from an ATM
and valid login credentials to access our social media accounts. The importance of authentication becomes even more apparent in the business world, where a security flaw can lead to significant financial losses and damage to a company’s reputation.
How Can Users Prove Credibility?
To authenticate a user or incoming request, the request must meet the specific criteria: 1. Proof of who the user is claiming to be.
The user should provide some proof to validate their identity such as login ID, password, or token.
2. Proof should be understandable by the system.
The proof should be understandable by the system and should
be present in the system records. If the proof is a user ID and
password, then it should be registered already in the system.
24
Chapter 2 UI Component and aUthentICatIon
If the proof is an access token or certificate, then it should be in line with the agreed format between the server and the client or
should be generated by the system itself.
3. Proof should be valid.
The proof provided by the user should be valid, such that the
access token should not be expired or the password should be
correct.
Once the process of authentication is successful, the next step is authorization.
What Is Authorization?
Let us consider a scenario where you have booked a flight ticket from Tokyo to Berlin.
Along with you, there are other passengers, air hostesses, and pilots who will be boarding the same flight. As long as you possess a valid ticket, you are authenticated to board the flight, along with the pilots and air hostesses.
However, if someone like Mr. Professor tries to board the same flight without a valid ticket, they will not be authenticated to board the flight. Once you, the pilots, and the air hostesses board the flight, each individual has a different level of access within the aircraft. For instance, you can only use the seats and washrooms, but cannot go to the cockpit or visit the pantry section of the aircraft to take food from the oven.
Similarly, air hostesses have different seats and cannot enter the cockpit to take control of the aircraft. This rule of different users having different levels of access to resources is what is known as authorization. The authentication and authorization flow can occur either between a server and users or between two servers. Regardless of the combination, the authorization server acts as the server, while the requester functions as the client. The client can be any web application, mobile application, or any program such as the CLI or backend server.
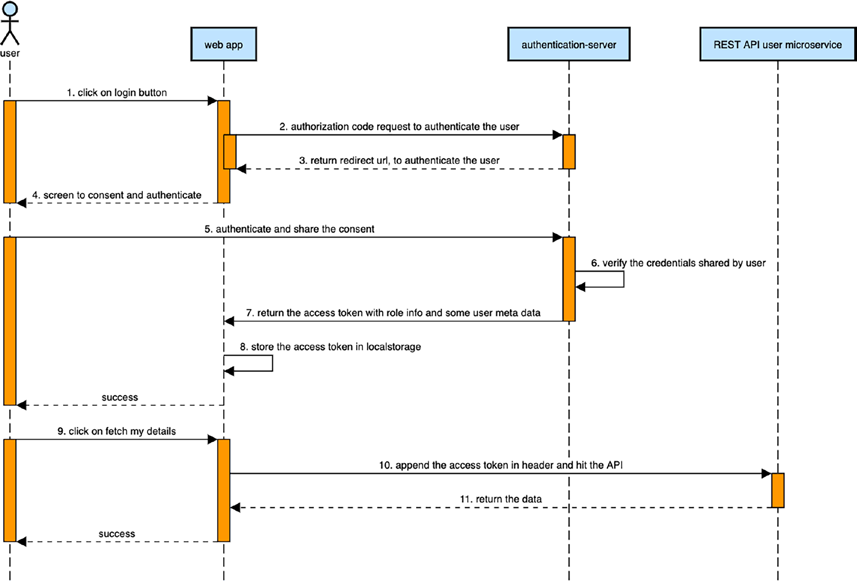
Figurubsequent steps outline the flow of how the authentication occurs in a web application when a user logs in and subsequently accesses other resources.
25
Chapter 2 UI Component and aUthentICatIon
Figure 2-1. The authentication flow between the application and the server 1. The user clicks the login button.
2. This triggers the whole flow of the authentication process, and in return, the authentication server returns a redirect URL, where the user needs to add credentials and grant consent if required.
3. The user is then presented with the screen on the browser,
prompting them to enter their credentials. In the case of social
login via Gmail, the Google sign-in screen will be displayed.
4. The user enters their credentials and grants their consent by acknowledging the login.
5. The authentication server verifies the provided credentials and returns a success response, if they are correct.
6. Upon successful authentication, the authentication server appends metadata such as TTL (time to live), user role, and other useful
information to the access token, which is then returned to the web app.
26
Chapter 2 UI Component and aUthentICatIon
7. The web app can store the access token and use it until it expires, which is typically a few minutes to hours depending on the token’s importance.
8. After a successful login, the user is inside the application and can access other resources such as their personal information. When
a new API request is made with the access token, the server or API gateway checks if the user’s token is valid and has a valid role. If it does, the server responds to the request successfully; otherwise, the request is rejected.
Broken Authentication
The configuration of the authentication system in any digital system should be robust enough to prevent malicious users from gaining unauthorized access to resources or sensitive data. Broken authentication refers to vulnerabilities in the system that allow an attacker to log in and gain access to sensitive data that they should not be able to access. This can result in significant financial loss, loss of customers, and damage to a company’s reputation. Broken authentication vulnerabilities can be caused by various factors such as poor session management, nonsecure protocols, nonsecure cookies, and poor password policies. A survey conducted by the National Cyber Security Centre (NCSC) in Great Britain revealed that a significant number of users, about 23.2 million, were using weak passwords such as “123456”. Additionally, passwords such as “qwerty”
and “password” were used by more than 3 million accounts.
Here are a couple of examples of real-world cases where broken authentication mechanisms were exploited:
• In 2014, Yahoo suffered a data breach that compromised billions of user accounts due to weak passwords and unencrypted
communication. As a result, Yahoo suffered significant financial
losses and damage to its reputation.
• Similarly, in 2018, hackers were able to access the Marriott hotel chain’s system by exploiting compromised credentials, leading to
exposure of personal information of up to 500 million guests.
27
Chapter 2 UI Component and aUthentICatIon
These incidents highlight the importance of implementing strong authentication mechanisms to protect sensitive data and prevent unauthorized access. The improper authentication mechanism can result in various types of losses such as financial, theft, and compromising of confidential data. This further leads to losing customers.
Therefore, organizations should implement strong security measures to ensure the confidentiality, integrity, and availability of their systems.
The following are ways to prevent broken authentication:
1. Disallow infinite attempts of the wrong password, as this can prevent hackers from using automated programs to guess the
password.
2. Never store passwords in clear text and always encrypt them with additional salt for extra security, such that even if some malicious user gets access to the database, they should not be able to
understand the passwords.
3. Enforce the password complexity, for example, a combination
of uppercase and lowercase letters as well as at least one special character to make guessing the password abstruse.
4. Have an automated alert mechanism that sends notifications
when multiple failed login attempts reach a certain threshold.
5. HTTPS should be the default protocol for all communications.
6. Implement the latest authentication protocols that have been
thoroughly tested against most of the security vulnerabilities to ensure the highest level of security.
Types of Authentication
• Basic authentication: This is the most basic type of authentication; in this method, a user’s credentials (username and password) are
encoded and sent in all the HTTP request header.
This type of authentication is not secure as the credentials are
to be saved on the device in order to send in every request. To
mitigate this risk basic authentication, is recommended.
28
Chapter 2 UI Component and aUthentICatIon
• Token authentication: This type of authentication is a widely used method for authentication in modern applications; in this method, the client (user or application) provides their credentials, username and password, once to the server. In return, the server generates a unique and encrypted token, which is then sent back to the client.
The token contains metadata about the user or client, as well as
information to validate its authenticity. This token serves as proof of authentication and is used for subsequent interactions with the server or for making API calls. The client includes this token in the request headers for each subsequent request, rather than sending the credentials (e.g., username and password) repeatedly.
Token authentication offers several advantages. It reduces the
risk of transmitting sensitive credentials with each request. It also enables better scalability and performance, as the server does not need to perform expensive authentication checks for every request but can validate the token quickly. Additionally, tokens can have expiration times, improving security by automatically invalidating them after a certain period. Overall, token authentication provides a more secure and efficient way to authenticate clients and protect sensitive data in web and mobile applications.
• Biometric authentication: Biometric authentication is a method of verifying a user’s identity based on their unique physical
characteristics. These characteristics, such as fingerprints, voice patterns, or facial features, are captured by sensors or cameras and compared with stored digital records for authentication purposes. Let us delve to discuss a few types of biometric authentication:
• Fingerprint authentication is one of the most commonly
used biometric authentication methods. It involves scanning
and matching the unique patterns present in an individual’s
fingerprint. This method is widely used in smartphones and
fingerprint-based laptops, where users can unlock their devices
by simply placing their finger on a sensor.
29
Chapter 2 UI Component and aUthentICatIon
• Face authentication is another popular biometric authentication method. It utilizes facial recognition technology to identify and authenticate users based on their facial features. Many mobile
phone companies have implemented this method, allowing users
to unlock their devices by scanning their registered face.
• Eye or iris authentication is a more advanced biometric
method. It involves scanning the unique patterns of the iris for
authentication purposes. By comparing the scanned iris pattern
with the stored record, access to resources can be granted if there is a match.
• Certificate-based authentication is a robust method of authentication that involves the use of digital certificates to gain access to specific resources. These certificates employ various algorithms, ensuring their uniqueness and making them nearly impossible to predict or
replicate. However, it is crucial to emphasize that the security of the certificate storage is of utmost importance, as the system relies on trusting any client or process that presents a valid certificate.
• Multifactor authentication (MFA) is a powerful authentication
approach that enhances the security of a system by requiring users to provide multiple proofs of their identity. This additional layer of security is essential for protecting sensitive resources such as bank accounts, VPNs, or any other system. Instead of solely relying on a username and password combination, MFA mandates the provision
of an extra authentication factor, significantly reducing the likelihood of unauthorized access by potential hackers. Implementing MFA
strengthens the overall security posture of a system and is often a prerequisite for systems aiming to be deemed secure, such as those employed by financial institutions.
Why MFA Is Important
Imagine a scenario where you have stored your bank account credentials in Google Keep, a note-keeping application. Now, suppose Mr. Professor gains access to your phone or obtains your Google ID and password. In such a situation, Mr. Professor 30
Chapter 2 UI Component and aUthentICatIon
would have complete access to your notes, including your bank credentials. This could potentially lead to unauthorized access to your bank account, allowing him to perform transactions or transfer money without your knowledge or consent.
However, this risk can be mitigated if multifactor authentication (MFA) is enabled.
Even if Mr. Professor manages to log in to your bank account using your compromised credentials, MFA adds an additional layer of security. In addition to the password, an OTP (one-time password) is required, which is typically sent to your mobile phone. This means that Mr. Professor would not be able to transfer money or perform any sensitive actions without possessing both your password and the OTP from your phone.
Furthermore, if Mr. Professor attempts to change the phone number associated with the account, MFA still provides protection. Without the SMS OTP sent to your registered phone number, the change request would not be successful, thwarting any attempts to gain control over your bank account.
By enabling MFA, you significantly enhance the security of your sensitive information and financial assets, safeguarding them against unauthorized access and potential fraudulent activities.
Types of MFA
Multifactor authentication (MFA) can be implemented through various methods, ensuring an additional layer of security beyond traditional username and password authentication. Here are some common ways MFA can be achieved:
1. SMS OTP (one-time password): A unique password is sent to
the user’s mobile phone via SMS, which must be entered along
with the regular login credentials to gain access. This password is generally valid for a few minutes.
2. Email OTP (one-time password): Similar to SMS OTP, but the
one-time password is sent to the user’s registered email address
instead.
3. Time-based one-time password: This method involves the use
of time-based algorithms to generate a unique password that
changes periodically. Users need to enter this password, along
with their regular login credentials, within a specified time
window. This password is generated on the device and not sent
via any network.
31
Chapter 2 UI Component and aUthentICatIon
4. Hardware token–based one-time password: Users are provided
with a physical device, often a small electronic token or key fob, which generates unique passwords that need to be entered during
the authentication process.
5. Location-based authentication: This method uses the user’s
current location as an additional factor for authentication. It
verifies if the user is logging in from a trusted or predefined
location, adding an extra layer of security.
6. Google-based two-step verification: This method utilizes Google’s two-step verification process, where users provide a secondary
verification code generated by the Google Authenticator app or
received via SMS or phone call.
These methods enhance the security of authentication processes by requiring users to provide additional information or verification beyond the traditional username and password combination. Implementing MFA helps protect against unauthorized access, as potential attackers would need to bypass multiple layers of authentication to gain entry.
JSON Web Tokens
JWT (JSON Web Token) is a universally accepted and standardized token used to establish a secure and trusted connection between two parties. JWT is a compact JSON object that is digitally signed. The JWT is issued to the clients after successful authentication; the token contains relevant information such as the user’s identity, access roles, token validity details, and expiration time. JWTs are commonly used for user authentication in modern, stateless applications.
To understand JWT, imagine it as a boarding pass for a flight. It includes your identity, details of the flight you are authorized to enter, and a barcode to prevent forgery by malicious individuals.
JWTs are encoded in base64 format, allowing the base64 decoder to read the JSON
information contained within.
JWTs can be digitally signed using various algorithms such as RSA (Rivest-Shamir-Adleman) and HMAC (hash-based message authentication code). Additionally, they can be encrypted using the JSON Web Encryption (JWE) standard, which ensures the confidentiality of the claims contained within the token.
32
Chapter 2 UI Component and aUthentICatIon
Overall, JWTs provide a secure and standardized approach to authentication, enabling the verification of user identities and the secure exchange of information between parties.
JWT Authentication Flow
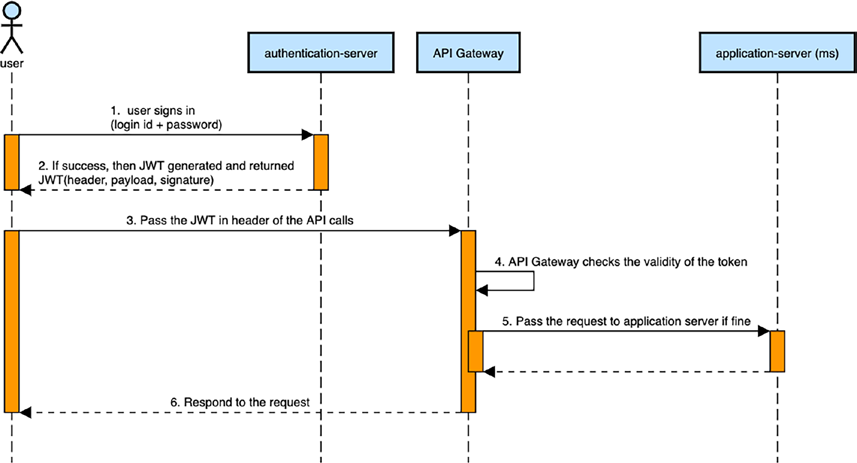
The API gateway plays a crucial role in the validation of JWTs. It examines the header information and expiration time contained within the token to determine its validity. If the token is found to be invalid, either due to an incorrect signature or expiration, the API gateway rejects the request immediately. This means that the request is halted at the API gateway level and never reaches the downstream services.
By performing this validation process, the API gateway ensures that only authenticated and valid requests are forwarded to the appropriate services. This adds an extra layer of security to the system by preventing unauthorized or tampered requests from reaching the backend services. Figurtrates the flow and system interaction.
Figure 2-2. The token validation mechanism on the API gateway 33
Chapter 2 UI Component and aUthentICatIon
JWT Structure
Let’s take the following JWT as an example to discuss the details of the token. By examining its components, we can gain a deeper understanding of its structure and purpose.
xxxx.yyyy.zzzz
The JWT contains three parts and is joined by the dot operator:
• Header
• The header contains two parts: the token type and the signing
algorithm used. It specifies the type of the token and provides
details about the specific signing algorithm, such as, HMAC,
SHA256 or RSA.
{
"alg": "HS256",
"typ": "JWT"
}
• JSON body or known as payload
This second part contains a JSON object payload with some data
in it that can be utilized by different services. For example, it may include user information such as name and email, eliminating
the need for an additional API call to retrieve user details from the authentication server. Additionally, the payload contains scope
and role information, as well as details regarding the token’s
generation time and its expiration time.
{
"sub": "1234567890",
"name": "John Doe",
"iat": 1516239022
}
34
Chapter 2 UI Component and aUthentICatIon
• Signature
This part is a crucial component of the JWT that serves the
purpose of verifying the authenticity of the sender and ensuring
the integrity of the payload. To generate the signature, the header and the payload parts are encoded in base64 format. The resulting encoded strings are then combined and signed using the specified
signature algorithm from the header, using a private key. This
process ensures that the signature can be validated using the
corresponding public key to verify the integrity and origin of
the JWT.
The signature would be the following:
HMACSHA256(
base64UrlEncode(header) + "." +
base64UrlEncode(payload),
256 bit secret
)
Setting Up Authentication Using AWS Amplify
In this section, we will dive into the practical aspect and demonstrate the integration of AWS Amplify Auth in our application. We will write code to implement this integration and make our application ready for authentication using AWS Amplify.
Upon completion of this section, we will accomplish the following objectives: 1. Creation of public and private pages: We will establish distinct pages in our application, some of which will be accessible to the public, while others will require authentication to access.
2. Implementation of a sign-up page: Users will be able to register themselves by providing the necessary information, enabling
them to create an account within our application.
3. Development of a login page: Users will have the ability to log in and log out of their accounts securely, allowing them to access
restricted features and personalized content.
35
Chapter 2 UI Component and aUthentICatIon
4. Provision of a manage password page: Users will be provided
with a dedicated page where they can change their passwords,
ensuring they have control over their account’s security.
By accomplishing these tasks, we will have successfully integrated AWS Amplify Auth into our application, enhancing its functionality and security through user authentication and account management features.
Note prior to proceeding, please ensure that you have completed the setup section outlined in the first chapter and that your machine is configured with aWS
amplify. If you haven’t done so yet, kindly follow the provided steps to set up aWS
amplify before continuing from this point. It is important to have the necessary configurations in place to ensure a smooth integration process. once you have completed the setup, you can resume the following steps.
Creating Our React App
To initiate the development of a React application, we will employ the create-react-app CLI, which offers a streamlined approach for setting up the project structure. By utilizing this tool, we can create a foundation for our React app and subsequently enhance it with additional features and functionalities.
npx create-react-app react-authentication
Upon executing the aforementioned command, a rudimentary “Hello World”
React application will be generated. This initial setup will encompass all the essential configurations needed for running and building the application.
Once the repository is established, navigate to the corresponding directory, and we can commence with the configuration of the authentication system.
cd react-authentication
To launch the React application, you can execute the script provided as follows. This script will initiate the necessary processes to start the app and make it accessible for interaction.
npm start
36
Chapter 2 UI Component and aUthentICatIon
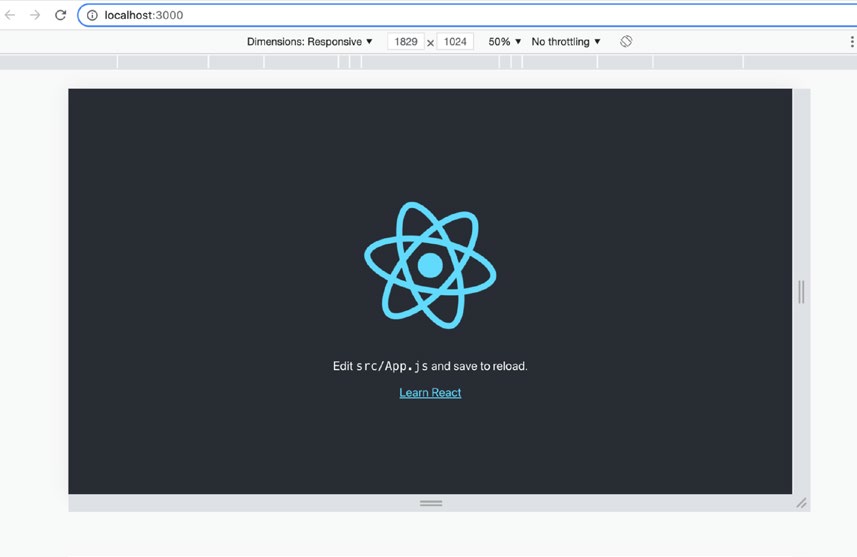
You can now open your web browser and enter the following URL in the address bar: http://localhost:3000. By doing so, you will be directed to the main page of the React application index page. Figure illustrates the index page.
Figure 2-3. The default index page of the newly generated React application Configuring the Backend for Our React Application
Now that we have our web app up and running, we need to set up the necessary infrastructure and services that enable functionalities like login, logout, and user creation. We will leverage the power of AWS Amplify to streamline this process effectively.
To begin, navigate to the root directory of your project and execute the following command:
amplify init
37
Chapter 2 UI Component and aUthentICatIon
Running this command will initiate the creation of a new app within AWS
Amplify. This step is crucial as it prepares the backend infrastructure required for your application.
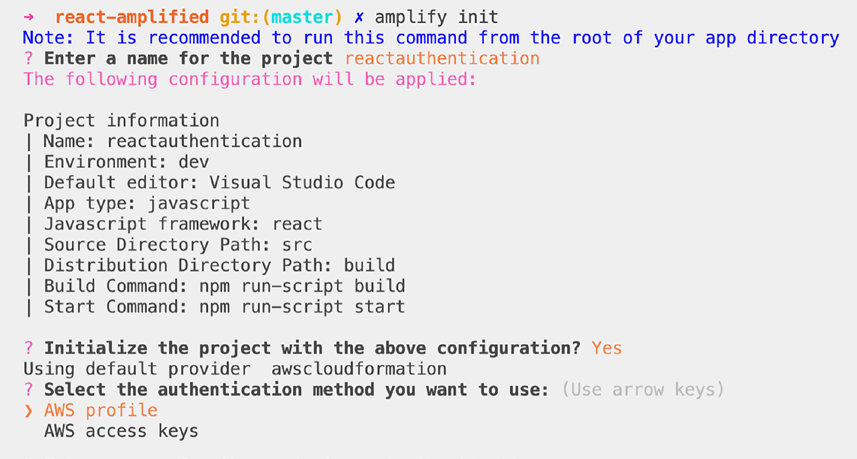
You will be prompted for confirmation and basic configurations. To proceed, simply enter “yes” to confirm your choices.
If the accessKey on your local machine is not set up during the initial configuration, you will be prompted to select an authentication method. As depicted in Figur
select the “AWS access keys” option.
This authentication method allows your local machine to establish communication with your authorized AWS account, enabling you to utilize Amplify services such as auth and REST API.
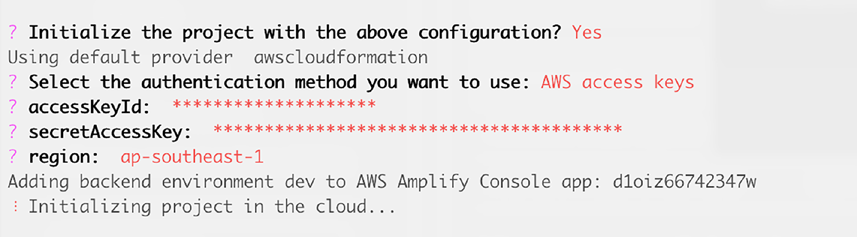
Figure 2-4. The options provided by the init command to choose from Provide the authentication method you wish to use, if you have followed instructions in Chapter , you can select AWS profile option and select the profile you created, else you can select AWS access keys options and then enter the “accessKeyId” and
“secretAccessKey” that you configured in Chapt, as shown in Figurhese credentials will authenticate your local machine and allow it to securely access and consume Amplify services.
38
Chapter 2 UI Component and aUthentICatIon
Figure 2-5. Entering the access key and secret key to authenticate the app These changes include the creation of an “amplify” directory, which contains all the necessary code to regenerate your backend infrastructure on AWS. As you continue to add more services such as Auth, REST API, and GraphQL, this directory will automatically expand, and any changes made to it should be committed to your Git repository. This approach exemplifies the concept of Infrastructure as Code (IaC), where your infrastructure can be easily replicated across different AWS accounts.
Once the Amplify CLI successfully initializes the backend for your new React application, several changes are made to your project repository. The changes are as follows:
1. A directory with the name “amplify” got created, which contains all the necessary code to regenerate your backend infrastructure
and configurations in AWS. As you continue to add more services
such as Auth, REST API, and GraphQL, this directory will grow
automatically, and any changes made to it should be committed
to your Git repository. This approach exemplifies the concept of
Infrastructure as Code (IaC), where your infrastructure can be
easily replicated across different AWS accounts.
To illustrate this, let’s consider a scenario where you have two
different AWS accounts: one for basic proof of concept (POC)
and testing and another for a different business or company’s
account. If you wish to recreate the Amplify app in the latter
account, you simply need to update the access keys and secrets,
and all the code within the amplify directory will replicate the
Amplify services in the new AWS account. This future- proof
approach ensures seamless deployment and management of your
infrastructure.
39
Chapter 2 UI Component and aUthentICatIon
2. The Amplify CLI generates an “aws-export.js” file in the “src”
directory, which contains all the necessary configurations for your services. It is important to avoid modifying any of the generated code directly. Instead, utilize the Amplify CLI to add or remove
services, which will automatically update these files accordingly.
Note please do not modify any of these generated codes. We will use the amplify CLI to add or remove services, and those will be added automatically to these files.
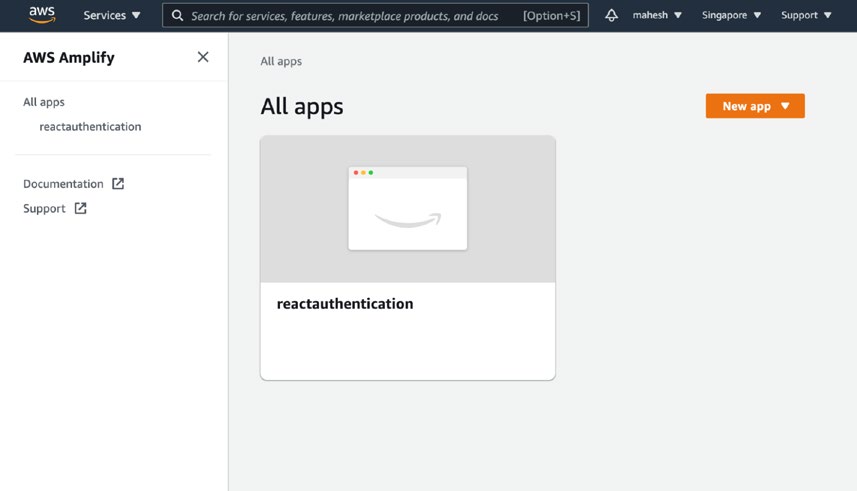
If you wish to view your Amplify app, you can log in to your AWS account and navigate to the Amplify service from the list of available services, as illustrated in Figurhere, you will find a detailed overview and management interface for your Amplify backend.
Congratulations on reaching this milestone!
Figure 2-6. The Amplify app in the AWS console
Now, let’s proceed with setting up the authentication for your application.
40
Chapter 2 UI Component and aUthentICatIon
Setting Up Authentication
When setting up authentication for an application, there are several important components that need to be considered. Here is a list of the components required for a comprehensive authentication setup:
1. User management: Authentication revolves around allowing a
predefined list of users to access the system. User management
involves functionalities like user creation, blocking or removing users when necessary.
2. Role management: Different types of users may require different levels of access to resources. Role management allows the
definition of roles and their assignment to users, ensuring
appropriate access controls.
3. Registration link: To streamline user onboarding, it is essential to provide a registration feature where users can self-register. This eliminates the need for manual onboarding by administrators.
4. Unique identifier: Each user needs a unique identifier, such as an email, phone number, or username, to distinguish them from
others. Verification of email or phone numbers can be done by
sending a code for users to confirm their validity.
5. Login link: Users should have a secure login mechanism where
they can authenticate themselves and receive a token or validation upon successful login.
6. Forget/reset password: As users are the owners of their passwords, the authentication system should provide options for password
reset or generation as needed.
7. Logout: It is important to have a mechanism for users to terminate their active sessions or revoke the issued tokens if they wish to log out.
AWS Amplify provides all these features out of the box. It leverages Amazon Cognito, an authentication service for applications, to handle authentication-related functionalities. Cognito also offers a user interface dashboard for managing and monitoring user activities. By utilizing Amplify and Cognito, developers can easily implement a robust and secure authentication system for their applications.
Let’s set up the authentication for our application.
41
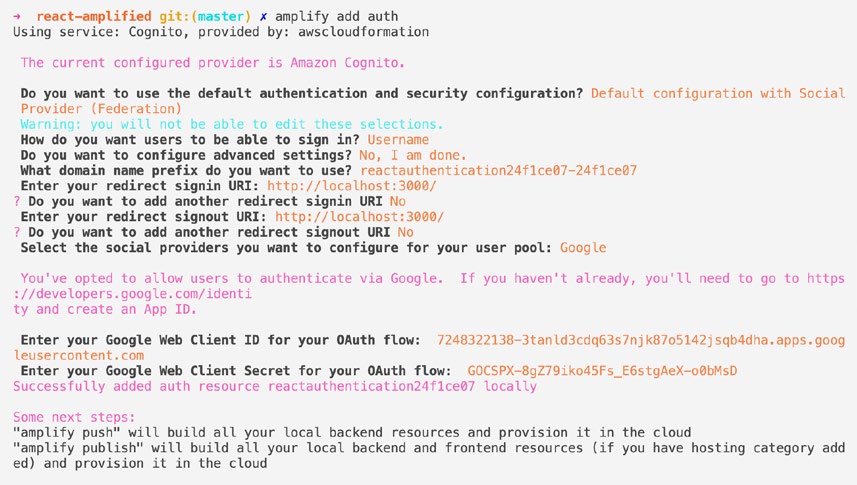
Chapter 2 UI Component and aUthentICatIon
Creating an Auth Service
To add the authentication service to our app using Amplify, we can run the following command:
amplify add auth
As shown in Figur, this command will prompt us to configure the authentication settings for our app. We can choose the default configuration or customize based on our requirements. Amplify supports various authentication mechanisms such as username and password, social sign-in, multifactor authentication, and more. We can select the desired options during the configuration process.
Figure 2-7. Options prompted by the CLI after the auth service add command is entered
Once the authentication service is added, Amplify will automatically generate the necessary backend resources and update the relevant configuration files in the project.
Please expand the àmplify` directory in the root of your application; you will see auth being added in `/amplify/backend`.
42
Chapter 2 UI Component and aUthentICatIon
To push the authentication configuration to our app on the cloud, we can use the Amplify CLI. Run the following command:
amplify push
During the execution of the àmplify push` command, AWS Amplify utilizes AWS CloudFormation to create the necessary infrastructure in the AWS cloud.
CloudFormation is an AWS service that allows you to define and provision AWS
resources using a declarative template.
By using CloudFormation, Amplify ensures that the infrastructure is created consistently. It automates the process of setting up the authentication service and its associated resources, such as user pools and identity pools, in a reliable and scalable manner.
Note It is important to commit the changes made in the amplify directory, by the CLI. this directory contains the generated code and configuration files that define the infrastructure and services created by amplify. By versioning the amplify directory along with your application code, you can track and manage the changes made to both the application and its underlying infrastructure. this approach ensures that the infrastructure and services are synchronized with your application code, making it easier to collaborate with other developers, revert changes if needed, and maintain a consistent deployment environment. now, let’s proceed by exploring some additional amplify capabilities of react components to enhance our application further.
Amplify UI React Components
The Amplify team has also published some React components to speed up the front development and integration with this service.
To streamline the frontend development and integration with the Amplify service, the Amplify team has provided a set of React components.
Let’s begin by adding the necessary npm package to our application, by running the following command:
npm install aws-amplify @aws-amplify/ui-react
43
Chapter 2 UI Component and aUthentICatIon
Once the package installation is complete, we can proceed to connect our React application with the Amplify backend. Let’s now connect our React app with the Amplify backend.
Open the ìndex.js` file located in thèsrc` directory and call thèconfigurè function. This function will handle the configuration of the React app, ensuring that it is connected to the appropriate backend service. Open the index.js in the src directory and call the configure function. This will take care of pointing the React app to the correct backend service.
import { Amplify } from "aws-amplify";
import awsExports from './aws-exports'
Amplify.configure(awsExports);
What If aws-exports Is Not Found?
Please note the aws-exports file will only be created after at least once the amplify push command is run. If you don’t find the aws-exports file, please run the push command.
If you cannot find the àws-exports.js` file in your project, it is likely because it has not been generated yet. This file is created after running the àmplify push` command at least once.
To generate the àws-exports.js` file, please follow these steps:
1. Open your terminal or command prompt.
2. Navigate to the root directory of your project.
3. Run the following command: àmplify push`.
This command will deploy the backend resources defined in your Amplify project and generate the necessary configuration files, including the àws-exports.js` file. Once the command completes successfully, you should be able to locate the àws-exports.js`
file in thèsrc` directory.
Note that the àmplify push` command should be run whenever you make changes to your Amplify backend configuration and want to deploy those changes to your AWS
environment.
44
Chapter 2 UI Component and aUthentICatIon
We have imported the AWS-amplify library which we installed and the AWS-export config file to point our app to amplify the backend.
And that’s all we need to do for connecting our frontend app with the Amplify backend.
Integrating Auth with React App
The AWS Amplify not only simplifies the process of creating the backend services for your application but also provides ready-to-use UI components that can be easily integrated into your React app.
Login and Registration UI Components
By using these UI components, you don’t have to build the authentication screens or components from scratch. Instead, you can leverage the prebuilt components provided by AWS Amplify to handle the user registration, login, and other functionalities.
To integrate the AWS Amplify login UI component into your React app, you can follow these steps:
STEP 1: Import the required component into your main app’s file, typically Àpp.js`: import { withAuthenticator } from '@aws-amplify/ui-react'
STEP 2: Wrap your main app component with thèwithAuthenticator` higher-order component (HOC).
export default withAuthenticator(App);
STEP 3: Add the CSS file if you want to use the default styles and theme by AWS
team. Add the following import command in your App.js file ìmport ‘@aws-amplify/ui-react/styles.css’`.
By wrapping your App component with withAuthenticator, you enable the authentication flow and automatically render the login UI component in your app.
Note What is hoC?
a higher-order component (hoC) is a function that takes a component and returns a new component with additional functionality. It allows you to enhance or modify the behavior of a component without changing its underlying implementation.
45
Chapter 2 UI Component and aUthentICatIon
In the context of React, an HOC is used to add or wrap a component with additional logic, state, or props. It helps in reusing code and separating concerns by abstracting common functionality into a separate function.
import React from 'react';
//HOC that adds a new prop extraProp
const withExtraProps = (Component) => {
return class extends React.Component {
render() {
return <Component {...this.props} extraProp="Hii" />;
}
}
}
// The component that will receive the extraProp
const MyComponent = (props) => {
return <div>{props.extraProp}</div>
}
export const WrappedComponent = withExtraProps(MyComponent)
STEP 3: Run the app.
npm start
As you launch the application, you will be presented with a login screen without having to create a separate login page or UI component. This login screen is provided by AWS Amplify, making it easy to incorporate authentication functionality into your app.
Figurovides a preview of the login screen, showcasing its appearance and layout.
46
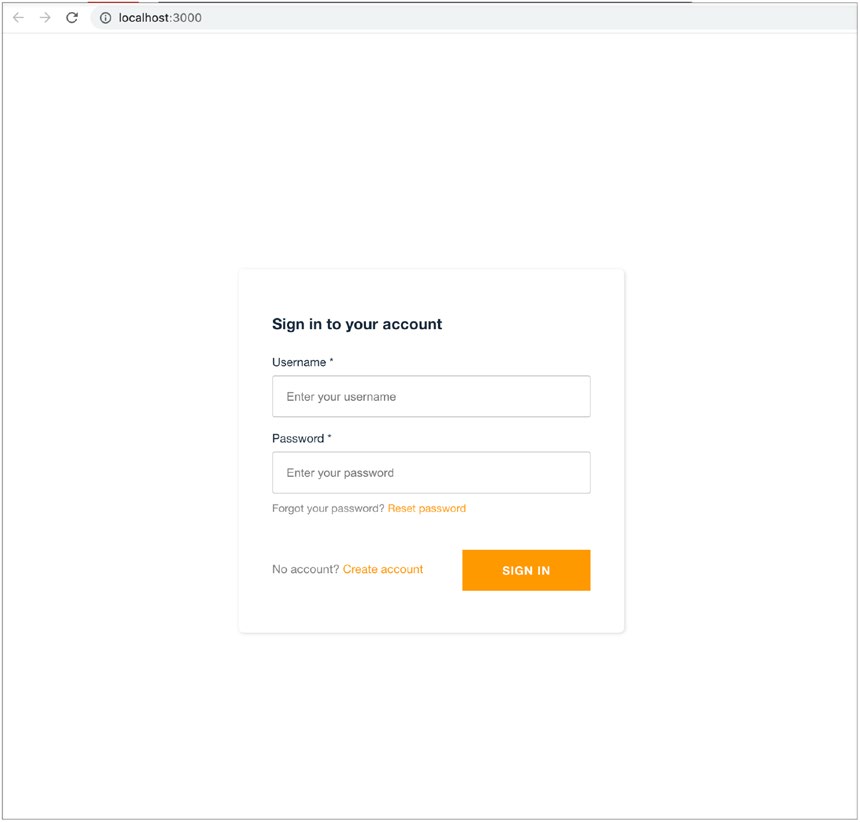
Chapter 2 UI Component and aUthentICatIon
Figure 2-8. The preview of the login screen for private pages Since we haven’t created any users yet, a successful login won’t be possible at this stage. However, you can still test the connection with the backend system by entering a random login ID and password. This should result in a “user not found” exception, indicating that the authentication process failed. Additionally, you can open the Network tab in your browser’s developer tools to inspect the API call and response, gaining further insights into the authentication process; this is shown in Figure .
47
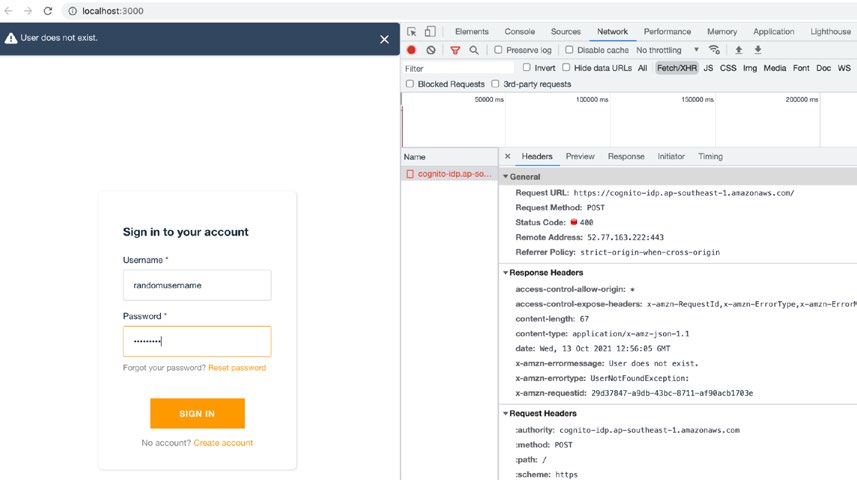
Chapter 2 UI Component and aUthentICatIon
Figure 2-9. Network tab showing the user not found error This successful demonstration validates the functionality of our application, confirming that the API calls are being made and processed correctly.
To proceed, locate the “Create Account” button located below the sign-in button on the user interface. Clicking this button will initiate the account creation process. In the prompted form, please provide the necessary details, including a desired username, email address, and phone number, which are essential for creating an account.
Once the verification process is successfully completed, you will be granted access to your application, and you will be automatically logged in.
Congratulations on successfully creating your account and accessing your application.
Logout UI
Once you have successfully logged in, you may notice that there is no visible “log out”
button or option available. To enable the logout functionality, you have a couple of options.
48
Chapter 2 UI Component and aUthentICatIon
Firstly, you can create a custom header component for your application that includes a profile section and a logout button, which triggers the logout API. This approach allows for more flexibility and customization according to your application’s design and requirements.
Alternatively, AWS Amplify provides a prebuilt UI React component specifically for the logout functionality. By utilizing this component, you can easily integrate the logout feature into your application without the need for extensive coding. To add the logout UI component from AWS Amplify, follow these steps:
STEP 1: Import the Button component from the Amplify library.
import { Button } from "@aws-amplify/ui-react";
STEP 2: Add this imported button component in the app.js file and get the function to signOut as parameter in App passed by withAuthenticator HOC.
04: import { withAuthenticator } from '@aws-amplify/ui-react'
05: import { Button } from "@aws-amplify/ui-react";
06: import '@aws-amplify/ui-react/styles.css'
07: function App({ signOut }) {
08: return (
09: <div className="App">
10: <Button onClick={ signOut }>Sign out</Button>
After you have logged in, the logout UI component will be rendered, as shown in Figur
49
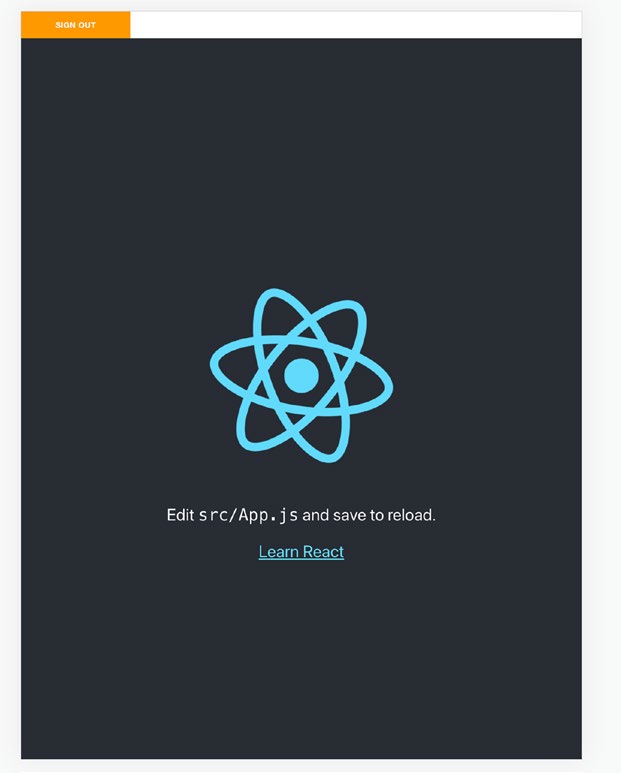
Chapter 2 UI Component and aUthentICatIon
Figure 2-10. React application with logout component from the library By clicking the logout button, which calls the signOut function, the user will be successfully logged out, and the application will navigate back to the login screen.
The signOut component takes care of clearing the authentication information from the browser and handling the navigation back to the login screen.
50
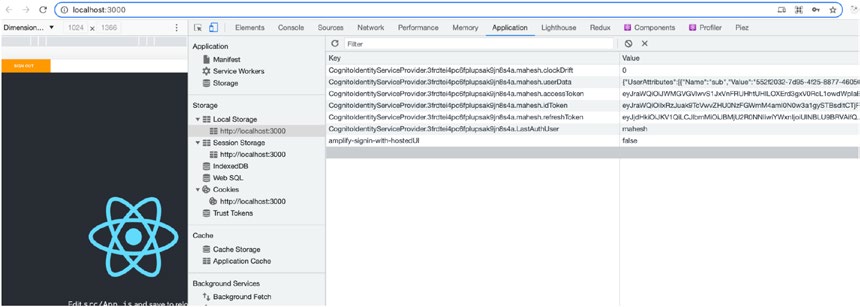
Chapter 2 UI Component and aUthentICatIon
Logging In and Logging Out
After integrating the Amplify UI React component, which automatically generates the login UI and provides functionality for logging in and logging out, let’s explore what happens behind the scenes. As mentioned earlier, to authenticate successfully, the client application needs a valid JWT access token, which will be used for future API requests from the frontend.
To understand where the generated tokens are stored, we can inspect the browser’s developer tools. To do this, right-click the web page, select “Inspect,” and navigate to the “Application” tab. Under the “Storage” section, click “Local storage.” Here, you will be able to see the relevant information, including the storage of tokens, as shown in Figur
Figure 2-11. View of local storage in the browser
1. If you are not logged in, please log in.
2. The item with key ùserDatà, contains information about the
currently logged-in user.
3. The item with key àccessToken`, represents the JWT access token, generated by AWS Cognito. Additionally, there are other items such as `refreshTokenànd ìdToken`, which are also relevant tokens as
discussed under the section of Auth2.0 protocols.
To further examine the contents of the access token, please copy the token value.
Then, open a web browser and navigate to jwt.io. And paste the access token as illustrated in Figur.
51
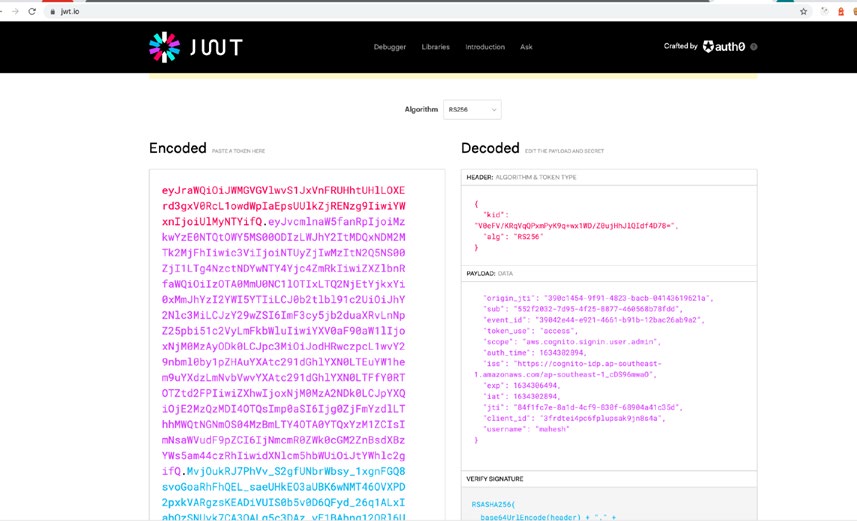
Chapter 2 UI Component and aUthentICatIon
Figure 2-12. The decoding of the JWT token
As shown in Figur, you can open the Cognito service in your AWS account and navigate to the list of users. There, you will find the users who have registered and interacted with your application through the authentication flow. The Cognito service provides a comprehensive dashboard for managing and monitoring user accounts and their associated information.
52
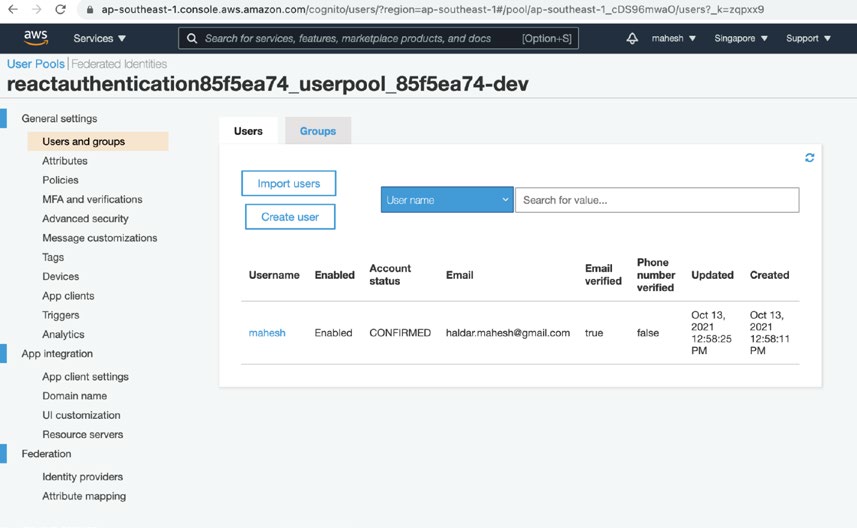
Chapter 2 UI Component and aUthentICatIon
Figure 2-13. The users list in AWS console
Getting Logged-In User Information
To display the username of the logged-in user in the header of our app, we will create a new React component called HeaderStrip. This component will be responsible for retrieving the user information and rendering the username.
Here are the steps to implement this:
1. Create a new file named HeaderStrip.js in the src directory.
2. Inside the component, import the necessary dependencies.
3. Add the logic to read the auth information for logged-in users.
53
Chapter 2 UI Component and aUthentICatIon
Let’s discuss the component code in detail.
01: import React from "react";
02:
03: import { Auth } from "aws-amplify";
04: import { useAuthenticator, Button } from "@aws-amplify/ui-react"; 05:
06: const HeaderStrip = () => {
07: const { authStatus, route, user } = useAuthenticator((context) => [
08: context.authStatus,
09: context.route,
10: context.user,
11: ]);
12: // we will get the current authStatus and user details if present 13:
14: return authStatus === "authenticated" && route === "authenticated"
&& user ? (
15: <div className="App">
16: Hi {user.username}
17: <div style={{ width: "20%" }}>
18: <Button
19: onClick={async () => {
20: await Auth.signOut();
21: }}
22: >
23: Sign out
24: </Button>
25: </div>
26: </div>
27: ) : null;
28: };
29:
30: export default HeaderStrip;
31:
54
Chapter 2 UI Component and aUthentICatIon
LINE 7: We are using useAuthenticator hook to get the current authState, route and details of the user.
Indeed, the different auth statuses provided by Amplify, such as “configuring”,
“authenticated” and “unauthenticated”, allow us to identify and handle various user statuses within our application flow. The useAuthenticator hook exports the auth route context such as “authenticated”, “confirmResetPassword”, “confirmSignIn”,
“confirmSignUp”, “confirmVerifyUser”, “forceNewPassword”, “idle”, “resetPassword”, and few others which helps us to control and customize the state of the application in the granular levels. These authStates and routes play a crucial role in determining the appropriate actions and rendering the corresponding UI components based on the current user state.
For example, when a user attempts to create an account, the signUp auth route is triggered. This enables us to display the necessary registration form and handle the registration process accordingly.
Similarly, when a user logs out, the signOut auth route is activated. In response, we can redirect the user to the login page or display a message indicating a successful logout.
On the other hand, when a user successfully logs in, the signIn auth route is triggered. This allows us to customize the user interface and provide access to authenticated features specific to logged-in users.
By leveraging these different auth statuses and routes, we can create a dynamic user flow that adapts to the current authentication status, enhancing the user experience and ensuring the application functions appropriately in each scenario.
LINE 10: We will get the current user’s basic details from auth like username, phone number, etc., and store in variable user.
LINE 14: We check if the authStatus and route is “authenticated”, we render the username.
LINE 18-20: We are rendering a sign out button if the user is authenticated, and calling the function signOut from Auth if this button is clicked.
55
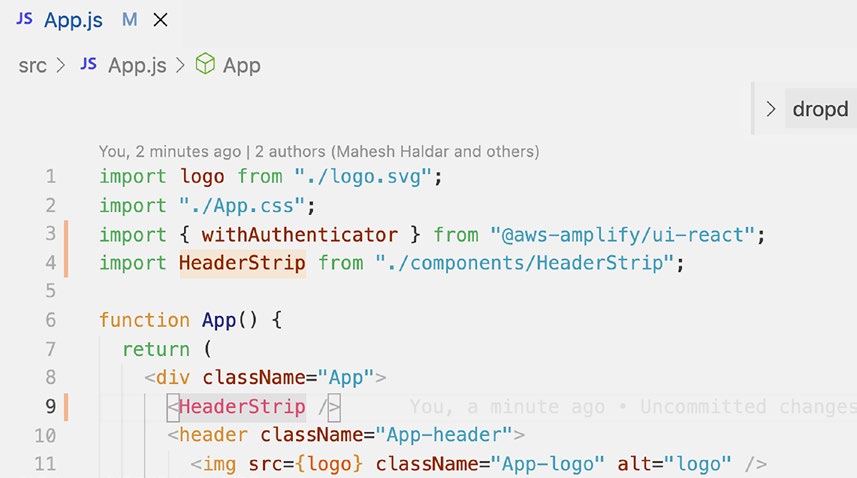
Chapter 2 UI Component and aUthentICatIon
Figure 2-14. Implementation of the HeaderStrip component LINE 9: Render the HeaderStrip component so that the logic of reading the user data and auth state can run, and we can show the logged-in username.
Congratulations! You have successfully implemented the functionality to read the logged-in user information; this is illustrated in Figury utilizing the Amplify authentication service and integrating it with your React app, you can now retrieve and display relevant user data such as the username, phone number, and other details.
This achievement allows you to enhance the user experience by personalizing the application based on the logged-in user’s information. You can now customize the app’s content, features, and interactions based on the specific user who is accessing the application.
By being able to read the logged-in user information, you have taken a significant step toward building a secure and user-friendly authentication system within your React app.
56
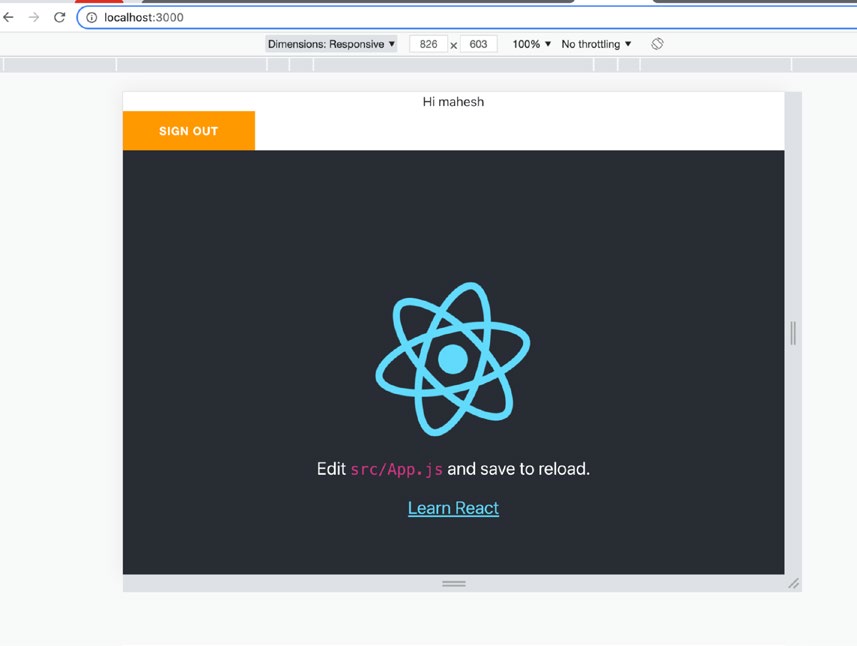
Chapter 2 UI Component and aUthentICatIon
Figure 2-15. The name of the logged-in user is shown in the implemented header strip
Let us now proceed with implementing the social login feature in our application.
This functionality allows users to log in using their social media accounts, such as Google, Facebook, or Amazon. By integrating social login, we can enhance the user experience and provide users with alternative authentication options.
OAuth Social Login
Indeed, social login has become a common and convenient way for users to access various online applications. It eliminates the need for repetitive form filling by allowing users to log in or register using their existing social media accounts, such as Google, Facebook, Amazon, or Apple.
57
Chapter 2 UI Component and aUthentICatIon
In our case, we will focus on integrating Google as the social login provider into our application using the AWS Amplify service. Amplify offers seamless authentication integration with popular social sites, making it easier for us to implement this feature without starting from scratch.
By leveraging Amplify’s authentication capabilities, we can enable users to log in or register using their Google accounts, enhancing the onboarding experience and improving user convenience. Let’s proceed with the integration of Google social login into our authentication app.
What Is OAuth?
OAuth, which stands for Open Authorization, is a widely accepted authorization framework that facilitates the secure access of user information by third-party applications, without the need for users to disclose their login credentials, such as usernames and passwords. This framework allows users to grant specific permissions to third-party apps, enabling them to access limited data from a particular service on behalf of the user.
For instance, when you sign up for a service using your Google account, Google grants the application access to certain basic details like your email, name, and phone number, without revealing your actual login information. Facebook, Google, and GitHub are prominent examples of companies that have developed APIs (application programming interfaces) for other applications to leverage as authentication methods.
The OAuth protocol is openly available, and anyone can build APIs following its standardized specifications, as outlined in the publicly accessible RFC (Request for Comments) documentation. This allows developers to implement OAuth-based authentication in their applications and integrate with popular service providers for streamlined and secure user authentication.
There are different types of OAuth2.0 flows, though we will discuss one most commonly used when the authorization server is a third party, in our case Google.
Figur illustrates the sequence of the OAuth2.0.
58
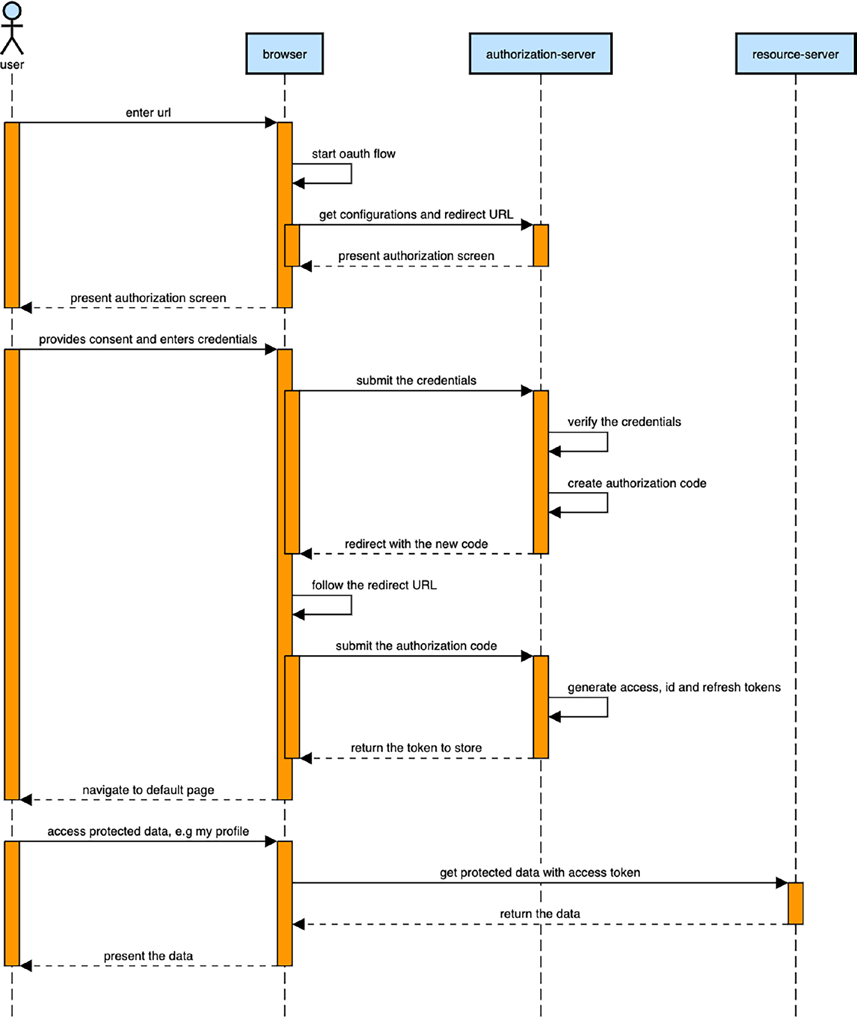
Chapter 2 UI Component and aUthentICatIon
Figure 2-16. The high-level OAuth2.0 sequence flow
59
Chapter 2 UI Component and aUthentICatIon
1. The user initiates the OAuth flow by requesting authorization from the application, by clicking a button or entering a URL.
2. The application redirects the user to the Authorization Server, including the necessary parameters, such as the requested scope
of access.
3. The user authenticates with the Authorization Server (e.g.,
providing credentials) and grants permission to the application.
4. The Authorization Server generates an Authorization Grant (e.g., a temporary code) and sends it back to the application.
5. The application sends an Access Token Request to the
Authorization Server, including the Authorization Grant obtained
in the previous step.
6. The Authorization Server verifies the Authorization Grant and issues an Access Token to the application.
7. The application can now use the Access Token to access protected resources on behalf of the user.
8. The application sends a request to the Resource Server (which hosts the protected resource) and includes the Access Token.
9. The Resource Server validates the Access Token by contacting the Authorization Server (token validation).
10. If the Access Token is valid, the Resource Server grants access to the requested protected resource.
11. The Resource Server sends back the requested resource to the application.
12. The application can now display or use the protected resource on behalf of the user.
60
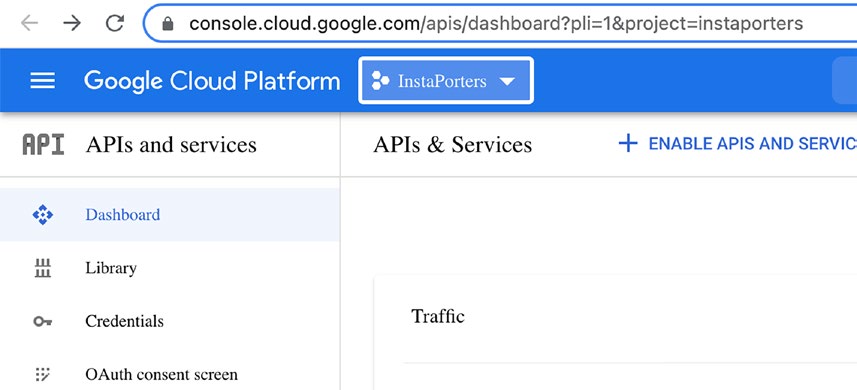
Chapter 2 UI Component and aUthentICatIon
This sequence diagram provides a high-level overview of the interactions between the user, application, Authorization Server, and Resource Server in the OAuth 2.0 flow. It showcases the delegation of authorization and the secure exchange of tokens to enable access to protected resources.
To integrate the social login with Google in our application, we are treating the auth server of Google as our authorization server, where we need to register our application, and our application’s URL as a redirect URL, so that on successful authentication the user can be navigated back to our application.
Let’s start with creating an application in Google Cloud to implement social login.
STEP 1: Create a Google app.
Go to g in with a Google ID – as shown in Figure , you will see a similar dashboard – and click the highlighted drop-down.
Figure 2-17. Dashboard after logging in to the Google Cloud console 61
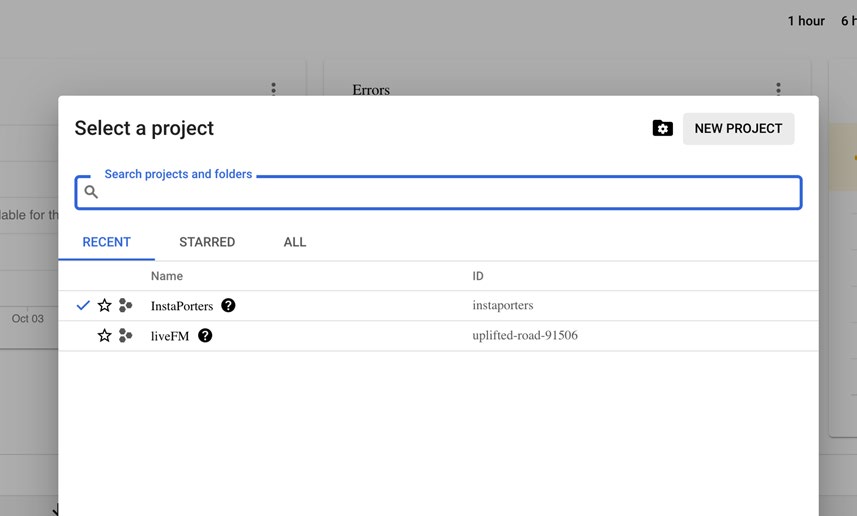
Chapter 2 UI Component and aUthentICatIon
STEP 2: Click New Project from the modal on the top-right corner, as shown in Figurter the project name.
Figure 2-18. Modal to show the list of projects and create a new project STEP 3: Enter a valid project name and choose No organisation, if there is none, and click Create as shown in Figur.
62
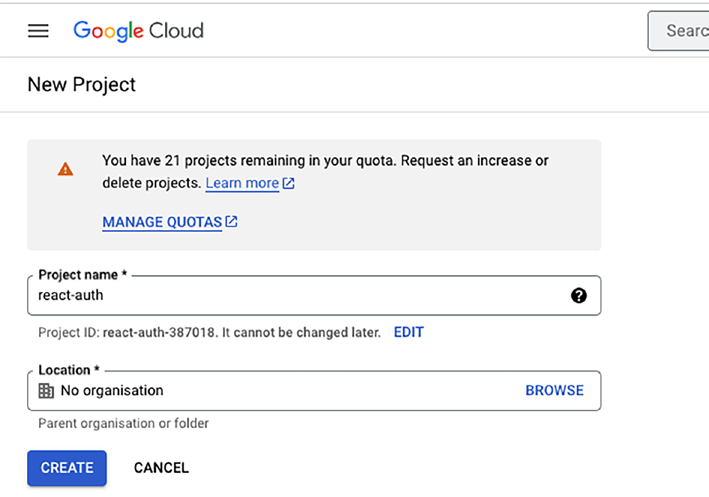
Chapter 2 UI Component and aUthentICatIon
Figure 2-19. Create new project screen
63
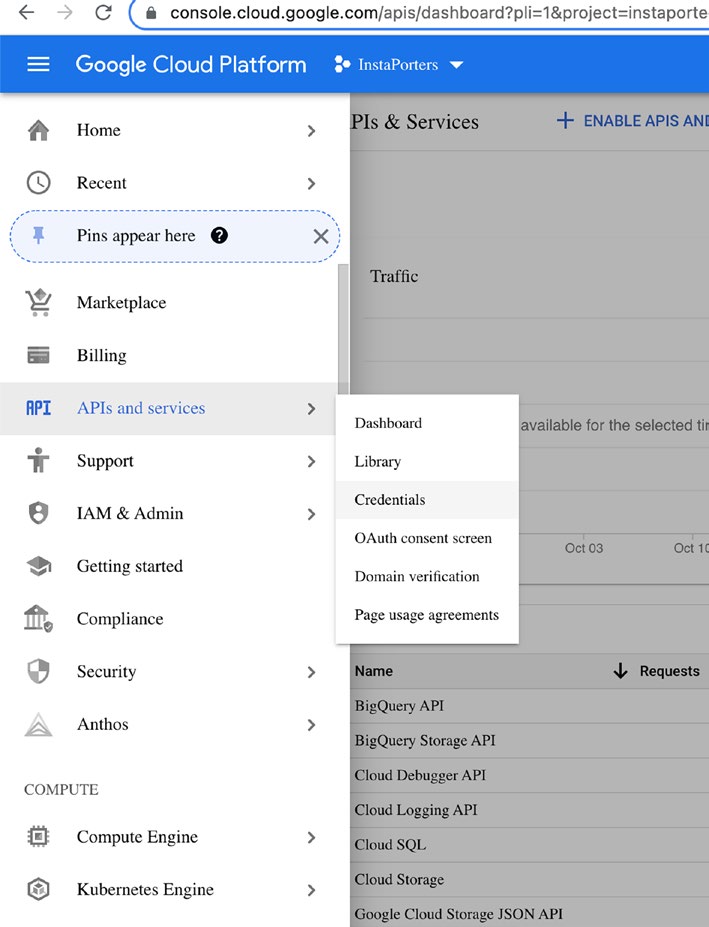
Chapter 2 UI Component and aUthentICatIon
STEP 4: After the project is created, open the left menu to access the credentials of the project, as shown in Figur.
Figure 2-20. Menu to access the API credentials
64
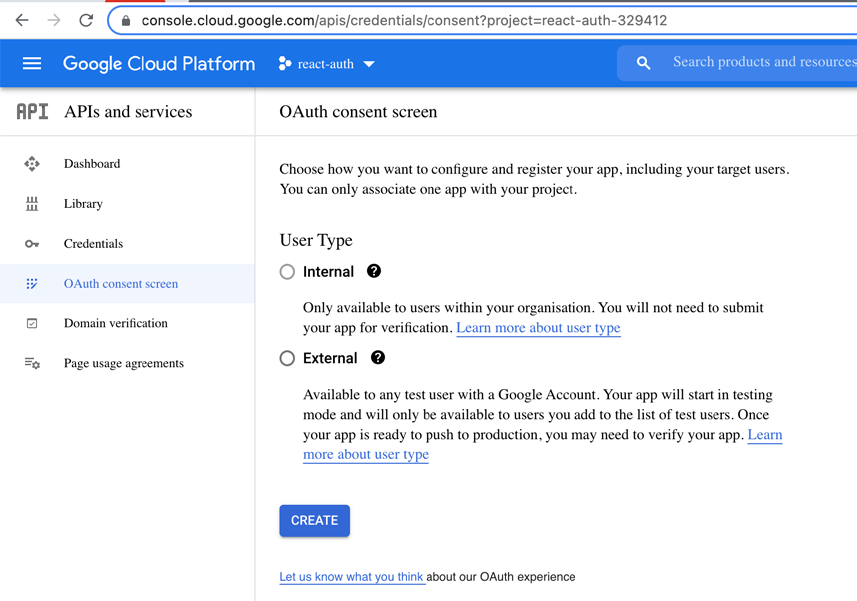
Chapter 2 UI Component and aUthentICatIon
You might have no API keys and no client IDs; we will require to create a new set.
STEP 5: Creating the OAuth consent screenTo integrate Google as the social login provider in our application, we need to set up an OAuth consent screen. The OAuth consent screen is an important step in the OAuth 2.0 flow as it informs the user about the application’s basic information and the user details that Google will provide to the third-party application. It ensures transparency and allows the user to give consent before providing their credentials.
As shown in Figur, choose the user type, and click Create. In the next screen, provide the app information and upload a logo and domain.
Figure 2-21. Creating the OAuth consent screen
65
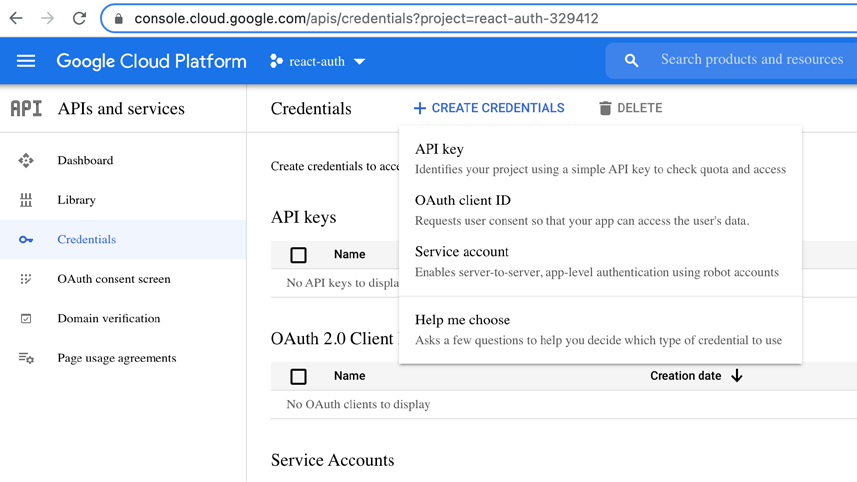
Chapter 2 UI Component and aUthentICatIon
STEP 6: Creating the OAuth client ID
Follow Credentials from the left menu and click Create Credentials on top, as shown in Figure .
Figure 2-22. Menu to create a type of credential
Please create the OAuth client ID.
As shown in Figur, fill out the form and select the web app as the type of application.
66
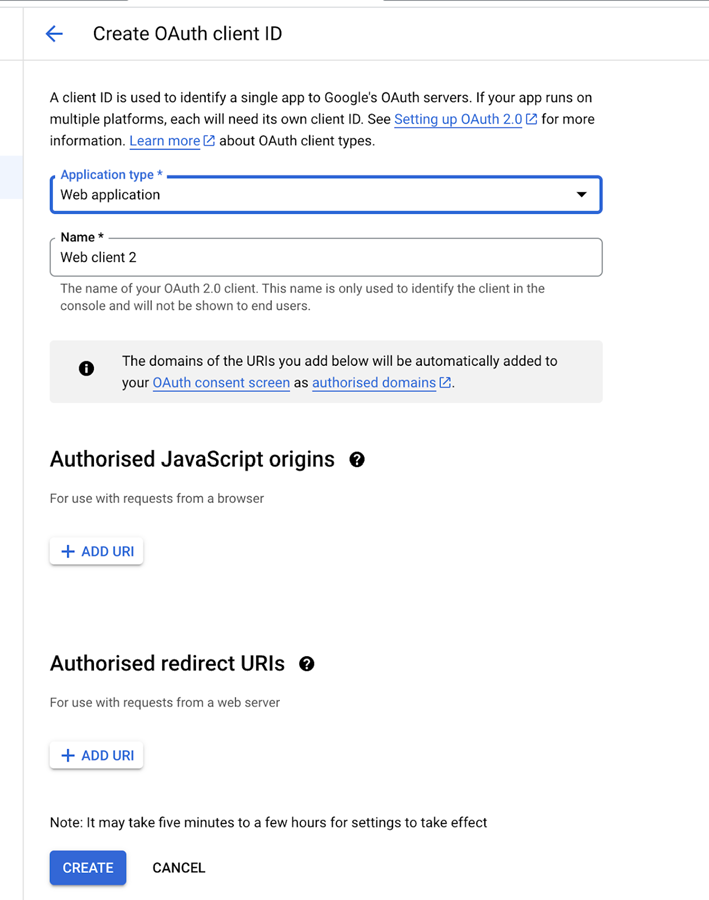
Chapter 2 UI Component and aUthentICatIon
Figure 2-23. Creating OAuth client ID form
We need to add the redirect URIs in the Google client app to let Google know which servers are allowed to log in. Once we add the auth configuration in Amplify, we will get the app URLs; we will use these URLs to add to the Google app.
67
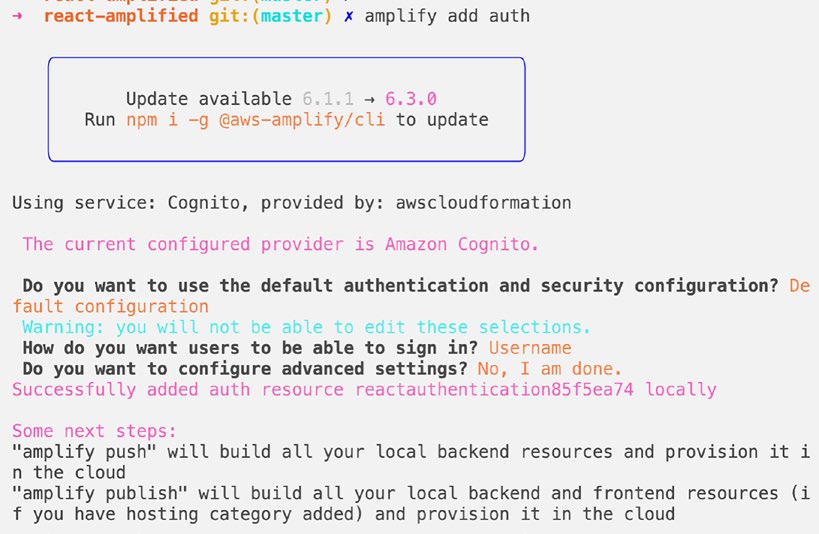
Chapter 2 UI Component and aUthentICatIon
For now, click the Create button; we will update the redirect URIs once we have them.
Copy the client ID and client secret; this is what we wanted to create.
Let’s continue on setting up the AWS Amplify, which will generate the valid AWS URL.
Updating Amplify Auth Service
Let’s add auth service from Amplify to set up the social login:
amplify add auth
Please note, I am adding a new auth service in case a different auth is already set up, and then we need to use the update command from the Amplify CLI to change the auth config. You can use the following to update the auth config:
amplify update auth
Figure 2-24. Amplify add auth options
68
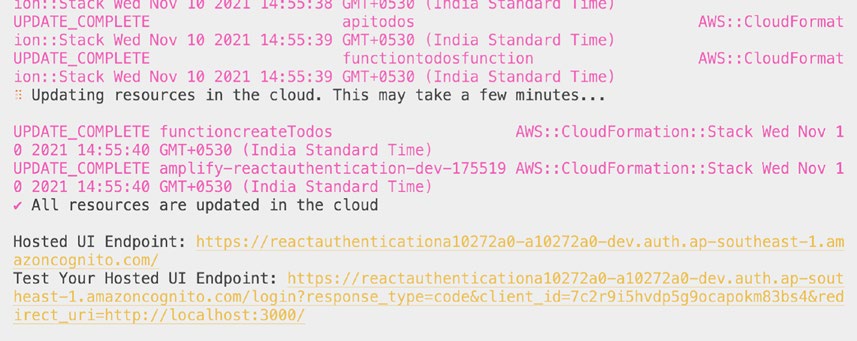
Chapter 2 UI Component and aUthentICatIon
Follow the options from the menus.
As we are going to run the application on localhost, we have added http://
localhost:3000/ as a redirect URI for sign-in and sign-out.
Select Google as the social provider.
Enter the client ID and secret generated on console.google.com when we created the OAuth client.
Let’s push the configuration to our AWS cloud:
amplify push
Adding the Redirect URIs
Once successful, our social login setup is done from the backend Amplify perspective; now we need to tell Google which URLs are allowed to log in or use these credentials to log in.
Figure 2-25. The hosted UI endpoints after the successful amplify push 69
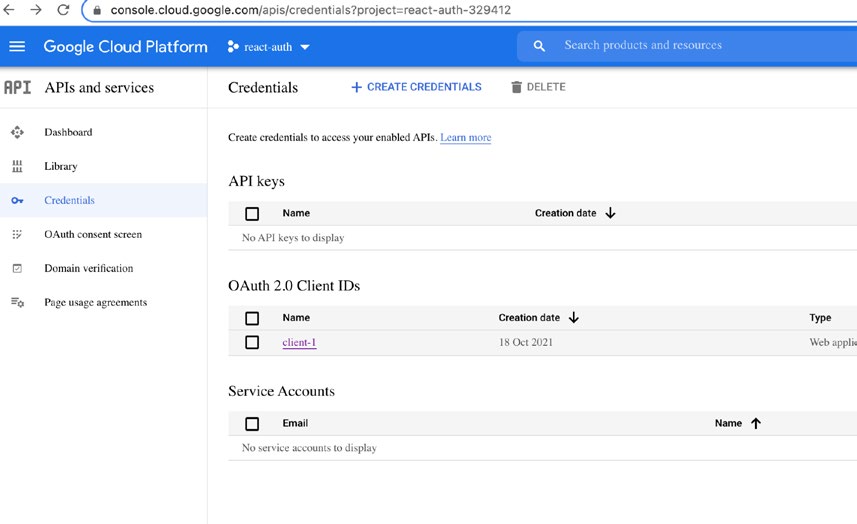
Chapter 2 UI Component and aUthentICatIon
Copy the first URL generated by AWS Amplify from the console.
Go to Credentials and open the OAuth2.0 client we created, as illustrated in Figur
Figure 2-26. The OAuth2.0 client ID created a while ago 70
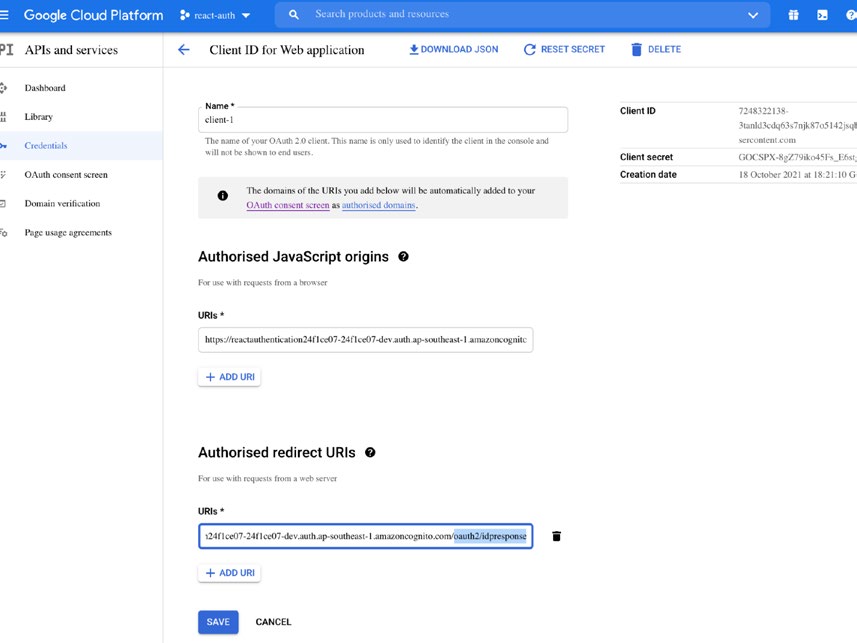
Chapter 2 UI Component and aUthentICatIon
Figure 2-27. Updating the authorized URIs and redirect URIs Add the URL in both the text boxes, namely, Àuthorised JavaScript originsànd Àuthorised redirect URIs`.
Append `/oauth2/idpresponseìn the redirect URIs to get the user profile.
Setting Up React App
To enable login with Google, in the login screen we need to add a button; when a user clicks this button, the Google login flow will be triggered.
71
Chapter 2 UI Component and aUthentICatIon
Let’s start with adding a button in our React app
1: <button
2: onClick={() => {
3: Auth.federatedSignIn({ provider: "Google" });
4: }}
5: >
6: Sign in with Google
7: </button>;
8:
LINE 1: This is a default button component; you can use any custom button as well.
LINE 2: Add a function on the event of click of this button.
LINE 3: Use the Auth imported from @aws-amplify/auth to call the federatedSignIn function by passing the provider; in this case, it is Google.

