What Happens If You Don’t Mock Write-Host: If you were to
comment out this line and not mock Write-Host, the actual Write-Host
cmdlet would be invoked when your tests run. As a result, you would see the Write-Host output on your screen, which can clutter your testing
results and make it more challenging to isolate the actual test outcomes from extraneous console messages. (Figure shows the extraneous messages that were not suppressed, cluttering the test results.)
Figure 9-1. Unwanted “noise” can make it difficult to read test results So, by including this mock without specific replacement actions, you
ensure that Write-Host stays silent during testing, keeping your test results clear and focused on the behavior of your function.
Describe Block
Describe "Invoke-FileOperation function" {
...
}
The Describe block provides a logical grouping for your tests and serves as a descriptive label for what you’re testing. In this case, it describes the testing of the “Invoke-FileOperation” function.
130
Chapter 9 MoCking Your WaY to SuCCeSS
Context Blocks
Context "When the file exists" {
...
}
Context "When the file does not exist" {
...
}
Within the Describe block, we have two Context blocks. Each Context represents a different scenario that we want to test:
– The first context, “When the file exists,” simulates a
scenario where the specified file exists.
– The second context, “When the file does not exist,”
simulates a scenario where the specified file is missing.
So far so good? It’s all ground we’ve already covered in previous
chapters. Now on to the good part.
IT Block
It "Should process the file" {
...
}
It "Should handle the missing file" {
...
}
Inside each Context block, we have It blocks. Each It block represents a specific test case or assertion. They specify what the expected behavior should be for the given scenario.
131
Chapter 9 MoCking Your WaY to SuCCeSS
In the first It block, we test that when the file exists, the function should process it. We use the Mock cmdlet to control the behavior of Test-Path, and we expect the result to be True using Should -BeTrue.
In the second It block, we test that when the file does not exist, the function should handle the missing file. Again, we use the Mock cmdlet to simulate Test-Path, and we expect the result to be False using
Should -BeFalse.
So we have effectively tested our code logic by simulating different
file existence scenarios, ensuring that our Invoke-FileOperation
function behaves as expected under both file existence and nonexistence conditions.
These Pester tests ensure that your Invoke-FileOperation function behaves correctly under different file existence scenarios, all without actually touching the real file system.
A Little More Between the Curly
Braces, Please
When using Mock, the portion between the curly braces { and } defines what the mock will return. As you observed in the earlier example Mock Test-Path { Return $true }, when Test-Path is called and replaced
by the mock, it returns $true. Your code, in turn, interprets this result as if Test-Path genuinely returned $true, and it proceeds based on that
response.
However, you can also use the curly braces to return nothing,
effectively silencing the command being mocked. This is similar to what we did when we mocked Write-Host. Leaving out any content between the
curly brackets, like in Mock-Write-Host { }, achieves the same result – the mocked command is silenced, and it doesn’t produce any output or return any values.
132
Chapter 9 MoCking Your WaY to SuCCeSS
So, the content between the curly braces defines what the mock
returns, and you can use this to control the behavior of the mocked
command, whether it’s returning specific values or producing silence
during testing.
Mocking Best Practices
The golden rule of mocking: Mimic reality, but don’t go overboard. Think of it as imitating a chef’s recipe; you want the taste to be authentic, but you don’t need to replicate the entire kitchen.
In our previous example of mocking Test-Path, how did I know to
mock the return as true or false? I simply looked at PowerShell’s Help Test-Path and unearthed this gem: "The ‘Test-Path’ cmdlet determines whether all elements of the path exist. It returns ‘$True’ if all elements exist and ‘$False’ if any are missing."
You can also dump the return in a variable and inspect its contents to see the type of data being returned, use GetType() or pipe to Get-Member if you need to find out the object type. I usually end up with my mocks returning a hashtable in most cases though, and you’ll see this shortly.
Now, here’s the trick: while you aim to mirror the real command, you
don’t need to mimic every nook and cranny. Imagine you’re crafting a
sculpture; you chisel away only what’s necessary to reveal the masterpiece within. Test-Path was easy; it returns a Boolean, and that’s it but take something like Get-ADUser, for instance; it spills out a treasure trove of properties, but maybe you need only a handful, so simply return the ones you need.
So, as we journey forward, keep this balance in mind. Our mocks
should echo reality but be tailored to suit our specific needs.
Here’s a handy list I put together of some mocking best practices that I try to follow and that you should also consider when creating your mocks: 133
Chapter 9 MoCking Your WaY to SuCCeSS
1. Mimic real behavior: Mock commands as close to
their real behavior as possible. Understand the real
command’s outputs and behaviors by referring to
official documentation or help files. By replicating
real- world responses, your tests reflect actual
application scenarios more accurately.
2. Keep it simple: While it’s essential to mimic real
behavior, don’t overcomplicate mocks. Focus on the
specific behavior your code interacts with. Complex
mocks can make tests convoluted and harder to
maintain.
3. Be consistent: Maintain consistency in your
mocks. If you mock a command in one test
scenario, use similar patterns in other relevant
scenarios. Consistency enhances the readability and
comprehension of your test suite.
4. Update mocks with code changes: When your
actual code changes, ensure that corresponding
mocks are updated. Mismatched mocks can lead to
inaccurate tests, providing a false sense of security.
5. Avoid tight coupling: Mock only what your code
directly interacts with. Avoid overly tight coupling
where a change in the underlying implementation
forces extensive changes in your tests. Mocking
should shield your tests from implementation
details.
6. Documentation is your friend: Rely on official
documentation, help files, and specifications when
determining how to mock specific commands.
Understanding the intended behavior helps create
accurate mocks.
134
Chapter 9 MoCking Your WaY to SuCCeSS
Beware of Pitfall #5 in the preceding list – steering clear of tight coupling. in my initial foray into the realm of mocking, i meticulously mocked every detail, down to the precise messages emitted by Write-host. (You’ll see how later.) however, when i subsequently altered the message text within my functions, chaos ensued. all my tests came
crashing down like a house of cards.
By adhering to these best practices, your tests become powerful tools
for ensuring your code’s correctness, resilience, and maintainability. Now that you have a strong foundation, let’s continue this lengthy chapter, building on the principles you’ve learned so far.
Mocking Complex Cmdlets
By now, you’ve mastered the art of mocking straightforward commands like Test-Path. You’ve gained the confidence to manipulate their behaviors, crafting your tests with finesse. But what about the more complex cmdlets, the likes of get-aduser, Invoke-RestMethod, or Import-Csv? These
multifaceted tools don’t merely return true or false; they churn out intricate data structures, arrays, and hashtables.
Fear not, for the Mock cmdlet is still your trusty companion on
this journey. It possesses incredible depth beyond the binary world of true and false. Within those curly braces, you can conjure a universe of possibilities – a PSCustomObject, an Array, a Hashtable, or even an array of hashtables, and the list goes on.
Once I had personally figured this part out, my mocking prowess
evolved from Billy-Basic to Henry-Hero. Suddenly, there was nothing in the PowerShell realm that I couldn’t mock, no complexity too great to
simulate.
135
Chapter 9 MoCking Your WaY to SuCCeSS
Stay with me, and I’ll guide you through this transformation. Together, we’ll unravel the secrets of mocking these intricate cmdlets, empowering you to wield PowerShell’s mightiest tools with finesse. After perusal of the next few pages, you will be stepping confidently into the realm of Henry-Hero mocking.
PSCustomObject
Imagine you have a function called Get-ServerInfo. Its job? Reading data from a CSV file and doing something with it. Simple, right? Well, reality often throws curveballs – the CSV file you’re expecting might not be there on the computer running your tests.
But here’s the catch: we don’t really care about the CSV file itself; as just alluded, the test may be run on a system that does not have access to the real CSV. We just want to know what our function does with the data.
And here’s where PSCustomObject becomes your buddy.
PSCustomObject can help you pretend that your function imported
data from a CSV file, even if it didn’t really. It’s like giving your function imaginary data to play with. How? Well, you create a pretend data set
like this:
$MockedData = @(
[PSCustomObject]@{
Property1 = 'Value1'
Property2 = 'Value2'
# ...add more properties if needed
}
)
Mock Import-Csv { return $MockedData }
136
Chapter 9 MoCking Your WaY to SuCCeSS
With this trick, your function can keep chugging along, imagining it’s working with real data. PSCustomObject ensures your tests stay smooth
and predictable, even when the real world throws a few surprises your way.
it’s worth noting that i’ve enclosed the entire [PSCustomObject]
and its properties in brackets so that it becomes an array of
pSCustomobjects: @([PSCustomObject]...). this setup allows
you to create more than one “row” in your simulated CSV by adding
additional pSCustomobjects. essentially, it becomes an array of
pSCustomobjects. if your needs are simpler and you only require one
custom object, you can omit the brackets entirely. Flexibility is the
key here – tailor your approach to match the complexity of your data
simulation needs.
Let me show you what I mean with an example:
function Get-ServerInfo {
$servers = Import-Csv -Path 'C:\OHTemp\Servers.csv'
return $servers.count
}
The function reads in a CSV file and returns the number of servers
found in the CSV file. Not very practical in the real world but good enough to hammer home the concept here. Listing demonstrates how a test could look for it.
Listing 9-3. Testing the Get-ServerInfo function
Describe 'Get-ServerInfo' {
Context 'When given a valid CSV file' {
It 'Returns the correct number of servers' {
#Arrange
137
Chapter 9 MoCking Your WaY to SuCCeSS
$MockedData = @(
[PSCustomObject]@{
Name = 'Server1'
OS = 'Windows Server 2019 Standard'
};
[PSCustomObject]@{
Name = 'Server2'
OS = 'Windows Server 2012 R2'
}
)
mock Import-Csv { $MockedData }
#Act
$expected = Get-ServerInfo
#Assert
$expected | Should -Be 2
}
}
}
remember, when the test calls the function Get-ServerInfo and
Import-CSV is executed, it swaps it out for your mocked Import-Csv
and mocked data. the real Import-Csv is never called within your
function. Clever stuff!
138
Chapter 9 MoCking Your WaY to SuCCeSS
There’s More Than One Way to Skin a Cat
Now, let’s explore an alternative approach when dealing with CSV files, revealing the versatility of Pester and encouraging you to think “outside the box” when crafting your tests.
Consider this: what if we achieve the same test results using
ConvertFrom-CSV and a here-string to simulate the CSV data? Let’s take a peek at how this scenario unfolds in the script snippet in Listing .
Listing 9-4. An alternative method
Describe 'Get-ServerInfo' {
Context 'When given a valid CSV file' {
It 'Returns the correct number of servers' {
#Arrange
mock import-csv {
ConvertFrom-Csv -InputObject @'
'Name','OS',
'Server1','Windows Server 2019 Standard'
'Server2','Windows Server 2012 R2'
'@
}
#Act
$expected = Get-ServerInfo
#Assert
$expected | Should -Be 2
}
}
}
139
Chapter 9 MoCking Your WaY to SuCCeSS
This alternative method not only showcases the power of Pester but
also prompts you to consider innovative solutions when shaping your
test cases.
Hashtables
When it comes to my mocking adventures, I often find myself relying on hashtables. Much like with PSCustomObjects, I encapsulate them in an
array by wrapping them in brackets: @().
Let’s dive into an example, shown in Listing , where we mock Get-Module using an array to simulate the return of multiple versions of the same installed PowerShell module.
Listing 9-5. Mocking Get-Module
Describe 'My Pester test' {
It 'does something wonderful' {
#Arrange
Mock Get-Module {
@{ Version = '1.0.9'; Name = 'MyModule'}
@{ Version = '1.0.5'; Name = 'MyModule'}
@{ Version = '1.0.2'; Name = 'MyModule'}
}
# Act...
# Assert...
}
}
In this scenario, the use of hashtables within an array enables us to
brilliantly mimic the behavior of Get-Module, returning various versions of the same module.
140
Chapter 9 MoCking Your WaY to SuCCeSS
It’s all about crafting your mocks to mirror the real-world scenarios, ensuring your tests are as robust as your imagination allows.
When to Use a PSCustomObject over a Hashtable
Knowing when to opt for a PSCustomObject over a hashtable is pivotal in PowerShell scripting. As a personal preference, I usually resort to arrays of hashtables. They’re simple to create, easy on the eyes, and universally comprehensible. However, there are situations that call for the elegance of a PSCustomObject.
If a cmdlet produces a PSCustomObject as its output, I follow suit.
Consistency is key; if the cmdlet provides data in this format, it makes sense to mirror it. Furthermore, if your scripting ventures lead you to the realm of strongly typed properties – where a property must be explicitly defined as a certain data type (like string or int) – PSCustomObject
emerges as the hero.
Consider this scenario: you need to define properties like this.
[PSCustomObject]@{
Name = [string]"John" # Name property is
explicitly defined as a string
Age = [int]30 # Age property is
explicitly defined as an integer
}
Or you may need to return a specific type of object and for that
PSCustomObject wins again with its PSTypeName Declaration:
[PSCustomObject]@{
PSTypeName = WhateverObjectTypeYouNeed
Name = 'MyName'
}
141
Chapter 9 MoCking Your WaY to SuCCeSS
In such cases, PSCustomObject becomes your trusted companion. Its
ability to accommodate well-defined data types ensures precision in your scripts.
Import-CliXML
The Import-CliXML cmdlet presents a powerful mocking technique,
especially for scenarios involving API calls. Whenever I saw Pester
examples using API calls I always thought they were bad examples as I
had never needed to use them. One career change later and whammo!
Suddenly, a wave of PowerShell API tasks flooded my workspace, proving that you never quite know what challenges lie ahead. So it would therefore be remiss if we did not include API mocks in our examples too.
Traditionally, mocking API calls involved intricate maneuvers.
However, a straightforward method emerged: calling the API for real and capturing its response in an XML file. This captured “snapshot” could then fuel our mocks, ready for testing. Allow me to illustrate.
Consider a function shown in Listin
Listing 9-6. Example function using an API call
function Get-ThingToDo {
$result = Invoke-RestMethod -Method Get -Uri
"https://www.boredapi.com/api/activity"
if ($result.type -eq "Relaxation") {
return $true
} else {
return $false
}
}
142
Chapter 9 MoCking Your WaY to SuCCeSS
In this function, the real API response is captured in the $result
variable. If the ‘Type’ property is “Relaxation,” it returns True; otherwise, it returns False. To mock this response, ensuring precise outcomes without real API calls, we employ Import-CliXML.
Firstly, we need to capture a real response. To capture the API
response, simply pipe Invoke-RestMethod to Export-Clixml, as
demonstrated in Listing .
Listing 9-7. Capturing the real API response for later use Invoke-RestMethod -Method Get -Uri
"https://www.boredapi.com/api/activity" |
Export-Clixml C:\OHTemp\Response.xml
This command generates an XML file at the specified location, ready
for use in our mock. In Listin, we integrate this captured response into our test.
Listing 9-8. Integrating the captured API response into the mock Describe "Get-ThingToDo" {
it "Should return True if Type is 'Social'" {
Mock Invoke-RestMethod {
Import-Clixml "C:\ohtemp\Response.xml"
}
$Expected = Get-ThingToDo
$Expected | should -BeTrue
}
}
143
Chapter 9 MoCking Your WaY to SuCCeSS
In this way, we harness the real-world API response to create mocks,
ensuring accurate and reliable tests. It’s a testament to the adaptability of PowerShell and Pester, empowering us to handle unexpected challenges
with finesse.
.Net Classes
Now, let’s delve into the scary world of .Net classes to demonstrate the flexibility of mocks. Consider a scenario where you’re working with
Invoke-WebRequest and want to specifically catch errors generated by
[System.Net.WebException] within a try-catch block. The function,
defined in Listing , looks like this.
Listing 9-9. The Get-Error function to be tested
Function Get-Error {
try {
$response = Invoke-WebRequest -Uri "https://
fearthepanda.com/notexist" -Method
get -ErrorAction stop
} catch [system.net.webexception] {
write-host "The error was $_"
return 1
}
}
In this function, the catch block targets errors of type [System.Net.
WebException] and returns 1. The corresponding Pester test, found in
Listinures this behavior is as expected.
144
Chapter 9 MoCking Your WaY to SuCCeSS
Listing 9-10. Testing error handling
Describe "Get-error" {
it "Should return 1" {
$webException = New-MockObject -Type System.Net.
WebException
Mock Invoke-WebRequest {
throw $webException
}
Mock write-host
$Expected = Get-Error
$Expected | should -Be 1
}
}
Within the It block, the Mock command simulates the Invoke-
WebRequest call. It uses New-MockObject to create a System.Net.
WebException object with the default error message and then throws the
[System.Net.WebException] to replicate the real scenario of Invoke-
WebRequest encountering an error. This mock ensures the Get-Error
function handles [System.Net.WebException] as anticipated, returning 1.
In general, you would employ New-MockObject to create a mock
object based on the .Net Type, a topic that falls outside the scope of this book. While diving deeper into mocking .Net classes can get intricate and complex, this glimpse should pique your curiosity, encouraging you to
explore this topic further and gain a deeper understanding.
145
Chapter 9 MoCking Your WaY to SuCCeSS
But Wait, There’s More!
So, .Net can be a bit of a maze, right? But fear not, you don’t have to get lost in it. There are tricks to navigate these complexities, and I’m here to share a couple of them with you.
1. Embrace Native PowerShell: Why complicate
things with .Net when PowerShell itself can often
do the job? Take the example of retrieving the
environment variable windir. Sure, you could use
the .Net approach:
[Environment]::GetEnvironmentVariable('windir')
But then you’re setting yourself up for a headache when it’s time
to mock it in your tests. Instead, opt for the native PowerShell
equivalent:
Get-Item -Path 'env:windir'
Simple, elegant, and best of all, easily mockable in your tests. No
more wrestling with .Net intricacies.
2. Wrapping .Net Commands in PowerShell
Functions: A Mocking Strategy: Now, what if
you can’t find a native PowerShell alternative?
Don’t worry, there’s a workaround. Wrap the .Net
command in a cozy PowerShell function. Let’s
say for some reason you just have to fetch an
environment variable using .net. Simply wrap it in a
function as shown in Listin.
146
Chapter 9 MoCking Your WaY to SuCCeSS
Listing 9-11. Encapsulating a .net command within a function Function Get-EnvironmentVariable {
[cmdletbinding()]
param (
[string]$Variable
)
$envVar = [Environment]::GetEnvironmentVariable($Variable)
if (-not ($envVar)) {
Write-Host "$Variable not found"
return 1
} else {
return $envvar
}
}
In this concise function, the intricate .Net call is encapsulated,
providing a clear interface. This not only enhances readability but also renders mocking a seamless endeavor during testing.
Let’s illustrate this concept further with an example. Imagine you have a function, as demonstrated by Listing
Listing 9-12. Sample function
Function My-AmazingFunction {
param (
[string]$EnvVar
)
if ($EnvVar) {
$result = [Environment]::GetEnvironmentVariable
($Variable)
147
Chapter 9 MoCking Your WaY to SuCCeSS
return $result
} else {
Write-Output "You didn't want to get the environment
variable"
return $false
}
}
In the initial script, Listine encounter a common problem: direct invocation of a .Net command within the function. Specifically, the line:
$result = [Environment]::GetEnvironmentVariable($Variable)
While this approach may seem straightforward, it poses a significant
challenge during testing. When attempting to unit test this function, a crucial problem emerges: the .Net method [Environment]::GetEnvironment
Variable($Variable) directly interacts with the operating system, fetching environment variables in real time. In the realm of testing, unpredictability becomes the enemy. We can’t guarantee the existence or values of these variables in different environments.
This unpredictability creates a testing nightmare. How do we write
reliable tests when the function’s behavior depends on external, ever-
changing factors? Enter the need for a solution: Listin.
Listing 9-13. Refactor the function to easily test .Net Function My-AmazingFunction {
param (
[string]$EnvVar
)
$result = Get-EnvironmentVariable -Variable $EnvVar
148
Chapter 9 MoCking Your WaY to SuCCeSS
if ($result -ne 1) {
$result
} else {
Write-Host "You didn't want to get the
environment variable"
return $false
}
}
Understanding the Transformation:
In Listin, the script undergoes a crucial transformation. (We already alluded to earlier in the book that Pester likes you to refactor your functions!) The direct invocation of the .Net method is replaced with a function call:
$result = Get-EnvironmentVariable -Variable $EnvVar
Here, Get-EnvironmentVariable acts as a protective shield. It
encapsulates the unpredictable .Net operation within a controlled
environment. By wrapping the .Net call in a PowerShell function (see
Listine achieve two critical goals:
1. Predictability for testing: The function can now
be mocked during tests. Instead of unpredictably
interacting with the OS, the function can return
predefined values, making tests reliable and
consistent.
149
Chapter 9 MoCking Your WaY to SuCCeSS
2. Readability and maintainability: The script
becomes more readable. The intention
behind fetching the environment variable is
encapsulated in a function with a clear name
(Get-EnvironmentVariable), enhancing the script’s
readability and making maintenance easier.
This transformation not only resolves testing challenges but also
contributes to the script’s overall robustness and maintainability. By understanding and addressing the inherent issues via Listin, we pave the way for more predictable, manageable, and reliable PowerShell scripting.
To test the functionality now, we can craft Pester tests like Listing .
Listing 9-14. Testing the refactored function
Describe My-AmazingFunction {
it "Should return the variable if it exists" {
# Arrange
mock Get-EnvironmentVariable { "SampleValue"}
# Act
$expected = My-AmazingFunction -EnvVar "SampleValue"
# Assert
$expected | should -be "SampleValue"
}
it "Should return the False if the variable does
not exist" {
# Arrange
mock Get-EnvironmentVariable { }
# Act
150
Chapter 9 MoCking Your WaY to SuCCeSS
$expected = My-AmazingFunction -EnvVar "SampleValue"
# Assert
$expected | should -beFalse
}
}
Listing
In the first It block, the mock Get-EnvironmentVariable { "SampleValue" }
statement is setting up a mock for the Get-EnvironmentVariable function.
This mock is simulating the behavior of the real Get-
EnvironmentVariable function and returning the string “SampleValue”.
When My-AmazingFunction -EnvVar "SampleValue" is called, it uses the mocked Get-EnvironmentVariable function, which always returns
“SampleValue”. The Assert section then checks if the returned value
matches the expected value “SampleValue”.
In the second It block, the mock Get-EnvironmentVariable { }
statement sets up a mock for the Get-EnvironmentVariable function that returns nothing, simulating the behavior when the environment variable does not exist.
When My-AmazingFunction -EnvVar "SampleValue" is called, it
also uses the mocked Get-EnvironmentVariable function, which now
returns nothing. The Assert section then checks if the returned value is False, indicating that the function correctly handles the scenario when the environment variable does not exist.
With these strategies up your sleeve, you’ll be taming .Net intricacies like a pro.
151
Chapter 9 MoCking Your WaY to SuCCeSS
Verifying Your Mocks: Ensuring Your Logic
Is Sound
So, you’ve mastered the art of mocking. Your functions are beautifully crafted, your tests are comprehensive, and everything seems to be working as expected. But how can you be absolutely certain that your mocks are doing what they’re supposed to do? This is where verification steps in.
Consider this scenario: you’ve set up a mock for Test-Path. You know
it should be called when your function runs, but how can you prove it?
Verification allows you to confirm that your logic is sound and that your function is interacting with the mock as intended.
Take, for instance, this sample function in Listing Get-Path.
Listing 9-15. The sample Get-Path function
function Get-Path {
param (
[parameter (Mandatory = $true,ValueFromPipeline
= $true)]
[string]$Path
)
process {
if (test-path $path) {
write-host "The path exists"
return $true
} else {
write-host "The path does not exist"
return $false
}
}
}
152
Chapter 9 MoCking Your WaY to SuCCeSS
It takes a path, checks its validity, and writes a message accordingly.
Now, if you send a path like “C:\I\Exist”, you’d expect Test-Path to be called once. Similarly, if you send two paths down the pipeline, it should be called twice.
The Pester test script for validating this function could be structured as demonstrated in Listing h shows tests that validate Test-Path was called the correct number of times.
Listing 9-16. Testing the Get-Path function
Describe "Get-Path" {
BeforeAll {
Mock Write-Host
}
Context "When sending a path" {
It "Returns True if the path is valid" {
# Arrange
$path = "C:\I\Exist"
Mock test-path {$true}
# Act
$expected = Test-Path -Path $path
# Assert
$expected | Should -BeTrue
Should -invoke Test-path -times 1 -Exactly
}
It "Returns False if the path is not valid" {
# Arrange
$path = "C:\I\Do\Not\Exist"
Mock test-path {$false}
153
Chapter 9 MoCking Your WaY to SuCCeSS
# Act
$expected = Test-Path -Path $path
# Assert
$expected | Should -BeFalse
Should -invoke Test-path -times 1 -Exactly
}
}
context "when sending via the pipeline" {
It "should call the mock the correct number
of times" {
# Arrange
Mock test-path {$true}
# Act
"c:\Exists", "c:\AlsoExists" | Get-Path
# Assert
Should -Invoke Test-path -times 2 -Exactly
}
}
}
This concept comes to life in your Pester tests. In Listin you create different contexts to test your function’s behavior. When testing a direct path, you assert that Test-Path is called once and only once: should -invoke Test-path -times 1 -Exactly
In the pipeline context, where two paths are sent, ("c:\path1","c:\ path2" | Get-Path), you adjust the -times parameter accordingly: should -invoke Test-path -times 2 -Exactly
154
Chapter 9 MoCking Your WaY to SuCCeSS
Here’s the key: using -times 2 -Exactly ensures that Test-Path is called precisely twice. This level of verification gives you confidence that your function is interacting with the mock exactly as planned. Without using –exactly, the test would pass if Test-Path was called at least two times.
Tip You also have the option to employ -Times 0 if you want to ensure with absolute certainty that a command is not called at all
or, alternatively, use the -not parameter to achieve the same result:
Should -not -Invoke Test-path
By verifying your mocks in this way, you’re not just writing tests; you’re ensuring the integrity of your functions. It’s a crucial step that adds a robust layer of reliability to your PowerShell scripts.
Understanding the Verification Line
Let’s wrap this section up by taking a little more time to make sure the verification line is fully understood before we continue the next part of our mocking journey.
This is the line that performs the verification magic:
should -invoke Test-Path -times 1 -Exactly
Here’s how it works:
– Should: We’ve covered this earlier in the book: This
keyword is fundamental in Pester. It’s like your testing
assistant, allowing you to set expectations about what
your code should do. It’s your way of saying, “Hey,
PowerShell, I expect this to happen.”
155
Chapter 9 MoCking Your WaY to SuCCeSS
– Invoke test-path: Here, you’re specifying the
command or function that you’re keeping an eye on.
In our case, it’s Test-Path. You want to ensure that this
specific command is executed.
– Times 1: This part indicates how many times you
expect your command to be called. In the code snippet
provided earlier, Test-Path should be invoked once.
Think of it like counting instances. If your function
loops and calls Test-Path multiple times, this number
should match the total count.
– Exactly: This parameter is key. It emphasizes precision.
You’re not just saying “I want it to be called at least
once.” (which is what would happen if you omitted this
parameter), but you’re stating, “I want it to be called
exactly once, no more, no less.” It ensures the com-
mand is behaving as you’ve planned.
Imagine you’re baking cookies. You want to make sure the oven timer
rings exactly once when your cookies are done. If it rings too early, your cookies might be undercooked. If it rings too late, they could burn. Setting
-times 1 -Exactly is akin to ensuring that precise timing, guaranteeing your cookies (or in this case, your function) turn out just right.
Using a Parameter Filter
In this section, we explore the powerful feature of -ParameterFilter
within Pester’s Mock command, a tool designed to ensure your mocks
are invoked with precise parameter values. This parameter serves as a
gatekeeper, allowing the mocked behavior only if the incoming parameters meet the criteria defined in the filter. It’s crucial to note that if the filter conditions are not met, the original command will be invoked instead of the mock, potentially leading to unexpected behavior.
156
Chapter 9 MoCking Your WaY to SuCCeSS
Why Would You Use -ParameterFilter?
This feature shines when you need to test diverse code paths in your
functions. Imagine a scenario where a function behaves differently based on the input parameters. With -ParameterFilter, you can precisely mock the command and its varied outputs, allowing you to thoroughly test
different code paths.
How to Use -ParameterFilter
To leverage this filter, you simply define which parameters you want to ensure are passed, encapsulating them within a script block. If you have more than one parameter to consider, you can employ PowerShell’s
comparison operators like -eq. For instance, let’s take Get-Item as an example. It has a -Path property. To guarantee that the mock is invoked only when a specific path is used, you can employ the -ParameterFilter like this:
Mock Get-Item {} -ParameterFilter { $Path -eq "C:\MyPath" }
This construct allows you to precisely control when your mock
executes, ensuring that your tests comprehensively cover different code paths within your functions.
Let’s take an example to illustrate this concept. Consider a function
Get-User that returns different results for different usernames as shown in Listin
Listing 9-17. The sample Get-User function
Function Get-User {
param (
[string]$username
)
157
Chapter 9 MoCking Your WaY to SuCCeSS
if ($username -eq 'admin') {
return 'Admin User'
} else {
return 'Regular User'
}
}
The accompanying tests shown in Listine mocks with parameter filters to control the function’s behavior based on input
parameters.
Listing 9-18. Using -ParameterFilter
Describe Get-User {
Context "When getting user information" {
beforeall {
mock Get-User {throw "Don't call Get-User
for real" }
}
it "Should return Admin User for 'admin'" {
# Arrange
Mock Get-User {
return 'Admin User'
} -ParameterFilter { $username -eq 'admin' }
# Act
$result = Get-User -username 'admin'
# Assert
$result | Should -Be 'Admin User'
}
it "Should return Regular User for other usernames" {
# Arrange
158
Chapter 9 MoCking Your WaY to SuCCeSS
Mock Get-User {
return 'Regular User'
} -ParameterFilter { $username -eq 'Joe' }
# Act
$result = Get-User -username 'Joe'
# Assert
$result | Should -Be 'Regular User'
}
}
}
In the provided example, the tests could pass without the
-ParameterFilter. However, the real power of -ParameterFilter
becomes evident in more complex scenarios where the function’s behavior hinges on specific parameter values. Here, the filter ensures that the mock is called only when the function is invoked with specific parameters,
allowing you to thoroughly test your code’s different pathways.
Gotta Catch ‘em All
It’s important to highlight the ‘Catch All’ mechanism for mocks,
implemented in the BeforeAll block. This catch-all prevents unexpected behaviors by intercepting function calls with parameters that don’t meet the criteria set by the -ParameterFilter.
Without this catch-all, if a function call doesn’t satisfy the filter
conditions, the mock won’t be invoked, and the real function will be
called instead. This safeguard ensures your tests remain robust even in complex scenarios, preventing inadvertent calls to the actual functions being mocked.
159
Chapter 9 MoCking Your WaY to SuCCeSS
For instance, let’s consider a modification in our tests. If we alter the second It block to call the function: Get-User -username 'Joe' (as shown in Listing ), it doesn’t align with the parameter filter’s condition of $Username -eq 'Fred'. Consequently, the mock won’t be invoked in this
case. Instead, the real function will be called, a situation that might not align with your testing objectives.
This highlights the precision that -ParameterFilter offers in
selectively mocking specific function calls based on the specified
parameter conditions. The ‘Catch All’ mechanism in the BeforeAll
block becomes crucial here, ensuring that unexpected calls to the actual functions being mocked are prevented, thereby maintaining the integrity of your tests.
Listing 9-19. The real Get-User is called
Describe Get-User {
Context "When getting user information" {
beforeall {
mock Get-User {throw "Don't call Get-User
for real" }
}
it "Should return Admin User for 'admin'" {
# Arrange
Mock Get-User {
return 'Admin User'
} -ParameterFilter { $username -eq 'admin' }
# Act
$result = Get-User -username 'admin'
160

Chapter 9 MoCking Your WaY to SuCCeSS
# Assert
$result | Should -Be 'Admin User'
}
it "Should return Regular User for other usernames" {
# Arrange
Mock Get-User {
return 'Regular User'
} -ParameterFilter { $username -eq 'Fred' }
# Act
$result = Get-User -username ' Joe'
# Assert
$result | Should -Be 'Regular User'
}
}
}
In Figurou can observe the ‘Catch All’ mechanism in action.
Here, the parameter filter set for the Get-User function is not met (as shown in the modified test: Listing causing the mock to be bypassed.
Instead, our safety-net is invoked, triggering the error message specified in the ‘Catch All’ block. This highlights the importance of the ‘Catch All’ in maintaining the expected behavior of your tests.
Figure 9-2. A close shave – saved by the catch all!
161
Chapter 9 MoCking Your WaY to SuCCeSS
Validating Output Messages Like a Boss
Using -ParameterFilter
When you are testing, ensuring the accuracy of output messages,
especially those generated by commands like Write-Host, Write-Output, or Write-Warning, is crucial.
This is where the powerful -ParameterFilter parameter in Pester’s
Mock command steps in. Consider the scenario of a function, Get-
Greeting, which employs Write-Host to display tailored messages based on input parameters. Listing trates this.
Listing 9-20. The sample function
Function Get-Greeting {
param (
[string]$Name
)
if ($Name -eq "Owen") {
Write-Host "Hello Owen, I hope you are having a
good day." -ForegroundColor Green
} else {
write-Warning "Oh, I see you are not Owen"
Write-Host "Hello $Name, how are you?" -ForegroundColor
Cyan
}
}
In the accompanying Pester test shown in Listing e utilize
-ParameterFilter to scrutinize the exact parameters passed to
Write-Host.
162
Chapter 9 MoCking Your WaY to SuCCeSS
Listing 9-21. The tests for Get-Greeting
Describe "Get-Greeting" {
Context "When the name is Owen" {
It "Should say hello to Owen" {
# Arrange
Mock Write-Host { }
$Name = 'Owen'
# Act
Get-Greeting -Name $name
# Assert
Should -Invoke Write-Host -ParameterFilter
{ $Object -eq "Hello Owen, I hope you are having a
good day." }
}
}
Context "When the name is not Owen" {
It "Should say hello to the name" {
# Arrange
Mock Write-Host { }
Mock Write-Warning { }
$Name = 'Bob'
# Act
Get-Greeting -Name $Name
# Assert
Should -Invoke Write-Host -ParameterFilter
{ $Object -eq "Hello $Name, how are you?"
-and $ForegroundColor -eq "Cyan" }
163
Chapter 9 MoCking Your WaY to SuCCeSS
}
}
}
In the first context block, our focus is on verifying the correctness of the displayed message. In the second context, not only do we validate
the message, but we also ensure the accuracy of the foreground color
parameter, enhancing the precision of our tests.
This technique is particularly handy when dealing with scenarios
where refactoring the code is challenging due to various constraints as you can simply add a Write-Verbose or Write-Host message and check for
the correct message to verify correct code branching. Useful if you have nothing else to assert on.
Imagine your code as a vast, unpredictable sea, each function call
being like a message in a bottle. Sometimes, you need to ensure these
messages are delivered correctly and in the right bottle. Now, think of the
-ParameterFilter as a seasoned sailor’s compass. In the vast expanse of the code sea, it acts as your reliable navigation tool, helping you pinpoint not just the bottle but also the exact message inside it. Just as a sailor uses a compass to follow a specific route across stormy waters, -ParameterFilter allows you to precisely chart the path of your function calls amid the complexities of your code.
It’s not just about finding the bottles; it’s about ensuring each
message reaches its destination flawlessly. Like a skilled navigator using the compass to avoid treacherous rocks, you use -ParameterFilter to
steer clear of unexpected errors and ambiguities in your tests. In the sea of coding uncertainties, -ParameterFilter becomes your guiding
star, ensuring your messages are not lost at sea but reach their intended recipients with utmost accuracy and clarity.
164
Chapter 9 MoCking Your WaY to SuCCeSS
Note i realize the last few analogies are all over the place now, but i have to admit that this far into the book i’m fast running out of theater analogy ideas! From now on, it’s a free-for-all in the analogy department; it was good while it lasted!
Verifiable Mocks
In the dynamic world of PowerShell scripting, the reliability of your
functions is paramount. Verifiable Mocks, a powerful technique in
Pester, serve as vigilant sentinels, ensuring each function’s pivotal role in the script. By appending the -Verifiable badge, these mocks become
discerning critics, validating the script’s execution. Let’s delve into this technique, exploring how these mocks guarantee that every function takes its rightful place on the coding stage.
Ensuring the Right Performers Take the Stage
When coding, ensuring that each function plays its part correctly is
paramount. I’ve previously mentioned the use of should -invoke with
cmdlets like Write-Host and Write-Verbose, complemented by the
discerning -ParameterFilter. This technique becomes invaluable when
you need to guarantee that your code follows the expected logic path,
triggering the precise Write-Host or Write-Verbose messages.
A critical practice I employ involves orchestrating this validation
during the preparation phase of our “theatrical performance,” shifting the focus from the Assert section to the Arrange section of our test. Here, our mock functions transition from mere observers to active participants. We bestow upon them the responsibility of validation by appending the
-Verifiable parameter. This essential role, akin to a vigilant theater critic, ensures that specific functions are called precisely as anticipated.
165
Chapter 9 MoCking Your WaY to SuCCeSS
Consider the script demonstrated in Listing at stages the interaction between our code and two crucial performers, Write-Host and Write-Warning.
Listing 9-22. Invoke-Verifiable at large
Describe "Get-Greeting" {
Context "When the name is Owen" {
It "Should say hello to Owen" {
# Arrange
Mock Write-Host -ParameterFilter { $Object
-eq "Hello Owen, I hope you are having a good day."
} -Verifiable
# Act
Get-Greeting -Name "Owen"
# Assert
Should -InvokeVerifiable
}
}
Context "When the name is not Owen" {
It "Should say hello to the name" {
# Arrange
Mock Write-Warning { } -ParameterFilter
{ $Message -eq "Oh, I see you are not Owen" }
-Verifiable
Mock Write-Host { } -ParameterFilter
{ $Object -eq "Hello $Name, how are you?" -and
$ForegroundColor -eq "Cyan" } -Verifiable
$Name = 'Bob'
166
Chapter 9 MoCking Your WaY to SuCCeSS
# Act
Get-Greeting -Name $Name
# Assert
Should -InvokeVerifiable
}
}
}
In the first act (context block) when the protagonist’s name is “Owen”, we scrutinize whether the correct message is displayed. Our mock function for Write-Host is marked as Verifiable by appending -Verifiable to the end of the mock, affirming its importance in our performance.
In the second act (context block), when our protagonist takes a
different identity, the same level of scrutiny is applied. Here, we validate not only the message but also the foreground color, demonstrating the
nuanced capabilities of -ParameterFilter in tandem with -Verifiable.
Additionally, Write-Warning is treated with the same -Verifiable
parameter.
The validation occurs seamlessly in the Assert section, where the
should -InvokeVerifiable scrutinizes the mock’s execution. It will check that every mock with -Verifiable tacked on to the end has been correctly called and, if not, will fail the test.
Moreover, the beauty of this approach lies in its efficiency. With just one line of code, you can verify all your mocks at once, in our example, all three, ensuring a comprehensive and robust evaluation of your script’s performance.
Verifiable Mocks also shine when we want to ensure the invocation of
functions that we don’t necessarily want to test. For instance, imagine a function responsible for sending emails or writing to a log file. We might not want to delve into their intricacies, but we certainly want to guarantee their execution. Enter the power of Verifiable Mocks. By appending the 167
Chapter 9 MoCking Your WaY to SuCCeSS
-Verifiable switch to our mock commands, we command Pester to
scrutinize their performance. The subsequent should -InvokeVerifiable
in the Assert phase of the test then becomes our discerning audience,
ensuring that the functions took their rightful place on the stage.
Caution without a -ParameterFilter, should
-InvokeVerifiable will pass if the mock is called once or more
times. While this grants flexibility, it might compromise accuracy.
thus, striking a balance between flexibility and precision becomes a
vital consideration in your testing scripts.
In essence, Verifiable Mocks are the watchful guardians of your code,
ensuring that each function steps into the limelight as expected. By
bestowing upon them the -Verifiable badge, you guarantee not just code execution but an orchestrated performance that adheres to your script’s grand design. The theater of coding, with its splendid actors and vigilant critics, truly comes to life with the power of Verifiable Mocks.
Mocking Without Modules: Ensuring
Test Portability
Ensuring your tests run seamlessly across different environments is
crucial. Yet, when it comes to mocking functions or cmdlets that rely on specific modules or tools, guaranteeing this portability can be challenging.
Picture this: your tests run smoothly on your computer, where all the
necessary modules are installed, but the moment someone else attempts
to run them, or they are integrated into an automated CI/CD pipeline,
disaster strikes – the tests fail.
168
Chapter 9 MoCking Your WaY to SuCCeSS
Pester, in its wisdom, creates mock versions of functions or cmdlets,
expecting them to be present on the testing machine. This becomes
problematic when the tests are executed in environments lacking the
required modules. So how do you ensure your tests don’t fail in these
scenarios? The solution lies in creating a simplified version of the required function or cmdlet directly within your Pester test.
Consider this scenario: you’re testing a function called Get-
ADUserDisabledState. This function interacts with Get-ADUser, a cmdlet from the Active Directory module. Listin shows this function.
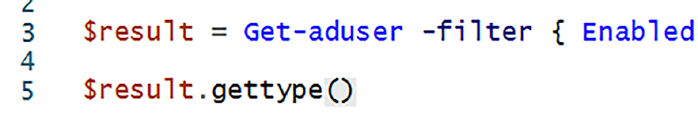
Listing 9-23. The sample Get-ADUserDisabledState function Function Get-ADUserDisabledState {
param (
[bool]$State = $false
)
$users = @(Get-Aduser -Filter {Enabled -eq $State}
-SearchBase = 'OU=Users,OU=MyCompany,DC=OH,DC-Local')
if ($state -eq $false) {
Write-Host "There are $($users.Count) disabled
user accounts:"
$users.name
} else {
Write-Host "There are $($users.Count) enabled
user accounts:"
$users.name
}
}
To guarantee test portability, you recreate Get-ADUser within your test environment.
169
Chapter 9 MoCking Your WaY to SuCCeSS
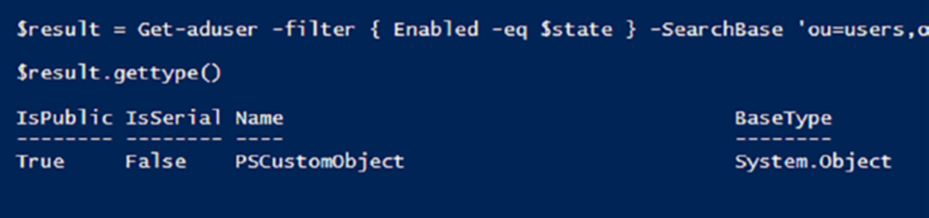
Before writing the test, I used GetType against the results of Get-ADUser to see what type of object was used to return the data as shown in Figurigure .
Figure 9-3. Using GetType to determine the returned object
Figure 9-4. It’s a PSCustomObject!
So I’ll mock with a PSCustom object too. Listin shows what the tests looks like initially.
Listing 9-24. Well, it worked on my computer!
Describe "Get-ADUserDisabledState" {
Context "When the user is disabled" {
It "Should return the disabled user" {
# Arrange
mock Get-ADUser {
[PSCustomObject]@{
Name = "Test User1"
170
Chapter 9 MoCking Your WaY to SuCCeSS
Enabled = $false
}
}
# Act
$expected = Get-ADUserDisabledState -State $false
# Assert
$expected | Should -Be "Test User1"
}
}
Context "When the user is enabled" {
It "Should return the enabled user" {
# Arrange
mock Get-ADUser {
[PSCustomObject]@{
Name = "Test User2"
Enabled = $True
}
}
# Act
$expected = Get-ADUserDisabledState -State $true
#Assert
$expected | Should -Be "Test User2"
}
}
}
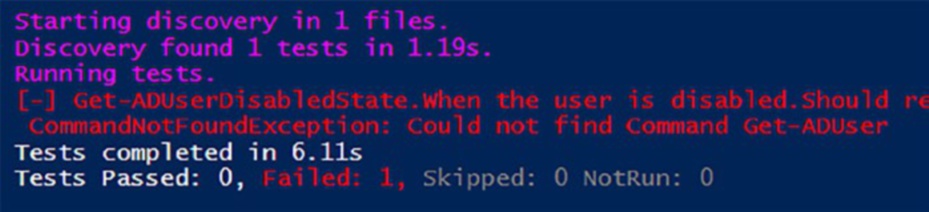
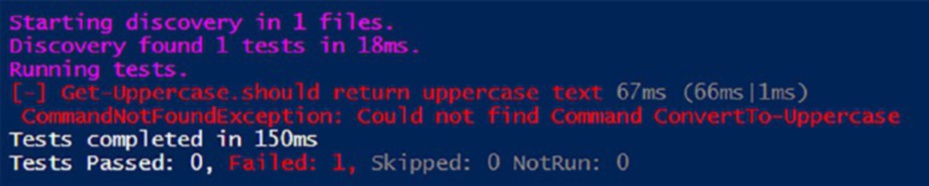
If I run the test on a system that does not have access to Get-ADUser, the test fails (Figure ). And tells you in no uncertain terms, “Could not find Command Get-ADuser”
171
Chapter 9 MoCking Your WaY to SuCCeSS
Figure 9-5. The test failed because the AD cmdlets were not installed on this computer
The solution is to define a blank function of the same name within
your test, as demonstrated by Listing ithin the BeforeAll script block.
Listing 9-25. It’s an easy solution, simply define a blank function Describe "Get-ADUserDisabledState" {
beforeAll {
Function Get-ADUser {}
Mock Write-Host {}
}
Context "When the user is disabled" {
It "Should return the disabled user" {
# Arrange
mock Get-ADUser {
[PSCustomObject]@{
Name = "Test User1"
Enabled = $false
}
}
# Act
$expected = Get-ADUserDisabledState -State $false
172
Chapter 9 MoCking Your WaY to SuCCeSS
# Assert
$expected | Should -Be "Test User1"
}
}
Context "When the user is enabled" {
It "Should return the enabled user" {
# Arrange
mock Get-ADUser {
[PSCustomObject]@{
Name = "Test User2"
Enabled = $True
}
}
# Act
$expected = Get-ADUserDisabledState -State $true
#Assert
$expected | Should -Be "Test User2"
}
}
}
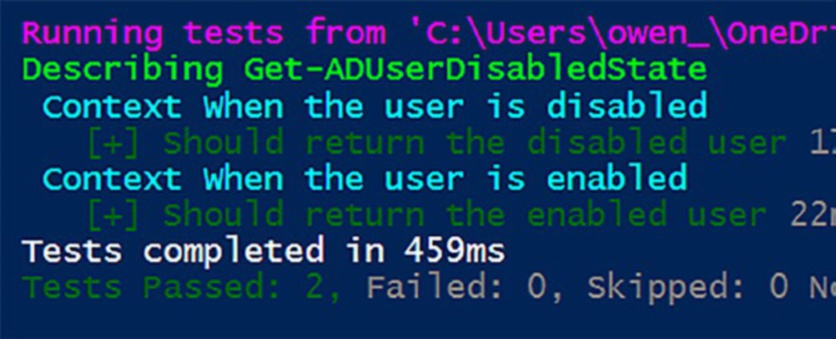
Figurw shows the results of the “dummy” function: the test suite passes with flying colors.
173
Chapter 9 MoCking Your WaY to SuCCeSS
Figure 9-6. The test passes even though Get-ADUser is not installed on the computer
By simulating the necessary functions directly within your test, you
ensure that the tests remain robust and functional, regardless of the
absence of specific modules in different environments. This technique
ensures your tests are not just reliable on your machine but are also ready to perform flawlessly on any stage, ensuring the integrity of your code across diverse settings.
Mocking with Modules: Navigating
Module Scopes
Modules, the building blocks of PowerShell’s modular architecture, often contain a mix of public and private functions. Testing these modules,
especially the private functions, presents a unique challenge. Consider a scenario where a module defines a private function internally used
by a public function. How do you mock this private function for testing purposes?
In our example module, seen in Listing ublic function Get-UpperCase internally calls the private function ConvertTo-UpperCase to perform its task.
174
Chapter 9 MoCking Your WaY to SuCCeSS
Listing 9-26. Our sample module that calls a private function Function ConvertTo-UpperCase {
param (
[string]$text
)
return $text.ToUpper()
}
Function Get-UpperCase {
param (
[string]$Text
)
return ConvertTo-UpperCase -text $Text
}
Export-ModuleMember -Function Get-UpperCase
When attempting to mock the private function without specifying its
module context as shown in Listing , your test might fail to locate the function, leading to unexpected results.
Listing 9-27. The test fails to locate the private function BeforeAll {
Import-Module "$PSScriptRoot\Mock_module01.psm1"
-Force -PassThru
}
Describe "Get-Uppercase" {
It "should return uppercase text" {
mock ConvertTo-Uppercase -MockWith {"HELLO"}
$expected = Get-UpperCase -Text "hello"
175
Chapter 9 MoCking Your WaY to SuCCeSS
$expected | should -be "HELLO"
}
}
Figurws the results of executing Listing
Figure 9-7. The test fails – it could not find the private function
“ConvertTo-UpperCase”
Two common approaches to mitigate this is to use the -ModuleName
parameter or encapsulate the test within an InModuleScope script block.
Using the -ModuleName Parameter
By specifying the module name when mocking a private function, you
explicitly indicate the module context for the mock. In the test scenario, this approach ensures the mock operates within the correct scope,
enabling the test to locate the private function and perform as expected.
Not only does this method provide speed advantages, but it also enhances code clarity. You clearly define the module context, making your tests more understandable for both yourself and other developers.
You are only required to add -ModuleName to any Mock or Should
-Invoke commands within your test suite as demonstrated by Listing
Listing 9-28. Using -ModuleName for speed and clarity
BeforeAll {
Import-Module "$PSScriptRoot\<moduleName>.psm1"
176
Chapter 9 MoCking Your WaY to SuCCeSS
-Force -PassThru
}
Describe "Get-Uppercase" {
It "should return uppercase text" {
# Arrange
mock ConvertTo-Uppercase -MockWith {"HELLO"}
-ModuleName moduleName
# Act
$expected = Get-UpperCase -Text "hello"
# Assert
$expected | should -be "HELLO"
should -invoke ConvertTo-UpperCase -times 1
-exactly -ModuleName moduleName
}
}
Note this will only allow you to mock private functions that are called by your public functions. i
(Get-Uppercase) calls the private function (ConvertTo-Uppercase).
if you wish to write a unit test for a private function directly, you will need to use inModuleScope.
Using InModuleScope Script Block
Alternatively, you can encapsulate your tests within an InModuleScope script block. This approach ensures everything inside the block runs
within the module scope. However, be cautious, as this method makes
177
Chapter 9 MoCking Your WaY to SuCCeSS
both public and private functions in the module available to your tests, potentially leading to undesired consequences. Listin demonstrates this approach.
Listing 9-29. Sometimes you have no option but to use
InModuleScope
BeforeAll {
Import-Module "$PSScriptRoot\<moduleName>.psm1"
-Force -PassThru
}
Describe "Get-Uppercase" {
It "should return uppercase text" {
InModuleScope 'moduleName' {
# Arrange
mock ConvertTo-UpperCase -MockWith {"HELLO"}
# Act
$expected = Get-UpperCase -Text "hello"
# Assert
$expected | should -be "HELLO"
should -invoke ConvertTo-UpperCase -times
1 -exactly
}
}
}
To follow best practice, you should avoid wrapping InModuleScope
around your Describe or It blocks – sure, it can be done, but you will end up slowing down the Discovery Phase and won’t ensure that your
functions are properly tested.
178
Chapter 9 MoCking Your WaY to SuCCeSS
Note using
InModuleScope has a significant benefit: it provides
access to all functions within the module, both public and private.
this means you can call a private function in your test script, rather than mock it, even if it hasn’t been exported by the module. it’s
also handy if you need to write a unit test for a private function in
the module.
While both methods achieve the goal, using the -ModuleName
parameter is considered best practice due to its speed, specificity, and clarity advantages. This explicit indication of the module context makes your tests robust, efficient, and easy to comprehend, ensuring the smooth navigation of module scopes during testing.
Summary
While this chapter may have tested your persistence, the invaluable skills you’ve gained are well worth the effort. You’ve embarked on a journey
into the art of mocking in PowerShell, a fundamental practice for powerful and effective testing. By exploring the sample code, delving into diverse examples, and rereading key concepts, you’ve equipped yourself with the knowledge to transform how you test your scripts.
Through various examples and scenarios, you’ve explored the nuances
of mocking, from simple function mocks to more complex interactions
involving parameters and module scopes.
You’ve discovered the power of -ParameterFilter in honing
your mocks to specific conditions, ensuring precise testing of diverse code paths. You’ve explored the concept of Verifiable Mocks, vigilant
gatekeepers that validate function invocations, bolstering the integrity of your tests. Moreover, you’ve learned the art of mocking private functions within modules, crucial for testing encapsulated code.
179
Chapter 9 MoCking Your WaY to SuCCeSS
By mastering these techniques, you’ve gained the power to
comprehensively validate your PowerShell scripts. Whether it’s simulating specific scenarios, validating complex interactions, or testing encapsulated code, you now possess the tools to elevate your testing game.
Beyond This Chapter
Remember, effective testing is not just about verifying your code;
it’s about ensuring its robustness under diverse conditions. Mocking
empowers you to create controlled environments, simulate various
situations, and assess your scripts’ behavior with confidence.
Your Journey Continues
Now that you’ve mastered the art of mocking, are you curious about how much of your code you’re actually testing? Dive into the captivating world of code coverage in the next chapter, where we’ll unveil techniques to measure and maximize the effectiveness of your test suite. Get ready to unveil hidden corners of your code and ensure its robustness like never before!
180
CHAPTER 10
Unveiling the Secrets
of Code Coverage
By now, you’ve mastered the art of crafting powerful Pester tests. But have you ever wondered: are you testing all the corners of your code? This is where the intriguing concept of code coverage comes into play.
Imagine having a map that visualizes which areas of your code
have been thoroughly tested and identifies any hidden pathways left
unexplored. Code coverage gives you just that! In this chapter, you’ll embark on a journey to
Demystify code coverage: Understand what it is,
why it matters, and the different metrics used to
measure it.
Generating insights: Discover how to interpret
coverage reports, identify untested areas, and
prioritize future testing efforts.
Optimizing tests and code: Utilize insights from
coverage data to refine your testing strategy,
write targeted tests, and ensure your code is well
protected from unseen issues.
By the end of this chapter, you’ll understand how to maximize your
testing investment and achieve peace of mind knowing your code is robust and ready for any challenge.
© Owen Heaume 2024
181
O. Heaume, Getting Started with Pester 5
Chapter 10 Unveiling the SeCretS of Code Coverage
Demystifying Code Coverage: Unveiling
the Map of Your Code’s Tested Terrain
Imagine building a magnificent castle, brick by painstaking brick. But how can you be sure every brick is strong and contributes to its overall stability?
Code coverage serves as the architect’s blueprint, highlighting which areas of your code have been tested and ensuring no hidden weaknesses remain undetected.
In essence, code coverage measures the percentage of your code that
is executed during testing. It’s like having a map that lights up specific regions when you walk over them, revealing how thoroughly you’ve
explored your code’s landscape. But why is this so important?
Well, untested code is like an unexplored path in the wilderness,
potentially harboring unexpected pitfalls. High code coverage minimizes the chance of hidden bugs lurking in the shadows, protecting your scripts from unexpected behavior and ensuring reliability. Imagine blindly firing arrows into the darkness hoping to hit the target. Code coverage reports act as spotlights, illuminating areas that haven’t been tested, allowing you to prioritize and streamline your testing efforts for maximum impact.
Knowing your code is well tested fosters confidence and reduces anxiety.
With high coverage, you can sleep soundly knowing you’ve covered all the bases and your scripts are prepared to handle real-world situations.
Metrics: Unveiling the Degrees of Coverage
Just like maps use different symbols to represent terrain, code coverage utilizes various metrics to gauge your testing comprehensiveness. For
instance:
Statement coverage: Tracks the percentage of
individual code statements executed during tests.
182
Chapter 10 Unveiling the SeCretS of Code Coverage
Branch coverage: Measures how well different
decision points (e.g., if-else statements) are
exercised by tests.
Function coverage: Ensures each function or
method within your code is called at least once
during testing.
Remember, a single metric doesn’t paint the whole picture. A healthy
mix of metrics helps you analyze different aspects of your code’s coverage and create a more comprehensive understanding.
Sample Functions and Tests
Before delving into code coverage, let’s visit our sample functions:
Compliment-Yourself and Compliment-Owen shown in Listing .
Listing 10-1. Our sample functions are contained in our Functions.ps1 file
function Compliment-Yourself {
$randomNumber = Get-Random -Minimum 1 -Maximum 3
if ($randomNumber -eq 1) {
return 'You are doing great!'
} else {
return 'Keep up the good work!'
}
}
Function Compliment-Owen {
$randomNumber = Get-Random -Minimum 1 -Maximum 3
183
Chapter 10 Unveiling the SeCretS of Code Coverage
if ($randomNumber -eq 1) {
return 'Well done Owen, you are doing great!'
} elseif ($randomNumber -eq 2) {
return 'Hey Owen! Keep up the good work!'
} else {
return 'This is a great chapter!'
}
}
These functions are accompanied by the Pester tests demonstrated by
Listin
Listing 10-2. The pester tests: our Functions.tests.ps1 file beforeall {
. "$psscriptroot\Functions.ps1"
}
Describe 'Testing Compliment-Yourself and Compliment-Owen' {
It 'Compliments yourself with "You are doing great!"' {
# Mocking the random number to ensure the
specific branch is tested
Mock Get-Random { 1 }
$result = Compliment-Yourself
$result | Should -Be 'You are doing great!'
}
It 'Compliments Owen with " Well done Owen,
You are doing great!"' {
# Mocking the random number to ensure the
specific branch is tested
Mock Get-Random { 1 }
$result = Compliment-Owen
184
Chapter 10 Unveiling the SeCretS of Code Coverage
$result | Should -Be 'Well done Owen, you
are doing great!'
}
}
Now, let’s see what code coverage can do for us in helping to identify areas for testing improvement by creating our configuration file.
Pester Code Coverage Configuration
Configuring a Pester configuration file is our first step. In Listine leverage New-PesterConfiguration to specify the path to our test file and activate code coverage. We’ve saved this separate file as Test.ps1.
Listing 10-3. Our Pester Code Coverage Configuration Item saved as Test.ps1
$config = New-PesterConfiguration
$config.Run.Path = ".\src\Functions.tests.ps1"
$config.CodeCoverage.Enabled = $true
Invoke-Pester -Configuration $config
Let’s take a moment and walk through step-by-step what we’ve
just done.
Step 1: Utilizing New-PesterConfiguration
The core of your configuration endeavors lies in the New-PesterConfiguration cmdlet. This command sets the stage for defining how Pester should conduct its tests, including the critical aspect of code coverage.
# Creating a new Pester configuration object
$config = New-PesterConfiguration
185
Chapter 10 Unveiling the SeCretS of Code Coverage
This command initializes a configuration object, a bit like creating a blueprint that informs Pester exactly what to do. Think of it as the master plan for orchestrating your tests, ensuring they align with your specific needs and goals.
Step 2: Setting the Test File Path
With the configuration object in hand, the next step is to specify the path to your test file. This ensures Pester knows exactly where to find and execute the tests. The Run.Path property serves this purpose.
# Setting the path to the test file
$config.Run.Path = ".\src\Functions.tests.ps1"
By defining the test file path, you’re providing Pester with a roadmap to navigate through your tests and execute them systematically.
Step 3: Activating Code Coverage
Now comes the pivotal moment – activating code coverage.
# Activating code coverage
$config.CodeCoverage.Enabled = $true
When you enable CodeCoverage.Enabled, you’re telling Pester to
unlock a whole new level of insight into your code – it’s like giving it a map to explore every line that your tests touch.
Step 4: Invoking Pester with the Configuration
Finally, the Invoke-Pester cmdlet, coupled with your configuration
object, is the catalyst for initiating the testing process.
# Invoking Pester with the configuration
Invoke-Pester -Configuration $config
186
Chapter 10 Unveiling the SeCretS of Code Coverage
This command kicks off the testing journey, leveraging the detailed
configuration you’ve constructed. Pester now traverses through your tests, executes them, and, thanks to code coverage activation, provides insights into how thoroughly your code is being tested.
Running the Configuration
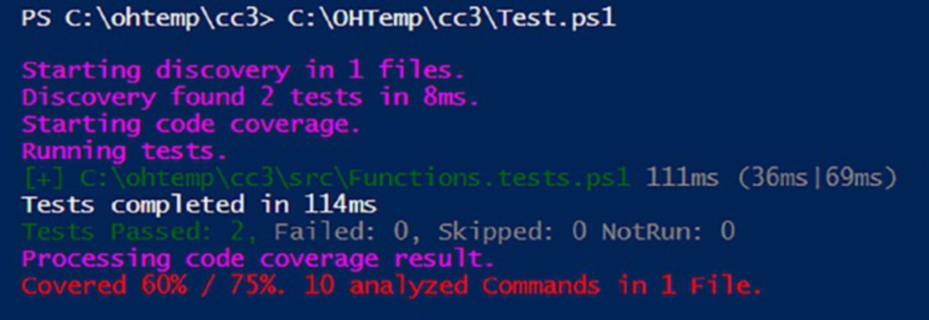
Now we have our configuration file saved as Test.ps1, we can run it. Doing so will execute our tests as well as present us with some code coverage metrics as shown in Figur.
Figure 10-1. Code coverage metrics
Breaking Down the Metrics
By default, the code coverage configuration employs a 75% threshold for the amount of code that needs to be covered for a successful pass. In the current report, we’ve attained a coverage rate of 60% against this 75%
benchmark. Clearly, there is room for enhancement in our testing efforts!
On closer inspection of the Functions.tests.ps1 file we can see we inadvertently forgot to test for this particular section of code in our Compliment-Owen function:
...elseif ($randomNumber -eq 2) {
return 'Hey Owen! Keep up the good work!' ...
187
Chapter 10 Unveiling the SeCretS of Code Coverage
Let’s fix this and add a test for it. Listing ws the revised
.tests file.
Listing 10-4. Adding a new test for better code coverage beforeall {
. "$psscriptroot\Functions.ps1"
}
Describe 'Testing Compliment-Yourself and Compliment-Owen' {
It 'Compliments yourself with "You are doing great!"' {
# Mocking the random number to ensure the
specific branch is tested
Mock Get-Random { 1 }
$result = Compliment-Yourself
$result | Should -Be 'You are doing great!'
}
It 'Compliments Owen with " Well done Owen, You are doing
great!"' {
# Mocking the random number to ensure the
specific branch is tested
Mock Get-Random { 1 }
$result = Compliment-Owen
$result | Should -Be 'Well done Owen, you are
doing great!'
}
It 'Compliments Owen with "Hey Owen! Keep up the
good work!"' {
# Mocking the random number to ensure the
specific branch is tested
Mock Get-Random { 2 }
188
Chapter 10 Unveiling the SeCretS of Code Coverage
$result = Compliment-Owen
$result | Should -Be 'Hey Owen! Keep up the
good work!'
}
}
Executing our Pester configuration file for code coverage now reveals
the ensuing metrics, as depicted in Figure .
Figure 10-2. Success! We have green lights!
Fantastic news! We’ve reached an impressive 80% of our initial
75% target. However, aiming higher, I prefer a 90% code coverage. To
accomplish this, we can elevate our aspirations by including the following line in our Pester Configuration file:
$config.CodeCoverage.CoveragePercentTarget = 90
With this addition, we are now striving to achieve a commendable 90%
code coverage as demonstrated in Listing
189
Chapter 10 Unveiling the SeCretS of Code Coverage
Listing 10-5. Setting the target code coverage to 90%
$config = New-PesterConfiguration
$config.Run.Path = ".\src\Functions.tests.ps1"
$config.CodeCoverage.Enabled = $true
$config.CodeCoverage.CoveragePercentTarget = 90
Invoke-Pester -Configuration $config
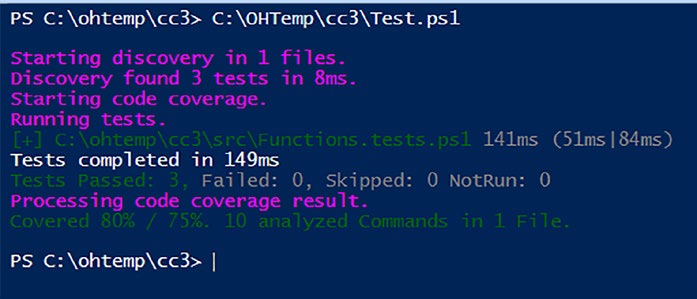
If we now run the code coverage configuration file again, we see the
following metrics as shown in Figur.
Figure 10-3. We are now 10% shy of our target
With the current coverage standing at 80%, there’s a remaining 10% to
fulfill our target. To pinpoint precisely what areas we’ve missed in our tests, let’s introduce an additional line to our Pester configuration file:
$config.Output.Verbosity = "Detailed"
This adjustment enhances the verbosity of our output, providing
detailed insights into the areas that require further testing to meet our ambitious 90% code coverage target. Listing shows the configuration file with our new addition.
190
Chapter 10 Unveiling the SeCretS of Code Coverage
Listing 10-6. The new Pester configuration file
$config = New-PesterConfiguration
$config.Run.Path = ".\src\Functions.tests.ps1"
$config.CodeCoverage.Enabled = $true
$config.CodeCoverage.CoveragePercentTarget = 90
$config.Output.Verbosity = "Detailed"
Invoke-Pester -Configuration $config
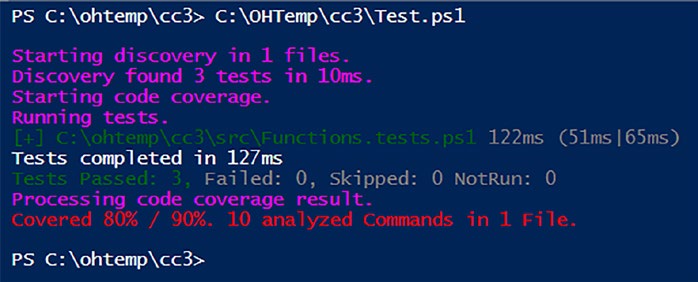
Running our configuration file now gives us the following metrics as
shown in Figure
Figure 10-4. Detailed metrics
Indeed, the decision to elevate the verbosity level to “Detailed”
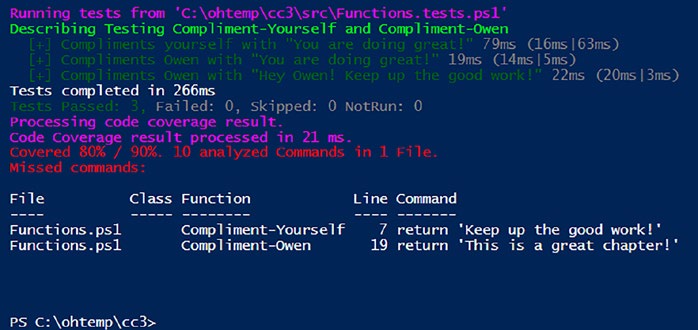
proves to be an excellent move. This adjustment not only provides a more intricate view of our test results but also illuminates exactly what has been overlooked in our tests. The metrics now clearly indicate that line 7 in the Compliment-Yourself function and line 19 in the Compliment-Owen function were not executed under any of the tests within our test suite.
191
Chapter 10 Unveiling the SeCretS of Code Coverage
With this detailed information, we can discern which functions, the
specific line numbers, and precisely what needs to be tested to address the gaps in our coverage.
Listinoudly showcases our refined .tests file, adorned with the latest additions to our test suite. These new tests have been carefully incorporated to address the areas we previously missed, as highlighted by the detailed insights gleaned from our code coverage metrics.
Listing 10-7. Two new tests have been added, one for each function as identified by the code coverage metrics
beforeall {
. "$psscriptroot\Functions.ps1"
}
Describe 'Testing Compliment-Yourself and
Compliment-Owen function' {
It 'Compliments yourself with "You are doing great!"' {
# Mocking the random number to ensure the
specific branch is tested
Mock Get-Random { 1 }
$result = Compliment-Yourself
$result | Should -Be 'You are doing great!'
}
It 'Compliments yourself with "Keep up the good work!"' {
# Mocking the random number to ensure the
specific branch is tested
Mock Get-Random { 2 }
$result = Compliment-Yourself
$result | Should -Be 'Keep up the good work!'
}
192
Chapter 10 Unveiling the SeCretS of Code Coverage
It 'Compliments Owen with "Well done Owen,
you are doing great!"' {
# Mocking the random number to ensure the
specific branch is tested
Mock Get-Random { 1 }
$result = Compliment-Owen
$result | Should -Be 'Well done Owen,
you are doing great!'
}
It 'Compliments Owen with "Hey Owen!
Keep up the good work!"' {
# Mocking the random number to ensure the
specific branch is tested
Mock Get-Random { 2 }
$result = Compliment-Owen
$result | Should -Be 'Hey Owen! Keep up
the good work!'
}
It 'Compliments Owen with "This is a great chapter!"' {
# Mocking the random number to ensure the
specific branch is tested
Mock Get-Random { 3 }
$result = Compliment-Owen
$result | Should -Be 'This is a great chapter!'
}
}
Each line in this revised file is a testament to our commitment to
thorough testing.
If we run the code coverage configuration once more, we are presented
with the metrics as shown in Figur
193
Chapter 10 Unveiling the SeCretS of Code Coverage
Figure 10-5. We have 100% code coverage!
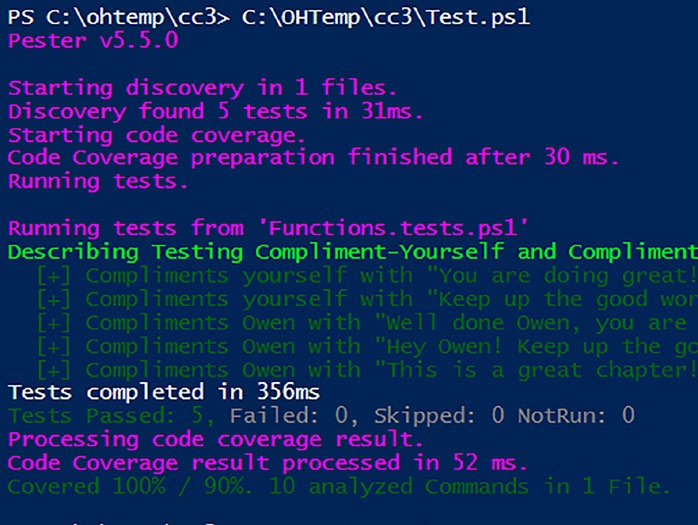
Triumphant news! We’ve achieved the pinnacle of success – a perfect
100%! This stellar outcome surpasses our initial target of 90%, signifying that every nook and cranny of our code has been thoroughly covered by
our tests.
Best Practices for Code Coverage Targets
There isn’t a universally defined “best practice” percentage for code
coverage targets in Pester or any other testing framework. The appropriate target for code coverage can vary based on the specific needs and goals of a project, team, or organization.
194
Chapter 10 Unveiling the SeCretS of Code Coverage
Some projects may aim for a high code coverage target, such as
90% or more, to ensure a comprehensive set of tests covers most of the codebase. This can be particularly important in safety-critical systems or environments with stringent quality assurance requirements.
On the other hand, some projects may find a lower code coverage
target, like the default 75% set by Pester, to be sufficient. I saw a video with Pester maintainer Jakub Jares where he was asked his thoughts on what the ideal percentage should be. He replied 75%, which is why it is the default setting. For me personally, this is too low, and in my workplace, we have this set at 90%, but it does nicely demonstrate how there really is no perfect number; it truly is different for all. Remember though, setting a realistic and achievable code coverage target is crucial, as overly ambitious targets can lead to diminishing returns and unnecessary efforts in some cases.
Running Coverage Across a Directory
Previously, we pointed $Config.Run.Path to a specific .tests file. But what if you have multiple test files in a directory? No sweat! Simply update the path to encompass the entire root directory:
$config.Run.Path = ".\code"
Alternatively, achieve the same result with
$config.CodeCoverage.Path
This will override the path from the general settings if present.
Listing ws our revised configuration file.
195
Chapter 10 Unveiling the SeCretS of Code Coverage
Listing 10-8. The revised configuration file now points to a root directory for our tests and code to be tested
$config = New-PesterConfiguration
$config.CodeCoverage.Enabled = $true
$config.CodeCoverage.CoveragePercentTarget = 90
$config.Output.Verbosity = "Detailed"
$config.CodeCoverage.Path = ".\src"
Invoke-Pester -Configuration $config
Important Keep your configuration file separate from your test files. if they share the same directory, pester may attempt to include code coverage metrics on itself, leading to unintended consequences.
Now, when you execute your configuration file, Pester will scan
all .tests files within the .\src directory and generate a comprehensive coverage report encompassing your entire codebase. This way, you
can ensure all your functions and scripts are thoroughly tested without manually specifying each file path.
Understanding Pester’s Coverage.xml
Every time you run a code coverage check, Pester graciously generates a coverage.xml file. This XML file is more than just a file; it’s a treasure trove of information about your test results. Think of it as a detailed report, documenting which parts of your code were tested and how thoroughly.
196
Chapter 10 Unveiling the SeCretS of Code Coverage
Why XML?
XML (eXtensible Markup Language) is a versatile and human-readable
format that represents structured data. In the context of Pester, the
coverage.xml file serves as a standardized way to communicate your
test results. This file can be understood not only by humans but also by external tools or programs designed to analyze and visualize test coverage.
How Can You Use It?
Imagine having a tool that visualizes your test coverage, highlights untested areas, or integrates with your continuous integration pipeline. (You will see how we can integrate CodeCoverage in Azure DevOps using this file in Chapthe coverage.xml file enables exactly that. External tools or programs can read this file and provide insights in a more easily readable way.
Customizing Output Path
If you prefer the coverage.xml file to reside in a specific location, you can customize the output path using $config.CodeCoverage.OutputPath in
your configuration file. For example:
$config.CodeCoverage.OutputPath = "path\to\coverage.xml"
In essence, the coverage.xml file is your gateway to deeper insights and collaboration with external tools to enhance your testing workflow.
Exploring Pester Configuration
In the journey of mastering Pester, the configuration file emerges as
a potent ally. Not only is it instrumental in shaping code coverage
parameters, but it also harbors a wealth of features that extend beyond just code coverage analysis. Let’s take a brief look at the Pester configuration file and how you can unravel its capabilities.
197
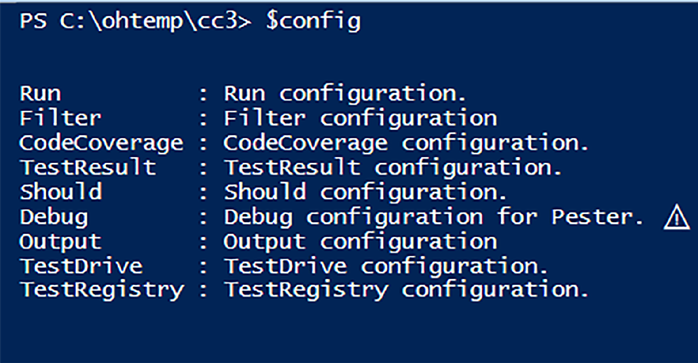
Chapter 10 Unveiling the SeCretS of Code Coverage
Creating the Pester Configuration File
The Pester configuration file is your command center, orchestrating
how tests are executed and providing valuable insights into various
testing aspects. In our example at the start of the chapter, we created a configuration file using the command
$config = New-PesterConfiguration
This simple line lays the foundation for a dynamic configuration object named $config, which encapsulates the settings governing your tests.
Diving into Configuration Options
Once your configuration file is in place, the exploration begins. You can gain a comprehensive overview of available options by typing $config
in the console as shown in Figure emember, $config is just a variable – you can name it anything you like.)
Figure 10-6. Exploring your configuration object
198
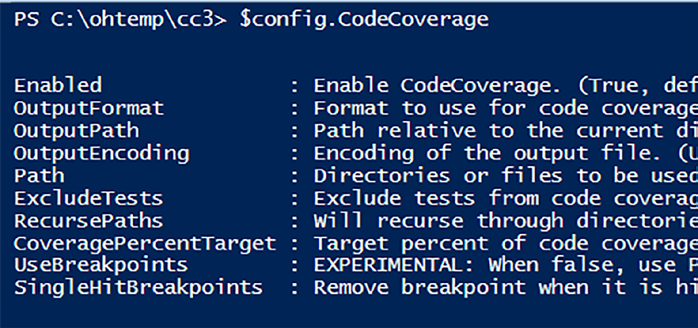
Chapter 10 Unveiling the SeCretS of Code Coverage
Executing this command in your console reveals a plethora of
parameters encapsulated within the configuration object. It’s like having a control panel at your fingertips, allowing you to fine-tune your testing environment.
Drilling Down into Specific Parameters
Suppose you’re eager to delve deeper into a particular aspect, let’s
pick CodeCoverage from the displayed list. To unravel the mysteries hidden within this facet of the configuration, you simply type $config.
CodeCoverage as depicted in Figur.
Figure 10-7. Drilling deeper into the configuration object, each item has its own line of help text
Using this dot notation to access CodeCoverage provides a view of all
parameters associated with it. From coverage percent targets to output paths, every nuance is at your disposal for customization.
The beauty of the Pester configuration lies in its versatility. Beyond code coverage, you can configure all sorts of aspects, and as you embark on this exploration, remember that learning about each parameter
empowers you to tailor your testing environment according to the unique 199
Chapter 10 Unveiling the SeCretS of Code Coverage
needs of your scripts and projects. Take a few minutes to explore and try out some of these configuration options – even if you don’t use them now, understanding what is available and how they work will elevate your game in the long term.
Summary
In this chapter, we demystified code coverage and harnessed its power
using a Pester configuration file.
We explored why testing every code corner matters for robust and
reliable scripts and utilized simple steps to generate basic code coverage reports. You learned how to tailor reports and set specific targets for coverage goals and finally saw how to identify untested areas and write targeted tests to achieve comprehensive coverage.
Next up: A whole new world awaits. In Chapte’ll delve into the exciting realm of DevOps.
200
CHAPTER 11
Streamlining Testing
with Azure DevOps
and Pester
Ready to take your PowerShell scripting to the next level? In this chapter, we’ll dive into the world of Azure DevOps, unlocking the power of
automated testing and code coverage reporting. We’ll explore the magic of YAML (Yet Another Markup Language), crafting a customized script to seamlessly integrate Pester tests into your Azure DevOps pipeline.
Forget tedious manual testing. This chapter empowers you to:
Master the Azure DevOps pipeline: Get hands-
on with YAML, understanding its key components
without getting bogged down in technical jargon.
Unleash Pester’s testing prowess: Configure your
pipeline to automatically execute Pester tests,
ensuring your scripts are battle-ready.
Shine a light on code coverage: Analyze detailed
reports, gaining valuable insights into your code’s
strengths and weaknesses.
Celebrate success with style: Earn the coveted
“Azure Pipelines Succeeded” badge, proudly
displaying your testing achievements.
© Owen Heaume 2024
201
O. Heaume, Getting Started with Pester 5
Chapter 11 Streamlining teSting with azure DevOpS anD peSter So, roll up your sleeves and prepare to unlock a new dimension of
efficiency and quality control for your PowerShell scripts. By the end of this chapter, you’ll be confidently running automated tests and generating insightful code coverage reports, becoming a true scripting master!
Bridging the Gap: The Purpose
of Automation
Having celebrated the prospect of running automated tests and generating insightful code coverage reports, it’s crucial to understand the core
motivation behind this transition to Azure DevOps.
Why Automate Pester Tests and Code Coverage?
In the dynamic landscape of PowerShell scripting, efficiency and
quality control stand as paramount objectives. While manual testing is undoubtedly valuable, the integration of Azure DevOps and Pester aims to elevate your scripting endeavors to new heights. Here’s why:
1. Streamlined Testing Workflow
– Automation eliminates the need for manual
execution of tests, saving time and effort.
– Continuous integration (CI) in Azure DevOps
ensures that tests run seamlessly with every code
change, maintaining a consistent and reliable testing
workflow.
2. Early Detection of Issues
– Automated tests, including Pester tests, can swiftly
identify potential issues as soon as they arise.
202
Chapter 11 Streamlining teSting with azure DevOpS anD peSter
– By integrating testing into the development pipeline,
you catch bugs and discrepancies early in the pro-
cess, preventing them from evolving into larger
problems.
3. Code Coverage Insights
– Code coverage reports go beyond traditional testing
by providing a visual map of which parts of your
code are exercised during testing.
– Insightful reports guide you in strengthening areas
that may be less tested, enhancing the overall reli-
ability and resilience of your scripts.
4. Efficient Quality Control
– Automated pipelines ensure that each code change
undergoes thorough testing, enhancing the overall
quality control of your scripts.
– With Azure DevOps integration, you establish a
standardized and efficient approach to maintain
high-quality PowerShell scripts.
5. Continuous Improvement
– Regular automated testing and code coverage
analysis pave the way for continuous improvement.
– You can iteratively enhance your scripts based on
feedback from automated tests, fostering a culture of
constant refinement.
203
Chapter 11 Streamlining teSting with azure DevOpS anD peSter Unlocking a New Dimension
By automating Pester tests and code coverage within Azure DevOps, you
unlock a new dimension of scripting efficiency. It’s not just about running tests; it’s a strategic move toward establishing a robust and streamlined testing process. As you embark on the journey into Azure DevOps in the upcoming sections, envision this integration as a gateway to a scripting realm where efficiency, reliability, and continuous improvement are the guiding principles.
Diving into Azure DevOps – Setting
Up the Stage
Let us transform your script testing with the magic of Azure DevOps! The whole of this chapter will take place within the DevOps portal. While
setting up a complete DevOps environment falls outside this book’s scope, we’ll assume you have one ready to unleash its power.
Ready, Set, Code
If you want to follow along, this chapter uses the following files from Chapt
– Functions.ps1 (Listing 10-1)
– Functions.tests.ps1 (Listing 10-7)
– Test.ps1 (Listing 10-8)
Let’s begin by integrating these files into your Azure DevOps
adventure:
204
Chapter 11 Streamlining teSting with azure DevOpS anD peSter 1. Head to your Azure DevOps project: Navigate
to your existing project where you’ll house your
DevOps magic.
2. Explore the Repo: Within your project, locate the
Repos section and select the repository you’ll use, in
this case, named “Demo.”
3. Create a chapter folder: Inside the repository,
create a new folder named “Chapter11” to organize
your files neatly.
4. Create a src folder: Inside the Chapter folder create a new folder named “src” that will hold our
functions and tests files.
5. Upload your files: Drag and drop your Functions.ps1
and Functions.tests.ps1 into the newly created
“Chapter11\src” folder and drop Test.ps1 into the
Chapter folder as shown in Figure
205
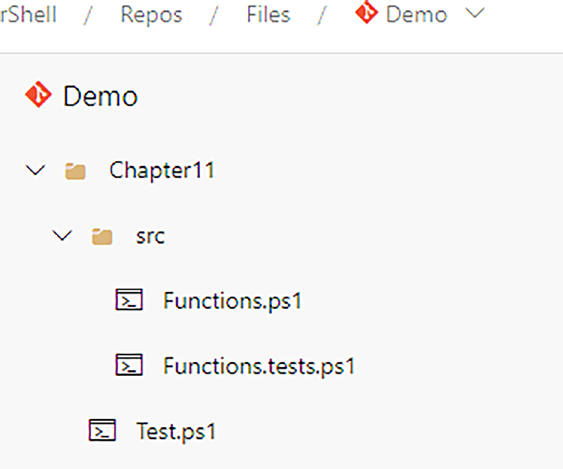
Chapter 11 Streamlining teSting with azure DevOpS anD peSter
Figure 11-1. The directory and file structure in DevOps
By completing these steps, you’ve successfully planted the seeds for
automation within your Azure DevOps project. The next chapter section
will guide you through building the YAML pipeline that unleashes the
testing power of Pester!
You Ain’t My Language, but You’re Useful:
Working with YAML Pipelines
YAML (Yet Another Markup Language) often gets a reputation for
being tricky to grasp. But hey, remember that classic advice, “If you find something difficult, do more of it”? Well, consider this chapter your chance to conquer YAML and unlock its power!
206
Chapter 11 Streamlining teSting with azure DevOpS anD peSter Don’t worry; we won’t throw you into the deep end. While we won’t
delve into every intricate detail of YAML, we’ll provide a clear and guided walkthrough of the specific YAML file we’ll be using. By following along step-by-step, you’ll gain practical experience and build confidence in configuring your own pipelines.
So, let’s shed the hesitation, embrace the YAML journey, and pave the
way for automated testing awesomeness!
Diving into the YAML Depths:
Azure- Pipeline.yaml
Alright, deep breath, everyone! Now that we’ve planted the seeds of
automation, let’s delve into the heart of our pipeline: the Azure-Pipeline.
yaml file. Don’t let the code in Listin scare you! We’ll dissect it layer by layer, transforming it into a familiar friend.
Listing 11-1. Azure-Pipeline.yaml
trigger:
- main
pool:
vmImage: windows-latest
steps:
- task: PowerShell@2
inputs:
targetType: 'inline'
script: |
# Set the working directory
Set-Location -Path "$(System.DefaultWorkingDirectory)/
Chapter11"
207
Chapter 11 Streamlining teSting with azure DevOpS anD peSter
# Run the Test.ps1 script
.\Test.ps1
displayName: 'Run Pester Tests'
- task: PublishCodeCoverageResults@1
inputs:
codeCoverageTool: 'JaCoCo'
summaryFileLocation: '$(System.DefaultWorkingDirectory)/
Chapter11/coverage.xml'
pathToSources: '$(System.DefaultWorkingDirectory)/
Chapter11'
displayName: 'Publish Code Coverage Results'
Let's Break It Down
– Trigger: This section tells Azure DevOps when to kick
off the pipeline. Here, it starts whenever changes are
pushed to the “main” branch.
– Pool: This specifies the environment where the pipe-
line runs. We’re using a preconfigured “windows-
latest” virtual machine.
– Steps: This is where the magic happens! Here are the
two critical steps:
• Run Pester Tests
• targetType: 'inline' : We’re defining the PowerShell
code directly within the script tag.
• Set-Location: Navigates to the “Chapter11” folder
where our files reside.
208
Chapter 11 Streamlining teSting with azure DevOpS anD peSter
• .\Test.ps1: Executes the Test.ps1 script, initiating
our Pester tests.
• displayName: Assigns a user-friendly name for
clarity. This appears in the Pipeline console view
we will see when running the pipeline.
• Publish Code Coverage Results
• codeCoverageTool: 'JaCoCo' : Specifies the code
coverage tool (we’re using JaCoCo in this example
as this is the default tool configured in our Pester
configuration item).
• summaryFileLocation: Defines where the code
coverage report (coverage.xml) is stored.
• pathToSources: Indicates the location of our
source code files for analysis.
• displayName: Helps us easily identify this step’s
purpose.
YAML Quirks: Mind the Spaces!
YAML thrives on order, and that includes spaces. A misplaced space can throw your entire pipeline into chaos! Here’s how:
Indentation matters: Indentation defines code
blocks and nesting, so pay close attention to those
spaces (usually 2 or 4 per level). One wrong indent
and your pipeline might not even run.
Colon consistency: Colons (“:”) mark the end of
key-value pairs. Ensure they’re always present and
followed by a space to avoid errors.
209
Chapter 11 Streamlining teSting with azure DevOpS anD peSter String awareness: Strings enclosed in quotes (“)
can be tricky. Watch out for extra spaces within the
quotes, as they become part of the string itself.
Remember, consistency is key. Stick to a defined indentation style and double-check your colons and quotes to keep your YAML pipelines
running smoothly.
Beyond the Surface: Exploring YAML’s
Potential
While we’ve navigated the core components of this YAML file, remember
that it’s just the tip of the iceberg! YAML in Azure DevOps boasts incredible flexibility:
Trigger variety: Don’t limit yourself to main branch
pushes! Explore triggers based on other pipelines
completing, specific schedules (cron jobs), or even
pull requests.
Operating system choices: Dive beyond Windows!
Run your pipelines on Ubuntu, macOS, or
other supported operating systems to suit your
development environment.
Multi-step mastery: Utilize strategy:matrix:
to run identical tasks on different configurations,
testing multiple scenarios with ease.
Template magic: Don’t reinvent the wheel!
Leverage templates for common tasks, saving time
and effort.
210
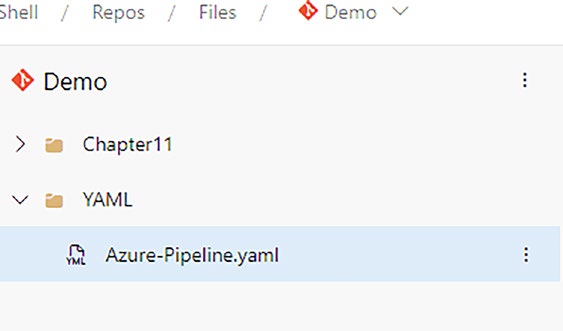
Chapter 11 Streamlining teSting with azure DevOpS anD peSter
While delving into all these intricacies falls outside this book’s scope, consider them an invitation to explore! Numerous resources await to
guide you on your YAML mastery journey. So, experiment, expand your
knowledge, and unleash the full potential of Azure DevOps pipelines!
Next Steps
Now that you have a basic understanding of the YAML file, we’ll explore how to integrate it into Azure DevOps and witness the automated testing magic unfold! Are you ready to dive deeper?
Bringing Your YAML into Azure DevOps
The first step is to place your YAML file within your Azure DevOps
repository. You have flexibility in terms of its location – the example in Figurtrates one possibility, but it’s not strictly required. The important thing is to be able to reference it later in your pipeline.
Figure 11-2. Example placement of Azure-Pipeline.yaml
211
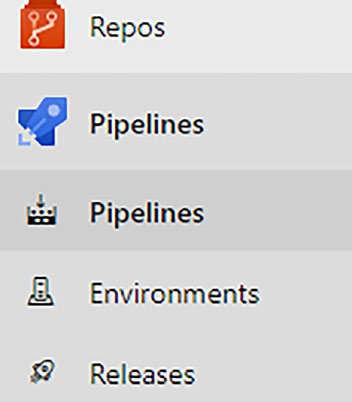
Chapter 11 Streamlining teSting with azure DevOpS anD peSter
Crafting the Pipeline Magic: Bringing
Automation to Life
With your YAML file securely nestled in your DevOps repository, let’s
embark on the exciting journey of creating your Azure DevOps pipeline!
This is where the automation magic truly comes alive.
1. Initiate the Pipeline Wizard
– Within your chosen DevOps project, navigate to the
Pipelines section on the left-hand side menu
(Figur).
– Click the New Pipeline button to kickstart the
pipeline creation process (Figur).
Figure 11-3. Select “Pipelines”
212
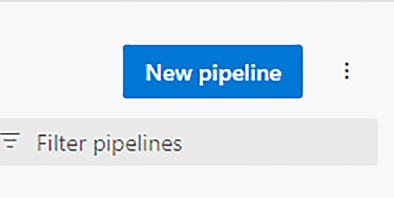
Chapter 11 Streamlining teSting with azure DevOpS anD peSter
Figure 11-4. Click “New pipeline”
2. Connect Your Code Source
– Select the appropriate code repository type. In our
case, we’ll choose Azure Repos (Figure
Figure 11-5. Selecting where our code is stored
3. Choose Your Repository
– From the displayed list, select the repository where your Azure-
Pipeline.yaml file resides. In this example, we’ll pick
the Demo repo (Figur
213
Chapter 11 Streamlining teSting with azure DevOpS anD peSter
Figure 11-6. If you have more than one repository, select it here 4. Embrace the YAML
– Since we already have a preconfigured YAML file, opt
for Existing Azure Pipelines YAML file
(Figur).
214
Chapter 11 Streamlining teSting with azure DevOpS anD peSter
Figure 11-7. We will select to use our existing YAML file
5. Select Your Masterpiece
– In the Path dropdown menu, locate and select your
Azure- Pipeline.yaml file (Figure hen, click
Continue.
215
Chapter 11 Streamlining teSting with azure DevOpS anD peSter
Figure 11-8. Selecting our preconfigured YAML file
6. Let the Automation Begin
– Click the Run button to initiate your first pipeline
execution (Figure atch as automation
unfolds!
Figure 11-9. Running the newly configured pipeline
216
Chapter 11 Streamlining teSting with azure DevOpS anD peSter
7. Pipeline in Action
– Head back to the Pipelines section. Figur
showcases your newly created pipeline hard
at work.
Figure 11-10. The running pipeline!
8. Dive into the Details
– Click the Demo pipeline to delve into its individual
jobs. You’ll notice a single job currently, labeled
#20240211.1 (Figur
217
Chapter 11 Streamlining teSting with azure DevOpS anD peSter
Figure 11-11. The pipeline jobs
9. Unveil the Results
– Click the job number to explore its execution details.
Figure ws a successful run (green tick!).
Click the job itself for an even deeper dive.
Figure 11-12. Click “Job” to drill into the job just executed and view the results
218
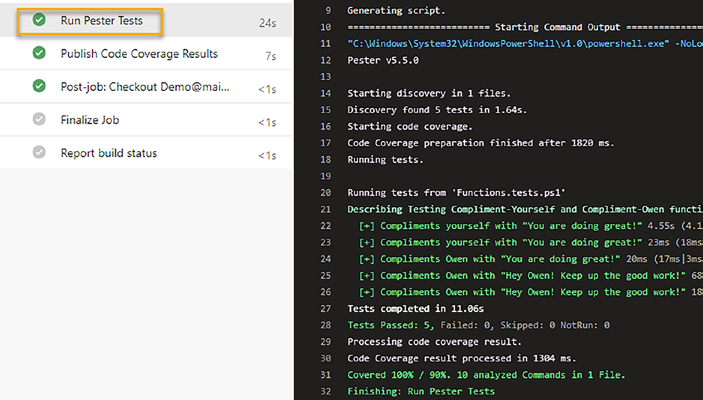
Chapter 11 Streamlining teSting with azure DevOpS anD peSter
10. Witness Each Stage
– Here, you’ll see all the pipeline stages laid out. Select
Pester to view its test and code coverage results, as
displayed in Figur.
Here you can view all the stages of your pipeline. If we select “Run
Pester Tests” we can see the results in the console output as shown in Figur.
Figure 11-13. The pester test and code coverage results
Congratulations! You’ve successfully created your first Azure DevOps
pipeline, empowering your Pester tests to run automatically and generate valuable insights.
219
Chapter 11 Streamlining teSting with azure DevOpS anD peSter Remember the “main” branch trigger we defined in our Yaml file?
that means your pipeline has an automation superpower: automatic
execution whenever changes are pushed to the main branch! So, any code updates or improvements you make will automatically trigger
your pester tests and code coverage analysis, ensuring continuous
quality and peace of mind. no more manual testing, just seamless
automation doing its magic!
Unraveling the Code Coverage Gems: Insights
and Learnings
Now that our pipeline has run successfully, let’s delve into the captivating world of code coverage results!
1. Return to the job summary: Click the back arrow to
navigate back to the job summary screen, as shown
in Figure
220

Chapter 11 Streamlining teSting with azure DevOpS anD peSter
Figure 11-14. Going back to the previous screen
2. Code Coverage awaits: Look for the Code Coverage
tab and click it (Figure his unlocks the
treasure trove of insights into your code’s coverage.
Figure 11-15. Select the Code Coverage tab
221
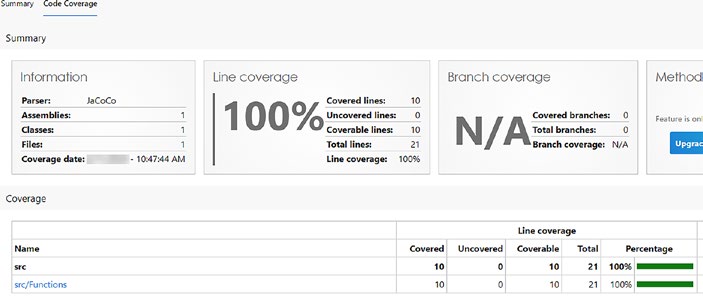
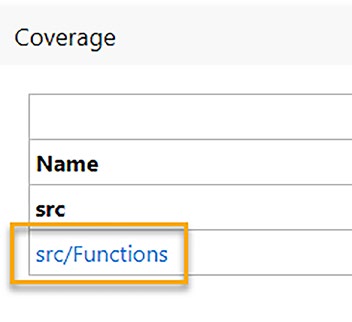
Chapter 11 Streamlining teSting with azure DevOpS anD peSter
3. Coverage in the Spotlight: Figure reveals the code coverage report, proudly displaying
100% coverage! All lines from your Functions.ps1
file have been tested, signifying comprehensive
verification.
Figure 11-16. The code coverage report
4. Deeper dive: Let’s zoom in for a closer look. Click
the src/Functions link (Figure o examine individual functions and their coverage details.
Figure 11-17. A deep dive into code coverage
222
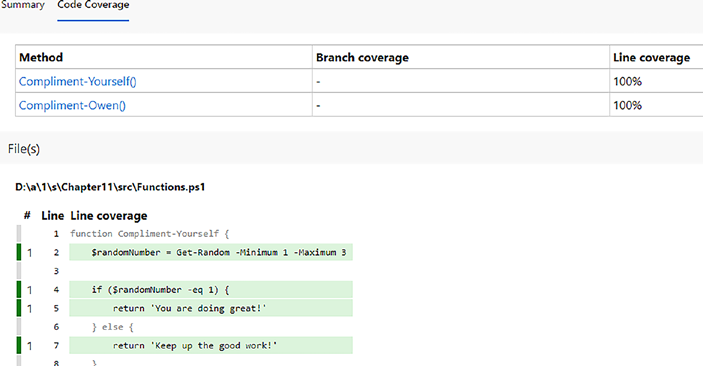
Chapter 11 Streamlining teSting with azure DevOpS anD peSter
5. Line-by-line clarity: Figure veils the granular level of coverage. Each line is highlighted,
with covered lines shown in green and uncovered
ones (if any) highlighted in red. This precise
visualization pinpoints areas needing attention or
further testing.
Figure 11-18. ViewingCode Coverage function insights
6. Simulating failure (for knowledge!): Remember,
learning also involves understanding potential
issues. By intentionally removing some tests,
I ran the pipeline again. The resulting report
(Figur) displayed individual function
coverage percentages (e.g., 75% for Compliment-
Yourself) and even highlighted uncovered lines
in red (Line 7 in Figur). This invaluable
information helps you identify areas for
improvement and ensure comprehensive testing
coverage in future iterations.
223
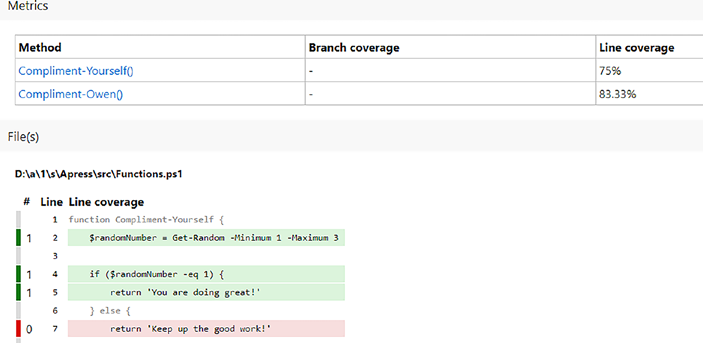
Chapter 11 Streamlining teSting with azure DevOpS anD peSter
Figure 11-19. Missed code coverage targets
As we’ve explored, the code coverage report offers a wealth of insights into your code’s health. By pinpointing uncovered areas, it guides you toward targeted improvements and enhances overall code quality.
Remember, strive for high coverage, but also analyze the results critically to prioritize testing efforts effectively.
Now, let’s shift gears and explore another exciting aspect of Azure
DevOps pipelines: badges! In the next section, we’ll unveil the “Pipelines Succeeded” badge and learn how to integrate it into your pipeline,
providing visual acknowledgment of your testing success.
Earning Your Badge of Honor: Showcasing
Pipeline Success
We’ve established a robust pipeline that executes Pester tests and analyzes code coverage. Now, let’s elevate your automation journey with a visible reward: the Pipelines Succeeded badge! This coveted badge serves as a visual testament to your successful testing runs, motivating you and fostering a culture of continuous improvement within your team. In this 224
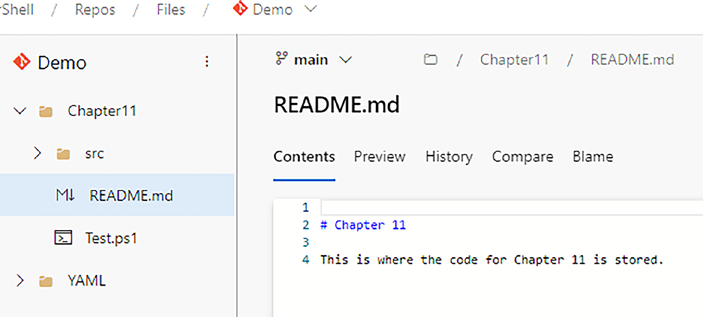
Chapter 11 Streamlining teSting with azure DevOpS anD peSter
section, we’ll unveil the secret sauce for integrating this badge into your pipeline, transforming it into a symbol of pride and achievement. Get
ready to display your dedication to automated testing and bask in the glow of well-deserved recognition!
Documenting Your DevOps Prowess: README.
md and the Status Badge
Let’s add some professionalism and transparency to your project by
creating a README.md file in your Chapt. This file serves as a central hub for anyone exploring the directory, providing context and usage instructions. Figure wcases the creation of this file.
Figure 11-20. The README.md file
Once created, selecting the root folder automatically displays the
README, as shown in Figure ow, let’s celebrate your successful pipeline with a visual reward: the “Pipelines Succeeded” badge!
225
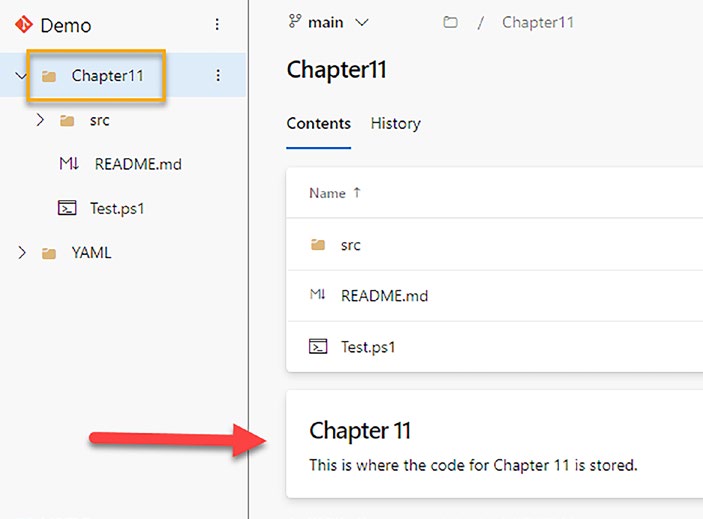
Chapter 11 Streamlining teSting with azure DevOpS anD peSter
Figure 11-21. The README file is automatically displayed when selecting the root folder
Earning Your Badge of Honor
1. Navigate to the pipeline’s section and select your
pipeline.
226
Chapter 11 Streamlining teSting with azure DevOpS anD peSter
2. Click the three dots in the top right corner and
choose “Status badge” (Figure
Figure 11-22. Click the three dots to reveal the menu
227

Chapter 11 Streamlining teSting with azure DevOpS anD peSter
3. Under “Sample markdown,” click “Copy” to grab the
provided code (Figur).
Figure 11-23. Copy the markdown – we will use this in a moment 228
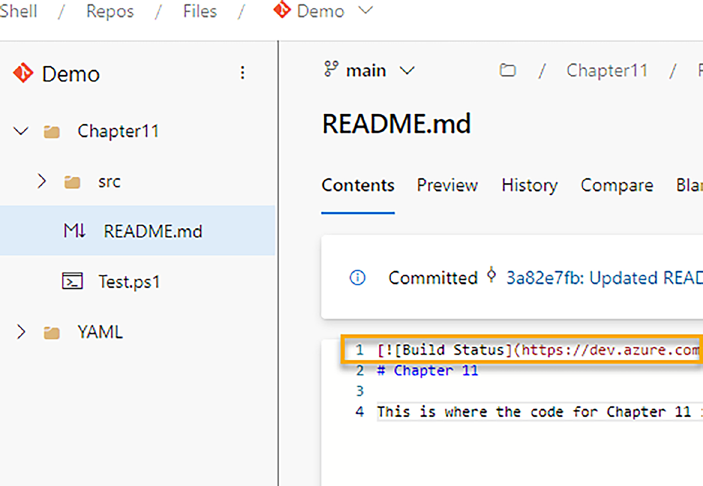
Chapter 11 Streamlining teSting with azure DevOpS anD peSter
4. Return to your README.md and paste the copied
markdown near the top (Figur).
Figure 11-24. Adding the markdown
229
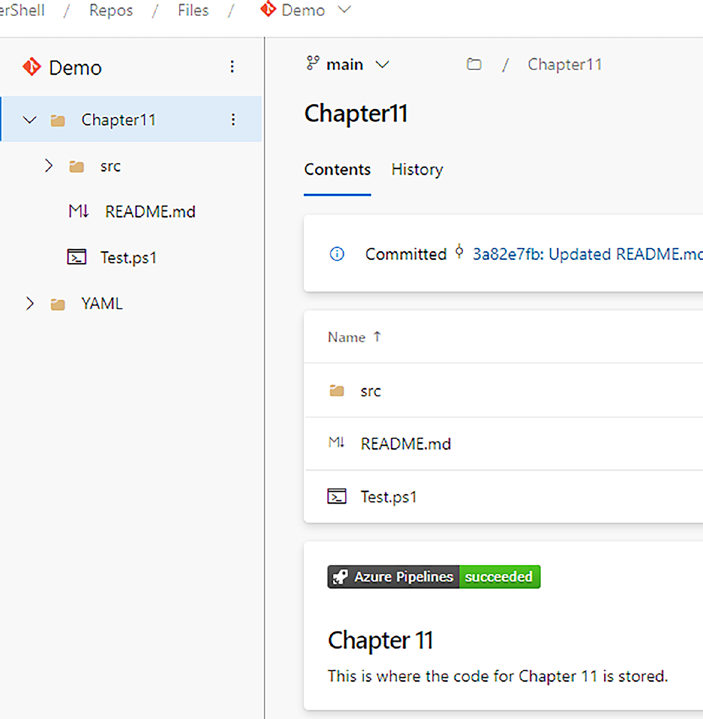
Chapter 11 Streamlining teSting with azure DevOpS anD peSter
Voilà! Selecting the root folder now proudly displays your badge of
honor, as seen in Figur.
Figure 11-25. Azure Pipelines has succeeded!
Testing the Badge’s Responsiveness
To demonstrate its dynamic nature, I intentionally introduced Pester
test failures. As expected, the badge automatically updated to a “Failure”
state (Figuremember, a browser refresh might be needed if the update isn’t immediate.
230
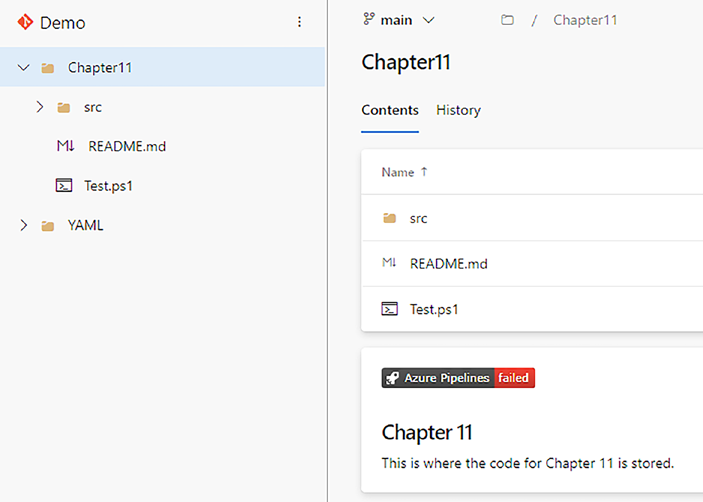
Chapter 11 Streamlining teSting with azure DevOpS anD peSter
Figure 11-26. The pipeline has failed
By incorporating a README and utilizing the status badge, you’ve
added clear documentation and instilled a sense of accomplishment
within your DevOps project.
Summary
Congratulations! You’ve embarked on an empowering journey of
automated testing and emerged victorious. This chapter has transformed you from a YAML novice to a masterfully wielding coder, crafting your own Azure DevOps pipeline with confidence.
From triggering Pester tests automatically, deciphering code coverage
metrics, and displaying your badge of honor, you’ve gained invaluable
skills that unlock efficiency and valuable project insights. Remember, this is just the springboard of your automation adventure!
231
Chapter 11 Streamlining teSting with azure DevOpS anD peSter While this chapter has equipped you with the fundamentals, there’s
an entire universe of DevOps automation waiting to be explored. As you venture forward, remember to stay curious, experiment boldly, and most importantly, enjoy the process! Your newfound skills have empowered you to navigate the exciting possibilities of continuous testing and automation.
So, keep learning, keep growing, and keep your tests running smoothly!
In our final chapter, we’ll showcase how Pester transforms from theory to practice. We’ll explore real-world functions and their corresponding tests, equipping you to tackle diverse scenarios with confidence.
232
CHAPTER 12
From Theory
to Practice: Applying
Pester to Your
Projects
Congratulations on reaching the final chapter! Now, it’s time to witness the power of Pester in action!
This final chapter serves as a showcase, presenting real-world
functions and their corresponding Pester tests. (And we also slip in a new data-driven technique to boot!) Though simplified for readability and
understandability, the concepts and testing approaches are applicable to more complex scenarios.
Prepare to see Pester in its natural habitat, tackling everyday scenarios and ensuring code quality. Don’t worry; we’ll highlight any notable aspects along the way, providing valuable insights and practical takeaways.
© Owen Heaume 2024
233
O. Heaume, Getting Started with Pester 5
Chapter 12 From theory to praCtiCe: applying pester to your projeCts Example 1: A Simple Function
First up, we’ll dive into a seemingly simple function: ConvertTo-Uppercase (Listing his function takes a string and, as the name suggests, transforms it into uppercase. But don’t underestimate its versatility!
We’ll witness its behavior with various inputs, from lowercase strings to mixed cases and even those containing symbols. In each scenario, Pester will ensure the expected uppercase output as shown in Listin, demonstrating the power of automated testing.
Listing 12-1. ConvertTo-Uppercase.ps1
Function ConvertTo-Uppercase {
[CmdletBinding()]
Param(
[Parameter(Mandatory = $true, ValueFromPipeline
= $true)]
[string]$InputString
)
Process {
$InputString.ToUpper()
}
}
Listing 12-2. ConvertTo-Uppercase.tests.ps1
BeforeAll {
. $PSScriptRoot/ConvertTo-Uppercase.ps1
}
Describe "ConvertTo-Uppercase" {
Context "When converting a string to uppercase" {
It "Should convert <Text> to <ExpectedResult>"
-foreach @(
234
Chapter 12 From theory to praCtiCe: applying pester to your projeCts
@{ Text = "hello world"; ExpectedResult =
"HELLO WORLD" }
@{ Text = "Hello World!!"; ExpectedResult =
"HELLO WORLD!!" }
@{ Text = "HELLO WORLD"; ExpectedResult =
"HELLO WORLD" }
@{ Text = "HelLo WOrlD"; ExpectedResult =
"HELLO WORLD" }
) {
$result = ConvertTo-Uppercase -InputString $Text
$result | Should -Be $expectedResult
}
}
}
In this testing approach, we used data-driven testing to enable
multiple test scenarios with ease.
Example 2: Mocking in Action
Mocking, which we covered back in Chapter owerful technique for isolating and testing specific parts of your code. Mocking allows you to simulate external dependencies or functions, ensuring your tests focus on the core logic of your function under test.
Imagine we have two functions:
– Get-FilePath: Checks if a given file path exists.
– Remove-FilesSafely: Removes a file if it exists,
otherwise logs a warning.
235
Chapter 12 From theory to praCtiCe: applying pester to your projeCts Testing Remove-FilesSafely directly involves file interactions, which
can be inconvenient and potentially dangerous. We do not want to really delete anything. That’s where mocking comes in! (For convenience, all
functions and tests are included in Listing o it may be run as-is.)
Listing 12-3. The functions and tests all-in-one file for convenience function Get-FilePath {
[CmdletBinding()]
Param(
[Parameter(Mandatory = $true)]
[string]$FilePath
)
Test-Path -Path $FilePath
}
function Remove-FilesSafely {
[CmdletBinding()]
Param(
[Parameter(Mandatory = $true, ValueFromPipeline
= $true)]
[string]$FilePath
)
if (Get-FilePath $FilePath) {
Remove-Item -Path $FilePath -Force
} else {
Write-Warning "Invalid file path provided: $FilePath"
}
}
Describe Remove-FilesSafely {
Context "When removing files safely" {
It "Should remove the file" {
236
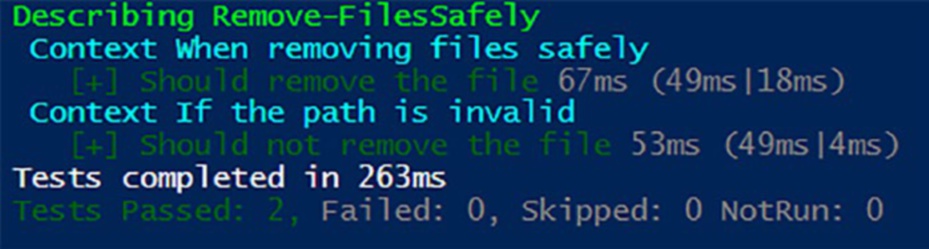
Chapter 12 From theory to praCtiCe: applying pester to your projeCts Mock Get-FilePath { $true }
Mock Remove-Item { }
Remove-FilesSafely -FilePath "C:\myFolder\file.tmp"
Should -Invoke Get-FilePath -Exactly -Times 1
Should -Invoke Remove-Item -Exactly -Times 1
}
}
Context "If the path is invalid" {
It "Should not remove the file" {
Mock Get-FilePath { $false }
Mock Remove-Item { }
Mock Write-Warning { }
Remove-FilesSafely -FilePath "C:\myFolder\
file.tmp"
Should -Invoke Get-FilePath -Exactly -Times 1
Should -Invoke Remove-Item -Exactly -Times 0
Should -Invoke Write-Warning -Exactly -Times 1
}
}
}
Running this code products the expected output as shown in Figur
Figure 12-1. The expected test results
237
Chapter 12 From theory to praCtiCe: applying pester to your projeCts Code Breakdown
Here is a brief code breakdown of the tests. If you feel you need more explanation, turn back a few pages to Chapter and refresh your memory!
Functions
– Get-FilePath: This simple function uses Test-Path to
verify if a file exists.
– Remove-FilesSafely: This function checks if the file
exists using Get-FilePath and removes it if so. It logs a
warning if the file doesn’t exist.
Tests
– We use Pester’s Mock function to simulate both
Get-FilePath and Remove-Item (used internally for
removal).
– Valid Path
– We mock Get-FilePath to return $true, simulating
a valid file path.
– We verify that Get-FilePath and Remove-Item are
called once each.
– Invalid Path
– We mock Get-FilePath to return $false,
simulating an invalid path.
– We verify that Get-FilePath is called once,
Remove-Item is not called, and a warning is logged.
238
Chapter 12 From theory to praCtiCe: applying pester to your projeCts Example 3: Unleashing Data Clarity:
Data- Driven Testing with a Twist
Data-driven testing is a powerhouse for streamlining test creation,
but deciphering complex code with nested loops can be daunting. In
this example, we’ll leverage a technique that enhances readability and flexibility without compromising efficiency.
Revisiting “ConvertTo-Uppercase”
Remember the ConvertTo-Uppercase function from Example 1? We’ll
revisit it, but this time, we’ll employ a powerful technique for data-driven testing.
Introducing the Data Construct (Listing ).
Listing 12-4. Using the Data construct for code clarity and flexibility BeforeAll {
. $PSScriptRoot/ConvertTo-Uppercase.ps1
}
Describe "ConvertTo-Uppercase" {
Context "When converting a string to uppercase" {
data testData {
@{Text = "hello world"; ExpectedResult =
"HELLO WORLD" }
@{Text = "Hello World!!"; ExpectedResult =
"HELLO WORLD!!" }
@{Text = "HELLO WORLD"; ExpectedResult =
"HELLO WORLD" }
@{Text = "HelLo WOrlD"; ExpectedResult =
"HELLO WORLD" }
}
239
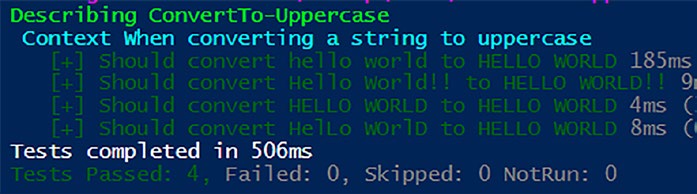
Chapter 12 From theory to praCtiCe: applying pester to your projeCts It "Should convert <Text> to <ExpectedResult>"
-ForEach $testData {
$result = ConvertTo-Uppercase -InputString $Text
$result | Should -Be $expectedResult
}
}
}
Remember the magic starts with the Data keyword! this defines your data set, but feel free to swap “testData” for any name that suits your fancy. just keep it consistent when calling it within the
-ForEach loop. this flexibility allows you to easily reuse the data in other tests within the same context, adding another layer of efficiency and organization to your testing endeavors.
The Outcome
Figurplays the expected test results.
Figure 12-2. The expected test results
240
Chapter 12 From theory to praCtiCe: applying pester to your projeCts The Final Analogy
It has been a few chapters now where I have not included an analogy, so let’s use one for the final time …
Imagine your Pester tests as a grand stage play. Each test case is an
individual act, carefully crafted to showcase the functionality of your code.
But as the number of acts grows, managing the props and remembering
everyone’s lines can become chaotic.
Enter the data construct, your backstage hero! It’s like a dedicated prop room, neatly storing all the costumes, scripts, and stage directions for each act. This frees up the actors (your test cases) to focus on delivering their best performances without tripping over props or fumbling with lines.
Here’s the magic:
Clarity: Instead of props scattered across the stage,
the “data” construct keeps everything organized and
easily accessible. Think of it as a well-lit prop room
with labeled shelves, making it a breeze for anyone
(even understudies!) to find what they need.
Flexibility: Need to add a new scene (test case)?
Simply add the props and script to the “data” room.
No need to rewrite entire acts – just reference the
new props in your existing test cases. It’s like having
a versatile wardrobe that can adapt to any scene
with minimal effort.
Reusability: Remember those fancy costumes
from Act 1? They can reappear in Act 3! With the
“data” construct, you can reuse data across multiple
test cases, saving time and effort while ensuring
consistency. Think of it as a costume rental service
for your entire play, maximizing resources and
avoiding redundancy.
241
Chapter 12 From theory to praCtiCe: applying pester to your projeCts So, the next time you find yourself juggling props and lines in your
Pester tests, remember the “data” construct – your backstage hero for
clarity, flexibility, and reusability!
Summary
This chapter revealed the true potential of Pester by demonstrating its capabilities in a real-world testing environment. We began with a simple conversion function, ensuring quality as you learned how to organize tests for readability and reuse. Next, you conquered the art of mocking and
isolating code sections to guarantee that even functions depending on
external interactions can be seamlessly tested. Finally, you discovered how to streamline data-driven testing with the “Data” construct, enhancing clarity and flexibility within your testing practices.
Key Takeaways
Testing is essential: Automated testing with Pester safeguards the quality and correctness of your code, empowering you to make changes
confidently.
Readability matters: Well-structured tests, like those using data-driven techniques, increase maintainability and promote easy test
updates.
Isolation for precision: Mocking lets you test the core logic of your code without depending on tricky external factors.
Pester in the real world: The examples in this chapter are more than theoretical; the concepts discussed translate directly to your everyday PowerShell development scenarios.
242
Chapter 12 From theory to praCtiCe: applying pester to your projeCts Moving Forward
As you continue your Pester journey, don’t be afraid to get creative! Look for opportunities to automate different tests within your own projects, experimenting with the techniques we’ve explored. Pester will become
your invaluable companion, ensuring your PowerShell code functions as
intended and allowing you to focus on delivering great results.
243
Index
A
Azure-Pipeline.yaml file, 207,
211, 213
Acceptance tests, 1, 6, 8–11
Azure Repos, 213
AfterAll block, 18, 19
AfterEach block, 22, 23, 74, 97
Analogy, 7–9, 60, 241–242
B
API response, 143, 144
BeforeAll script block, 83, 172
Automated testing, 2, 203, 207,
BeforeAll block, 44, 55
225, 234
container level, 17
Automation
Describe/Context
Azure DevOps, 202
Level, 17
Pester tests and code
designed to handle
coverage, 204
preconditions, 17
PowerShell scripting, 202
dot sourcing, 17
testing/code coverage, 203
one-time operation, 17
Azure DevOps, 204, 208, 224
BeforeDiscovery block, 76, 77
adventure, 204
BeforeEach block, 19–21, 94
DevOps magic, 205
-BeOfType operator, 39, 40
Functions.ps1, 205
Block scope
Repos section, 205
BeforeAll, 51–53
src folder, 205
concept, 49
Test.ps1, 205
contextual hierarchies/
Azure DevOps
limitations, 53–57
integration, 203
defining, 49–51
Azure DevOps pipeline, 201,
Describe block, 57
211, 219
theater analogy, 59
Azure Pipelines, 230
unbounded scope, 57, 58
© Owen Heaume 2024
245
O. Heaume, Getting Started with Pester 5
INDEX
Blocks in Pester
testing strategy, 181
AfterAll block, 18, 19
unlocks, 221
AfterEach, 22, 23
CodeCoverage.Enabled, 186
BeforeAll block, 16–18
codeCoverageTool, 209
BeforeEach block, 19–21
Compliment-Owen function,
Context blocks, 15
187, 191
Describe block, 14
Concise function, 147
It blocks, 15, 16
Configuration file, 185,
Bustling library, 108
187, 195–198
Context blocks, 15, 19, 65, 114, 131
C
Continuous integration (CI),
197, 202
CI/CD pipeline, 168
ConvertTo-Uppercase, 234, 239
Cmdlets
ConvertTo-Uppercase.ps1, 234
functionalities, 28
Get-ShouldOperator, 29, 30
It command, 29
D
learning process, 27
Data-driven testing, 239
Should command, 29
-ForEach, 65–68
Code breakdown, 238
Remove-Files ( see
Get-FilePath, 238
Remove-Files)
Remove-FilesSafely, 238
Degrees of coverage
CodeCoverag, 197, 199
branch coverage, 183
Code coverage, 183, 203
function/method, 183
best practice, 194
statements, 182
configuration file, 196
Demo pipeline, 217
deep dive, 222
Demystifying code coverage
Demystify, 181
code’s landscape, 182
function, 223
spotlights, 182
level of coverage, 223
Describe block, 13–15, 19, 31,
pipeline, 220
55, 65, 130
report, 222
DevOps automation, 232
target, 195
DevOps project, 205, 206, 212
246
INDEX
Discovery phase, 73, 84, 87, 88, 178
G
avoid misplacement, 74
Get-ADUser, 169, 171
BeforeDiscovery block, 76, 77
Get-ADUserDisabledState, 169
Choreography, 85, 86
Get-Boolean function, 31, 32,
dynamics, 77, 78
34, 38–40
identify/categorize, 73
Get-EnvironmentVariable function,
misplaced code outside, 75
149, 151
test code placement, 74
Get-FilePath function, 235, 238
Write-Host statements, 75
Get-Greeting, 49, 162, 163
displayName, 209
Get-Path function, 152–154
Dot sourcing, 17, 42, 43, 45
Get-ServerInfo, 136–139
Get-ShouldOperator, 28–30
E
Get-User function, 157–158, 161
-ExcludeTag, 116, 120
Excluding tests
H
advanced strategies, 116, 117
Hashtables, 65, 67, 135, 140–141
combining-Skip and-
-HaveParameter operator, 37–39
ExcludeTag, 116
dynamic exclusion, 117
exclusion, 116
I, J, K, L
-Skip parameter, 114–116
Import-CliXML, 142–144
InModuleScope, 176–179
F
Integration tests, 1, 6–10, 117, 119
Faster testing, 119
Invoke-FileOperation function,
FeatureX, 110
126, 128, 130, 132
File-based filtering, 119
Invoke-Pester, 45, 46, 107
Flexibility, 14, 44, 97, 137, 210, 241
cmdlet, 186
-ForEach parameter, 60, 65–68,
Configuration, 190
70, 80, 88
cross-file execution, 119
ForEach loop, 83, 240
with-ExcludeTag, 116
Functions.tests.ps1 file, 184,
skipping tests with the-Skip
187, 204
tag, 115
247
INDEX
Invoke-Pester ( cont. )
Invoke-FileOperation, 127
-TagFilter parameter, 110
It block, 132
-Tag parameter, 119
modules, 174
test suite, 115
private function, 175
wildcards, file-based filtering, 119
service responses, 124
InvokeVerifiable, 167, 168
services/file systems, 124
It blocks, 14–16, 60, 65, 109
software, 124
Test-Path, 126, 133, 152
M
tight coupling, 134
Write-Host, 129, 130
Maintainability, 96, 121, 135, 150
XML file, 142, 143
Mimic real behavior, 8, 134
Mock Test-Path, 132
Mocking, 123
ModuleName Parameter,
in action, 235
176–177, 179
API, 125, 142
$MyBoolean parameter, 38
BeforeAll block, 129
MyFunction.integration.tests.
‘Catch All’ mechanism, 159, 161
ps1, 118
challenges, 124
MyFunction.unit.tests.ps1, 118
cmdlets, 135
code changes, 134
N, O
consistency, 134
.Net classes, 144
ConvertTo-UpperCase, 174
Get-Error, 144
data, 124
intricacies, 146
dependencies, 124
Invoke-WebRequest, 144
documentation, 134
PowerShell, 146
factors, 125
.Net method, 148, 149
function, 125–127, 235
New-MockObject, 145
gain control and
New-PesterConfiguration, 185–186
predictability, 125
Get-ADUser, 133
GetType(), 133
P
Get-UpperCase, 174
Parameter filter
Get-User-username, 160
code paths, 157
import-CliXML, 143
Get-User, 157
248
INDEX
mocked behavior, 156
quality documentation, 4
PowerShell’s comparison
saves time in the long run, 3
operators, 157
Should operators, 37–40
Write-Verbose/Write-Host
structure of test, 31–37
message, 164
templates, 68–72
-ParameterFilter parameter,
tests, 123, 125–127, 153, 162, 241
156–159, 162–164
testing framework, 2
pathToSources, 209
testing prowess, 201
Pester, 1
Pester phases
automated assurance, 3
Discovery, 73–78
automated testing, 2
Discovery and Run, 84
blocks ( see Blocks in Pester)
Run Phase ( see Run Phase)
block scope ( see Block scope)
script blocks, 85
Cmdlets, 27–31
visualizing, 84–87
confidence in code changes, 3
Pipeline jobs, 217, 218
configuration file, 185, 189–191,
Pipelines, 203, 206–207, 210–212,
197, 198
217, 231
Coverage.xml, 196
Pipelines Succeeded, 201, 224, 225
data-driven testing
PowerShell, 2, 4, 11
( see Data-driven testing)
function, 146, 149
effective collaboration, 3
scripting, 141, 150, 165, 201
efficiency, 118
scripts, 2, 13, 61, 155, 180, 202
file structures, 9, 10
testing
finding bugs/ensuring basic
acceptance tests, 8, 9
functionality, 3
integration tests, 7, 8
installing
theater analogy, 7
easy updates, 6
unit tests, 7
latest version, 5
Predictability, 125, 149
Windows computer, 4
PSCustomObject, 39, 135–138,
Invoke-Pester, 45, 46
141–142, 170
Mock command, 156
Mock function, 238
Q
naming conventions, 9, 10
proactive problem solving, 4
Quality documentation, 4
249
INDEX
R
S
Readability, 60, 72, 96, 150, 239
Should operators
README.md file, 225
-BeOfType operator, 39, 40
Remove-Files
-HaveParameter operator, 37–39
context, 64
-Skip parameter, 114–116
crafting tests, 62
summaryFileLocation, 209
describe, 64
System.Net.WebException,
functionality, 61–63
144, 145
It statement, 64
log and tmp files, 65
T
Remove-FilesSafely, 235, 236, 238
Reusability, 241, 242
Tags
Run Pester Tests, 208–209, 219
case-insensitivity, 111
Run phase, 84
Describe, Context, and It
BeforeAll and-ForEach, 80
blocks, 109
Choreography, 85–87
efficient debugging, 109
dynamics, 78
enhanced collaboration, 109
Generating Tests via ForEach
excluding tests, 114–117
Keyword, 81
FeatureX, 110
Gotchas, 80–82
focused testing, 109
navigation, 82–84
functionality/target area, 108
order complexity
group-related tests, 108
Create New Scope, 79
intuitive, 107
flexibility and capabilities, 79
multi-tagging, 111
Invoke the It ScriptBlock, 79
outdated tests, 108
Repeat Until All Tests
PasswordReset, 112
Complete, 80
ProfileUpdate, 112
Return to Outermost
reduced complexity, 109
Scope, 80
RoleAssignment, 112
Return to Previous Scope, 79
specific functionalities, 108
Run the BeforeAll
tagged tests, 112
ScriptBlock, 79
UserCreation, 112
PowerShell tests, 78
Targeted Testing
250
INDEX
faster testing, 119
$path variable, 96
organization matters, 120
playing with files, 92–94
sharper focus, 120
readability/maintainability, 96
Templates
reading files, 92
defined, 69
referencing files, 95
expanding, 70, 71
sandbox, 90, 91
-foreach, 70
setting the stage
presentation, 71, 72
(BeforeEach), 99
in tests, 69, 70
simplicity and flexibility, 96
unveiled, 68
temporary drive, 91
valid variable, 70
temporary space
variable expansion, 69
creation, 90
TestDrive, 89
transparency, 91
benefits, 91
variable, 96
cleaning up with snap, 97–100
Test files, Add a prefix, 118
consistency, 97
Test-Path, 123, 125–127,
creating directories, 94, 95
133, 154–156
creating files, 92, 94, 95
TestRegistry, 89
Cleaning Up the Act
in action, 102
(AfterEach), 99
AfterEach block, 103
creation, 92
cleans up, 103
deleting files, 92
random GUID key, 102
Describe/Context block, 91
registry key and value, 101
drive illusion, 90
safe registry testing, 103
efficiency, 91
temporary key, 101
error checking, 97
virtual registry sandbox, 101
file-based testing, 90
your virtual sandbox, 101
flexibility and reuse, 97
Test structure
isolation, 91
AAA pattern
magic, 94
Act phase, 35, 36
Main Performance (It), 99
Arrange phase, 34, 36
manual cleanup, 97
Assert phase, 35–37
modifying files, 92
construct tests, 32
251
INDEX
Test structure ( cont. )
W, X
function logic, 32
Wielding wildcards, 120
Get-Boolean
Write-Host, 75, 129, 130, 135,
function, 31, 32, 34
164, 166
Should-BeFalse, 33
Write-Warning, 162, 166, 167
Should-BeTrue, 33
Writing tests
syntax, 31
dot sourcing, 42, 43
true and false, 32–34
import-module, 43–45
Theater analogy, 7, 36, 59,
inline execution, 41
60, 67, 165
Theatrical
performance, 36, 165
Y, Z
Yet Another Markup Language
U
(YAML), 206
Azure DevOps, 210, 211
Unbounded scope, 57, 58, 60
Azure Pipelines, 214
Unit tests, 1, 6–10, 117, 124
colons, 209
DevOps repository, 212
V
indentation, 209
journey, 207
-Verifiable badge, 165, 168
pipeline, 211
Verifiable Mocks, 165, 167, 168, 179
preconfigured, 216
Verification line, 155–156
strings, 210
252

