Working with AJAX Solr
Now that we have seen the architecture and components of AJAX Solr, let us go ahead and see how to implement it. We will download the default reuters index and build some features on top of it.
The reuters index is included as a part of code of this chapter. It can also be downloaded from .
Start with a fresh installation of Solr. Unzip the downloaded index and replace the data folder inside the <solr_installation>/example/solr/collection1 folder.
If the data folder does not exist, start Solr using the following command inside the <solr_installation>/example folder:
java -jar start.jar Once Solr is running, simply shut it down using Ctrl-C on the Command Prompt.
This will create the data folder and the related configuration files inside the <solr_installation>/example/solr/collection1 folder.
We will also need to add and modify certain fields in our Solr schema. Open up the schema.xml file inside the <solr_installation>/example/solr/collection1/conf folder and add the following lines to it:
<field name="places" type="string" indexed="true" stored="true" multiValued="true" omitNorms="true" termVectors="true" /> <field name="countryCodes" type="string" indexed="true" stored="true" multiValued="true" omitNorms="true" termVectors="true" /> <field name="topics" type="string" indexed="true" stored="true" multiValued="true" omitNorms="true" termVectors="true" /> <field name="organisations" type="string" indexed="true" stored="true" multiValued="true" omitNorms="true" termVectors="true" /> <field name="exchanges" type="string" indexed="true" stored="true" multiValued="true" omitNorms="true" termVectors="true" /> <field name="companies" type="string" indexed="true" stored="true" multiValued="true" omitNorms="true" termVectors="true" /> <field name="allText" type="text_general" indexed="true" stored="true" multiValued="true" omitNorms="true" termVectors="true" /> <field name="dateline" type="string" indexed="true" stored="true" multiValued="true" omitNorms="true" termVectors="true" /> <field name="date" type="pdate" indexed="true" stored="true" multiValued="true" omitNorms="true" termVectors="true" /> <copyField source="title" dest="allText"/> <copyField source="text" dest="allText"/> <copyField source="places" dest="allText"/> <copyField source="topics" dest="allText"/> <copyField source="companies" dest="allText"/> <copyField source="exchanges" dest="allText"/> <copyField source="dateline" dest="allText"/>
Note
The configuration and schema files required for running the example perfectly are available inside the ajax-solr/examples/solr-home folder cloned from the ajax-solr Git repository.
These files can simply be replaced inside the <solr_installation>/example/solr/collection1/conf folder.
Now start Solr.
Talking to AJAX Solr
We will now need to create or connect the web page with this Solr instance. The complete HTML files required for running this example can be found inside the ajax-solr/examples folder, cloned from the ajax-solr Git repository. Our base HTML page on which we are going to build the search using AJAX Solr is ajax-solr/examples/reuters/index.0.html. The following screenshot shows how the basic web page appears:
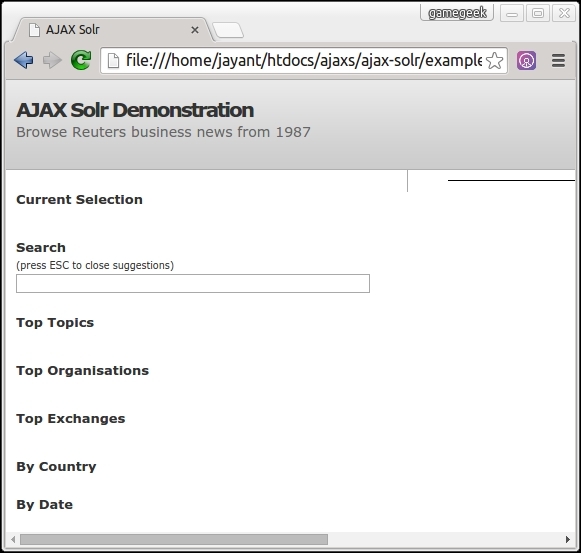
If we look at the code of the page, we can see that the following JavaScript and CSS files are being included in it:
<script src=http://ajax.googleapis.com/ajax/libs/jquery/1.7.2/jquery.min.js > </script> <script src="http://ajax.googleapis.com/ajax/libs/jqueryui/1.8.24/jquery- ui.min.js"></script> <link rel="stylesheet" href="http://ajax.googleapis.com/ajax/libs/jqueryui/1.8.24/themes/smo othness/jquery-ui.css">
We can replace them by downloading our copy of jquery and jquery-ui files.
In order to connect to Solr, we will need to include the following JavaScript in our code:
<script src="../../core/Core.js"></script> <script src="../../core/AbstractManager.js"></script> <script src="../../managers/Manager.jquery.js"></script> <script src="../../core/Parameter.js"></script> <script src="../../core/ParameterStore.js"></script>
We need to write the following JavaScript code to ask the Manager object to connect to our Solr instance running on localhost port 8983:
var Manager; (function ($) { $(function () { Manager = new AjaxSolr.Manager({ solrUrl: 'http://localhost:8983/solr/collection1/' }); Manager.init(); Manager.store.addByValue('q', '*:*'); Manager.doRequest(); }); })(jQuery);Let us write this code in a file called reuters.1.js inside the js folder and include it as a JavaScript source in our web page:
<script src="js/reuters.1.js"></script>
Here we have created an instance of Manager and assigned to it the Solr URL that connects to Solr running on our local machine, localhost:8983. We have initiated Manager and executed a query q=*:*. Since we have not defined any display widget, we will not be able to see the output. However, we can check whether the request was sent by enabling the Firebug status bar on the Firefox web browser.
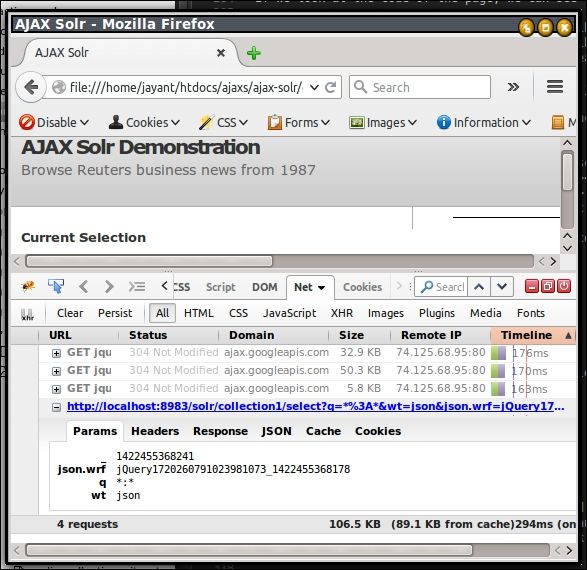
Inside the Net tab of Firebug, we can see the requests being sent from the browser. Here we see the following Solr URL being called:
http://localhost:8983/solr/collection1/select?q=*%3A*&wt=json&json.wrf=jQuery1720260791023981073_1422455368178&_=1422455368241
Also, we can see the parameters being sent in the call. This step creates the query and specifies the return response format as JSON.
Displaying the result
We can display the documents returned from Solr by creating a display widget. For this, we will need to create a new widget, say ResultWidget.js, inside the widgets folder. As this is inherited from AbstractWidget provided by the AJAX Solr library, we will have to include AbstractWidget.js as a JavaScript source in our web page:
<script src="../../core/AbstractWidget.js"></script>
Let us get a sense of the structure of the code that we will write inside ResultWidget.js:
AjaxSolr.ResultWidget = AjaxSolr.AbstractWidget.extend({ //Methods init: function () { //Manipulation of results. For example, hiding details. }, beforeRequest: function () { //Tasks that are supposed to be triggered before Solr responds. //For example, displaying loading image. }, afterRequest: function () { //Actual code chunk to render the result set. } }Now create a new file inside the widgets folder ResultWidget.js. We will have to define AjaxSolr.ResultsWidget, which extends the AbstractWidget:
(function ($) { AjaxSolr.ResultWidget = AjaxSolr.AbstractWidget.extend({ start: 0,We would like to show a loader image while the request is being processed. This image is included in the beforeRequest function:
beforeRequest: function () { $(this.target).html($('<img>').attr('src', 'images/ajax- loader.gif')); },After the results are received, the afterRequest function is called. Here, we process the result and create the view to be displayed:
afterRequest: function () { $(this.target).empty(); for (var i = 0, l = this.manager.response.response.docs.length; i < l; i++) { var doc = this.manager.response.response.docs[i]; $(this.target).append(this.template(doc));Here, we are looping through the result set and getting the variable doc out of manager. Now template is the function being called to create the HTML code for each result tuple:
template: function (doc) { var snippet = ''; if (doc.text.length > 300) { snippet += doc.dateline + ' ' + doc.text.substring(0, 300); snippet += '<span style="display:none;">' + doc.text.substring(300); snippet += '</span> <a href="#" class="more">more</a>'; } else { snippet += doc.dateline + ' ' + doc.text; } var output = '<div><h2>' + doc.title + '</h2>'; output += '<p id="links_' + doc.id + '" class="links"></p>'; output += '<p>' + snippet + '</p></div>'; return output; }The template function checks whether the length of the text in the document is more than 300. If so, the first 300 characters are displayed and a more link is added. The function creates a div tag with the document title and id and returns the output that is appended to the HTML view:
ResultsWidget.js is added to our web page with the following code:
<script src="widgets/ResultWidget.js"></script>
In order to glue this widget to our Manager, we will add the Widget to our Manager. We also add id and target div tags:
Manager.addWidget(new AjaxSolr.ResultWidget({ id: 'result', target: '#docs' }));Note the following:
id: It is a required parameter that identifies the widgettarget: It is an optional parameter and is normally the CSS selector for the HTML element that the widget updates upon each Solr request
Here we have specified the target div tag as docs, which is mentioned on our HTML page using the following code:
<div id="result"> <div id="navigation"> <ul id="pager"></ul> <div id="pager-header"></div> </div> <div id="docs"></div> </div>
To implement the more link at the end of each result tag, we implement the following code snippet inside the init method:
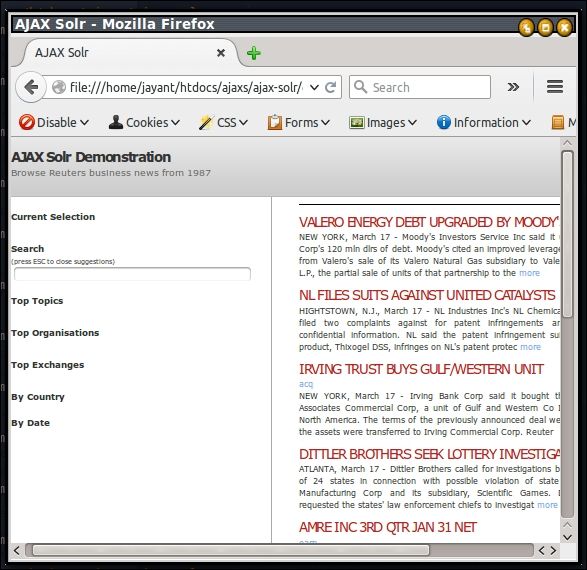
init: function () { $(document).on('click', 'a.more', function () { var $this = $(this), span = $this.parent().find('span'); if (span.is(':visible')) { span.hide(); $this.text('more'); } else { span.show(); $this.text('less'); } return false; }); }At the end of the each result tuple, the more link makes the entire result tuple visible, and the less link makes the first 300 characters visible. This works on the basis of the code in the init function shown earlier. Implementation of the previous code enables the init method of Widget to be called as soon as the init method of Manager is triggered.
This code is available in the index.2.html and js/reuters.2.js files. The execution of the file yields the following output:
AJAX Solr offers extremely convenient ways to achieve different activities and functions using widgets. Some of the features that can be achieved by adding widgets are:
- Display of the customized result set
- Addition of pagination capabilities
- Interactive and fast faceted search
- Free-text search
- Auto-complete capabilities
- Interactive maps
- Addition of calendars
- Interactive tag clouds
- Grouping of search results
Adding facets
Let us add facets and pagination to our example. We will need to define the functions facetLinks and facetHandler in our ResultWidget.js to handle faceting. The facetLinks function will be called from the afterRequest method. Add the following lines after the for loop of the afterRequest method:
var items = []; items = items.concat(this.facetLinks('topics', doc.topics)); items = items.concat(this.facetLinks('organizations', doc.organisations)); items = items.concat(this.facetLinks('exchanges', doc.exchanges)); var $links = $('#links_' + doc.id); $links.empty(); for (var j = 0, m = items.length; j < m; j++) { $links.append($('<li></li>').append(items[j])); }Let us also define the facetLinks function:
facetLinks: function (facet_field, facet_values) { var links = []; if (facet_values) { for (var i = 0, l = facet_values.length; i < l; i++) { links.push( $('<a href="#"></a>') .text(facet_values[i]) .click(this.facetHandler(facet_field, facet_values[i])) ); } } return links; },The handler function being called inside facetHandler is as follows:
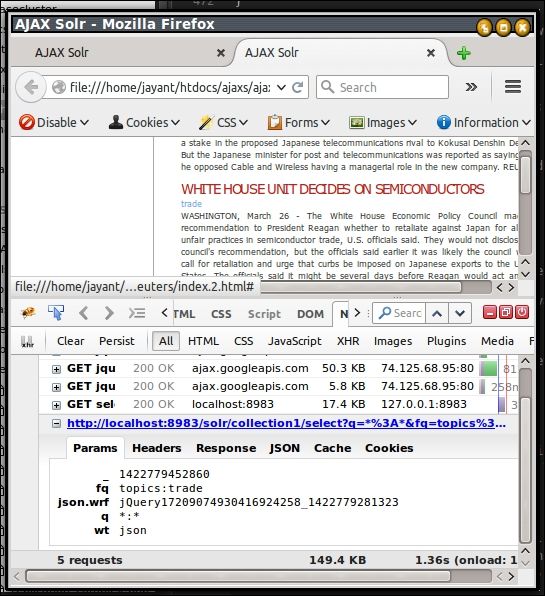
facetHandler: function (facet_field, facet_value) { var self = this; return function () { self.manager.store.remove('fq'); self.manager.store.addByValue('fq', facet_field + ':' + AjaxSolr.Parameter.escapeValue(facet_value)); self.doRequest(); return false; }; },This code creates links for browsing by topics, organization, or exchanges. When a link is clicked, the facetHandler function is called. This step resets the filter query inside Manager, adds a filter query, and sends a Solr request. We can see these links under the title – U.K. GROWING IMPATIENT WITH JAPAN – THATCHER as seen in the following figure:
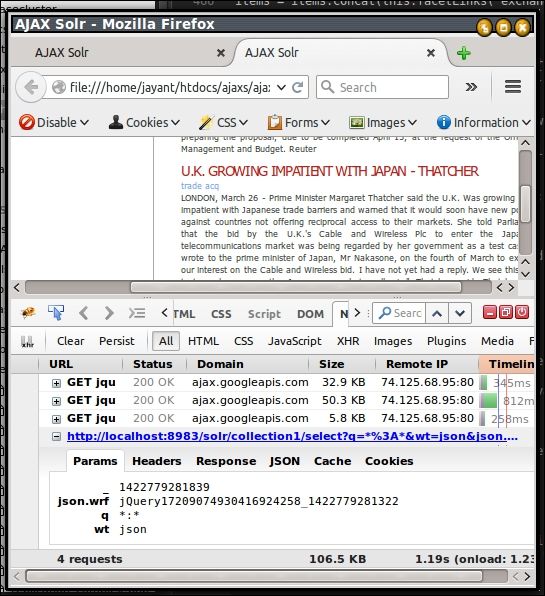
Here we can see two links under the title, namely trade and acq. Also, the parameters sent to Solr do not contain any filter query. Let us click on a link, say trade. We can see that a new Solr query is being executed that contains the filter query for topics:trade. The results are refreshed, so now all the results have at least the trade link below the title, as shown in the following screenshot:
Adding pagination
For adding pagination, we will need to add the PagerWidget class to our manager. Include the following JavaScript in the main HTML page:
<script src="../../widgets/jquery/PagerWidget.js"></script>
Add the pager widget to Manager inside the reuters.js file:
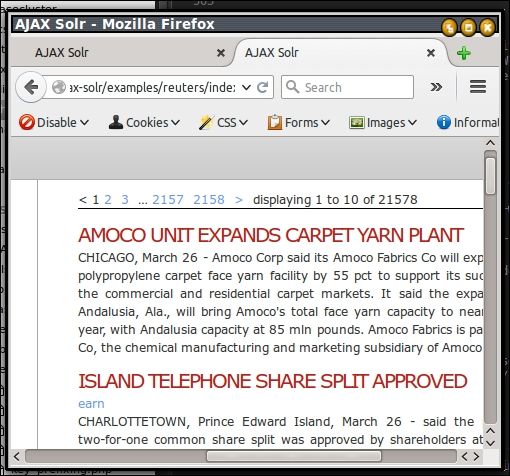
Manager.addWidget(new AjaxSolr.PagerWidget({ id: 'pager', target: '#pager', prevLabel: '<', nextLabel: '>', innerWindow: 1, renderHeader: function (perPage, offset, total) { $('#pager-header').html($('<span></span>').text('displaying ' + Math.min(total, offset + 1) + ' to ' + Math.min(total, offset + perPage) + ' of ' + total)); } }));In addition to defining id and target for this widget, the pager widget exposes some of its own properties, which were defined in the previous code. We have also implemented the abstract method renderHeader to display the total results found. This sets the total number of results inside the pager-header div tag, which needs to be defined in our HTML code:
<div id="pager-header"></div>
The pager class is defined by the following code inside our HTML:
<ul id="pager"></ul>
The pagination is shown above the results as follows:
Adding a tag cloud
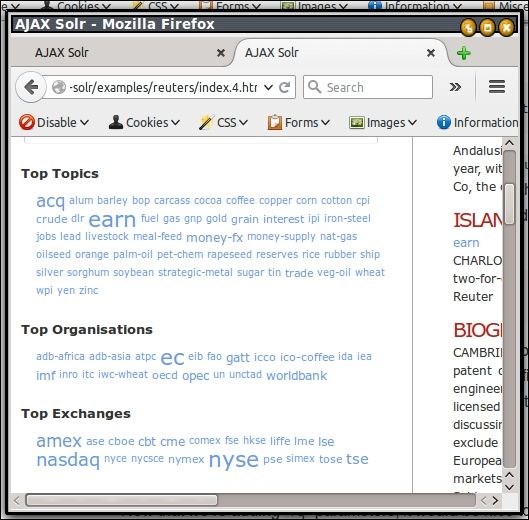
Let us derive the tag cloud from the facet fields, namely topics, organizations, and exchanges, and display the tag cloud on our web page. For this, add the Solr parameters required for faceting to reuters.js:
var params = { facet: true, 'facet.field': [ 'topics', 'organisations', 'exchanges' ], 'facet.limit': 20, 'facet.mincount': 1, 'f.topics.facet.limit': 50, 'json.nl': 'map' }; for (var name in params) { Manager.store.addByValue(name, params[name]); }Now, extend the AbstractFacetWidget and create a new widget called TagcloudWidget by adding the following code in a new file widgets/TagcloudWidget.js:
(function ($) { AjaxSolr.TagcloudWidget = AjaxSolr.AbstractFacetWidget.extend({ }); })(jQuery);We have used AbstractFacetWidget, which provides many convenient functions specific to the faceting widget.
We will need to add these two JavaScript files to our HTML page:
<script src="../../core/AbstractFacetWidget.js"></script> <script src="widgets/TagcloudWidget.js"></script>
Next, add three widget instances to Manager for each of the facet fields, topics, organizations, and exchanges. For this, write the following code snippet in the reuters.js file:
var fields = [ 'topics', 'organisations', 'exchanges' ]; for (var i = 0, l = fields.length; i < l; i++) { Manager.addWidget(new AjaxSolr.TagcloudWidget({ id: fields[i], target: '#' + fields[i], field: fields[i] })); }Any widget inherited from AbstractFacetWidget accepts the mandatory field parameter that identifies the facet field we want the widget to deal with. We need to add the target fields as div(s) to our main HTML page:
<h2>Top Topics</h2> <div class="tagcloud" id="topics"></div> <h2>Top Organisations</h2> <div class="tagcloud" id="organisations"></div> <h2>Top Exchanges</h2> <div class="tagcloud" id="exchanges"></div>
We will need to implement the afterRequest abstract method in TagcloudWidget to handle the response received from Solr. This method is called after receiving a response from Solr, similar to the afterRequest method of ResultsWidget.
We will add the following code to the afterRequest method of TagcloudWidget:
afterRequest: function () { if (this.manager.response.facet_counts.facet_fields[this.field] === undefined) { $(this.target).html('no items found in current selection'); return; } var maxCount = 0; var objectedItems = []; for (var facet in this.manager.response.facet_counts.facet_fields[this.field]) { var count = parseInt(this.manager.response.facet_counts.facet_fields[this.field][facet]); if (count > maxCount) { maxCount = count; } objectedItems.push({ facet: facet, count: count }); } objectedItems.sort(function (a, b) { return a.facet < b.facet ? -1 : 1; }); $(this.target).empty(); for (var i = 0, l = objectedItems.length; i < l; i++) { var facet = objectedItems[i].facet; $(this.target).append( $('<a href="#" class="tagcloud_item"></a>') .text(facet) .addClass('tagcloud_size_' + parseInt(objectedItems[i].count / maxCount * 10)) .click(this.clickHandler(facet)) ); } }A number of activities are performed in the previous code snippet. Let us focus on its highlighted portions that are closely related to AJAX Solr.
The first one, this.manager.response.facet_counts.facet_fields[this.field], behaves in the same way as that discussed in the Displaying the result section of this chapter. We set the field property this.field when adding the widget instance to manager. Thus, using this code chunk, we actually inspect the facet data associated with that field in the Solr response.
Note that clickHandler is another convenient function offered by AbstractFacetWidget. It adds the fq parameter, which is associated with the widget's facet field and its corresponding value. If it succeeds, a request is sent to Solr with this filter query.
The following screenshot shows how the tag cloud is displayed when the page is loaded:
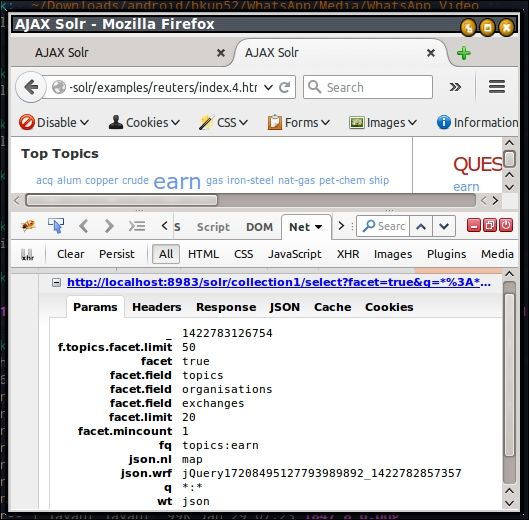
If we click on the topic earn, another Solr query is executed and the page is refreshed with the results. As shown in the following image, the Solr query will have a filter query for topics:earn in addition to faceting parameters.
Note
AJAX Solr can be used to build many custom widgets, such as freetext, filters, autocomplete, map, and calendar. More details can be obtained from its wiki page at .

