Selecting Colors
Advanced Color Selector Docker
When you start Krita for the first time, the first thing you will notice is the big color selector on the top right of the screen.
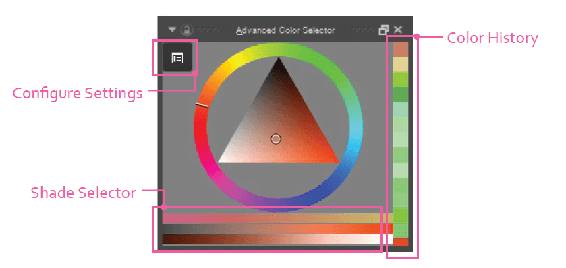
The Advanced Color Selector has a lot of options that are shown by default. It can also be configured to a great degree. The settings option in the top left corner allows you to configure what is shown. When the options are open, you can navigate to the Color Selector tab and change the Color Model Type and image drop-down on the left.
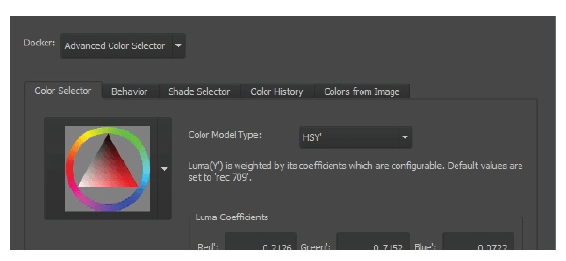
Selecting the settings icon lets you customize the Advanced Color Selector docker.
The shade selector shows different variations on your current color selected. This docker also shows you a history of the colors you have picked. It will be automatically updated as you continue to paint.
Digital Colors Mixer Docker
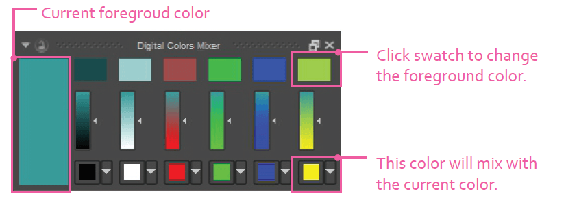
Mix other colors with your current foreground color. You have up to six different color columns that you can play around with. The bottom portion of each column will show you the color to mix with your current color. The color gradient slider will show different amounts of the color to mix. The top color swatch in each column is the resulting color. When you click this top color swatch, your foreground color will change. The color mixing process then starts over.
Pop-up Palette
Quickly select colors and common brush presets. You can access this by right-clicking on the canvas at any time. The inside color wheel is for selecting new colors. The color segments in the middle ring show you recent colors. The two color half circles on the outside show you the foreground and background colors.
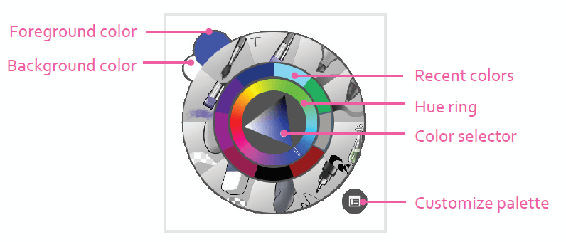
Like the other color tools, when you change your colors here, the colors will be updated in all of your color selectors and tools.

Color Selector Tool

Quickly select a color on your canvas to use. This tool can also be accessed by holding down Ctrl while on the canvas. This will temporarily select the Color Selector Tool.
Specific Color Selector Docker
If you know you need a specific color, you will find this docker helpful. You can simply specify your color model and select a specific color.
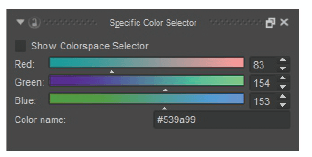
Clicking the checkbox will reveal options to show color selectors in other color models.
The foreground color selector in the toolbar has most of these options, but this docker can be faster. The Color name field shows the hex value that is often used in website design. If you want, you can click Show Colorspace Selector to determine what color sliders to show.
Small Color Selector Docker
This condensed docker provides another way to select a color. The area on the left selects the hue, while the area on the right selects the value and saturation. If the advanced color selector is too complex and big for you, this might be a good alternative.
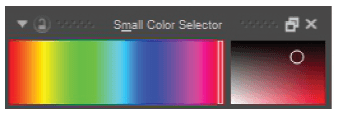
The docker elements do not scale larger if you try to resize the docker.
Artistic Color Selector Docker
This docker reduces the amount of colors you have for your palette. Configure your color wheel to show less available colors. You cannot limit the color ranges, though. For example, you cannot filter your colors to only show complementary or triadic values.
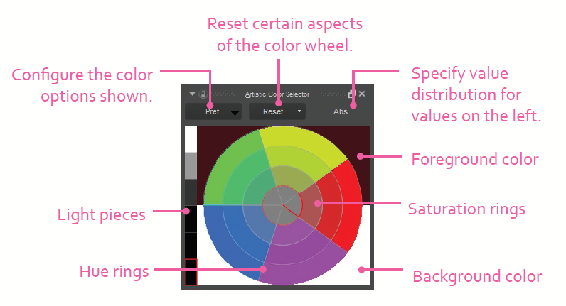
If you hold down your pen on a color segment, you can spin the wheel to change the hue. As you select different light pieces, your color wheel will become darker or lighter.
Palette Docker
Select from a predefined set of colors. You can add or remove from an existing palette or create your own. You can even change how many columns to display from the options.

Foreground/Background Toolbar Selector
The foreground and background selector gives you a few options on the toolbar to select and change your colors. Double-clicking one of the color swatches will bring up a color picker dialog.

Color Selector – Pick a foreground or background color. The bottom left icon allows you to flip the foreground and background colors.
Common Color Selector
This selector analyzes the canvas and shows the most used colors. The refresh button needs to be clicked for the color swatches to be updated. The colors won’t be accurate if you only have one color on the canvas. You can configure this selector through the main menu Settings > Configure Krita > Color Selector Settings > Advanced Color selector drop-down > Colors from Image tab. Changing the Patch Options with size and amount will update the common colors display. Shortcut: U.
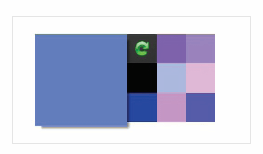
The refresh button will scan your canvas and update the colors. The amount of colors and size of each color patch are configurable.

Helpful Shortcuts
Minimum Color Selector pop-up: Shift + N.
Shade Selector pop-up: Shift + M.

