Chapter 10: Group (G)
The Blender node editor allows you to put any combination of nodes into a group. To do so, select all the desired nodes and press CTRL + G. You can select them by either SHIFT-clicking on them, use the B key to draw a box around them or the C key to paint them as marked.
Make Group (CTRL + G)
If you have more than one node selected and perform this operation, all the selected nodes will be combined in one group. This is very useful if you have a combination of nodes, you might need on more than one material. Everything you change inside the group will be transferred to all materials using this group. While everything that is changed from outside the group is material- specific. This way you can make a group of shaders and use one color to use the same material properties with different colors on different objects. It is also the only way to append or link node combinations from other blend files without importing the entire material.
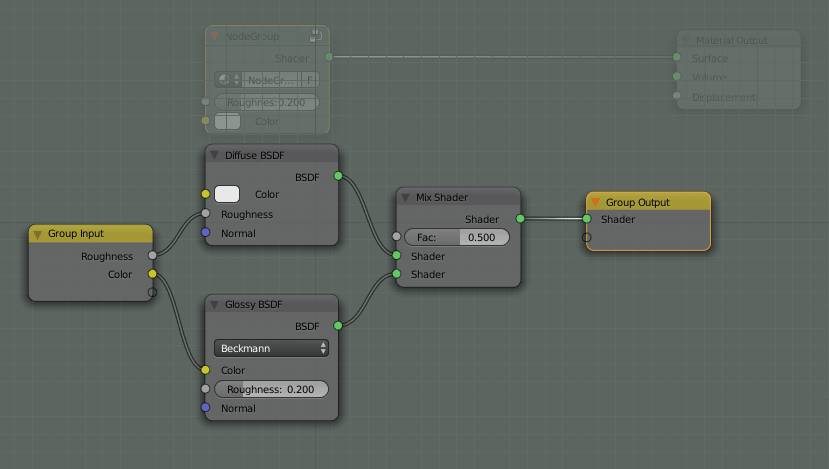
You can create a new group by selecting several nodes and pressing CTRL + G. Once you have done that, your background will receive a greenish tint, covering up the nodes that do not belong to the group.
You will see two yellow nodes, labeled Group In- and Output. If you drag any socket from any node in your group here, its name will appear in the list of inputs. If you want to tell others or remind yourself what that value is for, you can open the properties menu (press N) and under interface, you will see two lists one of in- and one of outputs. The two lists behave the same, so I will not cover them separately.
Selecting an item from the list lets you rename the socket , by typing into the field “Name”. Double clicking on a name works as well and is usually faster.
Like I specified in the introduction there are four different types of sockets. Except for the BSDF socket you can specify a default value. If nothing is plugged into the socket, this is what it will use.
Each comes with slightly different options.
Factor (gray)
They let you specify the default value and a minimum and maximum value to limit the range and keep people from entering ridiculous numbers.
Vector (blue)
Allows you to enter three default values, one for X, Y and Z respectively.
You can also specify a minimum and maximum value, which is set for all three together.
Color (yellow)
Only lets you choose a default color.
Shader sockets (green)
Do not come with a default value, since they require a BSDF input.
If you press P while editing a node group, you can put a node from the group back into the node tree. You can select to either copy it, then it will appear twice, or move it. The latter will only work if the node can be taken out of the group without breaking required connections. E.g. if you have a vector connected to an image, connected to a shader, you cannot just remove the image.
Rest of the List
Lets you insert a node group you created or imported earlier. Before there are any groups in your blendfile, this entry will be empty. The List is sorted alphabetically and usually the first letter will be assigned to the shortcut. If there are two groups starting with the same letter, the second one will be used and so on.

