Chapter 18: The Node Wrangler Addon
To facilitate your workflow with nodes even more Bartek Skorupa and Greg Zaal have written an Addon called Node Wrangler. It ships with Blender, so all you need to do is activate it.
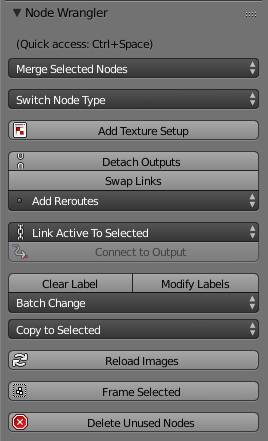
If you press T with the mouse in the node editor, the tools menu will open. The node wrangler-tab is all the way at the bottom. Here you can find all the tools offered by the addon The most commonly used ones come with built in custom shortcuts as well.
Operators
You could also call them tool menu entries, here is what they do:
Merge Selected Nodes
If you have more than one node selected, you can merge mix them by choosing from this menu. If they are both shader nodes, mix them by a shader mix or add node. You will still have the option to mix them in other ways, too but the result would be pretty much useless. If you have more than one node selected, the Node Wrangler will pair the first two with the method selected, then create another combine node and merge the combined result of the first two with the third node you selected and so on. You can either select the dropdown and choose from the list, but a much faster way to use this is to hold down ALT, then right click and drag from one node to another. The addon will choose the mix node for you.
Switch Node Type
If you want to switch the type of a node without deleting it and reconnecting, you can do so in the material tab, but you need to find it first, which can be pretty cumbersome in a more complex node setup. But if you select your node and choose the new type from this dropdown, it will be switched to the new type without changing its connections.
Note: You can change the type to any other node, so a pretty useless node tree can result from this method, if you don't pay attention to what you are doing.
Add Texture Setup (CTRL + T)
If you have a shader node selected and choose this option, the node wrangler will set up an image texture node left to it, that is connected to the UV output of a texture coordinates node via a mapping node.
Detach Output (ALT + D)
This does a similar thing as pressing M does, but in a more permanent fashion. Mutig a node will disable its influence, and if it mixing two other nodes, like a shader or color mix node, the lower socket will be ignored. Using detach output will therefore disconnect the mix node from its destination and connect it with the node from the upper input socket instead.
Swap Links (ALT + S)
If a node has exactly 2 inputs connected to other nodes, you can quickly swap them using this button. The upper will thereby become the lower and vice versa.
Add Reroutes (Numpad /)
This button will add reroutes to all the outputs of the active node, but you can specify further.
You can add them to all loose outputs, so every output without a connection to another node will be affected, the opposite would be to linked outputs, which will create intersections in all links going from this node.
Link Active To Selected (\)
To use this option, you need to select 2 nodes. The Node Wrangler will then try to determine, what connections from the selected to the active node make the most sense and make those. It takes some getting used to, but it can save some time in bigger node trees. There are several options:
Don’t Replace Links (K)
This way only unconnected sockets will be altered.
Replace Links (SHIFT K)
This way existing connections will be broken and replaced by a link to the selected node.
Use Label
This way only nodes that have a similar label like “test” and “test 1” will get linked.
Connect to Output (O)
Since every material needs an output, there is an option to quickly connect the active node to this output. The addon will decide automatically to what socket your node will be connected. If it is a regular shader node, it will be plugged to the surface, if it is a volume shader, it will be plugged into the volume output and every other node type will be plugged into the displacement input of the output node. If you use a material output node in this case that does not posses a displacement input – like world or lamp – this button will cause an error message.
Clear Label
This resets the label of the label of the selected nodes so it is blank, therefore the label displayed on node will be taken from the type.
Modify Labels (SHIFT + ALT + L)
If you use this option a menu will pop up that lets you convert the label of all selected nodes simultaneously. It will only modify the label, but not replace it, so if you want to start fresh, click clear label first.
You can enter a text that will be added at the beginning of the labels and also one to be added at the end .
You can also replace a certain string by another one, if the node contains the order of letters you specify in the Text to Replace field. Note that this is case sensitive.
Batch Change
Mix RGB and math nodes are the ones with the most modes to select from. Using the batch change, you can select a mode which will then be used either for all mix RGB or math nodes selected, depending on the option you choose.
Copy to Selected (SHIFT + C)
There are 2 options in this menu:
Copy Settings
If the selected nodes are of the same type as the active one, all of the settings of the active node
will be copied to the selection.
Copy Label
It copies the entry in the label field of a node to one or more others. You can choose to copy it from the active node, or inherit it from the nodes linked to its input, or the outputs. If there are several nodes attached, the label of the one linked to the highest socket will be used.
Reload Images (ALT + R)
Clicking this will search your displayed node tree for nodes containing an image. If the image is not packed and still exists on the specified location, it will be updated. This is much more convenient than going through all those nodes yourself.
Frame Selected (SHIFT + P)
It quickly draws a frame around all selected nodes. This is much faster than inserting the frame and then moving the desired nodes into it.
Delete Unused Nodes (ALT + X)
If there are any nodes in your material that do not have any connected outputs, they will be deleted by this button. This works as well if there is a chain of nodes and the last link is not connected to anything.
Menu Additions
But wait, there is more. The node wrangler will also add some options to the add node menu. Once it is activated, you can easily insert the following types via the menu that pops up when you press SHIFT + A.
Input → Vertex Colors
If your object has any vertex color information attached to it, you can access it quickly with this option. Choosing a color set will automatically insert an attribute node that has the name of the color set inserted
Textures → Multiple Images
If you know, you are going to use more than one image texture in your material, you can use this option to quickly load them all at once. Clicking it will open a browser window, where you can select multiple files, by SHIFT-clicking on them. By confirming your selection, you will create one image node for each selected image.
Textures → Image Sequence
Opens a Blender file browser. You can either select the first image in a sequence or all the images you want to use for the sequence. It will automatically set up an image texture node with the right settings. Requires consecutively numbered files.

