- The first step is to install the Recruitment application; it is the same as other Odoo applications. It can be installed from Odoo Apps:

As soon as the Recruitment Process application is installed, you will get the Recruitment App icon on your instance home screen. Like other Odoo applications, the Recruitment application also has its own dashboard to track the currently launched job positions. Look at the following screenshot. There are no job positions opened yet:

- Click on the CREATE button to create and launch the job position for the Sales and Marketing Department we just created:

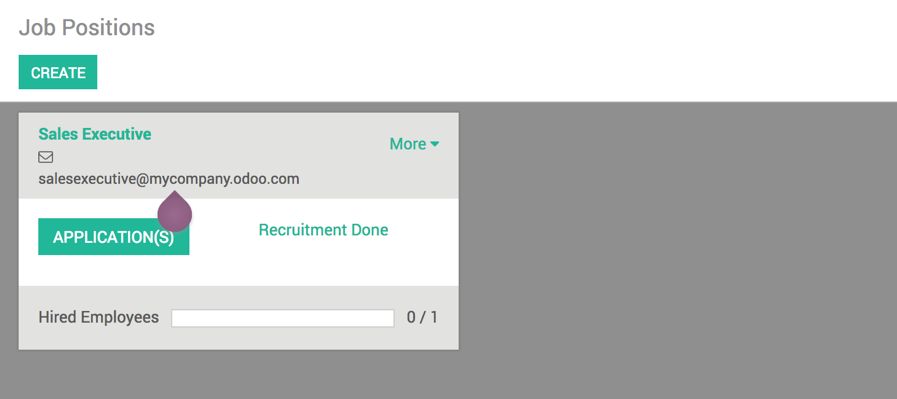
The job e-mail is used to create an e-mail alias in Odoo. When an e-mail is received at [email protected] in Odoo, it will create an applicant in the Sales Executive job position. Click on the CREATE button to create the job position. It will look like this on your Recruitment dashboard:
- As soon as the job position is created, it has to be configured to set the correct department and Recruitment responsible. Also, set the number of openings for Sales Executives. Look at the following screenshot of the job position configuration. Click on More | Setting on the Sales Executive job position:
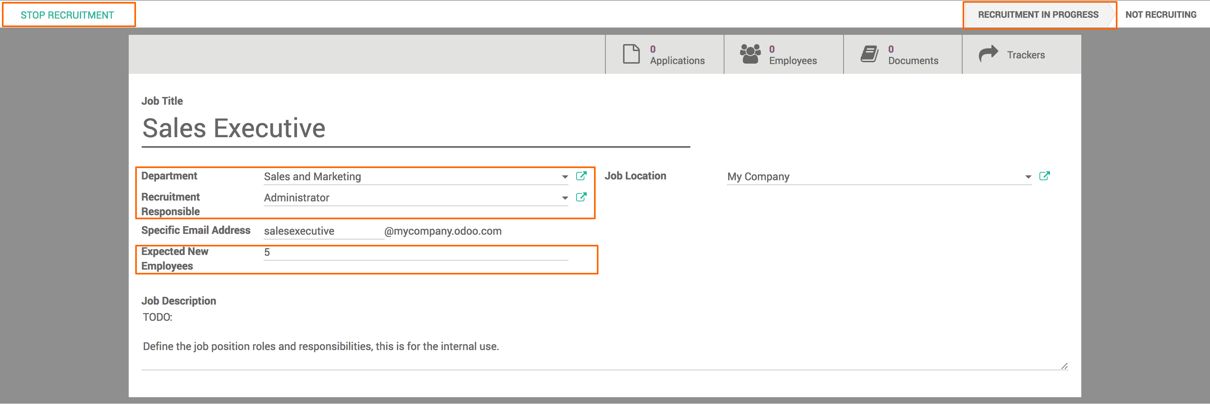
By default, the manager of the department will be set as a Recruitment Responsible, as soon as you select the Department. However, it can be changed manually if you would like to set someone other than the department manager to conduct the interviews.
- The next step is to configure the recruitment pipe; we have to configure or fix our recruitment process. This stage will define how the application will be processed for the Sales Executive job position.
The application may have different processes depending on the Job Position. Some positions may require two rounds of technical interviews, or some may require only one round of technical interviews.

Click on the APPLICATION(S) button available on the job position to enter into the pipe and configure the stages. By clicking on the ADD NEW COLUMN, we can add a new stage to the recruitment pipe. Look at the preceding screenshot for the Sales Executive job position pipe.
- Assume that we received an e-mail on [email protected], which creates an applicant in the Sales Executive job position. The applicant will look like this in the recruitment pipe:

- Click on the applicant to get more details. You can see the cover letter in the chatter along with the attached resume. Look at the following screenshot:
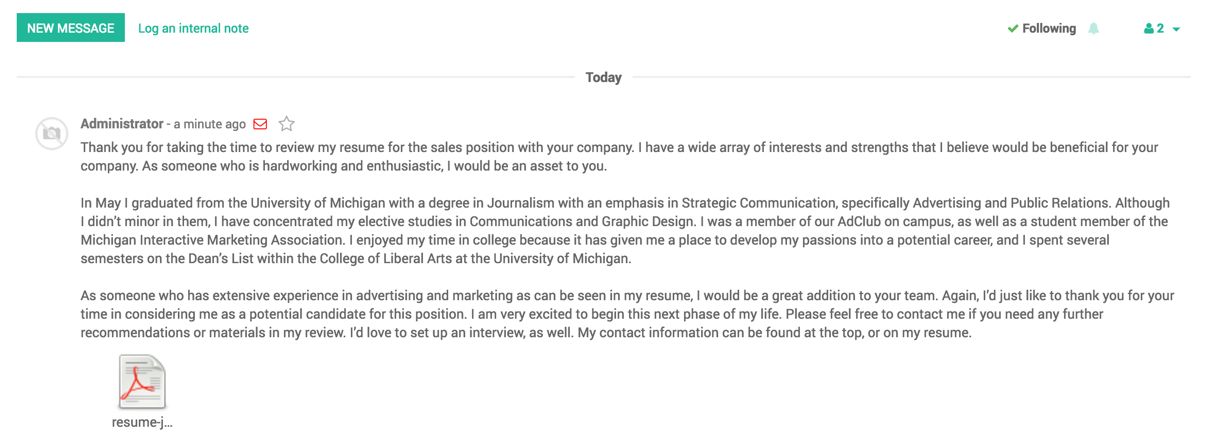
You can get the resume attached to the e-mail, check the quality of an applicant, and if he/she fits the criteria, you can process them accordingly. If the applicant does not fit the requirements, we can refuse or move forward to the Qualified stage:

You can drag the applicant and drop him/her to the Qualified stage.
- It's time to update and get more information on the applicant that may not be a part of the resume. Fill the information on the application, such as Expected Salary:
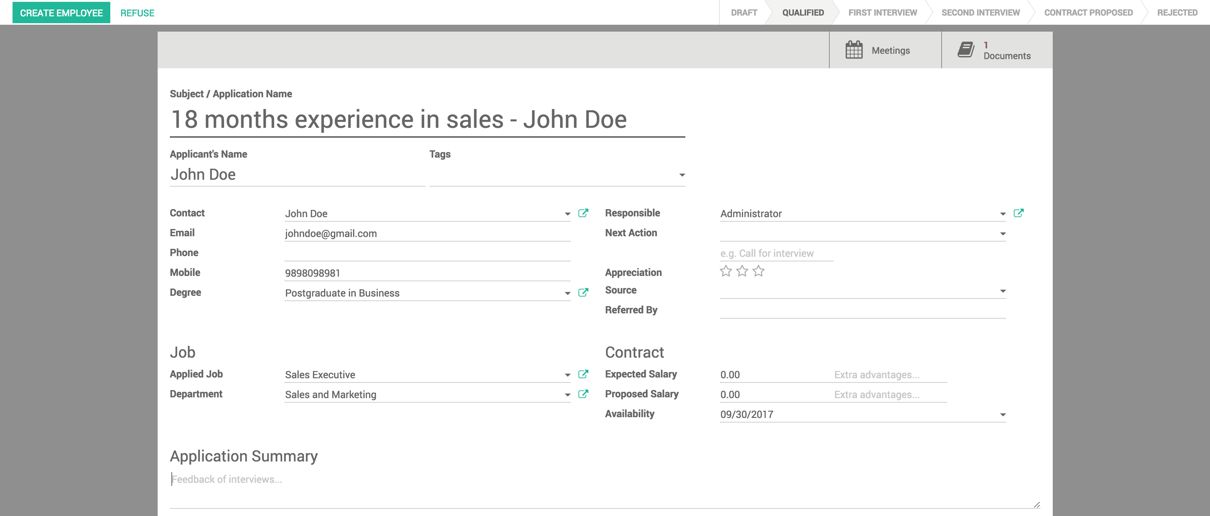
Let's call to collect more information and inform the applicant about the qualification and that they are moving forward for the first round of interviews.
Schedule an interview with the candidate by clicking on Meeting. This will redirect you to the Calendar view to schedule the meeting:
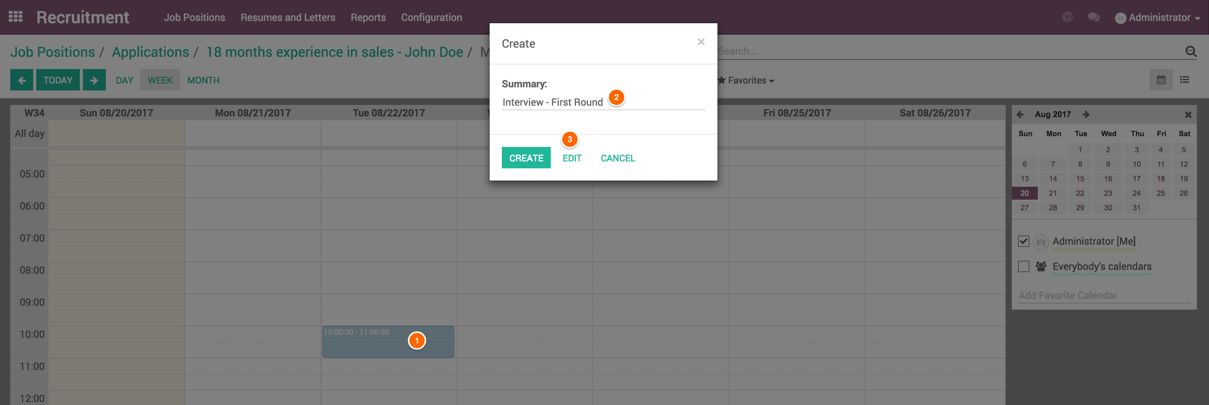
- To create an appointment, click on the start time and drag to the end time on the date suggested by an applicant. As soon as you release the mouse, a popup will appear asking us to enter the name of the meeting. Enter the name of the meeting and click on the EDIT button to add the attendees of the meeting:
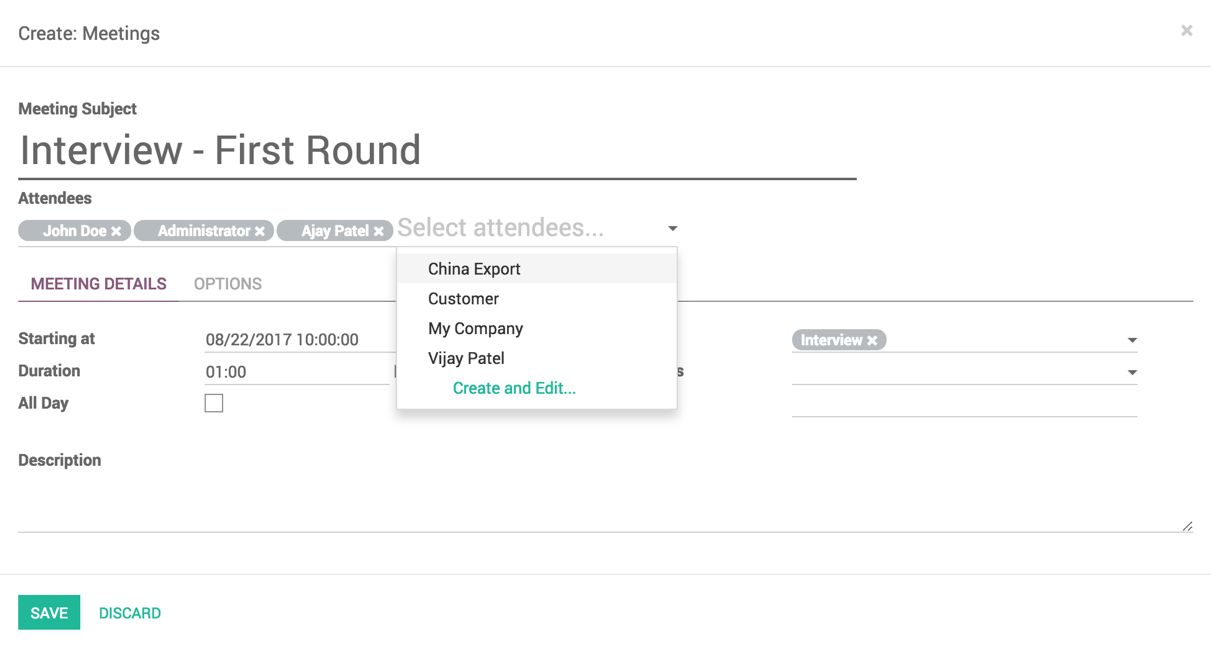
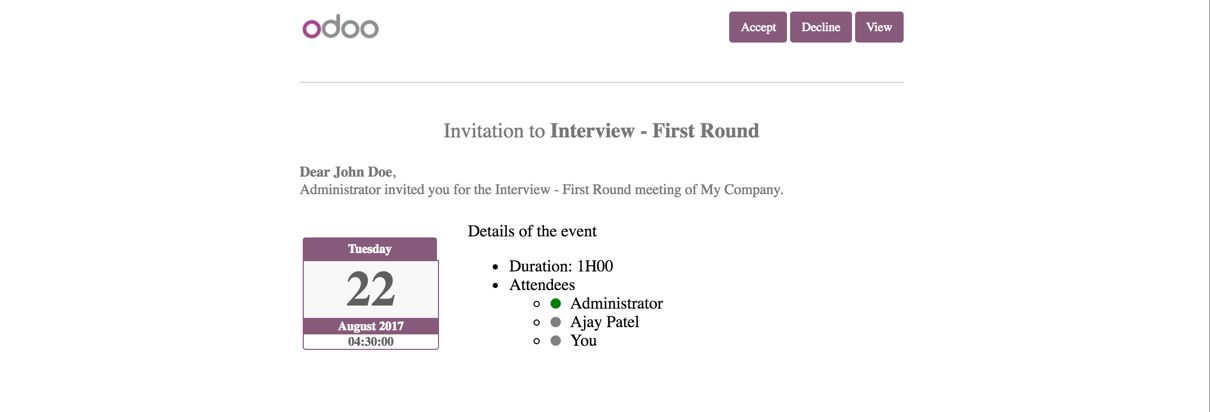
The creator of the meeting and the candidate will be added to the Attendees; we have to add the interviewer manually. Click on SAVE when the meeting agenda and attendees have been confirmed. The meeting will appear on everyone's calendar. The candidate will get an e-mail in their mailbox, as shown in the following screenshot. From the e-mail application, the applicant can Accept or Decline the meeting time to reschedule the meeting, or the applicant may reply to the e-mail to reschedule:
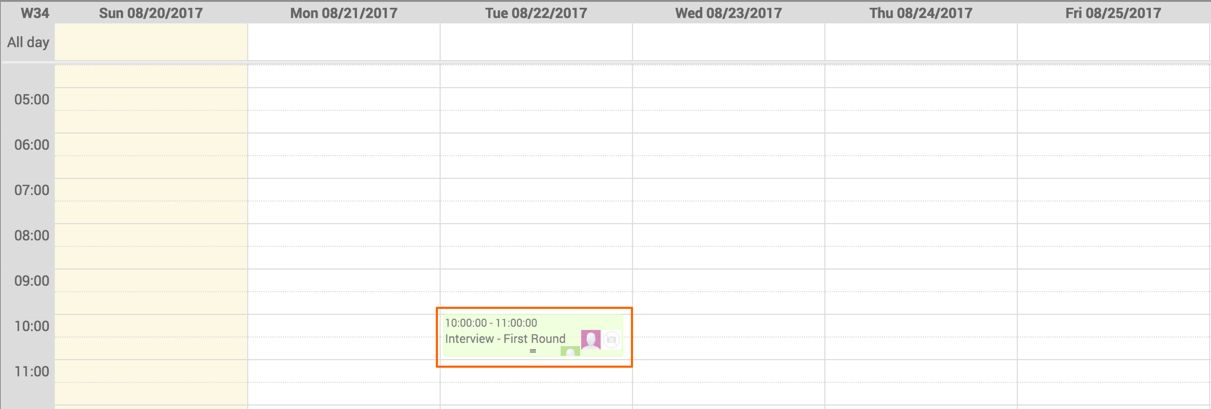
The scheduled interview will appear on the interviewer's calendar as follows; the interviewer can plan the day accordingly if there are many interviews to be conducted:
- On the day of the first interview, the interviewer goes through the standard procedure to check the technical skills and job knowledge, and collect more information along with contractual information. We may have information about the expected benefits and record them on the application.
Schedule the second round of interviews if needed or propose the contract as an offer. The contractual information can be stored on the application until it gets finalized:
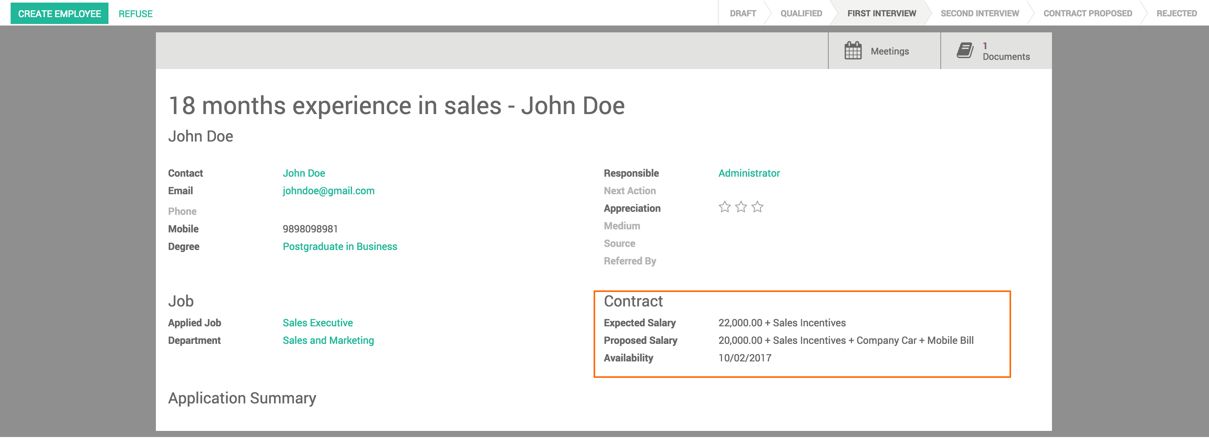
The applicant can either accept the offer or reject it. We may enter into negotiations if the candidate is really a key resource for the required job position or move to the next candidate, depending on the recruitment policy.
- Click on the CREATE EMPLOYEE button available on the application. When a candidate accepts the offer, the employee will be created in the Employee Directory:
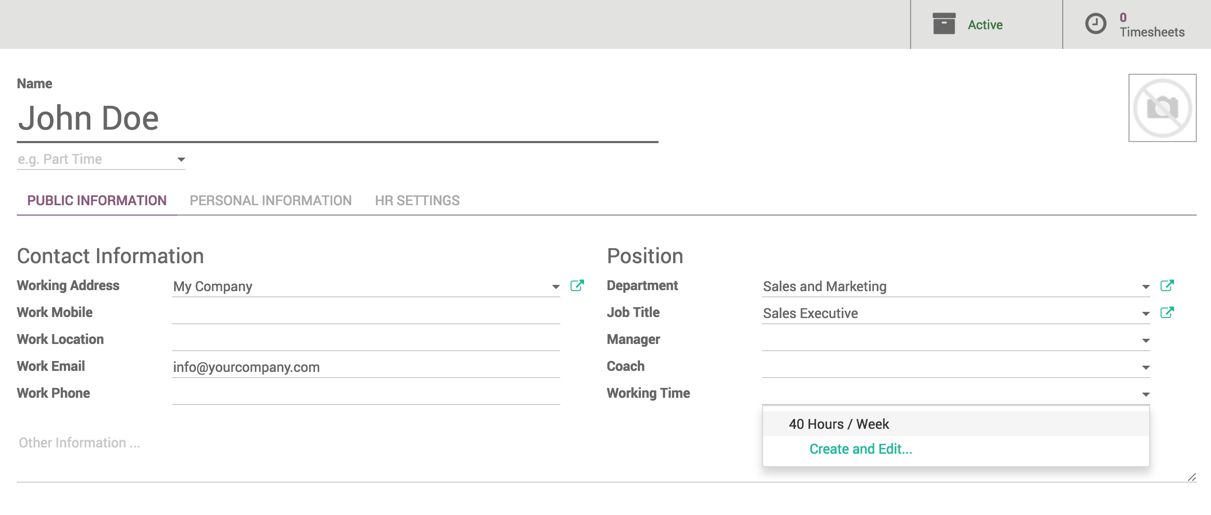
Configure the Manager, Coach, and Working Time under Position, and other information on the employee under PERSONAL INFORMATION. The most important field is to assign the user to the employee in the HR SETTINGS tab.

