- The forecasting feature on the project can be enabled from Configuration|Settings of the Project application. Select the checkbox Forecast, Planning and Gantt charts under the Forecasts section:

Click on the APPLY button to enable the forecasting feature for your projects.
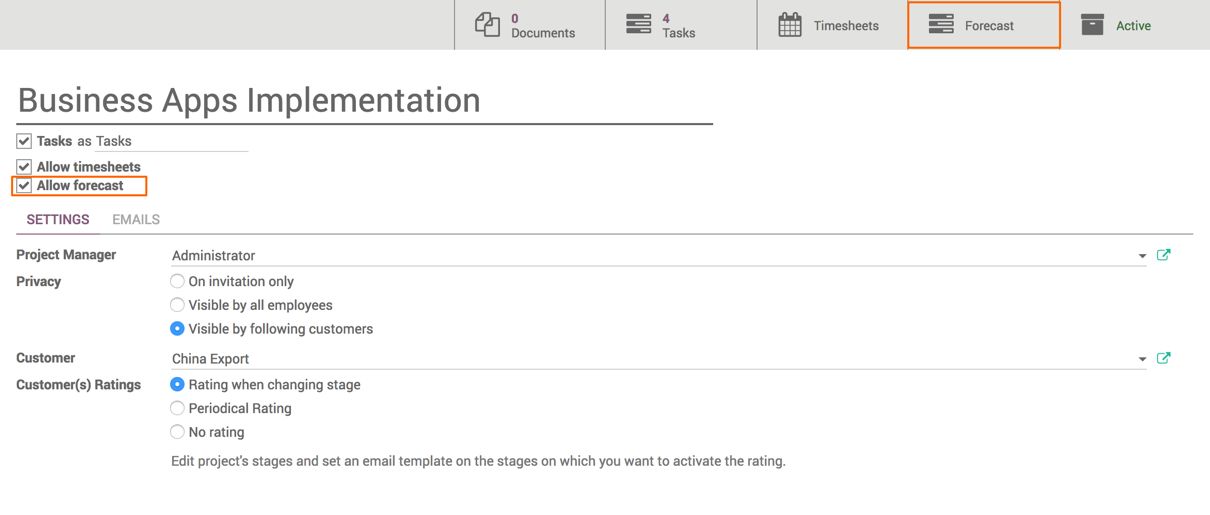
- Not all projects require forecasting and planning; it is only the long-term projects that require the forecasting feature. Open the settings of the project for which forecasting is required. Select the checkbox Allow forecast on the project and click on SAVE to save the setting. The forecasting will be enabled for that project.
Let's take an example of the Business Apps Implementation project that requires better resource planning as it is a customer project and we would like to meet the deadline:

Go to the Projects dashboard. You can see that the forecasting section is activated on the projects that have been chosen for forecasting:

The next step is to create a task and forecast it to allocate the resource and time period to the start date and end date to complete the task.
The critical tasks are required to be forecasted to ensure that the right member is assigned to work on it to complete it on time. The task can be included in the forecasting by creating a plan for the task. It can be done at the time of creating a task or later.
Assume that we have some data import tasks to implement the first business application, which is Point of Sale. It can be done by one of the business analysts in our team:

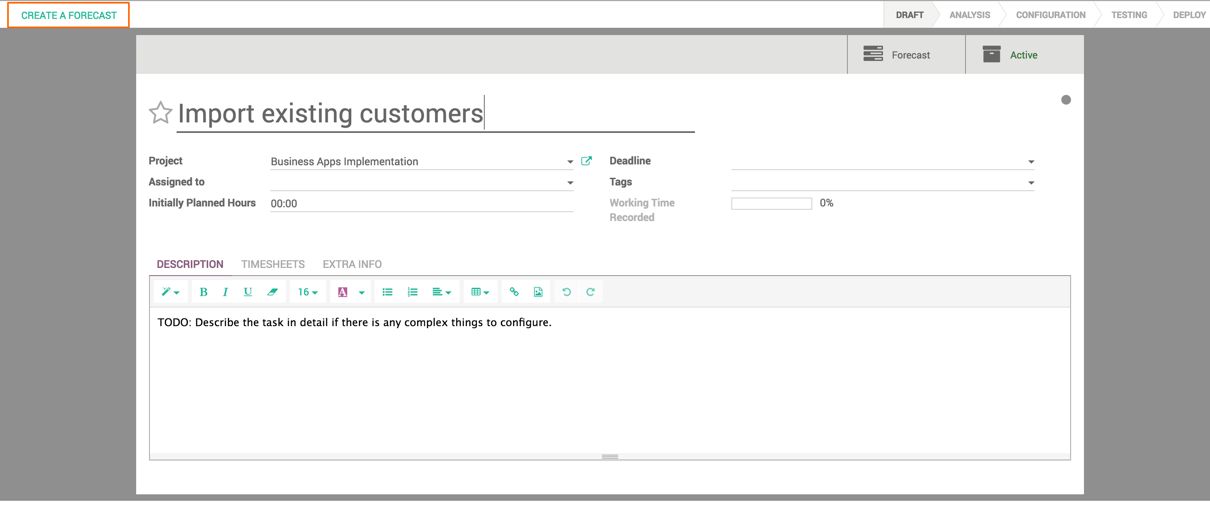
To create the forecasting for the task, click on the CREATE A FORECAST button. It will redirect you to the task forecasting window. Look at the following screenshot of planning:

Select the User (resource for the planning) to whom we plan to assign the task. A Start date is a date by which the task should start and End date is the planned deadline date by which the task should be completed. Planned hours are allocated to the resource to complete the task.
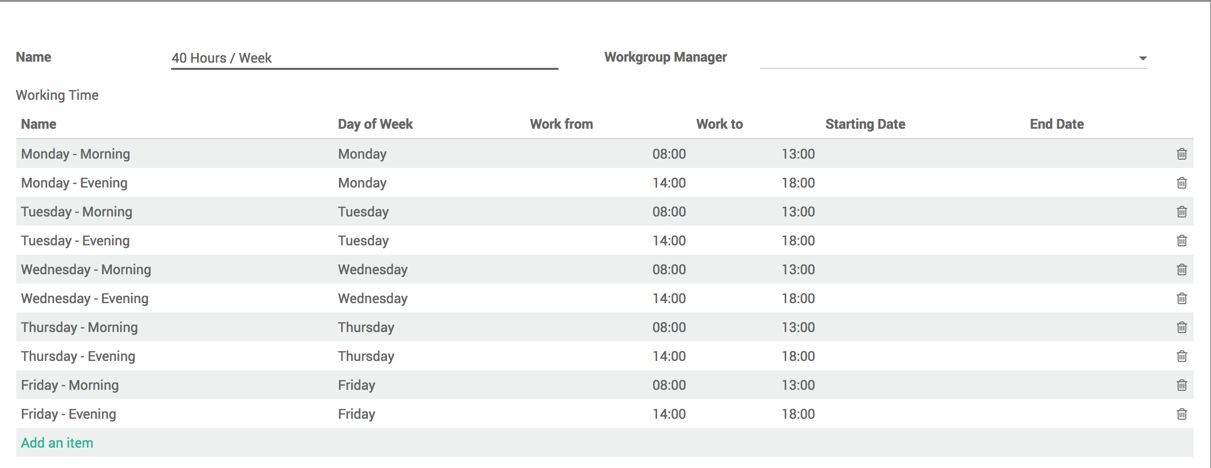
The %Time allocation will be computed based on the dates, hours applicable, and working timesheet attached on the employee. Look at the working timesheet I have created:

- Assume that we have some task to be performed to implement the e-commerce application. There are many prerequisites to be configured to launch the point of sale. The tasks are to be performed in the following order:
| Sequence | Task Description | Planned Time | Resource |
| 1 | Import existing customers | 80 hours | Vijay |
| 2 | Import brand wise product master | 70 hours | Vijay |
| 3 | Verify the tax configuration on product | 50 hours | Ajay |
| 4 | Set up website and e-commerce application | 50 hours | Ajay |
| 5 | Set up the website theme | 50 hours | Ajay and Vijay |
Create the preceding tasks and forecasting for the tasks so that we can identify the risk and manage the deadline.
- We have two consultants who can work parallel for the implementation project. Assume that the forecasting has been created for the task. Assign Start Date, End Date, Planned Hours, and Resource on the forecasting.
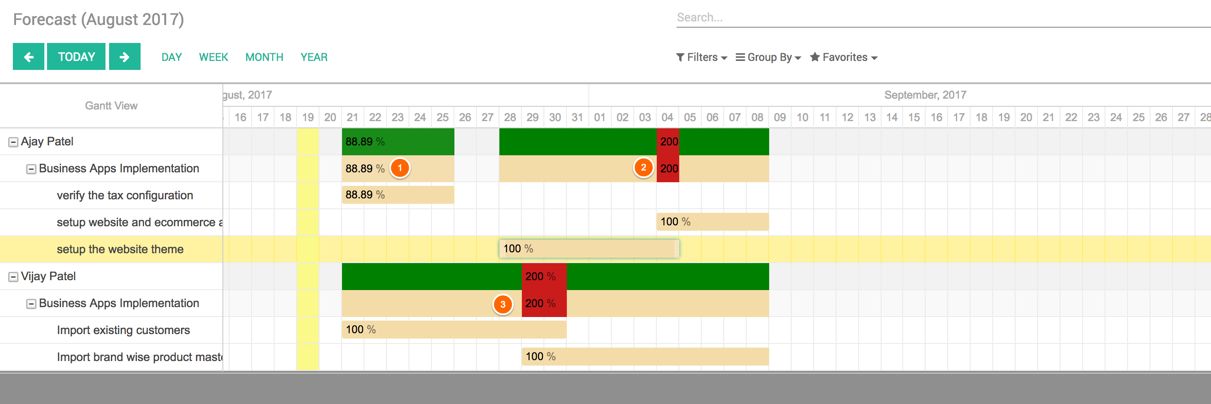
Look at the preceding screen. We created the forecasting as soon as the task was created. The initial planning has been done, but there are three problems that have to be fixed. The forecasting can be checked in two ways: By Project or By Users. Let's go and check the forecasting By Users from the Forecast menu under the Project application:

The first point it suggests is that the resource utilization is not 100 percent during that week. Still, we can use the resource for some other task for 20 percent of the weekly time.
Other two points indicate a critical problem fix. There are two tasks that overlap for the start date and end date. Those tasks have to be re-planned.
- To fix the problem, the task has to be dragged and dropped to the correct dates so that we do not have two parallel tasks running for the same user or the time allocation should not be more than 100 percent of the users. Look at the following screenshot after fixing the problem:

- The planning can be done by DAY, WEEK, MONTH, or YEAR. The current planning was based on MONTH. Let's switch to the WEEK view. It will look like this:


