Once you choose to pay the vendor bills by check, you can select to pay by check, and the checks can be printed in batch. At the end, the bank reconciliation process will match the checks you sent to the suppliers with actual bank statements.
Activate the feature Allow check printing and deposits from Accounting | Configuration | Settings:

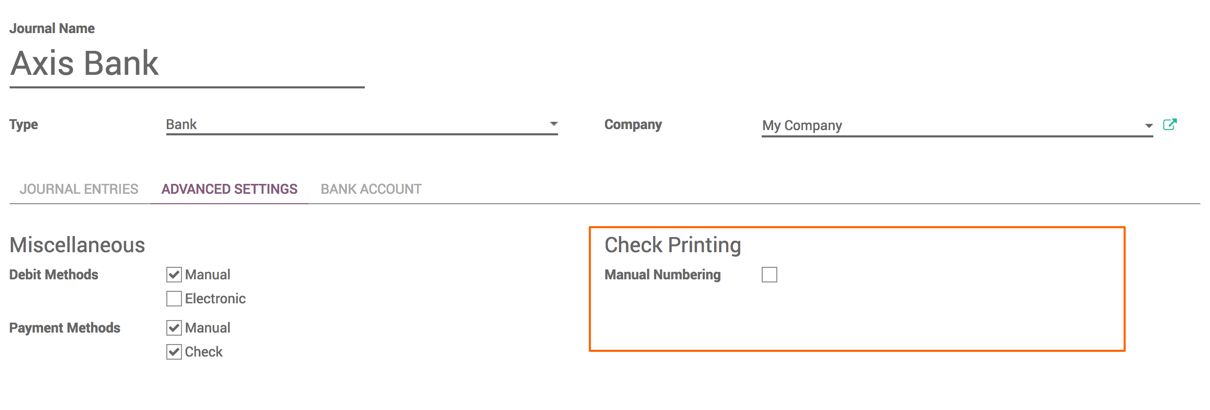
To pay a check to vendors, you have to activate the Check payment method on the bank journals. Open the bank journal settings. In the Payment Method field, select the Check payment method. The following screenshot shows payment method activation:

The check number can be maintained on the payment entry in two ways, either entered manually at the time of printing the check or can be generated automatically using the sequence number. Select Manual Numbering, if you plan to generate the check number generated manually using the sequence.
By default, Odoo supports three different formats for printing the checks, however, you can also customize check printing if you have any other printing format other than the available formats through customization:
- Checks at the top, and details in the middle and bottom
- Checks in the middle, and details at top and bottom
- Checks at the bottom, and details at the top
The supplier payment can be processed in three steps, listed as follows:
- Registering a payment on the vendor bill, you'd pay.
- Printing a check in a batch or individually for all the registered payments.
- Reconciling the bank statements.
The payment can be registered on the vendor bills or through payments under a vendor bill. Let's create a payment entry. The payment methods will be changed according to the Payment Journal selected. Select the Axis Bank journal, select Checks as the payment method, and VALIDATE the payment. Look at the following screenshot to see how the payment dialogue looks like:

As soon as you confirm the payment entry, it goes to the POSTED; state and you are ready to print the check. The PRINT CHECK button will appear on the form that allows you to print the single check just after the payment confirmation.
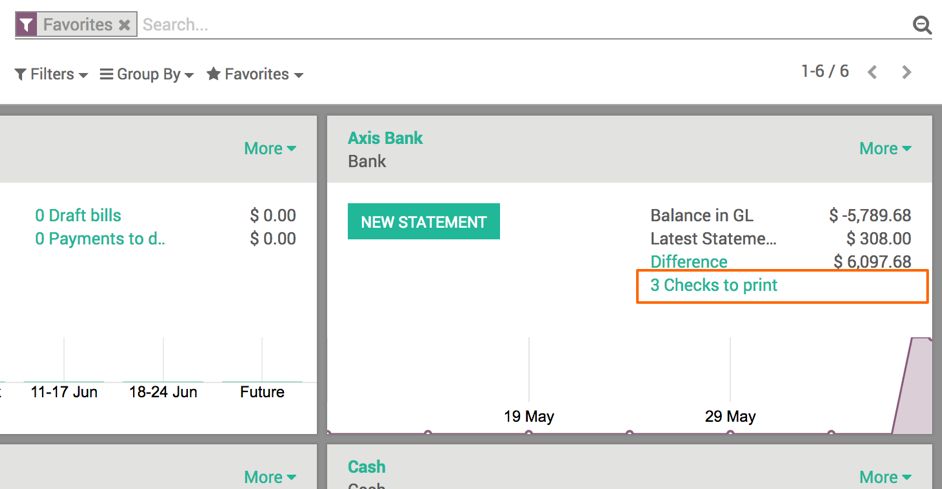
If you plan to issue some checks for all the pending vendor bills, create the payment entries and print all the checks at the end of the day; you can see the number of checks to be printed on the dashboard on the related bank journal:

By clicking on the link to print the checks, you will be redirected to the list of checks to be printed. You can print all the checks at once by selecting them, or review each check and print them individually.
Let's print the checks. Click on the PRINT CHECK button, a popup will appear asking you to enter the check number printed on the check:

Enter the check number, and click on the PRINT button to print the check.
As soon as the bank statement is received, the check entry will be matched with the statement entry automatically, and the payment entry will be marked as RECONCILED.

