Chapter 5
Advanced Language Constructs
What's in this chapter?
Using and Understanding Lambda Expressions
An Easy Way to Perform Tasks Asynchronously
Working with Custom Iterators
on the Download Code tab. The code is in the chapter 5 download and follows the single project sample application first discussed in Chapter 1, with some minor updates.
With any language, developers are typically provided with multiple ways to perform a given action. Some of these methods are easier and more efficient than others. One cause of this is simple growing pains. As a language evolves and grows, older ways of performing some functionality are replaced by more robust, efficient, and typically easier methodologies.
This is no different with Visual Basic 2012, which has many new features and improvements. Some of these come from its aforementioned growth as a language, while some can be attributed to its close relationship with C#. While C# may gain some new features and improvements first, Visual Basic is usually not far behind.
The focus of this chapter is to dive into several language features of Visual Basic that provide more advanced functionality. These features are deeply rooted into the framework and have very widespread uses, making them capable of fulfilling many needs. These features can be used to improve the overall appearance and flow of an application or decrease development time.
The first feature covered, Lambda Expressions, is not new to Visual Basic 2012 but deserves to be called out due to its many uses. A Lambda Expression is a specialized delegate that can be referred to as inline function. They are a core part of Language Integrated Query (LINQ), which is covered in depth in Chapters 8.
The second feature covered is brand-new to Visual Basic 2012 and one of the more exciting and anticipated for any developer who has had to work with asynchronous operations. The core to this feature is the new Async and Await keywords. While Chapter 19 dives into the gritty details of performing asynchronous operations on background threads and managing them, this chapter will tell you how much of that work can now be greatly simplified by using these two new keywords.
Finally, this chapter will conclude by covering another new feature of Visual Basic 2012 known as Iterators. C# has had iterators for a few versions now, and Visual Basic has finally caught up. They provide developers with a powerful and easy way to customize how iterated data is returned to the developer or user.
.
: MainWIndow — MainWindow.xaml
<Window x:Class="MainWindow" xmlns="http://schemas.microsoft.com/winfx/2006/xaml/presentation" xmlns:x="http://schemas.microsoft.com/winfx/2006/xaml" Title="Pro VB 2012 Chapter 5" Height="400" Width="400"> <Grid Background="Black"> <Grid.ColumnDefinitions> <ColumnDefinition Width="7*"/> <ColumnDefinition Width="3*"/> </Grid.ColumnDefinitions> <Grid.RowDefinitions> <RowDefinition Height="42"/> <RowDefinition Height="139*"/> </Grid.RowDefinitions> <ComboBox Name="ExampleList" Grid.Column="0" Margin="5" ItemsSource="{Binding}" DisplayMemberPath="Name" SelectedValuePath="Lambda" /> <Button Name="ExecuteButton" Content="Run Sample" Margin="5" Click="ExecuteButton_Click" Grid.Column="1"/> <ScrollViewer Margin="0,0,0,0" Grid.Row="1" Grid.ColumnSpan="2"> <TextBox Name="TextBoxResult" TextWrapping="Wrap" Text=""/> </ScrollViewer> </Grid> </Window> The next step is to add the following code to the application.
Private ReadOnly _examples As CollectionView Public Sub New() ' This call is required by the designer. InitializeComponent() ' Add any initialization after the InitializeComponent() call. Dim examplesList = { New With {.Name = "To be continued", .Lambda = "To be continued"} } _examples = New CollectionView(examplesList) End Sub Public ReadOnly Property Examples As CollectionView Get Return _examples End Get End Property The _examples field is used to hold a CollectionView of the collection created in the constructor. The Examples property provides read-only access to this field. Earlier, you bound this property to the ComboBox control on the user interface. This allows the data in the collection to be shown in the control.
At the moment, your examplesList collection is only stubbed out until you cover the first topic, Lambda Expressions. It is a collection of anonymous types where the anonymous type has a Name and Lambda property.
Your next step is to provide functionality for the button, which you accomplish by adding the following:
Private Sub ExecuteButton_Click(sender As Object, e As RoutedEventArgs) Dim ExampleMethod = TryCast(ExampleList.SelectedValue, Action) If ExampleMethod = Nothing Then TextBoxResult.Text = "Nothing to run" Return End If TextBoxResult.Text = String.Empty ExampleMethod.Invoke() End Sub
In the example you built initially in Chapter 1, your button was called Button. Since we changed the button name to Execute, you will no longer need the Button_Click_1 subroutine, in this version.
The detail on what this handler actually does will be covered later in this chapter. For now, you will finish setting up the application by handling the main window's Loaded event and binding the Examples property to the ExampleList control. The following event handler code should be added to the application:
Private Sub MainWindow_Loaded(sender As Object, e As RoutedEventArgs) _ Handles Me.Loaded ExampleList.DataContext = Examples End Sub
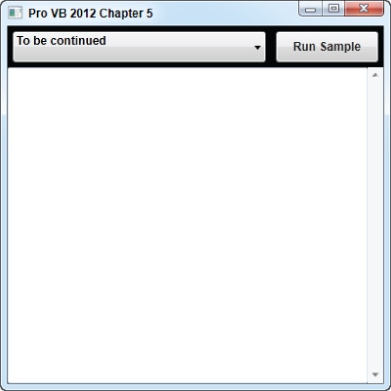
These changes and additions will prepare the application for use throughout this chapter. If you run the application, it will look like . However, it won't actually do anything yet because you haven't added any examples. You have waited long enough—it is time to move on to the real purpose of this chapter!
Main Application
) that its type is generated method. This means that the compiler actually created a method for it and generated a name for it. You can see from the same figure that the name for this method is Void_Lambda$_2. Subroutines example
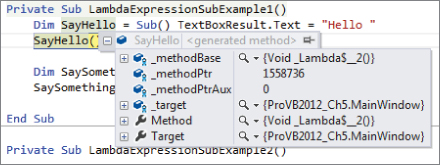
Subroutines example

Now you are going to update your sample application in order to test this out yourself. The first step is to add the following methods to the application:
Private Sub LambdaExpressionSubExample1() Dim SayHello = Sub() TextBoxResult.Text = "Hello" SayHello() Dim SaySomething = Sub(text) TextBoxResult.Text += text SaySomething("World") End Sub Private Sub LambdaExpressionSubExample2() Dim SayHelloWorld = Sub() TextBoxResult.Text = "Hello" TextBoxResult.Text += "World" TextBoxResult.Text += "Again" End Sub SayHelloWorld() End Sub The first example demonstrates using lambda expressions that are on a single line and that they can have zero or more parameters. The second example demonstrates how they can also support multiple lines.
Running the program now won't do anything, because you have not added these methods to the examples collection. You accomplish that by adding the boldfaced lines in the following snippet to the constructor:
Public Sub New() ' This call is required by the designer. InitializeComponent() ' Add any initialization after the InitializeComponent() call. Dim examplesList = { New With {.Name = "Lambda Expression - Subroutines 1", _ .Lambda = New Action(Sub() LambdaExpressionSubExample1())}, New With {.Name = "Lambda Expression - Subroutines 2", _ .Lambda = New Action(Sub() LambdaExpressionSubExample2())} } _examples = New CollectionView(examplesList) End Sub When you run the application, the combo box will have the names you provided for your two examples. When the button is pressed, the selected method executes and the results are displayed in the text box.
This all works because of the Action specified for each example. Action(Of T) is a generic delegate. Chapter 7 covers the concept of generics, so you will not get into that here. The method has many definitions that allow for numerous generic-type parameters that correspond to parameters in the wrapped method. It has no return type, and the only parameter is the actual method to be wrapped. In the case of this example, you are wrapping a lambda expression which calls the appropriate method. Pressing the button retrieves this delegate and calls the Invoke method to execute it.
Creating a Lambda Expression Function
As mentioned in the previous section, subroutines do not return a value. If you need to return a value from your lambda expression, you must define it as a function.
Update the sample application by adding the following methods:
Private Sub LambdaExpressionFunctionExample() Dim AreaOfCircle = Function(radius As Integer) As Double ' Compute the area of a circle Return Math.PI * Math.Pow(radius, 2) End Function Dim Circumference = Function(radius As Integer) ' Compute the circumference Return Math.PI * (radius * 2) End Function TextBoxResult.Text = "The area of a circle with a radius of 5 is " + AreaOfCircle(5).ToString() + Environment.NewLine TextBoxResult.Text += "The circumference of a circle with a radius of 5 is " + Circumference(5).ToString() End Sub
This example shows you how to create lambda expressions that are capable of returning a method. As you might imagine, instead of using Sub you use Function. Both of the functions defined take a parameter and return a value, but only the first one specifies the data type of the return value. For the second function, the compiler will infer the return type.
Before you can actually test this example, you need to add it to the examplesList collection by appending the following to the collection initializer:
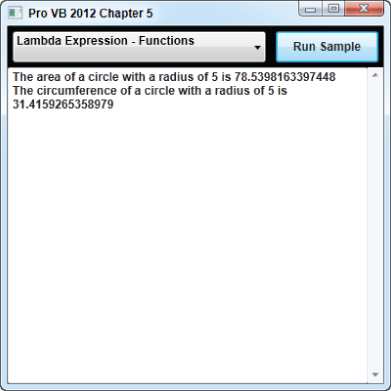
New With {.Name = "Lambda Expression - Functions", _ .Lambda = New Action(Sub() LambdaExpressionFunctionExample())} Once that is complete, you can run the application, select the Lambda Expression - Functions item from the list, and execute it by pressing the button. Your results should look similar to those in .
Functions example
. Event Handler example
Event Handler example

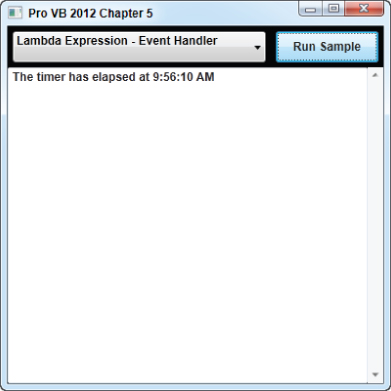
Using lambda expressions as event handlers works just like you may be used to, but it can make the task a little easier and make the code flow a little more natural. An added bonus with using lambda expressions is that you can use variables that are in the scope of the parent method within the expression itself. You did this in the example when you used the timer variable to stop the timer.
LINQ with Lambdas
Language Integrated Query (LINQ) allows you to create SQL-like queries against objects in code. You will not get into too much detail on what it is, since it is covered in great detail in Chapters 8 through 10, but certain points need to be understood in order for this to make the most sense.
LINQ queries typically rely on a set of clauses, such as Select and Where. These are key to supporting the SQL-like approach targeted by LINQ. What may not be obvious is that these clauses are just syntactic sugar that wraps extension methods of the IEnumerable(OF T) interface.
According to MSDN, the Where method (which corresponds to the Where clause) has the following declaration:
<ExtensionAttribute> _ Public Shared Function Where(Of TSource) ( _ source As IEnumerable(Of TSource), _ predicate As Func(Of TSource, Boolean) _ ) As IEnumerable(Of TSource)
This is an extension method, so the first parameter is really the source collection that the method is being executed against. The second parameter is the one you are interested in. The Action delegate was mentioned in a previous section. Func(Of T, TResult) is also a delegate but differentiates itself from Action by allowing a return type, specified by the TResult parameter. As with the Action delegate, a lambda expression can be implicitly converted to a Func delegate.
All LINQ extension methods, and the clauses that wrap some of them, represent either an Action(Of T) or a Func(Of T, TResult). This means lambda expressions can be used to provide additional functionality and support to queries.
To experiment with this, you need to update your application with the following:
Private Sub LambdaExpressionsWithLinq() Dim fireFlyCrew = { New With {.Name = "Malcolm Reynolds", .Age = 31}, New With {.Name = "Zoe Washburne", .Age = 30}, New With {.Name = "Hoban Washburne", .Age = 31}, New With {.Name = "Inara Serra", .Age = 27}, New With {.Name = "Jayne Cobb", .Age = 40}, New With {.Name = "Kaylee Frye", .Age = 23}, New With {.Name = "Simon Tam", .Age = 25}, New With {.Name = "River Tam", .Age = 19}, New With {.Name = "Shepherd Book", .Age = 52} } Dim minimumAge = fireFlyCrew.Min(Function(crewMember) crewMember.Age) Dim youngest = From crewMember In fireFlyCrew Where crewMember.Age = minimumAge Select crewMember.Name TextBoxResult.Text = "The youngest crew member is " + youngest.First + Environment.NewLine Dim averageAge = fireFlyCrew.Average(Function(crewMember) crewMember.Age) TextBoxResult.Text += "The average age is " + averageAge.ToString End Sub The first thing this method does is create a collection of anonymous types that have a Name and Age property. Next, you determine the youngest age and save it in the minimumAge variable. To calculate the minimum age you use the Min extension method, which accepts a Func(Of TSource, Integer) delegate. You use a lambda expression here, which is called for every record in the collection and provided with an instance of the anonymous type. The body of the expression is used within the actual calculation for determining the minimum.
If you just called Min() without providing an expression, you would receive an exception. That is because your anonymous type is not of a type, such as an Integer, that the function knows how to calculate. You overcome this by providing the function what it needs to execute correctly.
The example uses the minimum value within a query in order to get the name of the youngest person. You then perform a similar action by using the Average extension method as an additional test.
As with all the examples in this chapter, you can't actually test it until you add it to the list. Do this by updating the examplesList field, in the constructor, with the following item:
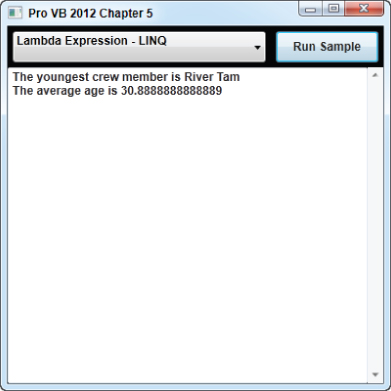
New With {.Name = "Lambda Expression - LINQ", _ .Lambda = New Action(Sub() LambdaExpressionsWithLinq())} When this example is executed (by selecting the name from the list and pressing the button) you will be presented with the appropriate results as shown in .
LINQ example
. Basic Async/Await example
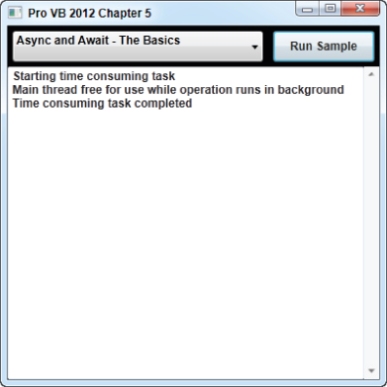
Basic Async/Await example

While this was a fairly basic example, you can clearly see the power you now have at your hands. Using Async and Await allowed you to very easily execute a task on the background, but it did it while maintaining the readability and maintainability of your code by preserving the flow.
The Man Behind the Curtain
You are no doubt intrigued at this point, but you probably also have many questions related to how this all works. What is the compiler doing to make this all happen?
The best way to show you what is happening is to show you what happens if you don't use Async and Await. shows you what the IL, discussed in Chapter 2, looks like if you remove both keywords from the StartTimeConsumingTask method.
IL of StartTimeConsumingTask without Async/Await
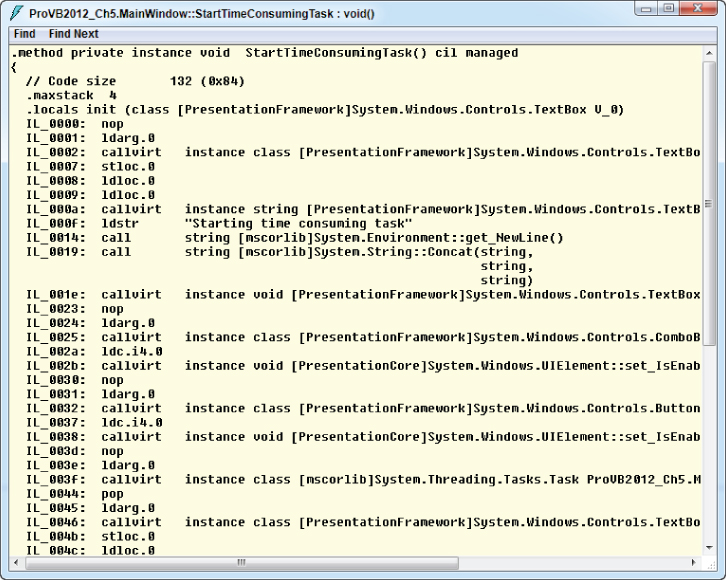
Don't worry about understanding this gibberish right now—this is only for comparison purposes. Now look at , which shows the same method with the Async and Await keywords restored to proper glory.
IL of StartTimeConsumingTask with Async/Await
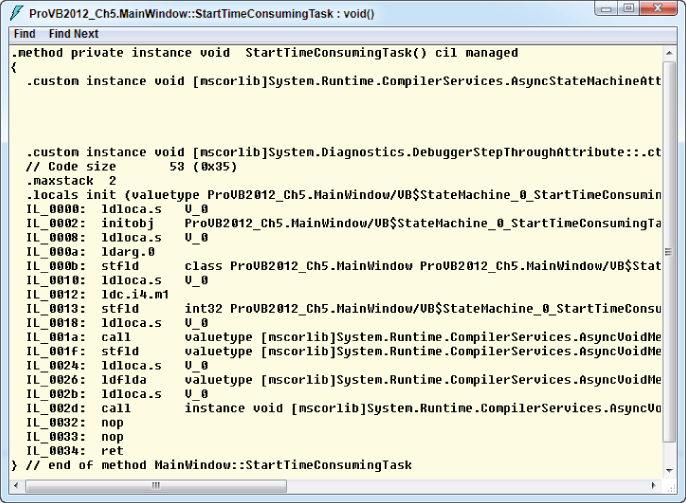
The first thing you may notice is that the method is much shorter in this version. You may also notice the references to some object named VB$StateMachine_0_StartTimeConsumingTask. A closer look at this class is shown in .
VB$StateMachine_0_StartTimeConsumingTask
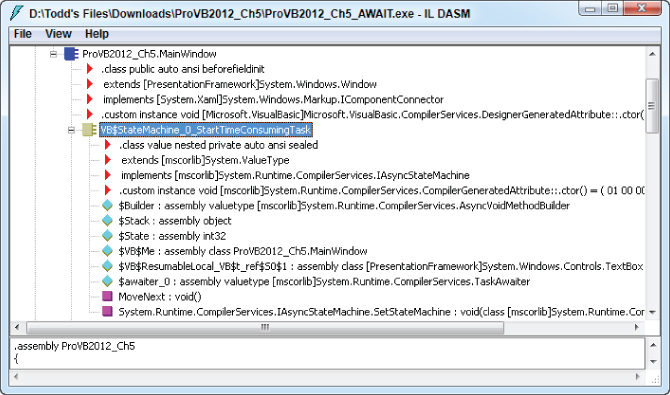
This class is the secret behind Async and Await. The Async modifier told the compiler to create an anonymous class that represents the method. This class is a state machine that keeps track, using a stack, of the locations of each Await operator in order to allow execution to return. Most of this work is handled by the MoveNext method of the state machine.
Using Async and Await
The previous section provided you enough information for you to be able to easily create asynchronous tasks, but the example was very general in order to focus on the core concept itself. This section aims to provide a more concrete example that you can more easily apply to real-world situations.
A very important thing to understand is that Microsoft wasted no time in providing internal support for Async and Await. Nearly any method that returned a Task has been updated, and many older classes have had new awaitable methods added. The rule of thumb is that if a method name ends with the word “Async” it is awaitable and supports the new asynchronous programming model introduced in this version of the framework.
The first thing you are going to do is create a new example that performs an asynchronous task using the old method. To get started, add the following methods to your application:
Public Sub OldAsyncExample() RetrieveSongData() TextBoxResult.Text += "**Main thread free for use while operation" + "runs in background**" + Environment.NewLine End Sub Private Sub RetrieveSongData() Dim url As String = "http://lyrics.wikia.com/api.php?artist=Linkin" + "Park&song=Lost in the echo&fmt=xml" TextBoxResult.Text += "Attempting to retrieve song lyrics" + Environment.NewLine ExampleList.IsEnabled = False ExecuteButton.IsEnabled = False Using client As New WebClient AddHandler client.DownloadStringCompleted, _ AddressOf DownloadStringCompletedHandler client.DownloadStringAsync(New Uri(url)) End Using End Sub Private Sub DownloadStringCompletedHandler(sender As Object, _ e As DownloadStringCompletedEventArgs) TextBoxResult.Text += e.Result TextBoxResult.Text += Environment.NewLine + "Completed retrieving song lyrics" ExampleList.IsEnabled = True ExecuteButton.IsEnabled = True End Sub
Be sure to add the following statement at the top of the code file in order to use the WebClient class:
Imports System. Net
The OldAsyncExample method runs on the main thread and starts everything running. The RetrieveSongData method calls out to a freely usable rest service to retrieve song lyrics. You use the WebClient.DownloadStringAsync method to asynchronously get the results from calling the REST service. When the asynchronous operation has completed, it fires the DownloadStringCompleted event. You handle this event in order to provide the results and re-enable the UI controls.
Now add the following item to the examples lists:
New With {.Name = "Async and Await - Old Way", _ .Lambda = New Action(Sub() OldAsyncExample())} When the example is executed and completed, it will look like .
Old methodology
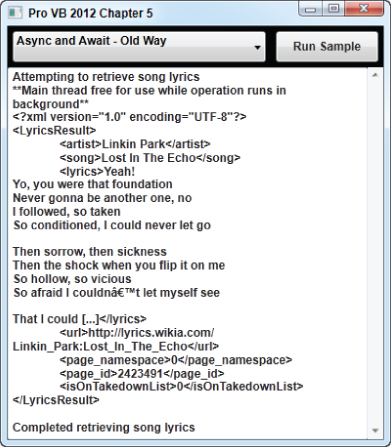
This example executes asynchronously, and there is nothing wrong with it. The one main complaint to be made is that your code has been split, breaking the natural flow, in order to handle the completed event. You could alleviate this, to some extent, by using a lambda expression instead.
Since this section is on the new asynchronous programming model, you will create a new example that uses it. Start by updating your application with the following methods:
Public Sub AsyncAdvancedExample() RetrieveArtistDataAsync() TextBoxResult.Text += "**Main thread free for use while operation" + "runs in background**" + Environment.NewLine End Sub Private Async Sub RetrieveArtistDataAsync() Dim url As String = "http://lyrics.wikia.com/api.php?artist=Linkin Park&fmt=xml" Using client As HttpClient = New HttpClient() TextBoxResult.Text += "Attempting to retrieve Linkin Park albums" + Environment.NewLine ExampleList.IsEnabled = False ExecuteButton.IsEnabled = False Dim response As String = Await client.GetStringAsync(url) ProcessArtistData(response) TextBoxResult.Text += Environment.NewLine + "Completed retrieving albums" ExampleList.IsEnabled = True ExecuteButton.IsEnabled = True End Using End Sub
In order to use the HttpClient class you will need to add a reference to System.Net.Http to the project. To do this, just right-click on the name of your project (within Solution Explorer) and select “Add Reference” from the context menu. You will then need to add the following statement at the top of the code:
Imports System.Net
For starters, RetrieveArtistDataAsync uses the new HttpClient class. This class is a replacement for WebClient and fully supports Async and Await. The main difference between this method and RetrieveSongData, in the previous example, is that you use the new GetStringAsync method. This method runs on a background thread using Task, which it returns. Since it returns a Task it is awaitable.
Now add the following method, which is responsible for processing the data:
Private Sub ProcessArtistData(rawXmlValue As String) TextBoxResult.Text += "Parsing album names from data" + Environment.NewLine Using sr As StringReader = New StringReader(rawXmlValue) Using reader As XmlReader = XmlReader.Create(sr) While reader.Read() Select Case reader.NodeType Case XmlNodeType.Element Select Case reader.Name.ToLowerInvariant() Case "album" TextBoxResult.Text += String.Format("{0}{1,-20}", Environment.NewLine, reader.ReadElementString) Case "year" Dim value As String = reader.ReadElementString TextBoxResult.Text += " [" + IIf(Not (String.IsNullOrWhiteSpace(value)), value, "Not Listed") + "]" End Select End Select End While End Using End Using TextBoxResult.Text += Environment.NewLine + "Complete Parsing album names" End Sub Since you make use of the StringReader and XmlReader classes, you will need to add the following import statements to your code:
Imports System.IO Imports System.Xml
When the method runs, ProcessArtistData will not be called until after the GetStringAsync method completes. This method uses an XmlReader to parse the data and write it to the results text box.
To complete the updates, add the new example to the list:
New With {.Name = "Async and Await - Advanced", _ .Lambda = New Action(Sub() AsyncAdvancedExample())} With that updated, you can run the application and execute the new example. It will make a REST call to a service in order to retrieve album information. This operation executes on the background, allowing the application to continue running smoothly. Once the operation completes, control returns to the RetrieveArtistDataAsync method where the results are processed and displayed.
The final result is shown in .
New methodology
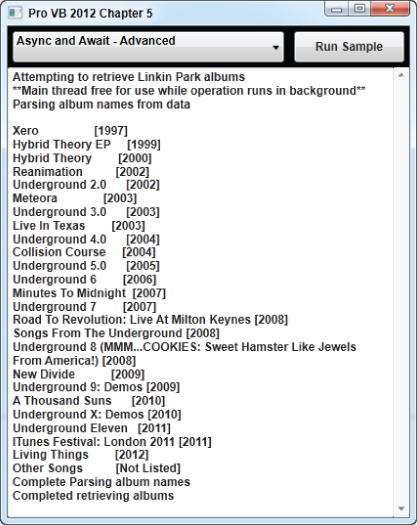
Since you used Async and Await in this scenario, you have retained control of the flow of the application and kept the appearance of the code clean and concise. There are no callbacks or event handlers visible. This new asynchronous programming model provides developers with a much-needed, and deserved, reprieve from the headache of traditional asynchronous development.
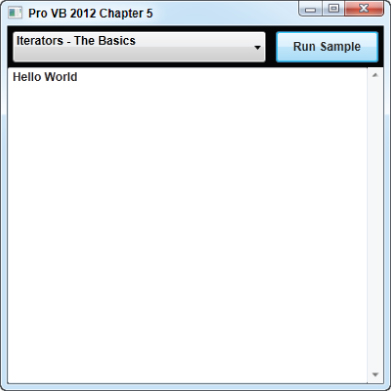
. Basic Iterator example
An Advanced Iterator Example
Basic Iterator example

The previous example touched only on the very basics. This example will go a little deeper into the same concepts and cover a few extra points. For this example, you will need the Oceans class. Create this class now by creating a new class file and updating it with the following (code file: Oceans.vb):
Public Class Oceans Implements IEnumerable Dim oceans As List(Of String) = New List(Of String) From {"Pacific", "Atlantic", "Indian", "Southern", "Arctic"} Public ReadOnly Iterator Property WorldOceans As IEnumerable(Of String) Get For Each ocean In oceans Yield ocean Next End Get End Property Public Iterator Function GetEnumerator() As IEnumerator _ Implements IEnumerable.GetEnumerator For Each ocean In oceans Yield ocean Next End Function End Class This class is a very simple class that just returns a list of oceans stored in an internal collection. The first iterator available is the WorldOceans property. The first new thing you will learn is that Yield statements work just fine inside a loop. The second is that Get accessors work as iterators in the same way as functions do.
The second iterator will be discussed in a moment; for now you need to add the following code to the main application (code file: MainWindow.xaml.vb):
Public Sub IteratorBasicExample2() Dim oceans As Oceans = New Oceans() TextBoxResult.Text = "Oceans from property: " + Environment.NewLine For Each value As String In oceans.WorldOceans TextBoxResult.Text += value + " " Next TextBoxResult.Text += Environment.NewLine TextBoxResult.Text += "Oceans from GetEnumerator: " + Environment.NewLine For Each value As String In oceans TextBoxResult.Text += value + " " Next End Sub
Initially, an instance of your Ocean class is created. The next part of the code iterates over the Ocean.WorldOceans property, writing each returned value to the results text box.
In the second part of the method, you iterate over the object itself. You can do this because the object implements IEnumerable. As mentioned previously, the compiler will automatically call the GetEnumerator method in this situation.
Now look back at the GetEnumerator method that you created in the Ocean class. Since it is marked with the Iterator modifier, the compiler has been kind enough to implement all the underlying IEnumerator methods for you. This saves you the headache of having to do it
Again, you are just writing the returned values to the results text box. However, before you can run the example, you need to add this item to the exampleList collection:
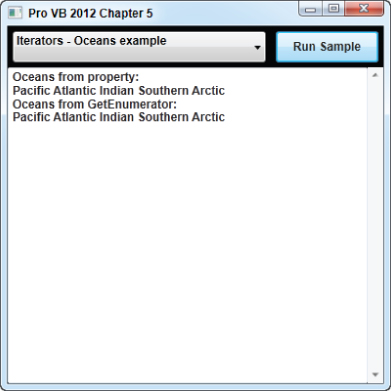
New With {.Name = "Iterators - Oceans example", _ .Lambda = New Action(Sub() IteratorBasicExample2())} The final results of executing the example are shown in .
Oceans example
Using Iterators
The examples provided in the previous section may not seem very practical because they are focused on the core concepts themselves. They also did not touch on the most powerful feature of iterators, which is the ability to customize the iterator itself.
In order to really see this in action, you are going to create another example. Start by adding the following code to your application (code file: MainWindow.xaml.vb):
Private Iterator Function Primes(max As Integer) As IEnumerable(Of Long) Dim isPrime As Boolean = False For i As Integer = 2 To max isPrime = False ' We know 2 is a prime and we handle it now since ' we are going to rule out all other even numbers If i = 2 Then Yield i Continue For End If ' We don't care about even numbers (except 2) If i Mod 2 = 0 Then Continue For End If isPrime = True For j As Integer = 2 To CLng(Math.Sqrt(i)) ' Check if current value is divisible by something ' other than 1 and itself If i Mod j = 0 Then isPrime = False Exit For End If Next If isPrime Then Yield i Next End Function
You marked the method with the Iterator modifier, so you know you can use For Each over it. You can also see several Yield statements. Basically, a Yield statement will be executed only if the value in question is a prime.
Without the use of iterators you would have had to perform the calculation and store each prime internal, returning a collection at the end. In this case you get each prime as it is discovered.
To use the new iterator, you need to add the following small method to the application (code file: MainWindow.xaml.vb):
Public Sub IteratorAdvancedExample() For Each value As Long In Primes(100) TextBoxResult.Text += value.ToString() + Environment.NewLine Next End Sub
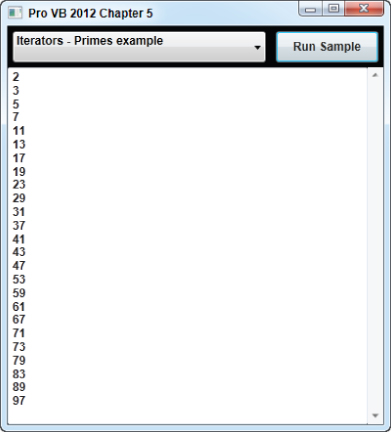
This method iterates over the results return by the Primes method. You provided the number 100 to the method, so all prime numbers between 2 and 100 will be returned.
Add the following item to the example list in order to be able to run it:
New With {.Name = "Iterators - Primes example", _ .Lambda = New Action(Sub() IteratorAdvancedExample())} Running the application will product results similar to those seen in .
Primes example
Summary
The purpose of this chapter was to provide you with additional weapons for your utility belt. It aimed to provide you additional insight into lambda expressions as well as the new asynchronous programming model and iterators.
You learned what lambda expressions are and how you can use them to provide cleaner and more efficient code. You also learned how they can be beneficial for use as event handlers and when working with LINQ.
The new and highly anticipated asynchronous programming model, lead by Async and Await, was also introduced. You experimented and explored how this new model could be used to quickly and easily develop asynchronous applications and cleaner code without the usual headache. Asynchronous programming no longer needs to be scary.
The chapter concluded by diving into iterators. While iterating over a collection is not new, you have now learned how iterators can allow you to make the process less cumbersome as well and more customizable.
You should have also learned how each of the topics covered by this chapter could easily reach into any of the other chapters and influence them in some manner. These features have endless uses, so feel free to experiment with them.
Anytime you write code you are inevitably going to be confronted with an error or some unforeseen results. The next chapter provides you information on how to appropriately handle errors and steps for debugging your application.

