- Expense Tracker is an independent application like leave. It can be found and installed from Apps. Go to Apps and search for Expense Tracker. Then, click on the INSTALL button:

As soon as the Expense Tracker application is installed, the new application Expenses can be found on your instance home page.
- The first step is to set up the expense products. It can be created or imported in Odoo. It is a special type of product used to register the employees' expense. Expense products can be created from Expense | Configuration | Expense Products.
Let's take an example of a cab service. When employees' went onsite for a customer meeting, they may have to hire a car to commute to the customer location:

In Odoo, we can create an expense product with a predefined cost price. This will help us approve or reject the expense bills. Look at the preceding screenshot. We created the Cab Service as an expense product. We will allow the maximum cost price at the rate of 10 per kilometer.
Likewise, you can create other services or products such as Hotel Accommodation, Air Ticket, and Lunch or Dinner.
- Assume that we have to send one of our employees' onsite to work on a customer project. This mission is about five days. As soon as the employee comes back, he/she will submit expenses for the five days. The expenses can be created from My Expense | Expenses to Submit under the Expense application:

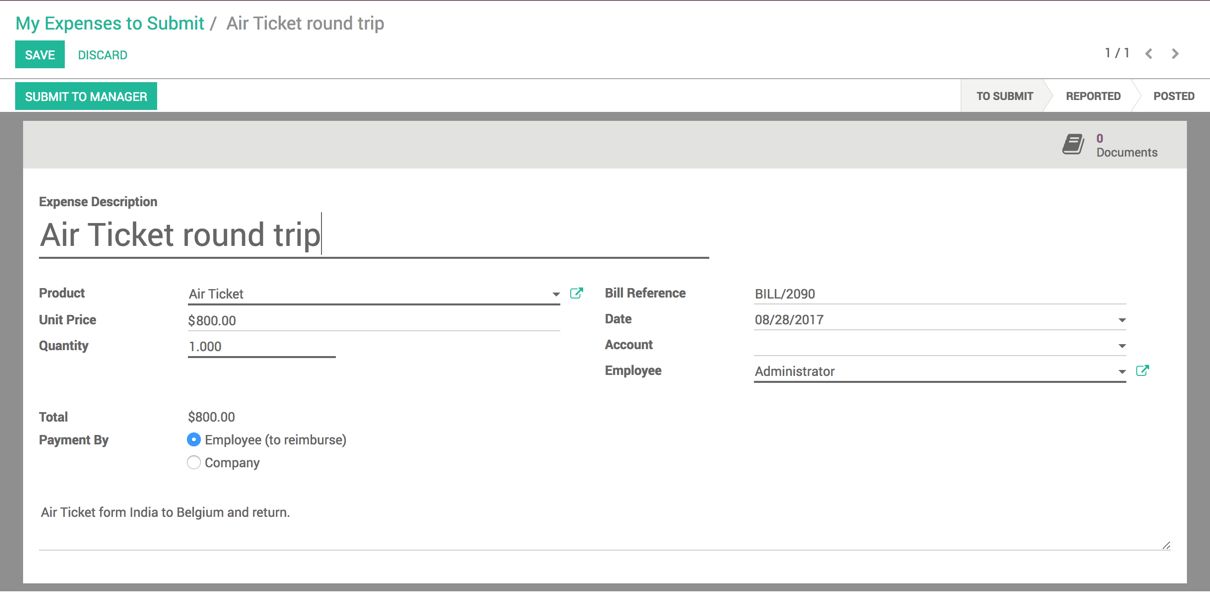
The expenses can be processed in four steps. Let's create an expense by clicking on the CREATE button:

- The related document can be attached on the expense by clicking on the Documents action button. Click on CREATE, enter a file name, and upload the file by clicking on the UPLOAD YOUR FILE button:

Click on the SAVE button to attach the new document on the expense.
- The expense can be applied for the approval of a manager. If the employee has to submit only one expense, it can be submitted to the manager by clicking on the SUBMIT TO MANAGER button or the employee can apply for more than one expense in a single sheet. First, create all the expenses for the single business trip:

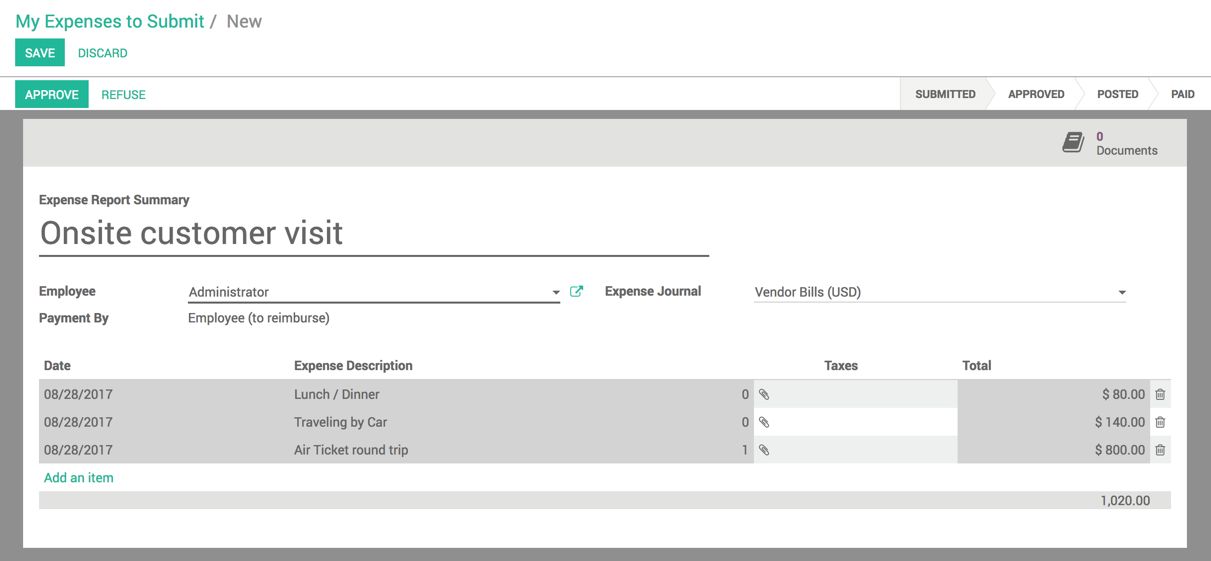
The expense lines will look as displayed in the preceding screenshot. Select the expense lines to apply for the reimbursement and click on the Submit To Manager menu available under Actions:

The expense sheet will be created with the list of expense lines selected. Enter the name of the sheet. I have entered Onsite customer visit and clicked on SAVE to save the sheet.
- The status of the sheet is marked as SUBMITTED as the sheet is submitted to the manager for approval. All the expenses waiting for manager approval can be found under To Approve | Expense Reports to the Approve menu available under the Expenses applications.
The manager may approve or reject the expense depending on the policy. The sheet can be approved by clicking on the APPROVED button:

As soon as the sheet is approved, it goes to the APPROVED stage, and it will wait for Accountant approval.
- The account can find all the sheets that are approved by the manager and waiting to be posted in the accounts under the Accountant | Expense Reports To Post menu under the Expenses application:

The accountant has to post accounting entries by clicking on the POST JOURNAL ENTRIES button available on the expense sheet. The sheet will go to the POSTED stage once the accountant clicks on the JOURNAL ENTRIES button.
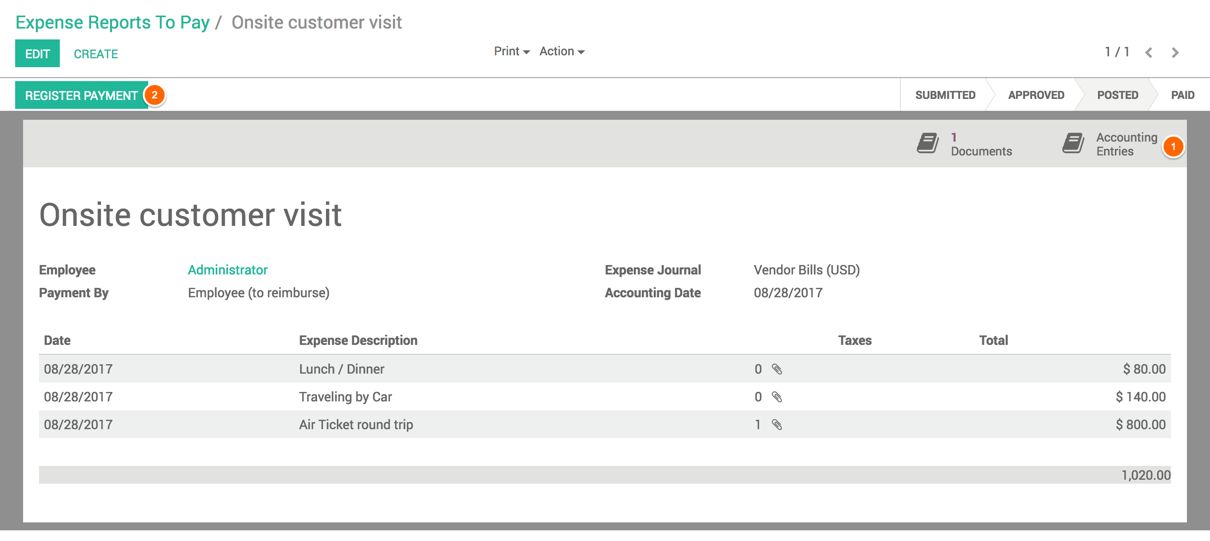
- The next step is to pay the expenses to the employee. All the posted expense sheets are waiting for payment. It can be found under Accountant | Expense Reports To Pay menu under the Expenses application:

Open the sheet to make the payment. To register the payment, click on the REGISTER PAYMENT button. A popup will appear asking you to select the mode of payment. The amount will be filled automatically:

Click on VALIDATE to pay the reimbursement to the employee. The payment will be registered and the expense sheet will go to the PAID stage.


