Make sure that the Employee tags are assigned correctly to each employee once the leave is allocated to the employee by tags.
Click on the APPROVE button to approve the leave allocation to the selected employee:

As soon as the leave is approved, the leave allocations will be created by Odoo By Employee who falls under the selected Employee Tag. Look at the preceding screenshot.
If you find mistakes in the leave allocation, assume Angira Patel joined after two months after the academic year started. She should get only 10 leaves instead of 12, depending on the leave policy.
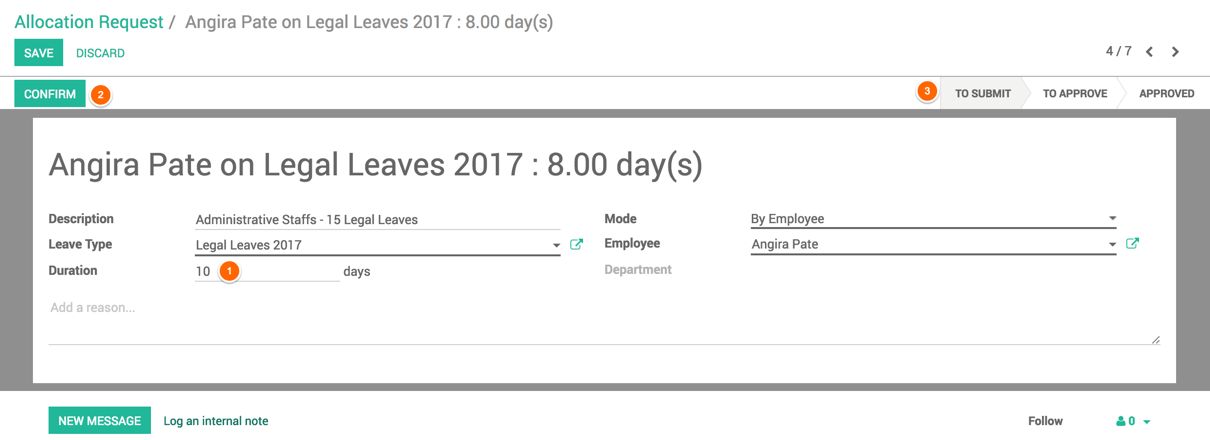
Let's change it. Search the application entry that allocates 12 Legal leave to Angira Patel. Click on REFUSE and then on RESET TO DRAFT to make the modification. When you modify the leave allocation, Odoo will ask you to pass through the allocation approval or rejection workflow:

Set Duration to 10 instead of 12, and click on the CONFIRM button; the request will go to the TO APPROVE stage. As soon as the manager finds it solved, the request can be approved by clicking on the APPROVE button.

