- The quality control application can be activated by going to Settings under the Inventory application. It is an extra feature of the Inventory application:

Select the feature and click on the APPLY button to activate it. You will get a new application called Quality on your home screen.
- Like other Odoo applications, the Quality application also has its own dashboard. The list of the quality team will appear on the dashboard. The quality team actually processes the quality checks and either passes or fails the product. They also work on quality alerts to identify the root cause of the problems:
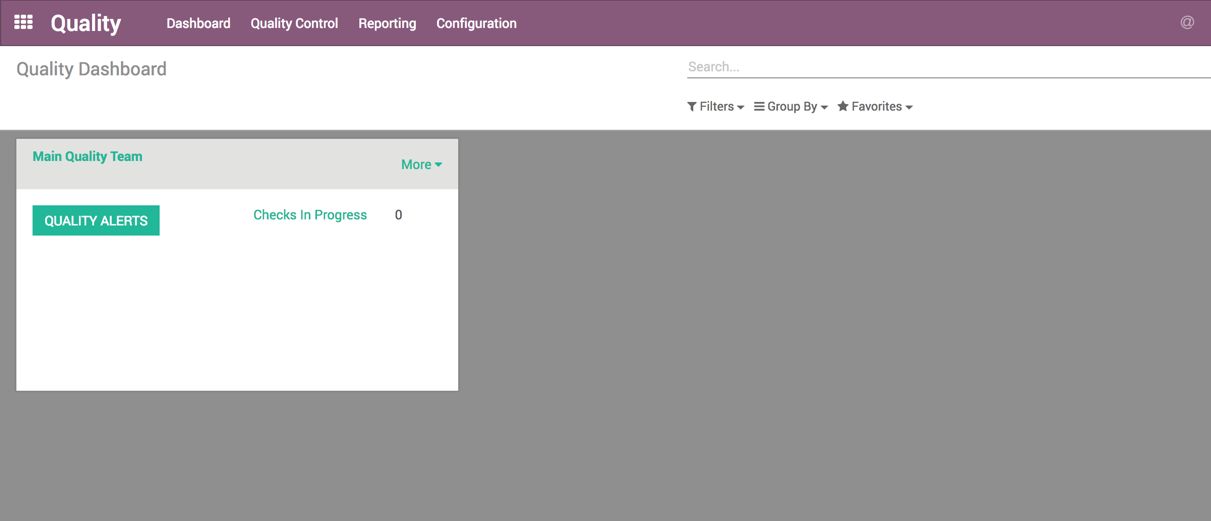
Each team has their own quality alerts to work on, and Checks in Progress can be tracked on each team.
- The quality point has to be configured. To set up the quality control, go to Quality Control | Quality Points and create a new quality point. The form will look like this:
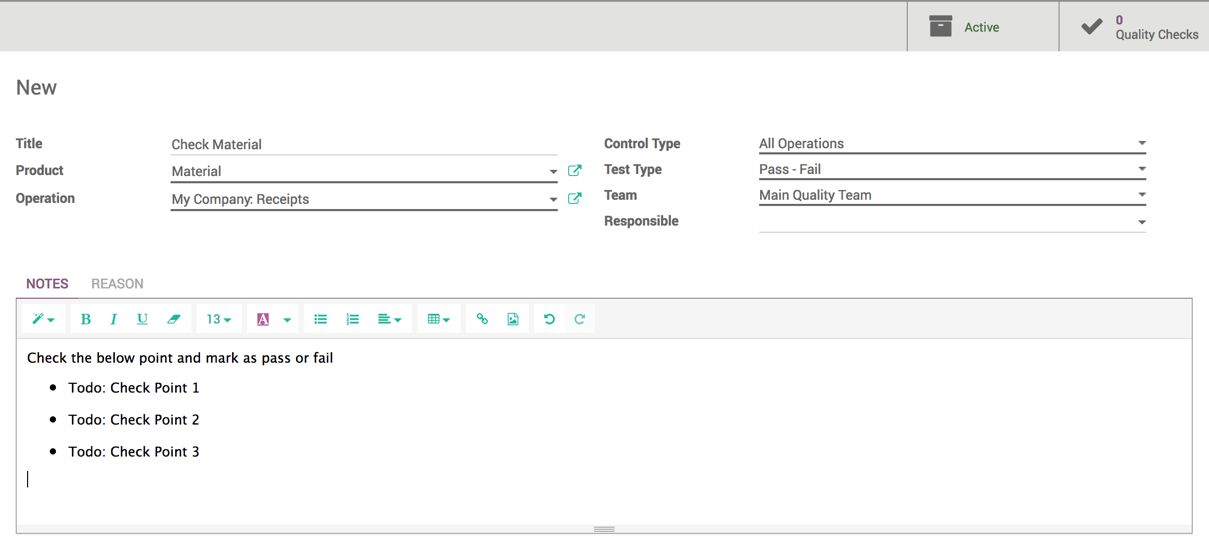
Enter the other details as follows:
-
- Title: The name of the quality check
- Product: The product that has to be checked
- Operation: Select one from Reception, Delivery, or Internal Transfer
- Control Type: How frequently the quality has been checked; select anyone from All Operations, Randomly, or Periodically.
- Test Type: The test type can be either pass/fail based on the measure
- Quality Team: Select the team that has to perform the quality check
- The quality has been activated for the Material product at the reception. Any incoming shipment having a Material product cannot be processed until the quality team performs the check:
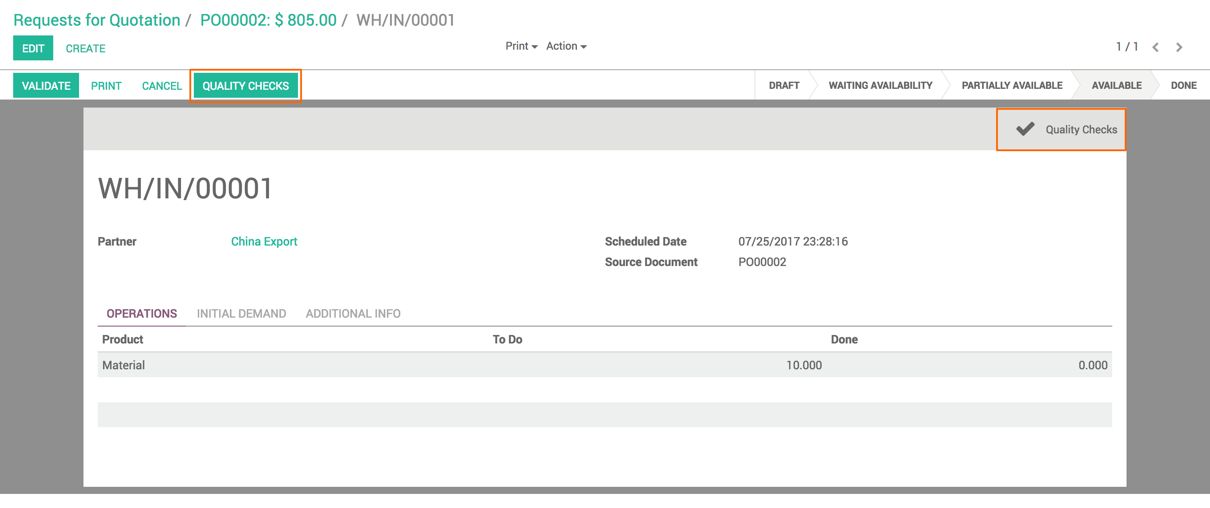
The quality check will be created automatically for incoming shipment if there is Material coming at the reception. By clicking on the QUALITY CHECKS button, you will be prompted for the quality check instructions and asked for the result. You can click on the Quality Checks action button to see the list of checks to be performed for the Material product.
- The quality check team starts checking the Material and marks it either PASS or FAIL:
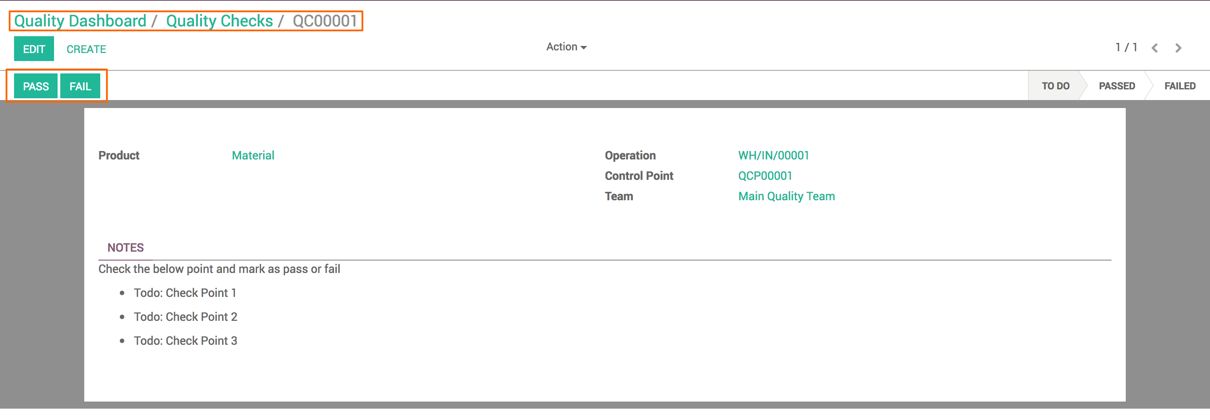
Take the sample and check the quality. If it passes, click on the PASS button to mark it as pass, or if it doesn't, then click on FAIL to mark it as fail.
- As soon as the quality team processes the incoming shipment at the reception and the product passes the quality check, it can be received in the Warehouse:

The incoming shipment has to be rejected manually at the reception if the quality check fails.
- If the quality check fails, it can be marked as failed by clicking on the FAIL button. If the quality issue is frequent, a quality alert can be raised from the quality check itself:

- Click on the QUALITY ALERT button to raise a quality alert. It will create an alert for the Main Quality Team:
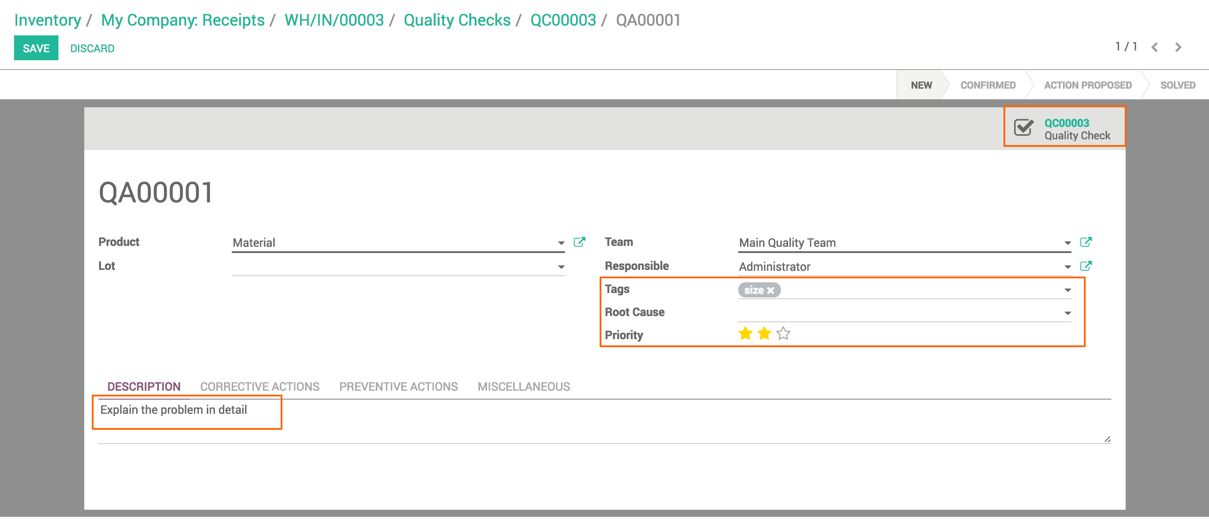
Explain the problem in the description. Set the tags, if any, and set the priority depending on the need. The quality check document also links from where the alert was created.
- The quality team actually starts working on the alert. First, they qualify the problem and start the investigation to identify the root cause. Look at the following screenshot of the quality alert pipe, where multiple quality alerts are being processed:

- As soon as the root cause is identified, the team or individual sets the Root Cause on the alert and describes the solution that has to be taken by the purchasing office at the time of purchasing the material:
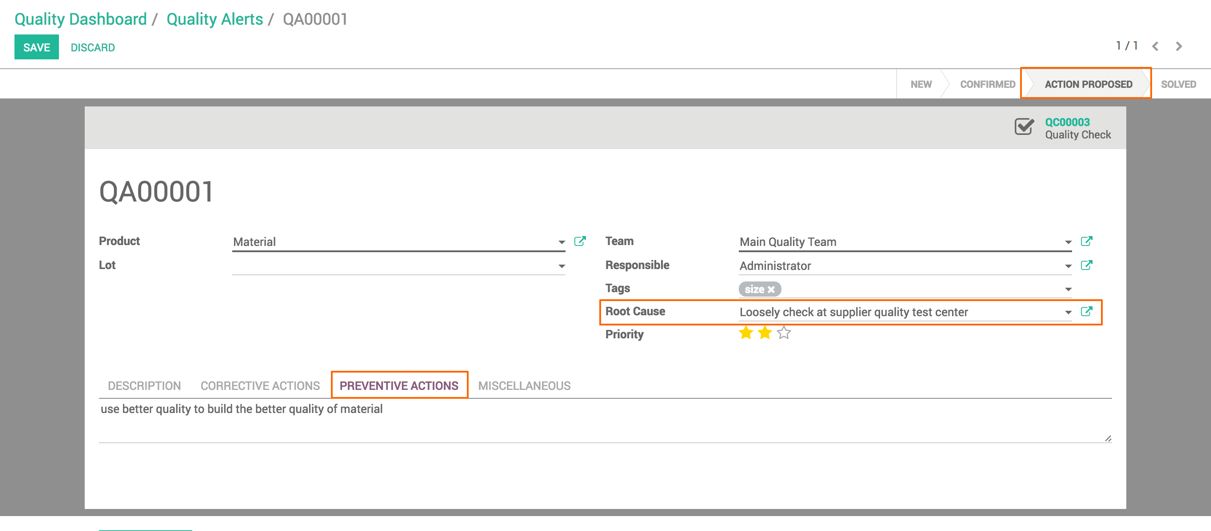
The alert can be marked as Solved or Action Proposed.

