- The default warehouse configuration in Odoo is to have a single warehouse with a stock location. This is a perfect fit for a small shop. There are three different options under which a warehouse can be configured.
- Go to Configuration | Setting in the Warehouse application. The default option Manage only 1 Warehouse with only 1 stock location was selected please select to Manage several Warehouses, each one composed by several stock locations:

Let's activate multiple locations within a single warehouse so that we can configure either physical or logical location to create the virtual locations in Warehouse to map the physical locations available in the warehouse, that is, bins, shelves, or rooms. Click on APPLY to save the configuration:
- The Locations menu will be activated as soon as you enable the option Manage only 1 Warehouse, composed by several stock locations. The menu can be accessed from Configuration | Warehouse Management | Locations.
By default, you can see locations which are Internal, as soon as you remove the Internal filter you can see all the locations. Look at the following screen of locations:

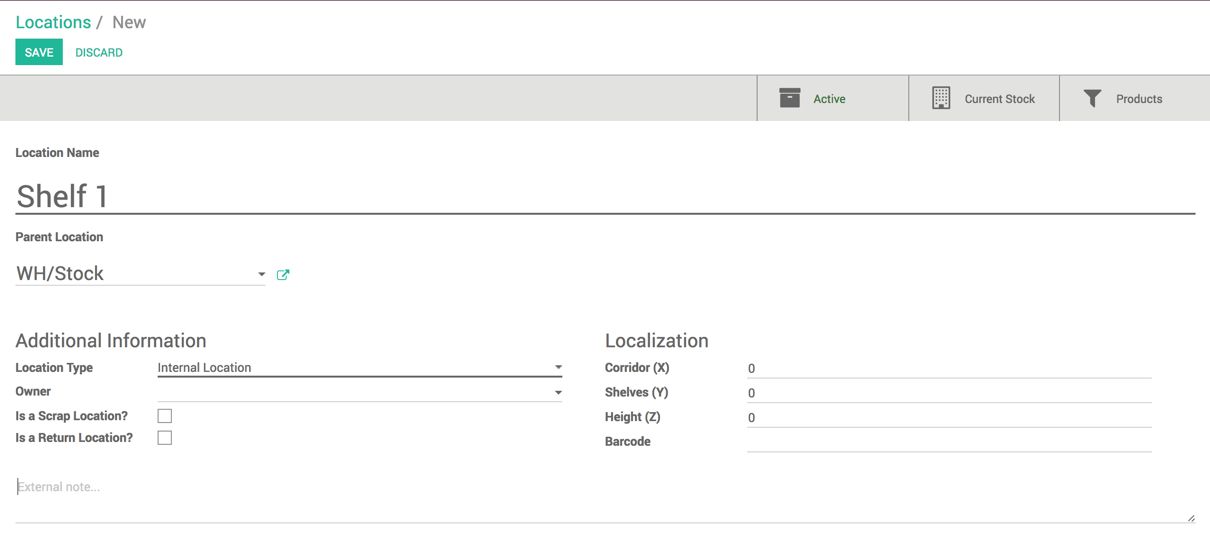
- Let's create a new location which is in the stock but it will be a logical location that represents a physically small part of the Stock location within the warehouse. Click on the CREATE button to create a new location:

- Enter the Name. As this location will be the stock, select Stock as a Parent location. Select the type Internal Location as this location's physical location is inside the warehouse.
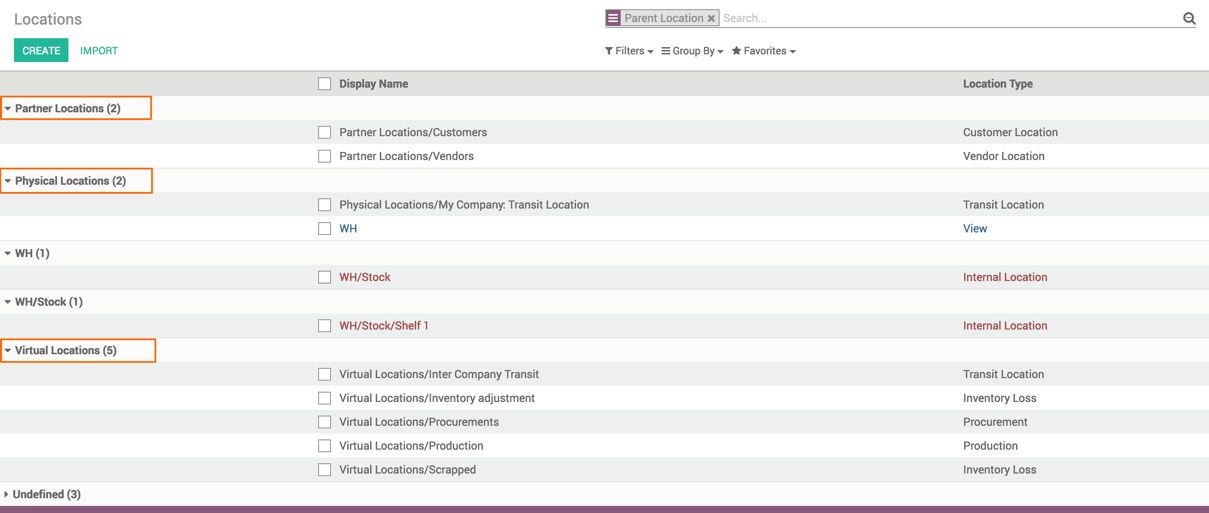
The locations in Odoo are organized in a hierarchical structure in Warehouse. There are three top-level locations, Partner Locations, Physical Locations, and Virtual Locations in Warehouse. Look at the following screen:

The hierarchical structure of locations is used to compute the stock and inventory valuations.
- On the Inventory dashboard, you will get the new operation type Internal Transfers. It will appear as we have activated the multiple locations in Warehouse, and now we can transfer the inventory between different locations within Warehouse:

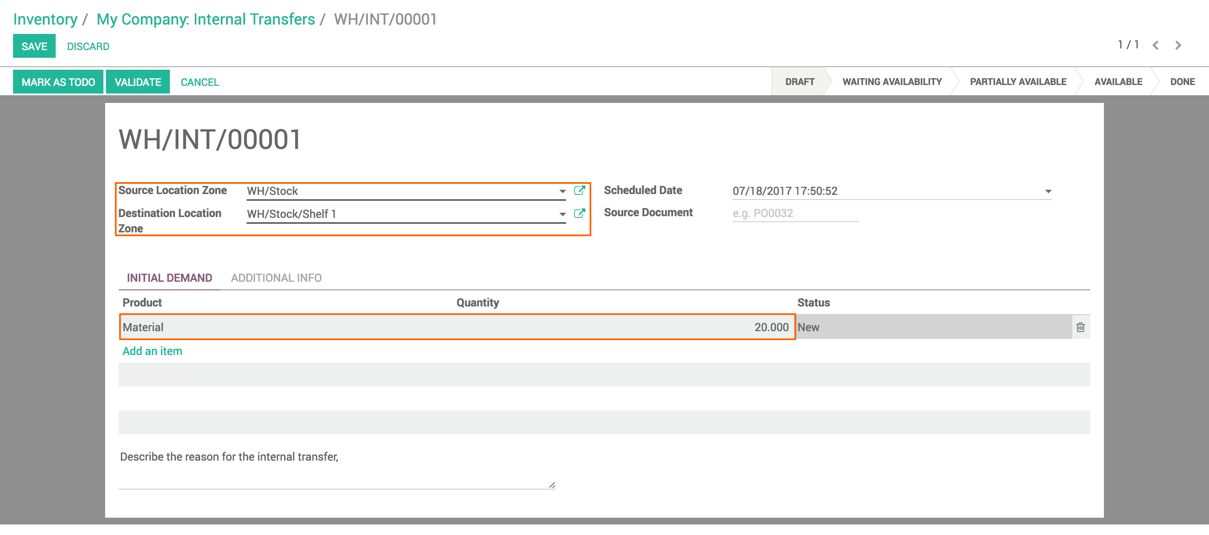
- Click on the TRANSFERS button in the Internal Transfer operation available on the Inventory dashboard to see all the internal transfers available within Warehouse. Click on the CREATE button to create a new internal transfer. Select the Source Location Zone from where the inventory is going to be transferred.
The Destination Location Zone is the location where the inventory will be shifted. Enter the Scheduled Date on which the internal transfer has to take place:

- Select the product and enter the quantity that you would like to transfer from Stock to Shelf 1.
- Click on the MARK AS TO DO button, if you would like to process it later. Or you can click on the VALIDATE button to process the internal transfer now. As soon as you choose to process the internal transfer later, it will go to the stage WAITING AVAILABILITY:

- The internal transfer will be available, either you check for the stock manually by clicking on the RESERVE button or the scheduler assigns the quantity automatically.
- The rest of the process is the same as the delivery or reception, enter the quantity to be processed in the Done field on the operations line and click on the VALIDATE button. The transfer will be processed and the internal transfer will be marked as DONE.
The inventory can be tracked from the Inventory Valuation report available under the Inventory | Reports menu. Look at the following screen, Shelf 1 contains 20 units of material available while the Stock location has decreased by 20.

The overall quantity of material is the same as before, what we have changed is just a few units that we have moved to Shelf 1 from the Stock location.

