- An invoice can be created either from AccountingDashboard or Accounting | Sales | Customer Invoice. You will be taken to a list of invoices. Click on the CREATE button to create a new invoice. As we are creating an invoice manually, we have to enter all the information such as Customer, Invoice Lines, and so on:
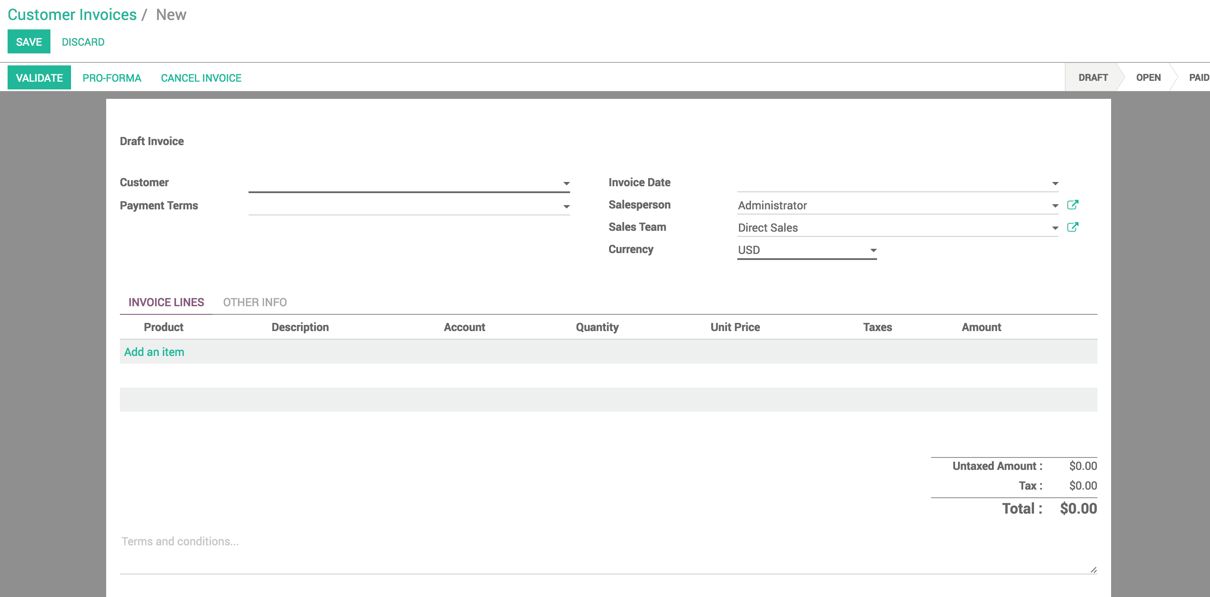
- Payment Term will be filled automatically based on the customer selected on the invoice. However, that can be changed from order to order manually. To set Payment Terms on the customer, open the customer form view; and set the field Customer Payment Terms under the ACCOUNTING tab:

Select the option from the list of existing terms, and click on SAVE.
- The currently logged user will be set in the Salesperson field; however, it can be changed; if the sale has to be registered for another salesperson. Sales Team will be set automatically, depending on Salesman; this can be changed too in some business cases.
These fields are used to generate the statistical reports to measure the sales by a team or a salesman or to compute the incentives.
- By default, Invoice Date is not set. It can either be set manually, or it will be set automatically when the invoice is confirmed.
The income will be considered in the month depending on the date it was registered; Invoice Date will be copied to the journal entries in accounting when the invoice gets confirmed.
- Let's create an invoice line that actually describes the invoice detailing part--it can be a product or service with Quantity, Unit Price, and Taxes:

Product is not a required field when you are working with invoices. You have to enter Description, Quantity, and Unit Price. The default Account will be selected where the income will be registered; you can change it to another account if you want the income to be registered in another account.
- Terms and conditions can be defined on the invoice; look at the bottom of the invoice, you will find a textbox to enter text information. It will be printed on the invoice as it is at the end of the invoice.
- In business, it's sometimes required to send the PRO-FORMA invoice before we validate the invoice. You can activate the feature that allows you to create a PRO-FORMA invoice from Accounting | Configuration | Settings. Select the option Allow pro-forma invoices, and click on APPLY to activate the feature:
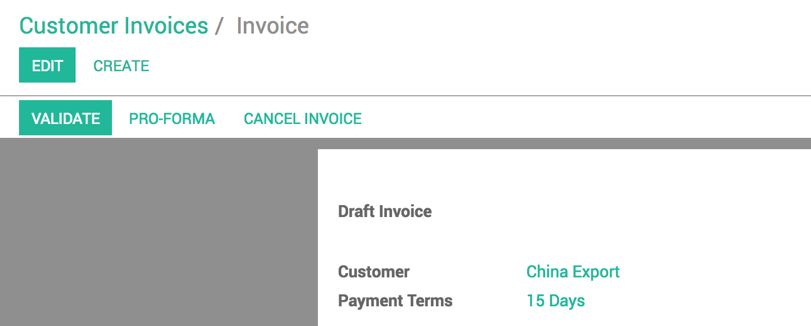
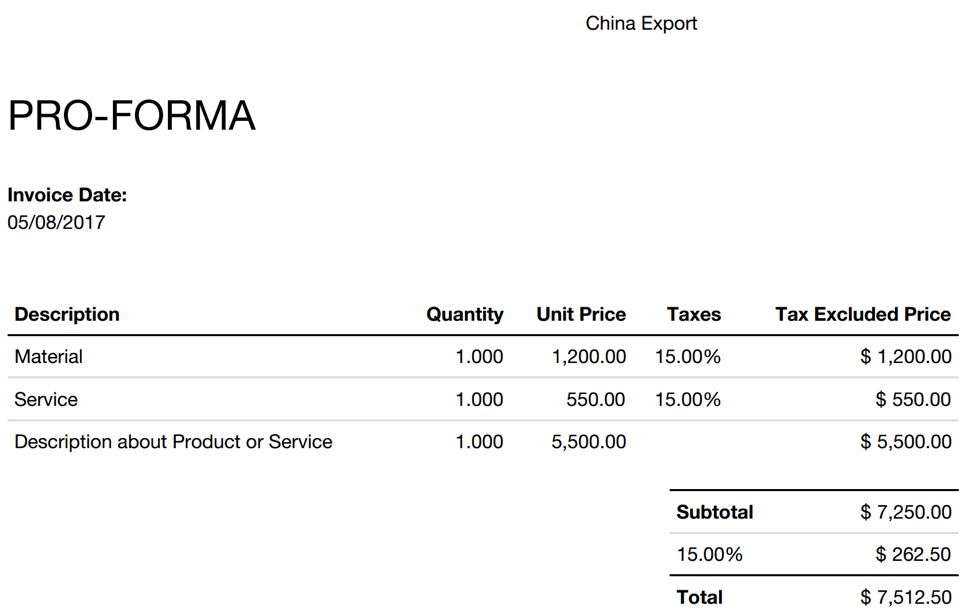
As soon as the feature is activated, you can see the button PRO-FORMA in Invoice, to create a PRO-FORMA invoice. Click on the button. The invoice goes to the PRO-FORMA state, and now you are ready to send the Pro-forma invoice to the customer:
- The invoice can be confirmed before we send it to the customer; click on the VALIDATE button to confirm the invoice. The invoice number will be generated as soon as the invoice gets confirmed. You can print the invoice and send it to the customer. Here is the final invoice ready to print and send to the customer either by courier or by email:
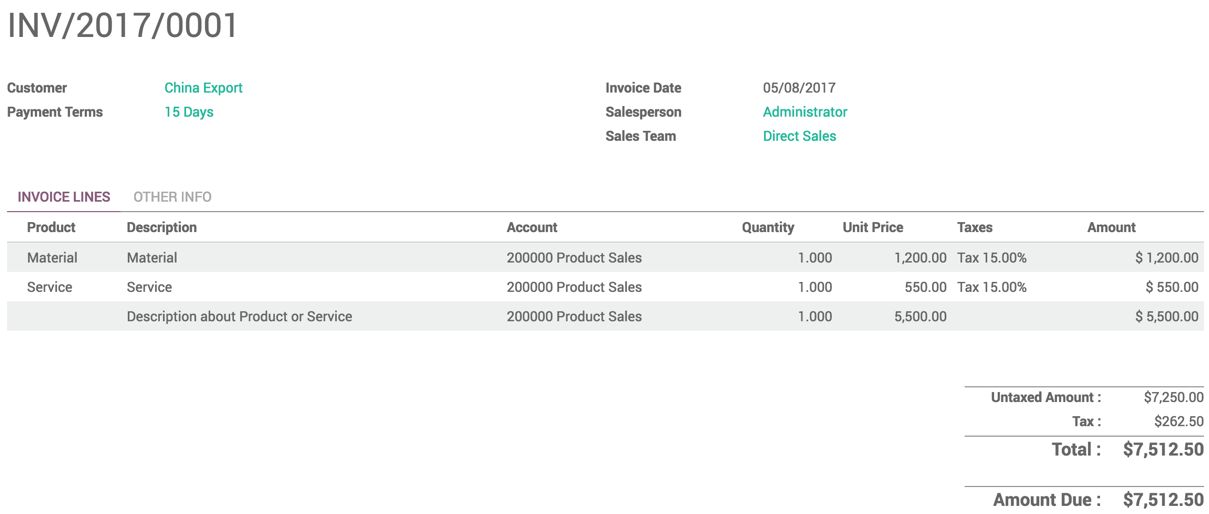
The value of the Amount Due field is computed as soon as you confirm the invoice. It is equal to the difference between the total of the invoice and the payment received against the invoice.
You can send the invoice to the customer by clicking on SEND BY EMAIL or print the invoice by clicking on the PRINT button.
- Let's assume that the customer pays the invoice by check; you can register the check payment by clicking on REGISTER PAYMENT. A pop-up wizard will appear, and ask you to fill the payment information:

Select Bank (USD) in the Payment Journal field, Payment Amount will be the amount written on the check, Payment Date will be the date mentioned on the check, and the Memo field can be the free text where you can enter the check number along with the invoice number. Click on VALIDATE to register the payment:
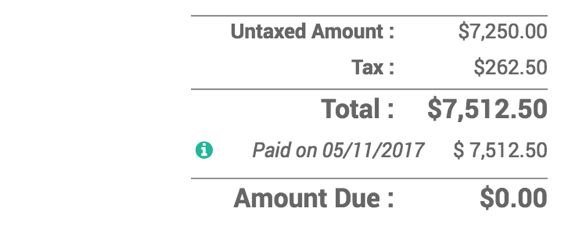
As soon as the payment is registered, the payment details are updated on the invoice, and Amount Due has computed again before the invoice goes to the PAID state, as in the preceding screen.

