How to do it...
, Getting started with Odoo Online, Setting up your domain name and website theme section: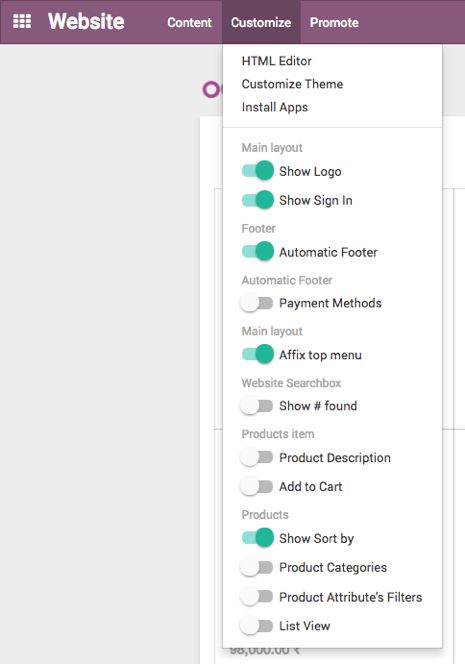
Beside Customize Theme, you may also find other key configurations for the shop, such as Product Item and Products. You can also configure Main layout, Footer, Product Search and Payment Methods for your website. The Customize options will be changed depending on the theme you choose and the page on which you are.
- The shop layout can be changed to list view. Go to Customize | Products | List View. The page will be refreshed, and box view will be converted to list view. Both box view and list view are super clean and usable; you can choose any one to showcase our products on the shop page:
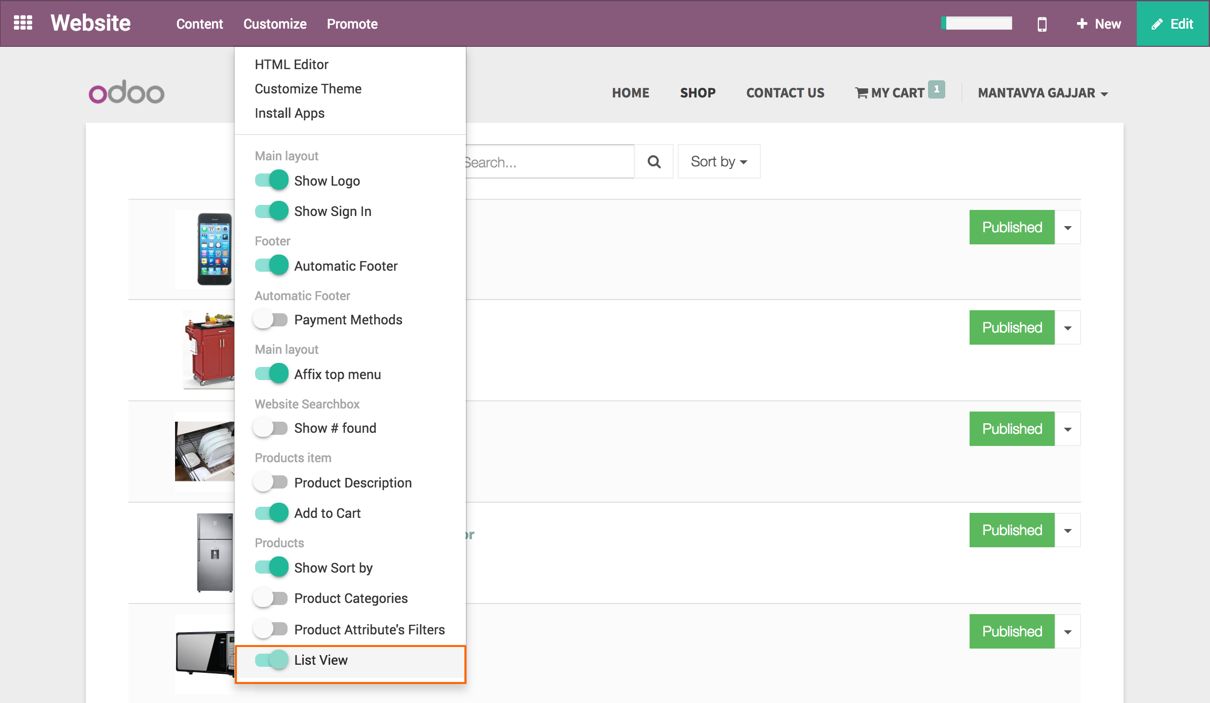
- The visibility of the product can be managed using the Published/Unpublished button available beside each product. It's a toggle button; clicking on the button swaps the visibility state:

- A user can filter the specific product by its category. Displaying the product category on the shop page is essential when the shop sells multiple types of product; in our case, we sell building materials, home appliances, furniture, and many other types of products.
Categorization of the product can be activated by going to Customize | Products | Product Categories:
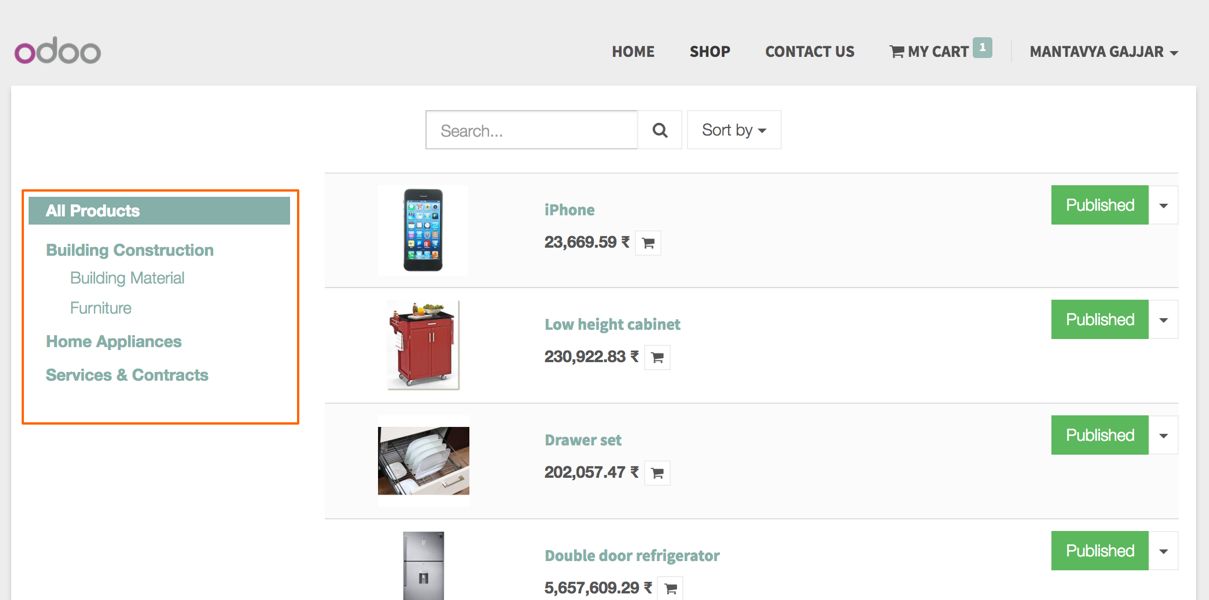
- As soon as the Product Category feature is enabled, you will get the additional configuration to select the way to display product category. By default, it's a list of categories or a collapsible list view. Change the category view by going to Customize | Product Categories | Collapsible Category List:
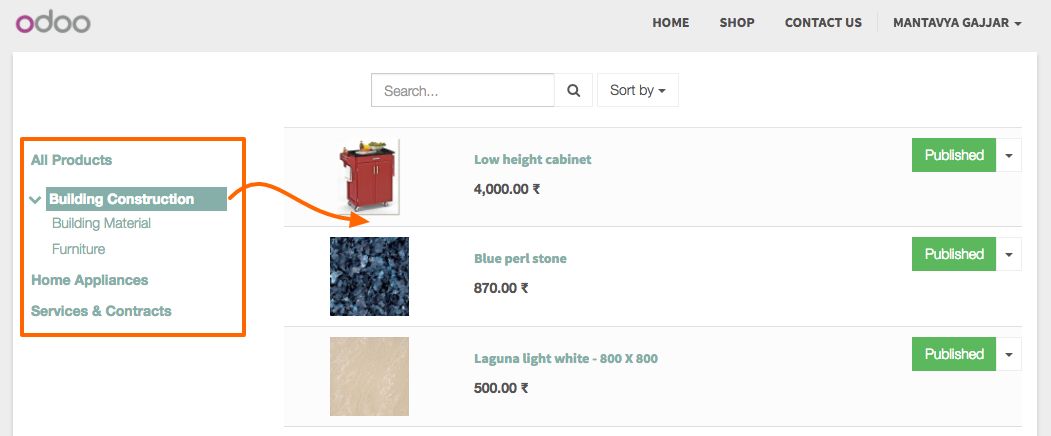
The product category hierarchy can be created from the backend. Go to Website Admin | Configuration | Website Product Category and you can create the parent/child category by setting the Parent Category field:

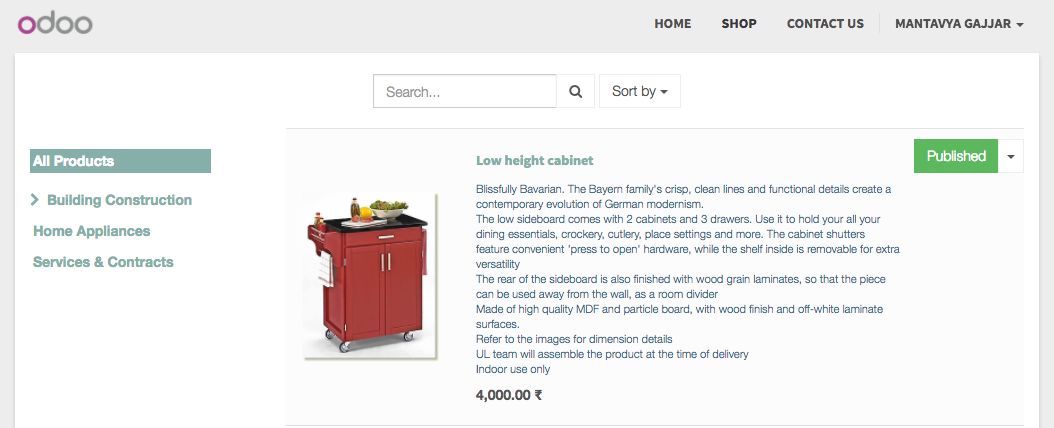
You can activate the product description on the shop page by clicking on Product description from Customize | Product item menu:
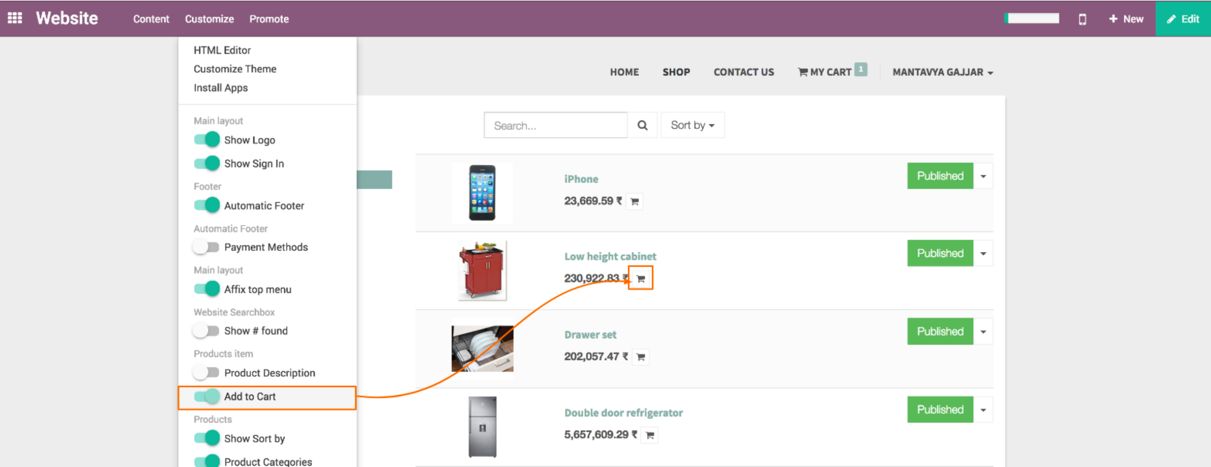
Like the description, the quick cart icon can be activated on the product catalogue from the Add to Cart menu from Customize | Product item.
Click on the Add to Cart option. The cart icon will appear beside the product price on the product list.
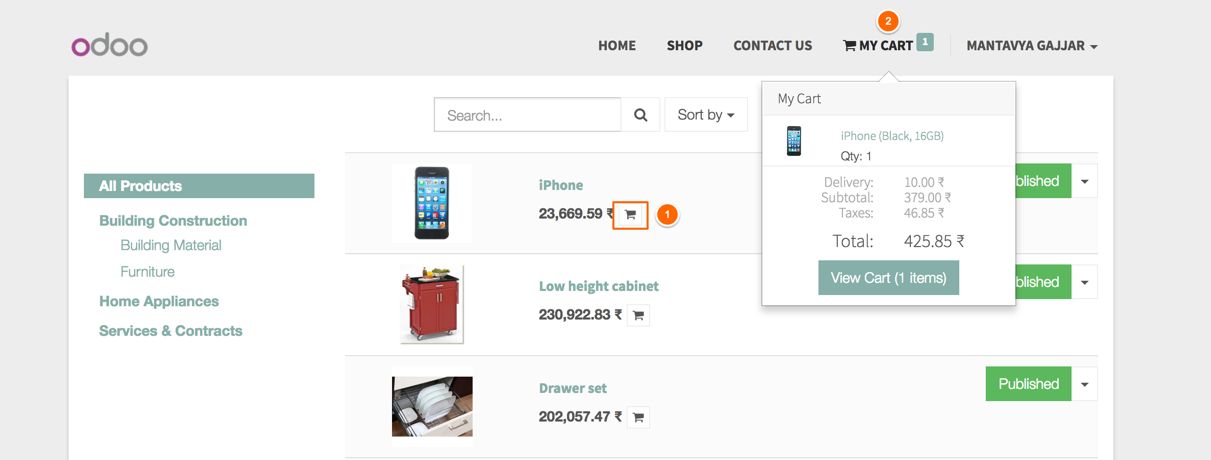
When you click on the cart icon, the product will be added to the cart, and you will be redirected to the checkout process:
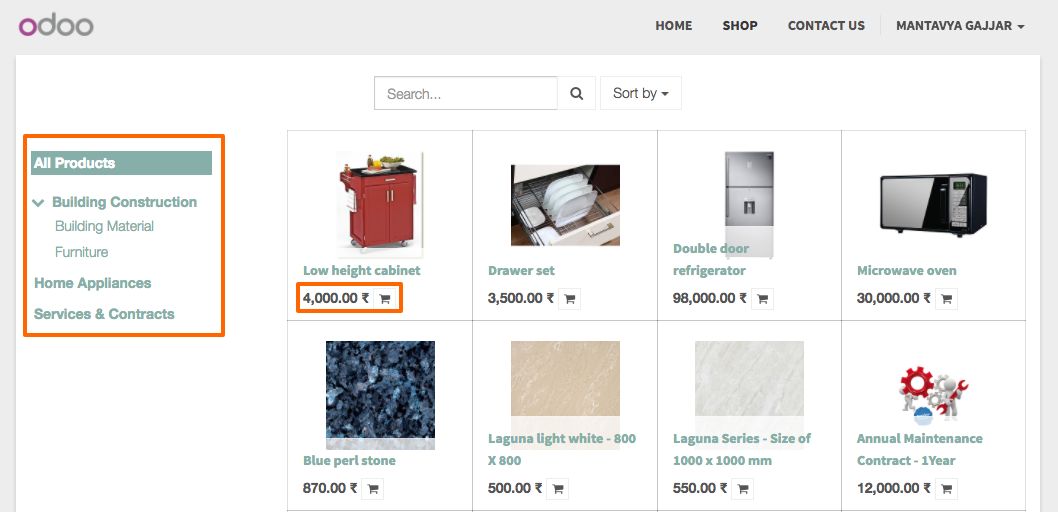
- You can switch between box view and list view by deactivating List view previously activated in step 2. You will switch to box view without losing any other configuration such as product category, add to cart button. Look at the following screen after switching to Box View:
- Like the shop page, you can also configure the view of the product page. By clicking on the product, you will be redirected to the product page. Check the Customize options; you will find many useful options to configure the product page.
Almost all the minimum options are activated in the product catalog. There are some advanced options that can be enabled to have the advanced product catalog such as Product Variants filter, Discussion, and Ratings on the Product; the advanced options are available under the Customization menu. You will see product variants in the next recipe, Configure products and their variants, of this chapter.
- The product page will look like the following image after activating Discussion and Ratings on the Product:
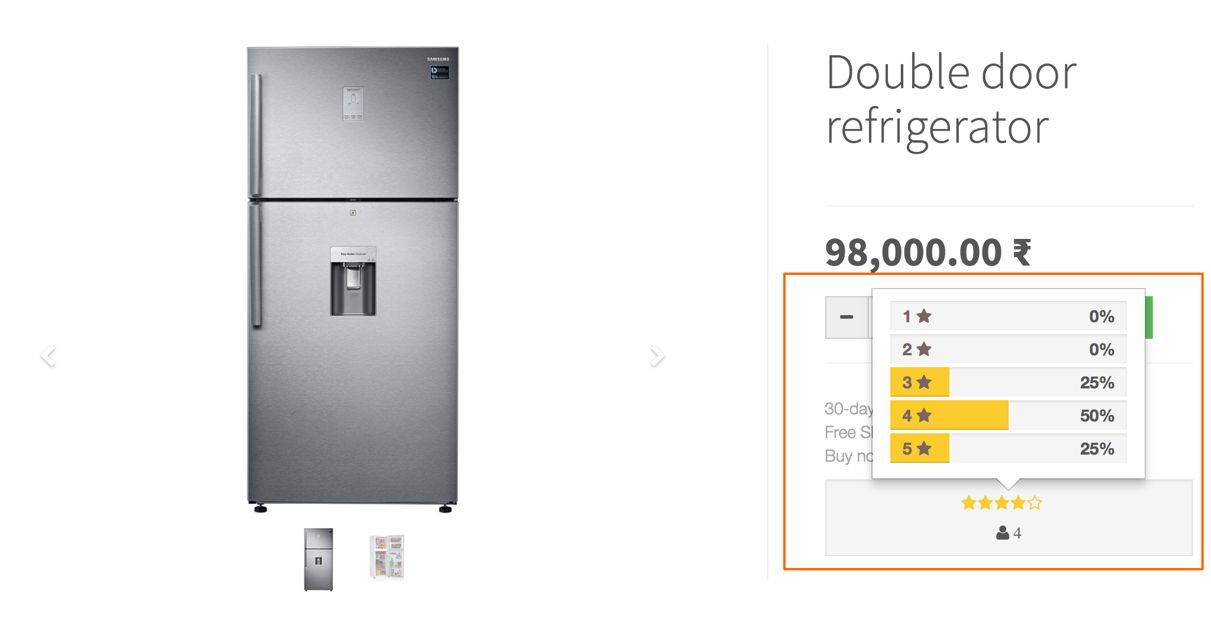
The chatter can be found below product information. Only login users can post the comments and submit ratings on the product.

