- To activate the subscription plans and recurring bill go to Sales | Configuration | Setting and go to the Subscriptions setting to manage subscriptions and recurring invoicing, select the checkbox and click on the Apply button to activate the feature. You will be redirected to the home page, as soon as the subscription feature is activated.
- Click on the Subscriptions application, you will be taken into the subscription application. Here, you will see the list of subscriptions.
- To configure the subscription application, we have to create two things, first subscription product, and subscription template.
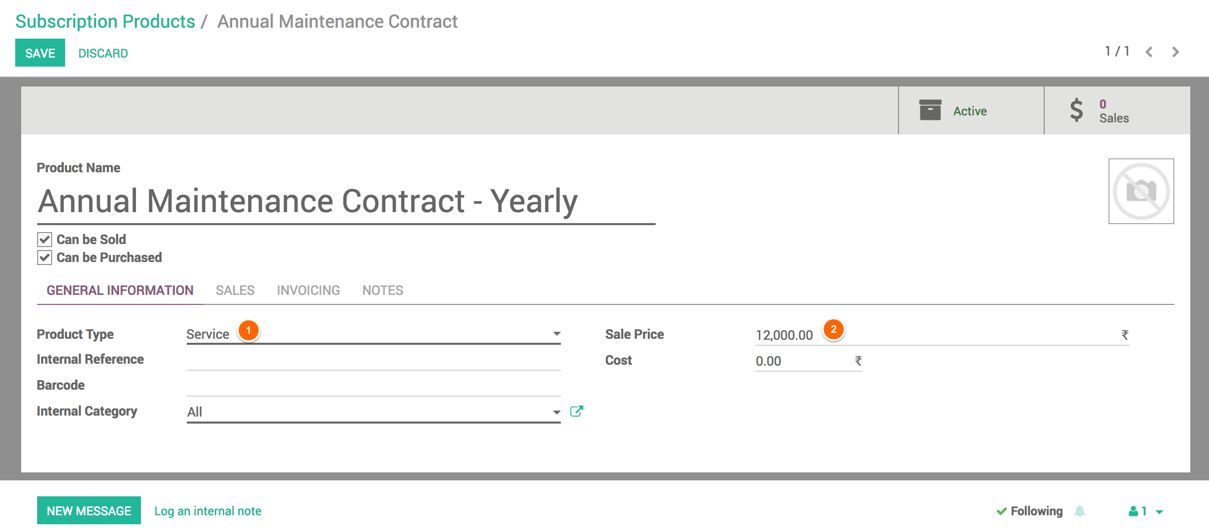
Let’s create the subscription product first. To create the subscription product, go to Subscriptions | Subscription Products under the Subscriptions application and click on the CREATE button to create a new product:

The Product Type set to Service and Sale Price are two important fields which have to be filled on the product form. The most important is to select Subscription Product checkbox available under the SALES Tab.
- The second step is to create a subscription template that helps us to create and start the subscription quickly. The subscription template is a blueprint of the products list that we are offering the subscription service and terms & conditions related to the subscription.
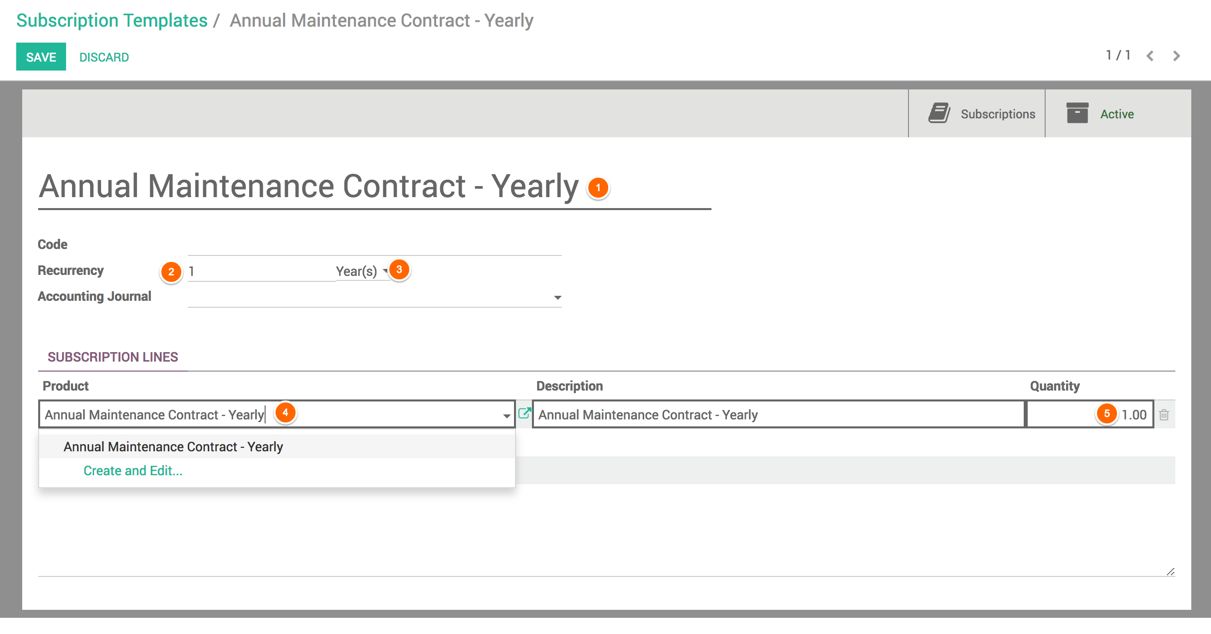
The subscription plan can be created from Subscriptions | Subscription Template, click on CREATE button to create a new template. Look at the following screen for the Annual Maintenance Contract:

Enter Annual Maintenance Contract - Yearly in the Name field. Set 1 for Year(s) in the Recurrency field. Click on Add an item on the SUBSCRIPTION LINES. Select Annual Maintenance Contract - 1 Year in the Product field. Enter Description and set Quantity to 1 on the line.
In our case, the quantity refers to the number of air-conditioners (as per the screenshot above) installed and stated in the subscription for the maintenance contract. This quantity can be changed at the time of creating the service contract.
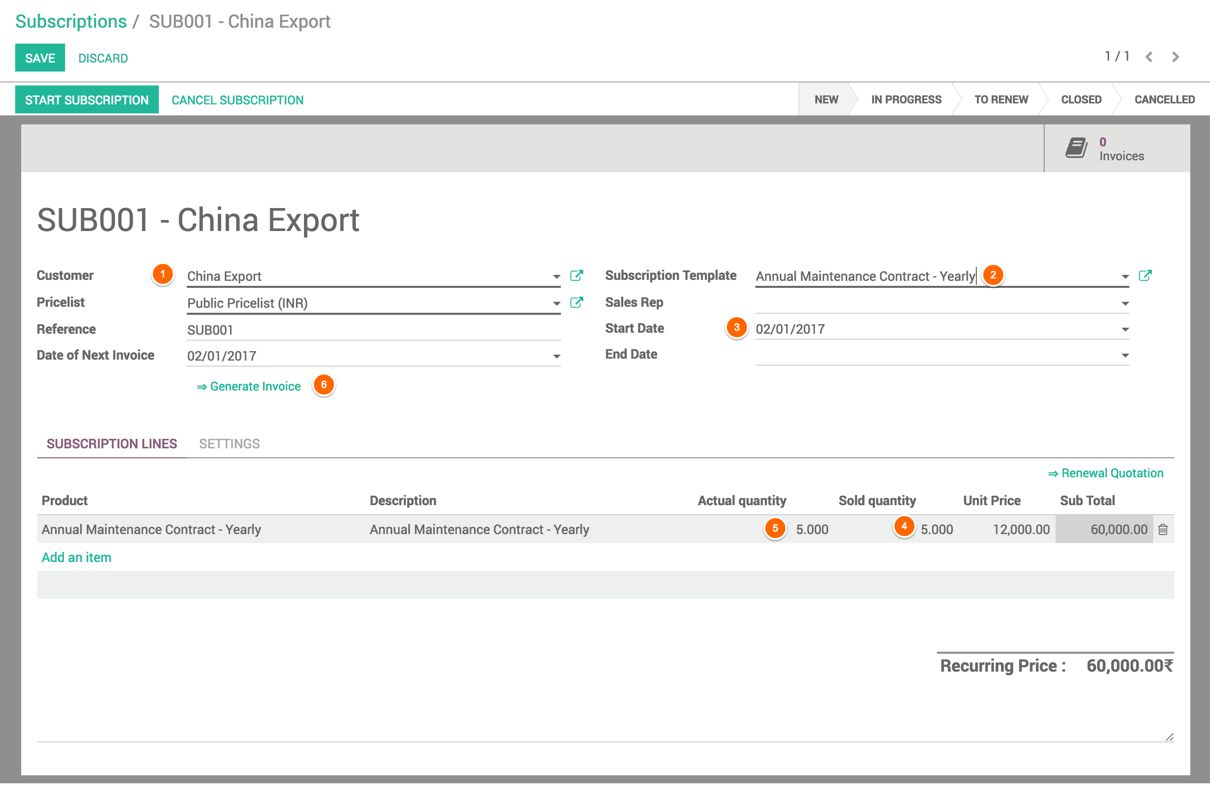
- There are two ways to start the subscription plan for the air-conditioners contract. The simplest way is to create the subscription using the subscription template. To create a new subscription, go to the Subscription application and you will see the empty subscription list, click on the CREATE button to create a new subscription. Look at the following subscription created for 1 year:

Select the customer. As soon as you select the Subscription Template, the SUBSCRIPTION LINES will be filled automatically. Set 5 in the Sold quantity field as the customer has bought it for the service of 5 air-conditioners. Pricelist will be filled automatically based on the selection of the customer. Name of the subscription will be generated automatically.
The Actual Quantity is the quantity used by the customer onsite. In our case, when we do the first air-conditioners service onsite, we will come to know how many air-conditioners are actually installed by the customer. It can be less than the Sold Quantity or if they are more, we have a potential to upsell for the additional quantity.
The Start date is the date when the subscription starts. The contract has to be renewed on the Date of next invoice. On this date, the invoice has to be generated and sent to the customer to request a payment.
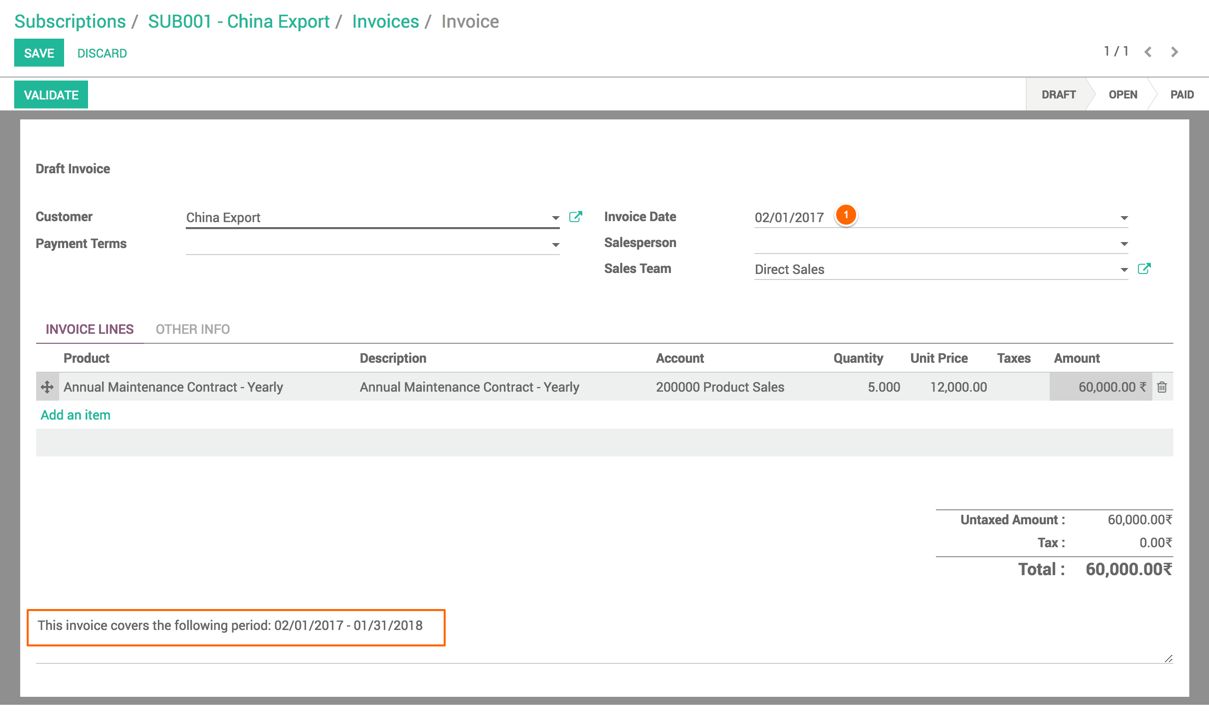
- The first invoice has to be generated and sent to the customer before we started the subscription. Click on the Generate Invoice link to create the first invoice. Confirm the Invoice and send it to the customer for the payment. Look at the following invoice we created:

- The subscription can be started as soon as the payment is confirmed. It can be started by clicking on START SUBSCRIPTION button on the subscription:

- The subscription will go to the TO RENEW stage as soon as it expires. The renewal of the contract can be done either by creating the next invoice or by sending a renewal quotation.
If you are sure about the customer renewal and the payment, click on Generate Invoice, or send the Renewal Quotation by clicking on the Renewal Quotation link.

Click on the Submit button to close the contract:

The contract will be updated; End date and Close reason will be set on the contract selected on the closing wizard.

