Downloading and Installing Java
To write and run programs using Java, you need the Java Development Kit (JDK) and the NetBeans Integrated Development Environment (IDE). These are free products that you can download from the Internet. This simply means we will copy a file onto our computer to allow installation of Java.
- Start up your web browser (Internet Explorer, Chrome, Firefox, Safari or other browser) and go to Java web site:
This web site has lots of useful Java information. As you become more proficient in your programming skills, you will go to this site often for answers to programming questions, interaction with other Java programmers, and lots of sample programs.
- On this web page, you should see a button that looks something like this


This button downloads both the JDK (Version 8) and NetBeans (Version 8.0Once on the page with the JDK download links, accept the license agreement and choose the link corresponding to your computer’s operating system.
For Mac users click on the Mac OS X x64 download for your Operating System.
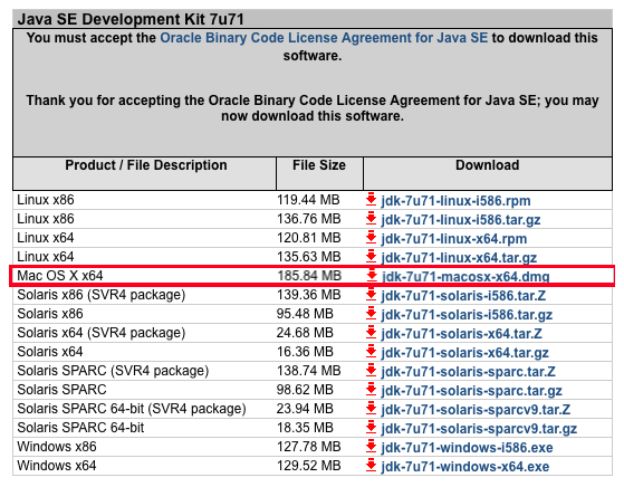
For Microsoft Windows click on the Windows version that corresponds with your specific Operating System.
In these notes, I will be downloading and installing the Windows 64 bit version of the JDK because I am currently using a brand new system with the 64 Bit version of Windows. Select the Windows x86 version if you are using the older 32 Bit version of Windows like Windows Vista on a tablet or older PC or laptop computer.


Instructions for installing Java on other platforms such as Linux or Solaris can also be found on the website. My screenshots in these notes will be Microsoft Windows.
- You will be asked if you want to Run a file. Click Yes. The Installation begins.
- The Java installer will unpack some files and an introductory window will appear:
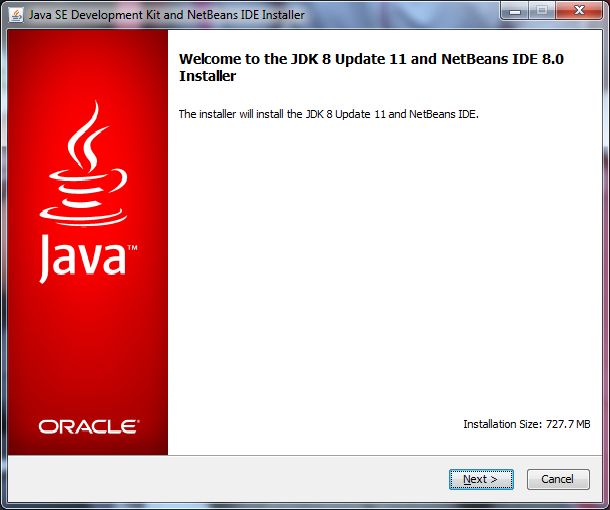
Click Next to start the installation. Several windows will appear in sequence. Accept the default choices by clicking Next at each window.
When complete (it will take a while), you will see this window:
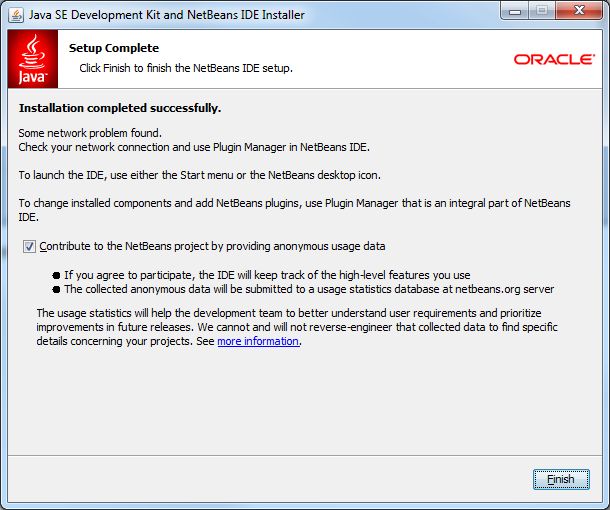
Click Finish and the installation will complete.
Running NetBeans
You now have Java and the NetBeans IDE installed on your computer. All of our programming work will be done using NetBeans. Let’s make sure NetBeans installed correctly. To start using NetBeans under Microsoft Windows,
- Click on the Start button on the Windows task bar.
- Select All Programs, then NetBeans
- Click on NetBeans IDE 8.0
To start using NetBeans under the MAC OS,
- Click on the Finder and go to the Applications Folder.
- Open the NetBeans folder
- Click on NetBeans IDE 8.0
Some of the headings given here may differ slightly on your computer, but you should have no trouble finding the correct ones. You can also start NetBeans by double-clicking the desktop icon. The NetBeans program should start (several windows and menus will appear).
We will learn more about NetBeans in the notes. For now, we want to make some formatting changes.
In Java programming, indentations in the code we write are used to delineate common blocks. The NetBeans IDE uses four spaces for indentations as a default. This author (and these notes) uses two spaces. To make this change, choose the Tools menu item and click Options. In the window that appears, choose the Editor option and the Format tab:
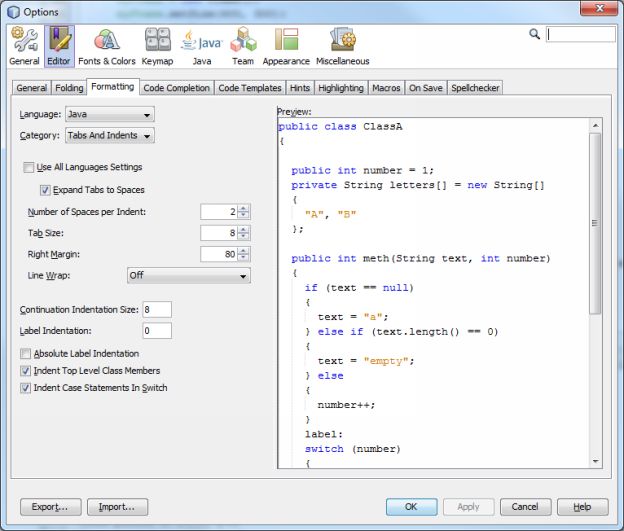
As shown, choose the Tabs and Indents Category and set the Number of Spaces per Indent to 2.
Before leaving this window, we make another change. Braces (curly brackets) are used to start and stop blocks of code. We choose to have these brackets always be on a separate line – it makes checking code much easier.
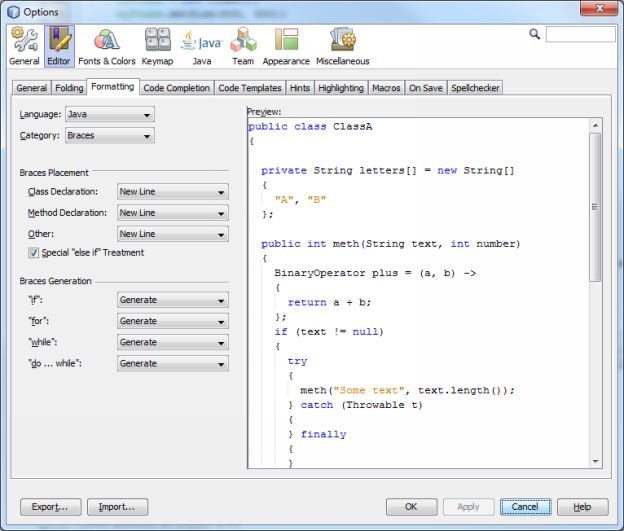
As shown, choose the Braces Category and under Braces Placement, set all choices to New Line. Click Apply, then OK. Stop NetBeans – you’re ready to go!

